tn6437,
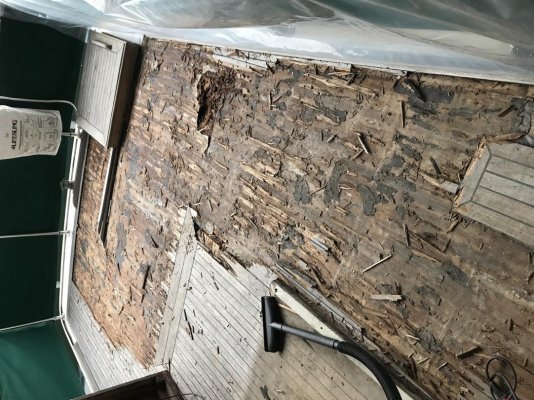
In my last boat, there was excessive rot under one of the windows. The house was built with two layers of what seemed to be hardwood plywood, mahogany on the visible layer and possible all the way. I removed it from the from top-to-bottom, all the way to the corner. I cut the other side where it couldn't be seen, behind a bulkhead. To make the repair stronger, I cut the outer and inner layers in different places. I used heavily thickened epoxy to glue the inner layer back into the fiberglass exterior, buttering each surface. The thick mixture of thickened epoxy caused it to accommodate the dimensional variations in the fiberglass. Then, I used a much less thickened epoxy (barely thickened, just enough to avoid drips once in place and while curing) to glue the outer layer to the inner layer. I pushed some heavy boards against the middle of it to keep it in place and then screwed the top and bottom under what would be the trim. I varnished the whole thing a couple times, put the trim back, and varnished it again. When done, I cut the whole for the replacement window and put it in. It was custom to be about the same size as the original, but because of a different corner radius, I had to widen the corners with an angle grinder first. Then I put the window in. It turned out perfect and solid from the inside and out. The only thing one would notice is that the grain is horizontal, not vertical, because the piece was too large for me to go the other way. The color didn't match exactly, but was good enough given that there wasn't old directly against new anywhere visible. It was a weekend of labor, but wasn't super expensive. The board and epoxy+thickener were the only real costs. The board was marine-grade mahogany plywood. It wasn't cheap, but I just don't remember what I paid for it. The epoxy was a gallon or two with fast cure from west marine plus a couple of packages of thickener. That wasn't free either. But, all in, I think it was a few hundred dollars plus about $1200 for the window.
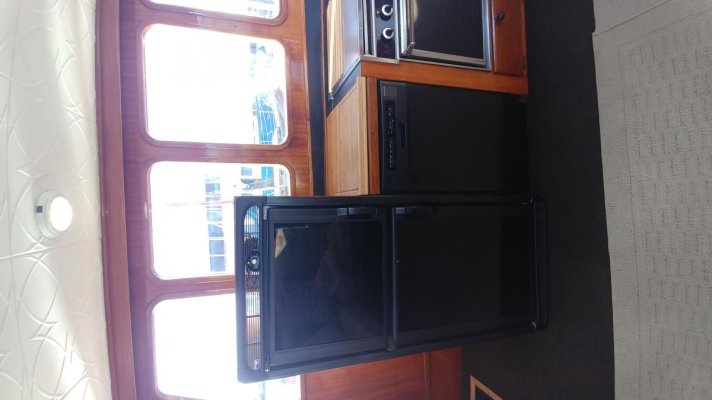
I replaced the plywood under the lower half of another window. This left a seam in the middle and I didn't like how it looked, so I covered it with some mahogany veneer. Overall, it worked very well. It looks perfect unless one really examines it. Even the color turned out to be a compatible match. But, if you really look, at the very bottom by the trim, you might notice that the contact cement didn't fully adhere. Next time I used the veneer, on a refrigerator enclosure, I used the version with the 3M pressure-sensitive backing. It worked 100% perfect. I'd recommend it.
On that same boat (when I bought it), there was significant delamination of the fiberglass deck surface from the underlying and deteriorated fiberglass core. I hired someone to fix it. He injected it with 22 tubes (caulk gun tubes) of epoxy. A ton. Then glasses over it, primed it, and texture painted it with awlrip. The person who did the work was very experienced and skilled -- but it turned out rock solid, rigid, looking perfect, and lasted.
In another case, where a window leak was staining the wood underneath but there wasn't much softness, I was able to rebed the window (not just caulk around the outside) and then sand into the stained area underneath, seal it with a sanding sealer, and revarnish it. The sanding sealer was key to matching the color of the original finsih. Again, it wasn't a perfect match up-close-and-personal. The old varnish had some whitening/opaqueness that the fresh varnish didn't, so the character was slightly different in the repair area than around it. But, it was unnoticable from a distance and didn't look bad up close.
My current boat once had teak decks all around. The prior owner removed most of them, but didn't repair the soft area near the bow. I had it recored, glassed over, and awlgrip texture painted. The person who did it was a slob w.r.t. the awlgrip texture painting. He mixed the texture into the paint and rolled it, which is a valid method of doing it -- but predictably results in an inconsistent texture. None-the-less, it wasn't a bad job. He reported (and charged for) 24 hours of labor -- but it looked more like 15 to me watching. None-the-less, it wasn't an expensive job. Cutting out the core didn't take long. Nor did putting in the new core and glassing it in. Most of the labor was, as you might expect, in feathering it in and getting it primed and painted.
My point is that these types of things can be a bit labor intensive, but don't require a crazy amount of skill, and aren't super expensive. Other than major, expensive things, e.g. engines, generators, running gear, etc, I don't fear single things on boats. My biggest fear is a boat that is, overall, behind the 8 ball w.r.t. maintenance or that has been maintained by improvisation vs properly. In either case, it gets really hard to figure out the issues to price them and address them. Each day turns up something new.
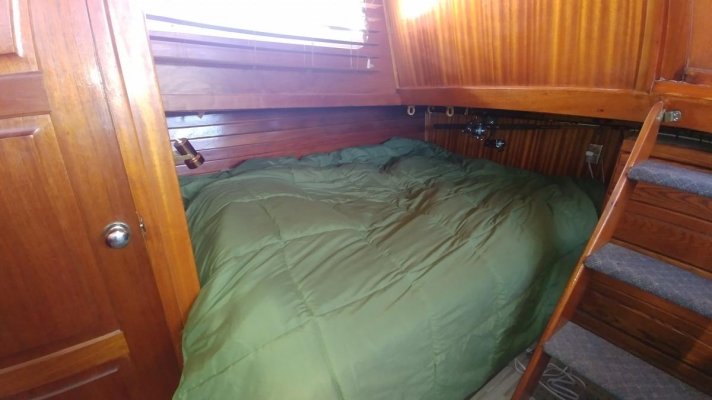
Many trawlers, at least trunk trawlers, have leaky windows. In fact, it almost seems to be the standard. I think most knowledgeable trawler buyers are either looking for a freshly and completely redone boat -- which is rare and very expensive. Or, they are just looking for something that is typical of boats that age, knowing they'll have to maintain the affected areas as each gets ripe.
My new boat is a Europa style. And, it doesn't seem to have these window issues, I'm guessing because the covered decks provide it some level of protection. But, the front windows are designed silly and, because of the angle, hold water in the outside window sill. The previous owner had to caulk it to stop it from leaking in from there. And, I ended up having to redo that -- and probably will have to do it again every couple or few years. Its okay. I know it is a maintenance item, will keep an eye on it, and will make sure I keep it sealed up before it becomes a problem again.
Boats are all about managing maintenance to ensure that the boat remains suitable for the intended use, while still ensuring that it is actually used as intended. I like my boat in truly excellent shape in all respects. But, I know I can't have it perfect. I always have a small list. But, that's okay -- it is the price I pay to get to be an active boater on the water (not just the slip).
Hope this helps. One person's perspective, at the least.