Gulf Star 36MK "Reef Monkey" Project

The friendliest place on the web for anyone who enjoys boating.
If you have answers, please help by responding to the unanswered posts.

Panacea

Veteran Member
Joined
Aug 17, 2015
Messages
88
Location
USA
Vessel Name
Panacea
Vessel Make
Marine Builders, Voyager 70
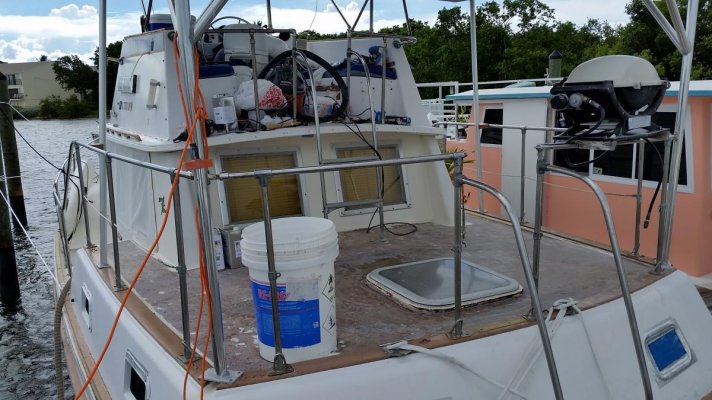
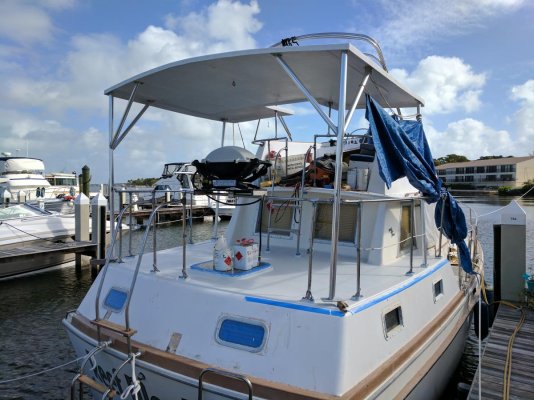
I've always had a thing for the old Gulf Star trawlers. Several months ago I found Reef Monkey, a 1975 Gulf Star 36 MKII for sale on craigslist and adopted her. She has twin Perkins 4-154 and a 12kw Northern Lights Genny. Mechanically, she is an alright condition. Cosmetically, she needs some love.

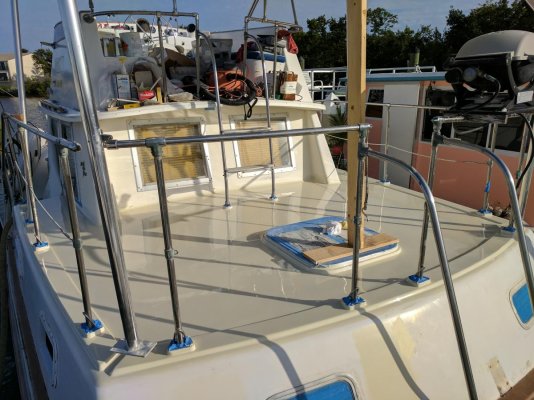
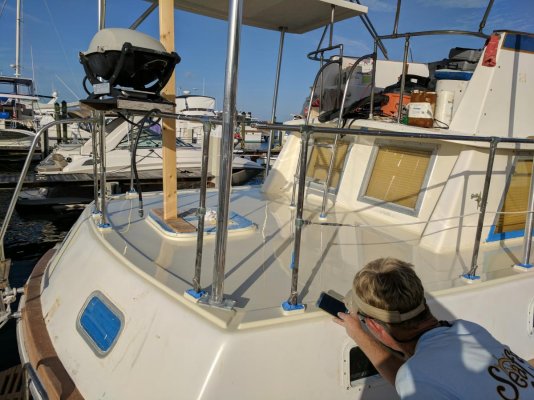
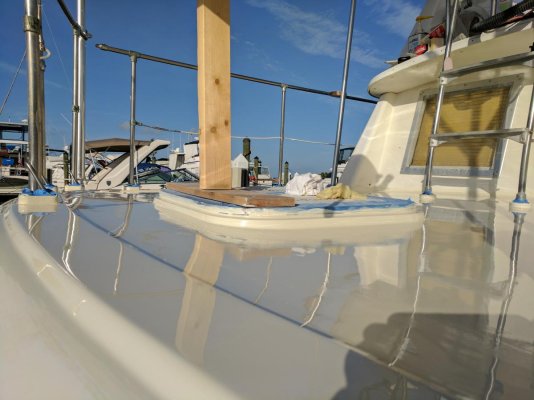
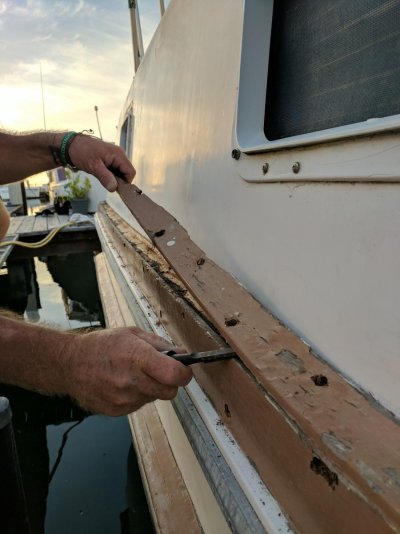
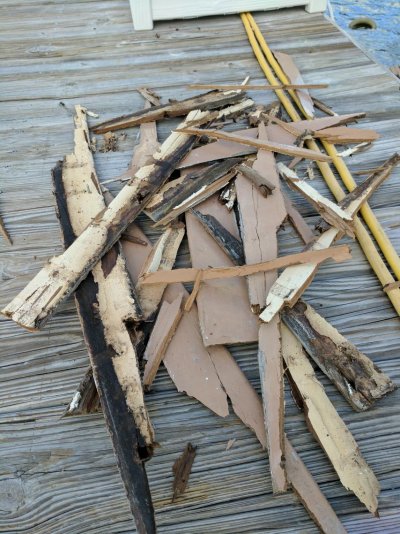
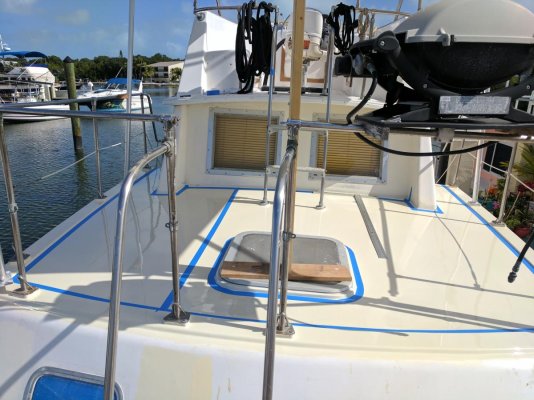
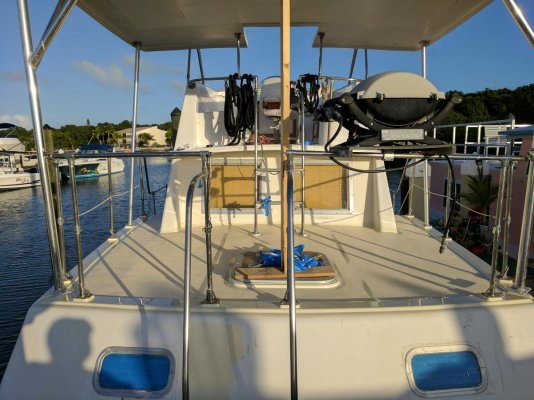
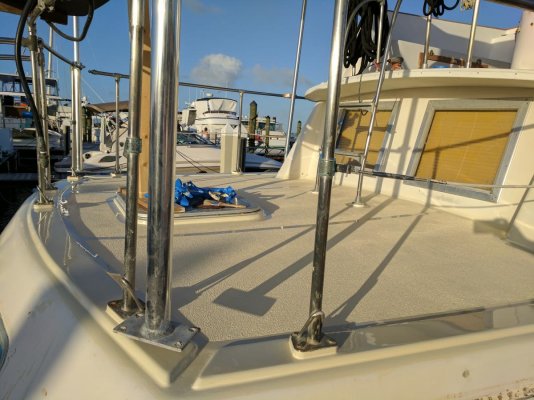
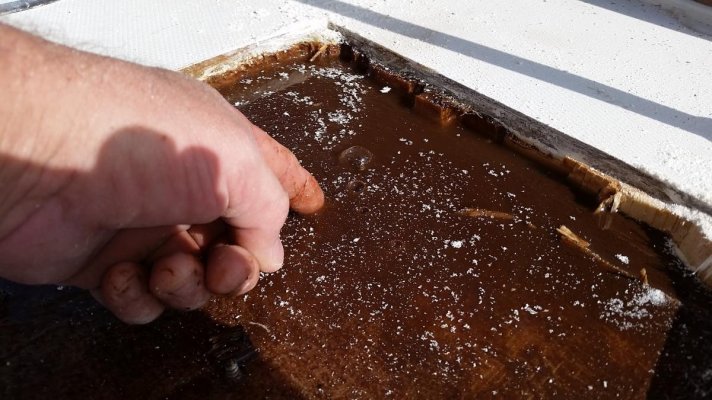
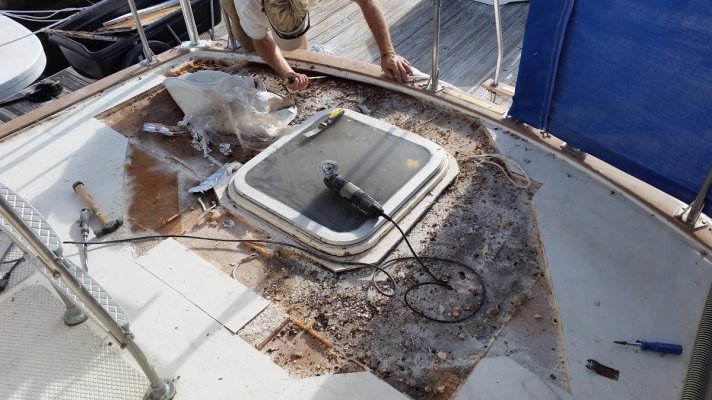
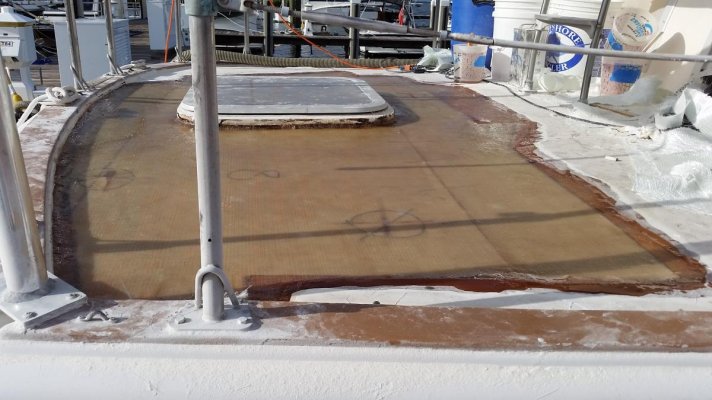
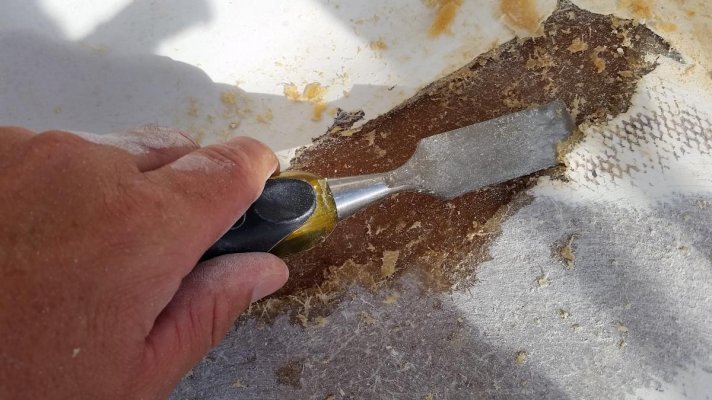
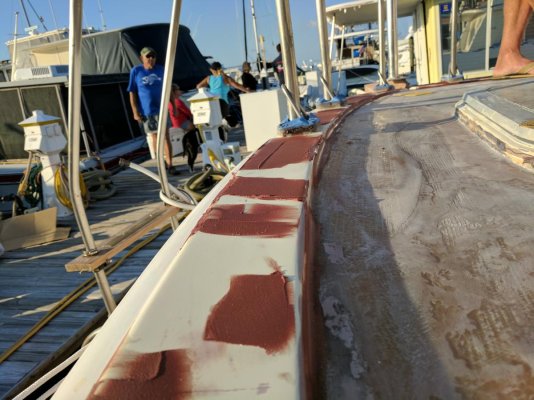
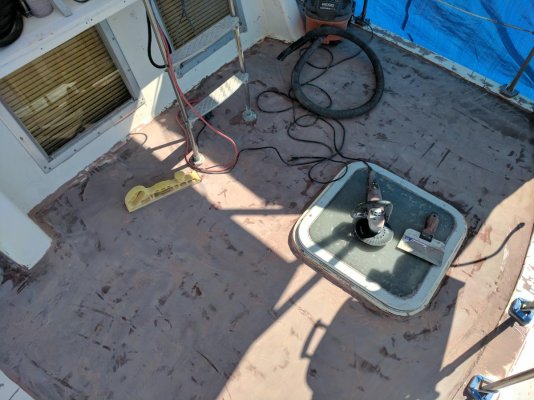
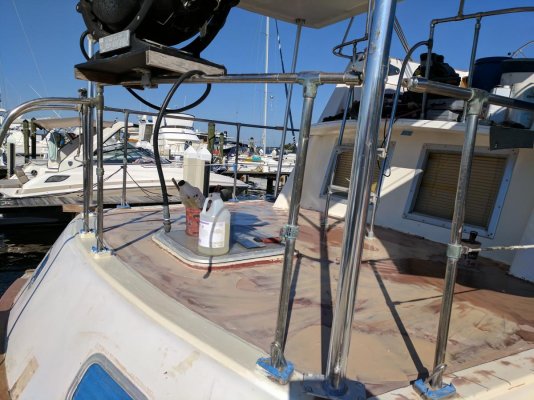
The teak toe rail and trim has been painted brown with house paint. The gel coat has a lot of crazing and stress cracks. There are quite a few leaks that need to be addressed. The deck is severely blistered in places due to Treadmaster non-skid mat holding moisture. Both air conditioning units don't work. The aft deck has a pretty severe soft spot. The swim platform is deteriorating. And at one point in her life she had a "professional" paint job that appears as if the paint was applied with a mop. :rofl:

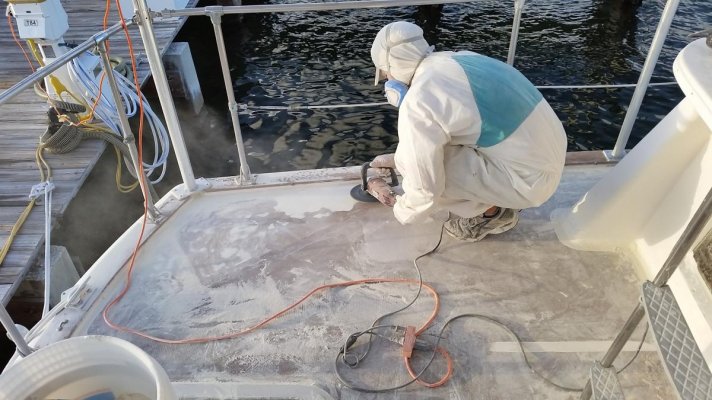
My goal is to do a practical restoration of the boat. Anywhere that I can avoid complication or reduce maintenance will get attention. I have always enjoyed reading project threads, so I I plan on posting updates in this thread as the project processes!
 

Attachments

  • 20151014_151934(1).jpg
    20151014_151934(1).jpg
    195.4 KB · Views: 251
Those old Gulfstars are great boats (in my opinion). Good luck with the project, and hoping to see those updates from time to time.
 
Since my daughter is living aboard for a while before heading off to college, I spruced up the interior a bit and replaced both old non-functioning split AC units with one 16,000BTU and one 12,000BTU Ocean Breeze stand alone units. Air conditioning is not optional down here! :D I didn't think to take pictures of the process, but I basically tore out the old air handlers and compressors and bolted in the stand alone units. New wiring, new plumbing, and new ducting.

Now that the interior is "inhabitable" its time to move on to the exterior! I will re-visit the interior once 100% of the leaks have been fixed and all deck fasteners have been re-bedded.
 

Attachments

  • IMG_20160629_185302.jpg
    IMG_20160629_185302.jpg
    138.2 KB · Views: 232
The aft deck has had a pretty bad soft spot. It seemed softest on the starboard side of the hatch. It is time to open things up and see just how bad things are. I have been told that soft spots are always bigger than they seem once you open things up. That is the absolute truth. There was so much moisture water was literally puddling in an area!!! Unbelievable. :facepalm:

So, I ended up removing about a third of the deck skin and core. Keep going until there is nothing but good clean balsa core. I won't be replacing the skin, so although a bit annoying, the odd shape of the removed area isn't a big deal.
 

Attachments

  • 20160902_160350.jpg
    20160902_160350.jpg
    111.4 KB · Views: 244
  • 20160902_162100.jpg
    20160902_162100.jpg
    107.8 KB · Views: 241
  • 20160902_170458.jpg
    20160902_170458.jpg
    142.4 KB · Views: 246
  • 20160902_174316.jpg
    20160902_174316.jpg
    159.3 KB · Views: 274
These older Gulfstar 36 and 43's are ripe for refitting IMO. Priced right with pretty reliable old Perkins diesels. Look forward to following your project.
 
For some reason, Gulf Star cored the deck strange. Fiberglass boat building was a new concept at the time and they were figuring things out as they went. Reef Monkey had only one layer of glass mat under the balsa core, but about 5 layers on the top skin! Also, there are no stringers or any structure to keep the deck rigid. This results in a slightly "springy" aft deck.

The original layup was like this:
[Glass Mat]
[Glass Mat]
[Glass Mat]
[Glass Mat]
[Glass Mat]
{=======}
{==Balsa==}
{==Core==}
{=======}
{=======}
[Glass Mat]

I added 2 additional layers of glass mat on the bottom layer below the core. This will increase rigidity a bit.

The new layup is like this:
[Glass Mat]
[Glass Mat]
[Glass Mat]
{=======}
{==Balsa==}
{==Core==}
{=======}
{=======}
[Glass Mat]
[Glass Mat]
[Glass Mat]
 

Attachments

  • 20160904_162816.jpg
    20160904_162816.jpg
    127.9 KB · Views: 209
  • 20160904_132105.jpg
    20160904_132105.jpg
    121.1 KB · Views: 244
  • 20160903_164746.jpg
    20160903_164746.jpg
    160.3 KB · Views: 221
  • 20160903_160201.jpg
    20160903_160201.jpg
    154.7 KB · Views: 232
I replaced the rotted out balsa core with Divinycell closed cell foam core. It is a good product, easy to cut, and will last an eternity.

Wetted out 3 layers of biaxial glass mat over the core and we have a deck we can walk on again! :thumb:
 

Attachments

  • 20160905_131601.jpg
    20160905_131601.jpg
    101.8 KB · Views: 220
  • 20160905_131615.jpg
    20160905_131615.jpg
    120.2 KB · Views: 243
  • 20160905_180032.jpg
    20160905_180032.jpg
    112.3 KB · Views: 232
  • 20160906_174641.jpg
    20160906_174641.jpg
    125.9 KB · Views: 242
  • 20160906_174703.jpg
    20160906_174703.jpg
    123.9 KB · Views: 253
Nice work! Keep the photos coming.
Cheers, Bill
 
First off, it is good to have a buddy to help out with this kind of work. A second set of hands makes things go faster and another point of view helps out tremendously. I don't recommend tackling a big job like this solo.

If you have Treadmaster non-skid, chances are your entire deck is blistered and toast. Apparently moisture is retained between the gel-coat and non-skid mat. Over time that moisture absorbs into the polyester resin and forms a blister. Anywhere there was Treadmaster non-skid there is severely blistered fiberglass under what is left of the gelcoat. I wish I took better pics of the blistering.

Each blister was opened up and aired out. All the gelcoat on the deck had to be removed. A dusty/itchy/dirty job.
 

Attachments

  • 20160908_175149.jpg
    20160908_175149.jpg
    111.5 KB · Views: 195
  • 20160908_175158.jpg
    20160908_175158.jpg
    150.5 KB · Views: 230
  • 20160908_185752.jpg
    20160908_185752.jpg
    116.7 KB · Views: 213
  • 20160908_185800.jpg
    20160908_185800.jpg
    143.9 KB · Views: 199
  • 20160909_104801.jpg
    20160909_104801.jpg
    131.7 KB · Views: 217
  • 20160909_104810.jpg
    20160909_104810.jpg
    146.7 KB · Views: 225
Some of you guys are going to freak out, but I'm removing the teak from Reef Monkey. Don't get me wrong. Teak is beautiful. I love teak... on other peoples boats!

The previous owner painted the teak with brown house paint. Ugh... What an eyesore. Plus, the crazing/cracking in the gelcoat extend under the teak toerail. So... bye bye teak!

After removing the toe rail I dremeled out the gel coat cracks and filled with epoxy fairing.
 

Attachments

  • 20161112_122629.jpg
    20161112_122629.jpg
    112 KB · Views: 124
  • 20161113_125132.jpg
    20161113_125132.jpg
    77.3 KB · Views: 127
  • IMG_20161116_163222.jpg
    IMG_20161116_163222.jpg
    175.5 KB · Views: 119
  • IMG_20161116_163243.jpg
    IMG_20161116_163243.jpg
    196.7 KB · Views: 127
  • IMG_20161116_163249.jpg
    IMG_20161116_163249.jpg
    141.6 KB · Views: 137
Love the progress pictures, great work :thumb::thumb:

Tell your neighbor with the Gibson 36 houseboat that I love his color scheme.
 
Our boats have all had teak, varnished teak...
It is quite beautiful to look at and it is not all that difficult to keep up here in the North East but I am sooooo looking forward to no more teak!
We will find a nicely varnished boat to anchor next (easy when we are in Maine!) and enjoy that teak from a distance!!!
What a treat it is to watch someone restore their boat. I've been there before but I also enjoy the view from the armchair.
Many thanks for the opportunity.
Bruce
 
Now its time to make it flat! Since I'm painting the boat I'm switching from polyester to epoxy resin. Epoxy is so much nicer to work with. It took 5 fairing passes to make the deck nice and flat. Sanding was done by hand with an 18 inch longboard.

The deck hatch trim ring is now fiberglassed in and encapsulated with epoxy, so there is no chance of leaking.

When somebody installed the hard top they simply cut the bolts to the corner cleats and left the holes gaping wide open with no sealant under the hardtop pipe mount! This was another huge water leak that is now fixed.
 

Attachments

  • IMG_20161117_145230.jpg
    IMG_20161117_145230.jpg
    160.8 KB · Views: 121
  • IMG_20161118_131448.jpg
    IMG_20161118_131448.jpg
    142.1 KB · Views: 112
  • IMG_20161120_143146.jpg
    IMG_20161120_143146.jpg
    163.9 KB · Views: 118
  • IMG_20161120_143927.jpg
    IMG_20161120_143927.jpg
    163 KB · Views: 123
  • IMG_20161129_134448.jpg
    IMG_20161129_134448.jpg
    159.2 KB · Views: 148
All the deck fairing is completed and a few coats of primer have been applied. Its funny how they call this type of work "painting a boat". 99% of the work is sanding, repairs, and prep. Not paint! :D It sure looks good to see everything white again. :thumb:
 

Attachments

  • IMG_20161130_101346.jpg
    IMG_20161130_101346.jpg
    155.4 KB · Views: 193
  • IMG_20161130_101350.jpg
    IMG_20161130_101350.jpg
    149.8 KB · Views: 176
  • IMG_20161130_101408.jpg
    IMG_20161130_101408.jpg
    153.2 KB · Views: 176
Rolled and tipped 5 coats of Alexseal topcoat. It should have been 3 coats, but it has been so humid the past few days dew set in and ruined the finish overnight. :banghead: I could have used accellerator, but it effects flow when brushing so I don't like to use it.

I prefer Alexseal over Awlgrip because it is just as durable, it can also be either sprayed or brushed, and most importantly it can be wet sanded buffed/polished for repairs. Alexseal was created by the same guy that formulated Awlgrip way back in 1973. Both Alexseal and Awlgrip are great 2-part polyurethane products, but the ability to easily repair (and remove any imperfections during application) is a game changer.

I'm going with Cream color for everything above the rub rail to keep the old school classic spirit of the boat. I've done a bit of painting in the past and was able to achieve a spray quality finish with no orange peel or signs of brushing. The transition between this area and the next painted area will be wet sanded and polished to remove the masking line.
 

Attachments

  • IMG_20161213_154559.jpg
    IMG_20161213_154559.jpg
    159.7 KB · Views: 101
  • IMG_20161213_154615.jpg
    IMG_20161213_154615.jpg
    144 KB · Views: 88
  • IMG_20161213_154618.jpg
    IMG_20161213_154618.jpg
    150.8 KB · Views: 95
  • IMG_20161213_154633.jpg
    IMG_20161213_154633.jpg
    105.4 KB · Views: 112
No non-skid of any kind on the deck?

Ted
 
Its funny how they call this type of work "painting a boat". 99% of the work is sanding, repairs, and prep. Not paint!
My reaction when I got into welding. They call it "welding," but at least 90% of your time is spent cutting and shaping the metal, and then cleaning up after the actual welding is done!
 
Hah! Yes, there will be nonskid. Patience grasshoppa. :)

While certainly necessary, it is a shame that much of the beautiful paint job will be hidden under nonskid. At least we were able to appreciate it before you covered it up.
 
While certainly necessary, it is a shame that much of the beautiful paint job will be hidden under nonskid. At least we were able to appreciate it before you covered it up.

Thanks man! The rest of the boat will have just as good of a finish, so there will be plenty of other areas to appreciate. :speed boat:
 
Very nice job, and I really like a lot Gulfstar shape. I was about to get a 43 one earlier this year when I got my first boat.

But this said... now that you have all that experience with boat renovation... I think it would be a pity to lose all this knowledge... you could come here and do the same on my boat! :D
 
Did some "brightwork" today!!! :D

Tearing off the old 1/4 inch teak trim. The surface underneath will be faired and painted.

Also, removed a trim ring on one of the port lights to see how they look. Going to rebed all port lights and hatches. Ordering new trim rings since these ones are shot.
 

Attachments

  • IMG_20161213_170914_1.jpg
    IMG_20161213_170914_1.jpg
    99.8 KB · Views: 83
  • IMG_20161216_135449.jpg
    IMG_20161216_135449.jpg
    94.5 KB · Views: 75
  • IMG_20161216_141852.jpg
    IMG_20161216_141852.jpg
    119.9 KB · Views: 87
  • IMG_20161216_145958.jpg
    IMG_20161216_145958.jpg
    167.8 KB · Views: 80
  • IMG_20161216_150011.jpg
    IMG_20161216_150011.jpg
    197.9 KB · Views: 92
So surprised you can do all this work in the slip.
Years ago, OK many years ago, my wife would put on her bikini and run the shop vac as I did some exterior sanding.
When Harbor Patrol cruised by they never noticed the dust in the water. :D
 
So surprised you can do all this work in the slip.
Years ago, OK many years ago, my wife would put on her bikini and run the shop vac as I did some exterior sanding.
When Harbor Patrol cruised by they never noticed the dust in the water. :D

SSSSSsshhhhhhhhhhhh!!!! :whistling:

The people on my dock are very cool and the vibes are very "live and let live". I make sure I don't annoy anybody and if there is going to be dust I have a conversation with my neighbors before hand. Also, if their boat is dusted I hose it down or wash it. If things are extreme, a sincere apology and some ice cold beers go a long way.

And good tip with the wife-in-bikini maneuver! The marina manager here is a girl though so I guess I have to put on the banana hammock?
Borat-Banana-Hammock-Mankini-205x300.png
 
We rolled out some non-skid yesterday and the horizontal surfaces on the aft deck are now done! The new paint sure makes the rest of the boat look like absolute crap!

I'm a big fan of Kiwigrip. I did my entire 70 foot MY with the stuff. It feels great on your feet, is easy to repair, and looks pretty good. The trick to getting a good professional looking job is masking off the reveals. I'm pretty happy with the way it turned out and I'm looking forward to seeing the rest of the boat with the same finish. :thumb:
 

Attachments

  • IMG_20161218_125127.jpg
    IMG_20161218_125127.jpg
    151.3 KB · Views: 169
  • IMG_20161218_125136.jpg
    IMG_20161218_125136.jpg
    156.1 KB · Views: 157
  • IMG_20161218_164159.jpg
    IMG_20161218_164159.jpg
    154.6 KB · Views: 161
  • IMG_20161218_164210.jpg
    IMG_20161218_164210.jpg
    156 KB · Views: 178
  • IMG_20161218_164217.jpg
    IMG_20161218_164217.jpg
    157.1 KB · Views: 177
  • IMG_20161218_164315.jpg
    IMG_20161218_164315.jpg
    160.6 KB · Views: 165
  • IMG_20161218_164346.jpg
    IMG_20161218_164346.jpg
    129.2 KB · Views: 124
  • IMG_20161218_170208.jpg
    IMG_20161218_170208.jpg
    78.7 KB · Views: 165
Nice job! Extremely happy with the Kiwi Gripped decks on my boat.

Ted
 

Latest posts

Back
Top Bottom