Reply
 
Thread Tools Search this Thread Display Modes
 
Old 05-31-2016, 12:11 AM   #21
Senior Member
 
City: San Pedro, CA
Vessel Name: Boatless
Vessel Model: Dreamer
Join Date: Jan 2016
Posts: 159
Alrighty,

Where is the Advil? Need it for all the work dealing with these decks... lots of labor grinding and caulking.

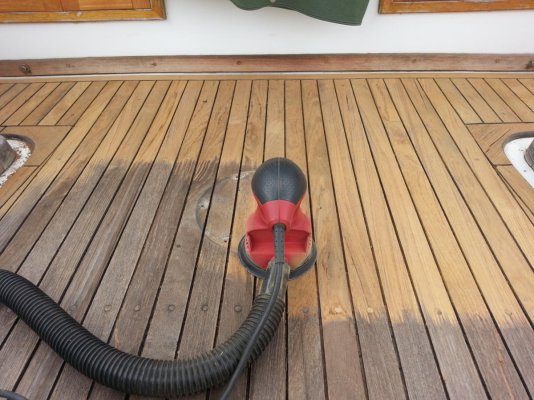
Sanded the side decks which are under the shade of the europa overhangs... wood seemed "harder"... sander labored to cut the worn wood.

Started the recaulk on the foredeck. On the starboard side I did the fill and tool flat as recommended by the TDS instructions... recognizing that cutting all that smeared caulk would be a lot of work, on the port side I just filled the seam with caulk without the smear - assuming it will be easier to sand away the excess caulk with the 120-grit.

I reiterate, condition of the teak and old caulk is generally good. Happy about that.
Attached Thumbnails
2016-05-30 15.02.22.jpg  
CarlinLA is offline   Reply With Quote
Old 05-31-2016, 12:58 AM   #22
Guru
 
Star0210's Avatar
 
City: Madisonville, LA
Vessel Name: Sea Star
Vessel Model: 2004 Cruisers Yachts 50SS
Join Date: May 2016
Posts: 906
Sorry about your leaks but that teak sure is pretty!
Star0210 is offline   Reply With Quote
Old 05-31-2016, 01:25 AM   #23
TF Site Team
 
Insequent's Avatar
 
City: Brisbane
Vessel Name: Insequent
Vessel Model: Ocean Alexander 50 Mk I
Join Date: Mar 2012
Posts: 4,126
I had some small areas re-bedded recently. The Shipwright put masking tape on the teak before caulking and smearing. Then he sanded the tape off, with any raised caulking. He feels its the best way, but each to his own method.
__________________
Brian
Insequent is online now   Reply With Quote
Old 05-31-2016, 02:25 PM   #24
Guru
 
Xsbank's Avatar
 
City: Pender Harbour, BC
Vessel Name: Gwaii Haanas
Vessel Model: Custom Aluminum 52
Join Date: Sep 2013
Posts: 3,791
The sanding looks good but you probably just ground off, oh, 5 years of your deck's life.

Once you get the decks more or less remediated, wet the decks and watch how they dry - the areas that leak will stay wet a lot longer than the rest, mark the leaking area with masking tape.

Taiwanese trawlers were made in many yards and a famous trick was to drill the hole for the screw and not install it, just glue in the bung. The screws would be sold in the market. If you plan to keep your decks, you might also need to pop out the bungs to fill those holes with a screw or epoxy. Another favourite trick was to use any old scrap wood, packing cases, pallets as the "structure" under the Fiberglas. This stuff turns to mush as soon as it's wet and so you should investigate wet areas in case you have this stuff in there, epoxy will not give it sufficient structural strength.

Check inside the boat for discoloured panelling, signs of a leak. If you have any it's a sign that the structural wood is saturated and a serious source of mold. For your own longevity you need to address this.
__________________
Don't believe everything that you think.
Xsbank is offline   Reply With Quote
Old 05-31-2016, 02:32 PM   #25
Guru
 
Xsbank's Avatar
 
City: Pender Harbour, BC
Vessel Name: Gwaii Haanas
Vessel Model: Custom Aluminum 52
Join Date: Sep 2013
Posts: 3,791
Forgot to add, "good luck!"

On my teak decks I masked all the seams I wished to repair, caulked, pulled the tape when cured, cut the top of the caulk by sliding a hard-backed razor blade along the caulk so I would not need to sand and make the wood thinner.
__________________
Don't believe everything that you think.
Xsbank is offline   Reply With Quote
Old 05-31-2016, 05:17 PM   #26
Guru
 
oscar's Avatar
 
City: Bethlehem, PA
Vessel Name: Lady Kay V
Vessel Model: 1978 Hatteras 53MY
Join Date: Oct 2015
Posts: 1,098
You see, once the water is in the core, slamming the door behind it won't stop the rot. Because it won't dry out. And, if you can FEEL it it's bad. The rot is usually spread well beyond that. The good news is that it won't sink the boat, so as long as you don't get potholes in the deck to trip over and the cabin is dry......
__________________
https://ladykay.blog/
oscar is offline   Reply With Quote
Old 05-31-2016, 08:00 PM   #27
Senior Member
 
City: San Pedro, CA
Vessel Name: Boatless
Vessel Model: Dreamer
Join Date: Jan 2016
Posts: 159
Quote:
Originally Posted by Star0210 View Post
Sorry about your leaks but that teak sure is pretty!
Thanks a bunch - I like it tan like this and when it is that silver/gray too... as soon as its sealed I'm pouring gallons of sea water on it to start the transition.

Carl
CarlinLA is offline   Reply With Quote
Old 05-31-2016, 08:02 PM   #28
Senior Member
 
City: San Pedro, CA
Vessel Name: Boatless
Vessel Model: Dreamer
Join Date: Jan 2016
Posts: 159
Quote:
Originally Posted by Insequent View Post
I had some small areas re-bedded recently. The Shipwright put masking tape on the teak before caulking and smearing. Then he sanded the tape off, with any raised caulking. He feels its the best way, but each to his own method.

Yep... after smearing that first side I decided to back off and not put so much on the rest of the board.

Removing tape is fine as addressed in the next post about removing wood...

Carl
CarlinLA is offline   Reply With Quote
Old 05-31-2016, 08:06 PM   #29
Senior Member
 
City: San Pedro, CA
Vessel Name: Boatless
Vessel Model: Dreamer
Join Date: Jan 2016
Posts: 159
Quote:
Originally Posted by Xsbank View Post
The sanding looks good but you probably just ground off, oh, 5 years of your deck's life.
Bummer - but I read a post from several years ago from Boatsmith - and there was something in there that noted that uneven teak surfaces harbor dirt and dust - and I thought that made sense - and as I am anti-dirt in the wrong place - like my teak decking - out came the sander.

At the rate of degradation over the thirty years of the boats life - I bet you're right - about five years came off through sanding...

Carl
CarlinLA is offline   Reply With Quote
Old 05-31-2016, 08:25 PM   #30
Senior Member
 
City: San Pedro, CA
Vessel Name: Boatless
Vessel Model: Dreamer
Join Date: Jan 2016
Posts: 159
Thanks again XS...

Sad, sad, sad...


Quote:
Originally Posted by Xsbank View Post
Taiwanese trawlers were made in many yards and a famous trick was to drill the hole for the screw and not install it, just glue in the bung. The screws would be sold in the market. If you plan to keep your decks, you might also need to pop out the bungs to fill those holes with a screw or epoxy. Another favourite trick was to use any old scrap wood, packing cases, pallets as the "structure" under the Fiberglas. This stuff turns to mush as soon as it's wet and so you should investigate wet areas in case you have this stuff in there, epoxy will not give it sufficient structural strength.

Check inside the boat for discoloured panelling, signs of a leak. If you have any it's a sign that the structural wood is saturated and a serious source of mold. For your own longevity you need to address this.


Such wonderful, useful, affordable, and good looking vessels have a time-bomb built into them. Thankfully the problem is not fatal... imagine how much marketplace money would have been lost over the years if these soft deck problems were terminal.

While I was boat shopping back in January I looked at an Endeavour catamaran down in San Diego... and I could not help but notice the quality of the fiberglass layup when peering into one of the foredeck lockers... perfectly smooth woven mat. Loved it. The Fu Hwa? Not so much.

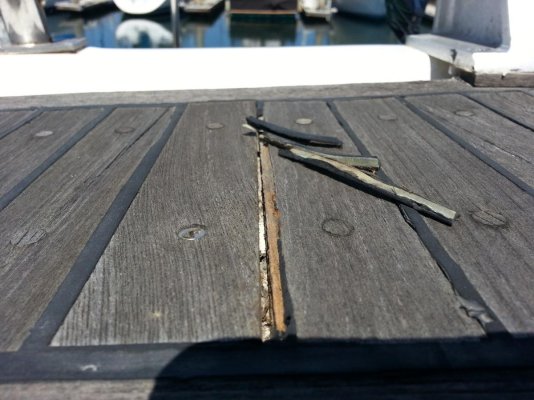
Anyway - yep, I have two major soft spots. When I did the re-bed of the starboard water tank fill the core was mushed and wet - all I could do was to pack a little epoxy putty in there to hold it together until some other solution comes along.

Its a bit of a paradox... the only structural contribution without the core is a mere quarter inch of fiberglass and the teak decking strips - and if you remove the teak decking strips - you are forced to go all the way in and replace the core - to replace the strength lost when you pull the teak decking.

Signs of leaks????? Ha!!!!! Got caught in a big storm on one of the first overnight stays on the boat... Water water everywhere...

Hence the mission to stop the leaks now. Thankfully it stays dry in LA for a few months giving me time to attack these issues.

Carl
Attached Thumbnails
2016-03-07 06.58.31.jpg   2016-03-07 02.41.40 - Copy.jpg   2016-03-07 02.38.26.jpg   2016-03-07 02.34.22.jpg  
CarlinLA is offline   Reply With Quote
Old 05-31-2016, 08:28 PM   #31
Senior Member
 
City: San Pedro, CA
Vessel Name: Boatless
Vessel Model: Dreamer
Join Date: Jan 2016
Posts: 159
Quote:
Originally Posted by Xsbank View Post
Forgot to add, "good luck!"

On my teak decks I masked all the seams I wished to repair, caulked, pulled the tape when cured, cut the top of the caulk by sliding a hard-backed razor blade along the caulk so I would not need to sand and make the wood thinner.
Concur... hence after I deduced that no-tape-and-tooling was spreading a lot of caulk across beautiful and valuable wood - to heck with that - switched to the standing seam method...

Will razor the excess caulk off the standing seam and then hit it with the 120-grit sanding (planned to do the 120-grit all along so no loss there).

Anyway - to all - I do appreciate the feedback - Trawler Forum is very helpful.

Carl
CarlinLA is offline   Reply With Quote
Old 06-04-2016, 11:18 PM   #32
Senior Member
 
City: San Pedro, CA
Vessel Name: Boatless
Vessel Model: Dreamer
Join Date: Jan 2016
Posts: 159
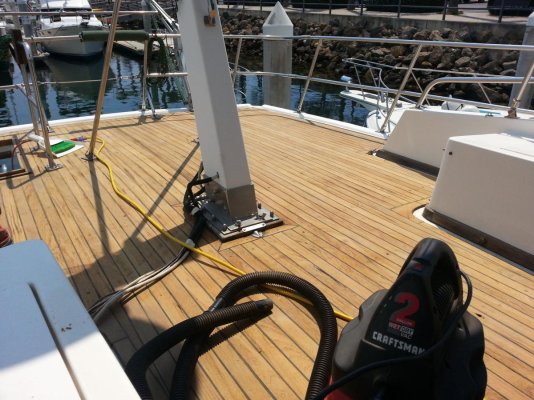
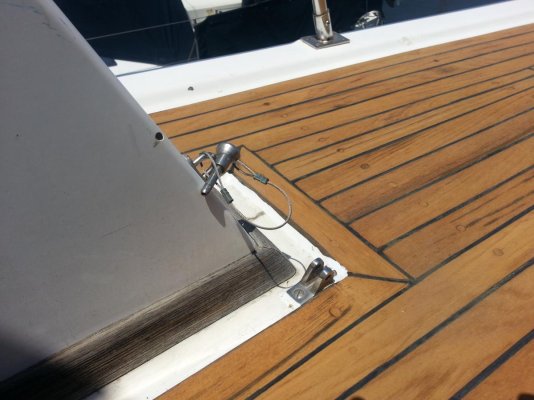
A bit more progress today...

At the bow I sanded the smeared caulk off the wood. Not the solution... took a lot of wood off. Wont be doing that again.

Trimed the caulk that I laid in without tooling flat - left gaps. That wont work either - going with tape and tooling for the next go-round.

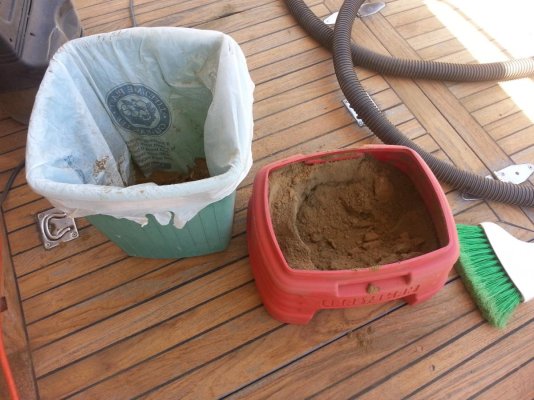
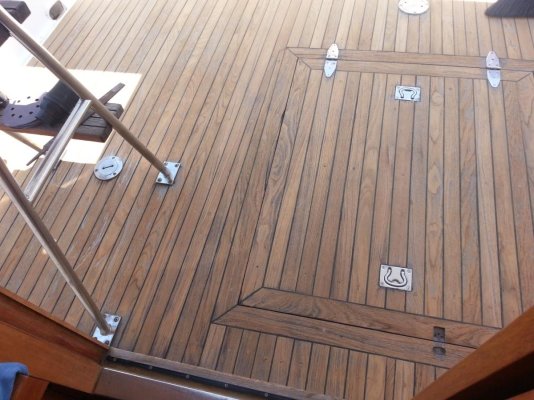
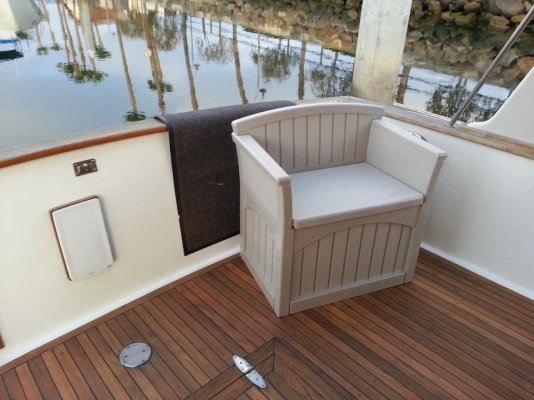
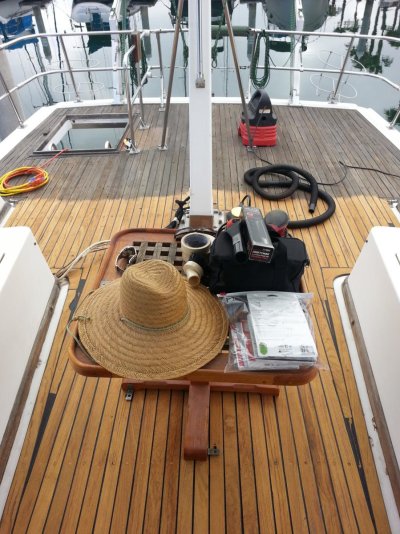
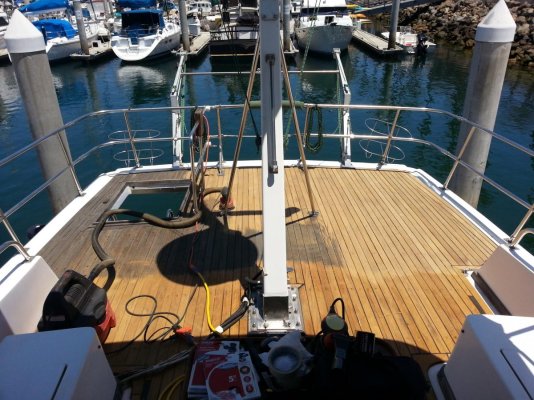
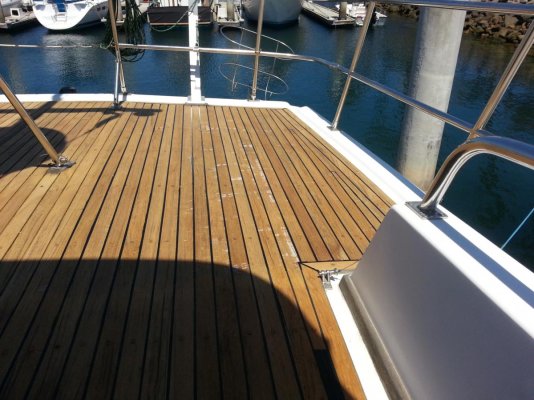
Sanded all the way aft across the cockpit. Beautiful. Lots of worn caulking to remove... (Xs - check out that 5-years worth of teak captured in the vacuum cleaner - sad)

With the amount of work involved I am considering not bothering with teak-triage on the flybridge - just go straight to teak removal. Tough call as the refinished teak is beautiful.
Attached Thumbnails
2016-06-04 12.27.10.jpg   2016-06-04 12.58.25.jpg   2016-06-04 17.04.53.jpg  
CarlinLA is offline   Reply With Quote
Old 06-05-2016, 08:19 AM   #33
Guru
 
DHeckrotte's Avatar
 
City: Philadelphia, PA
Vessel Name: Revel
Vessel Model: 1984 Fu Hwa 39
Join Date: Nov 2015
Posts: 1,024
Our '84 Fu Hwa does not appear (yet) to have leaks caused by failed Teak decking. There is plenty of cracked sealant in seams. Some of this sealant is brittle; some is still soft. There is just a very small percentage of missing bungs. There are many bungs that appear to have been replaced with a colored resinous filler. There are precious few bungs over the area of the decking. The highest 'bungs per square foot' of decking is on shorter pieces of Teak. My lazarette hatch had no screws at all in the Teak, but no fiberglass either. The structural hatch was scrap plywood. The sealant in the seams is generally tenacious, as is whatever the glue is that holds the Teak down to the fiberglass.

I therefore conclude that if I deal with the screws and bungs, as well as the bedded fittings, I will have no problems with the Teak. I don't think that failed sealant joints over fiberglass can be a source of leaks. Since the Teak is firmly bonded to the 'glass, I think that: 1, the wholesale removal of bungs and fastenings, 2, the cleaning up (countersink or boring out to clean 'glass) the holes in the fiberglass, 3, and patching the holes with epoxy and either replacing the bung or accepting the appearance of the 'filled' epoxy will be the end of potential problems over the area of the Teak. I don't think that sanding the Teak is good for anything but appearance, maybe comfort under bare feet, but removes years of future lifetime. I don't think that raking out the seams and resealing is good for anything but appearance.
DHeckrotte is offline   Reply With Quote
Old 06-07-2016, 08:21 PM   #34
Senior Member
 
City: San Pedro, CA
Vessel Name: Boatless
Vessel Model: Dreamer
Join Date: Jan 2016
Posts: 159
I was sick today... could not go to work...

What do they say? starve a cold feed a fever and work on the boat every chance you get... so I convalesced caulking the cockpit deck.

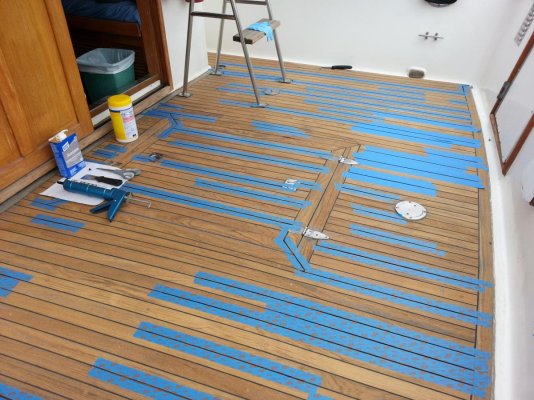
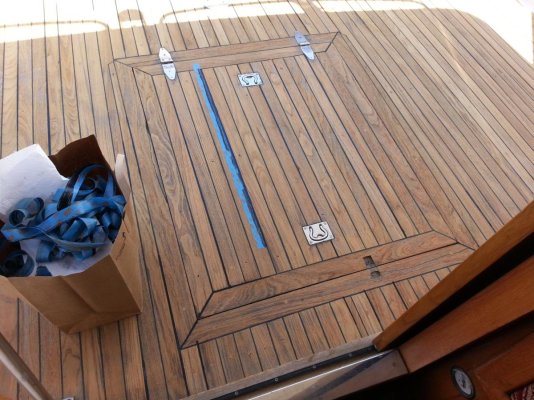
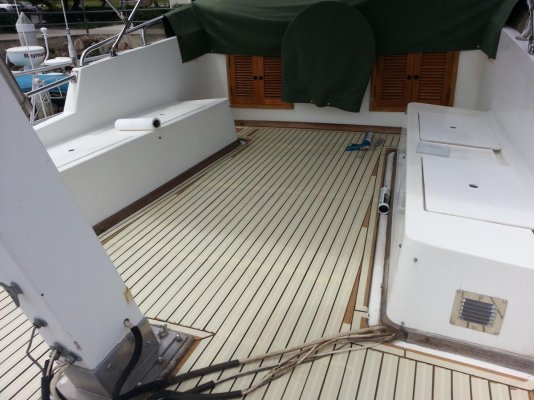
Went with tape for the third method of doing the re-caulk. Tape takes longer but the instant clean edges are better.

From the first shot you get a sense of the size of the problem... not that bad... perhaps 20% of the seams required recaulk.

Apply the caulk.

Tool the bead flat.

And peel the tape.

Pretty cool.
Attached Thumbnails
2016-06-07 10.20.19.jpg   2016-06-07 11.04.24.jpg   2016-06-07 11.06.55.jpg   2016-06-07 11.07.06.jpg   2016-06-07 12.35.28.jpg  

CarlinLA is offline   Reply With Quote
Old 06-07-2016, 08:33 PM   #35
Senior Member
 
City: San Pedro, CA
Vessel Name: Boatless
Vessel Model: Dreamer
Join Date: Jan 2016
Posts: 159
Ok, now lets talk about the flybridge...

The flybridge teak appears far worse than the deck level.

Sanding would be pretty agressive to flatten that out.

And of course with agressive sanding you have less of a sealant grove to work with. Presumably that means cutting the grove deeper. Lots of work.

Perhaps rather than starting to sand - just get started removing the teak and prep for filling those 900 screw holes... that and the rotted core and having to work around all the rail mounting points which need to be at the same elevation they are as the sit on the teak.

What to do?
Attached Thumbnails
2016-06-07 14.35.39.jpg  
CarlinLA is offline   Reply With Quote
Old 06-07-2016, 10:05 PM   #36
Senior Member
 
Brisyboy's Avatar
 
City: Brisbane
Vessel Name: Malagari
Vessel Model: Island Gypsy 36 Europa
Join Date: Mar 2015
Posts: 418
Only a divergence - not a hijac
When we talk of teak decks there is often talk of recutting the groove......... my question is how is this done - any particular tool and or tecnique?
Cheers
__________________
George
Brisbane
IG 36 Europa
Brisyboy is offline   Reply With Quote
Old 06-08-2016, 01:08 AM   #37
Guru
 
BruceK's Avatar
 
City: Sydney
Vessel Name: Sojourn
Vessel Model: Integrity 386
Join Date: Oct 2011
Posts: 13,104
Quote:
Originally Posted by Brisyboy View Post
Only a divergence - not a hijack
When we talk of teak decks there is often talk of recutting the groove......... my question is how is this done - any particular tool and or technique?
Cheers
I think it needs a router, but there is the issue of creating a guide to control it. Dremel might make an attachment.
Carlin, you are doing a great salvage job and if it keeps the existing teak(FB excluded) alive for some more years it is a major achievement. Most of mine was like your FB, after preparing to do the repair job you have done I concluded mine needed what you realised your FB needed. The shipwright put down 2 layers of glass where we went with a painted finish.
__________________
BruceK
2005 Integrity 386 "Sojourn"
Sydney Australia
BruceK is offline   Reply With Quote
Old 06-08-2016, 01:32 AM   #38
Guru
 
78puget-trawler's Avatar
 
City: LaConner
Vessel Model: 34' CHB
Join Date: Apr 2016
Posts: 1,257
Quote:
Originally Posted by CarlinLA View Post
Thanks again XS...

Sad, sad, sad...


Such wonderful, useful, affordable, and good looking vessels have a time-bomb built into them. Thankfully the problem is not fatal... imagine how much marketplace money would have been lost over the years if these soft deck problems were terminal.

While I was boat shopping back in January I looked at an Endeavour catamaran down in San Diego... and I could not help but notice the quality of the fiberglass layup when peering into one of the foredeck lockers... perfectly smooth woven mat. Loved it. The Fu Hwa? Not so much.

Anyway - yep, I have two major soft spots. When I did the re-bed of the starboard water tank fill the core was mushed and wet - all I could do was to pack a little epoxy putty in there to hold it together until some other solution comes along.

Its a bit of a paradox... the only structural contribution without the core is a mere quarter inch of fiberglass and the teak decking strips - and if you remove the teak decking strips - you are forced to go all the way in and replace the core - to replace the strength lost when you pull the teak decking.

Signs of leaks????? Ha!!!!! Got caught in a big storm on one of the first overnight stays on the boat... Water water everywhere...

Hence the mission to stop the leaks now. Thankfully it stays dry in LA for a few months giving me time to attack these issues.

Carl
Oh my goodness! I hate it when that happens! I guess I was pretty lucky all in all, with the recent purchase of the 78 CHB. It had been under cover for some good time, thankfully. On the day we did sea trials and haulout in Bellingham, WA it poured all freaking day! All I could think of was the rainforest down below! As luck would have it, and I don't get much of it, the only leaks found were around the holding tank fill, the fwd skylight and the aft cabin doors at the top. Both had their canvas on too! All were relatively easy fixes. On the skylight I removed and replaced the two glass panels and re bedded. Aft, I dug some old caulk out of the seams around the aft door jambs, poured epoxy into a gap until it started pushing water in to the inside, let cure, then re caulked. The deck fill had to come up and be re bedded, which turned into a bit more of a PITA than hoped for but its done. I do know there is some softness on the aft deck right at..you guessed it. The water fill, port side only so far. Not gonna worry about it too much for now. I don't think my poor old knees are up to doing what you are doing though. Too many years working on them in shipyards.
78puget-trawler is offline   Reply With Quote
Old 06-08-2016, 01:35 AM   #39
Guru
 
Xsbank's Avatar
 
City: Pender Harbour, BC
Vessel Name: Gwaii Haanas
Vessel Model: Custom Aluminum 52
Join Date: Sep 2013
Posts: 3,791
Get a panel saw and put two or more blades in it to get the correct width of the kerf. Drill a hole in the saw plate behind the blade (closer to you) and tap it for a machine screw the width of the kerf. This will (help) guide the saw as you cut the new slots. If you can add a vacuum hose to it to keep the area clean it will be easier to see.

Panel saws are usually found in garage sales, although I've seen battery powered ones in Home Depot, some makes come in left or right hand models. Some have little headlights.
__________________
Don't believe everything that you think.
Xsbank is offline   Reply With Quote
Old 06-08-2016, 07:57 AM   #40
TF Site Team
 
Larry M's Avatar
 
City: Jacksonville
Join Date: Nov 2008
Posts: 11,427
Quote:
Originally Posted by Xsbank View Post
Get a panel saw and put two or more blades in it to get the correct width of the kerf. Drill a hole in the saw plate behind the blade (closer to you) and tap it for a machine screw the width of the kerf. This will (help) guide the saw as you cut the new slots. If you can add a vacuum hose to it to keep the area clean it will be easier to see.

Panel saws are usually found in garage sales, although I've seen battery powered ones in Home Depot, some makes come in left or right hand models. Some have little headlights.
We used a 3 3/8" circular saw and made our own dado blade by adding 2 blades together. Control was surprisingly easy. A chisel was used for the sharp radiuses and ends. The guy who taught me how to do it, said you needed 3/8" of teak to be considered serviceable. Less than that, you couldn't effectively secured the planks via screws and bungs or have enough depth for the caulk.
Larry M is offline   Reply With Quote
Reply

Thread Tools Search this Thread
Search this Thread:

Advanced Search
Display Modes

Posting Rules
You may not post new threads
You may not post replies
You may not post attachments
You may not edit your posts

BB code is On
Smilies are On
[IMG] code is On
HTML code is Off
Trackbacks are Off
Pingbacks are Off
Refbacks are Off


» Trawler Port Captains
Port Captains are TF volunteers who can serve as local guides or assist with local arrangements and information. Search below to locate Port Captains near your destination. To learn more about this program read here: TF Port Captain Program


All times are GMT -5. The time now is 09:17 PM.


Powered by vBulletin® Version 3.8.8 Beta 4
Copyright ©2000 - 2023, vBulletin Solutions, Inc.
Search Engine Optimization by vBSEO 3.6.0
Copyright 2006 - 2012