Uniflite 42 Double Cabin Refit

The friendliest place on the web for anyone who enjoys boating.
If you have answers, please help by responding to the unanswered posts.
Love her deep flared bow!
Propspeed would be my first choice, they hold up well here in the PNW, but they're not cheap.
Pettit Barnacle Barrier zinc spray is also available.
If you are going to paint with anti fouling paint, use the Pettit underwater metal kit...they come with both etching primer & tie coat primer.
 
Last edited:
I thought I would add some notes about just what kind of undertaking it is to paint a large boat. I'm working primarily alone and only able to work evenings/weekends, and not all available time can be spent on the boat.

For perspective. Each side of the hull has a minimum of 6 coats of paint on it. The port side has 9 due to learning processes, and sanding off the early coats. Each coat on each side takes 3 hours on the scaffolding wielding a roller. Each coat has to be separated by times set by the paint system, usually a day apart or more. So that comes to 45 hours of just rolling paint.

45 hours of rolling paint does not include any prep work at all. There is sanding, filling and cleaning that also has to be done before each coat and this takes longer than rolling the paint on, triple the time is about right. Another 90-120 hours of prep, minimum so you get up to 165 hours of labor. This is only the hull sides. The cabin was another whole set of time.

It's time consuming and labor intensive and honestly there is more that I could have done. There are defects and blemishes that I could have fixed but chose not to, so it's not perfect, but it's not bad either.

Hopefully that is helpful to anyone considering painting their boat, whether you want to do it yourself or have a yard do it for you. If you plan to do it yourself, there are many options and the route I've chosen (high end, two part yacht coatings) is a lot of work. Even if I was working on it full time with a helper it would be a month's long job just to paint the hull. The cabin would be another month and the decks would add more time yet.

When a yard quotes a number and it seems too big, think of the hours that will go into the job and that you will expect them to stand behind the work once it's completed.
 
I don’t remember what paint you are using, but Alexseal just came out with a rolling agent so you don’t have to tip. Boat Works did some painting with it and it looks great. What did the tool cost to replace the cutless bearings?
 
I don’t remember what paint you are using, but Alexseal just came out with a rolling agent so you don’t have to tip. Boat Works did some painting with it and it looks great. What did the tool cost to replace the cutless bearings?

Yes I'm using the additive and I am not doing tipping. Boatworks today is a pretty good channel, but he leaves out a lot of details and works in a climate controlled shop which he tends to discount the value of (imho).

I've found that the Alexseal Topcoat lays down best at around 60-65F and low humidity. Any warmer and you get more orange peel. Doing rolling only requires a LOT of vigilance to not leave behind any roller lines because nothing is coming behind you to clean them up. That said, once you get the technique practiced and if you are able to have good conditions the results can be very, very good. I'm pretty pleased with what I've done considering I'm doing it by myself, outdoors in a dusty boatyard. I'm sure a professional job with spray equipment and climate control would be stunning.

I don't remember exactly but I think my strut pro was about $400 shipped to me with the components to fit one shaft/bearing size combo. I also bought some extra sizes separately. A couple in in the boat yard also used it and they just bought extra 'horseshoes' to fit their boat's specific shaft and cutless bearing, and gave me the extra sizes as a thanks for using the tool. They do sell a complete kit to fit a wide range of sizes intended for boat yards and even have a hydraulic powered one for yards to speed up bearing replacment jobs.
 
Love her deep flared bow!
Propspeed would be my first choice, they hold up well here in the PNW, but they're not cheap.
Pettit Barnacle Barrier zinc spray is also available.
If you are going to paint with anti fouling paint, use the Pettit underwater metal kit...they come with both etching primer & tie coat primer.

My understanding with Propspeed was that it does not have anti fouling abilities when not in motion, is that what you have found? I'm wanting to have something to minimize growth even if the boat isn't moved for a period of time.
 
With the tool is there a way to change a cutless bearing on an intermediate strut?
 
With the tool is there a way to change a cutless bearing on an intermediate strut?

Yes that's what I tried to depict in my photos. I pressed two new bearings onto the aft strut. This pushed new bearing on the shaft between the struts which I then slid forward to the forward strut and pushed it into the the forward strut. This pushed the old forward strut bearing forward where it was loosed on the shaft between the strut and the hull. I then cut the freed up old bearing off with an angle grinder to remove it. You could do the whole job without cutting the bearing off but it would require pushing the old bearing through the aft strut before pressing the new bearing forward. It's faster to just cut it.

The caveat is that if your forward bearing O.D. is larger than your aft bearing O.D. this won't work and you'd have to pull the shaft back far enough to slide the new bearing onto the shaft before pressing it in.

The best thing about the tool to me is that I can do the job without removing the shaft, and I also do not risk damage to the strut as with the common cut-split-hammer method. To remove the shaft in the boat yard I'm at now would involve digging a very large hole in the ground or having a huge crane come in to lift the boat high enough to do the job. There is no equipment on site that can lift it high enough for the shaft to clear the ground with it's installed angle and length.
 
PS is a release coating, not an anti foul.
Yes they say... the more you use your boat, the better PS will perform.
Recommended by many boat yards in Seattle area.
 
That was what I was thinking about, but unfortunately for me the PO put lots of layers of paint on my shafts. Don’t think I could slide the bearing forward. Guess at some point I will be stripping the paint off the shafts. Thanks for the info.
 
Now working on the bottom. I had an analog speed through water wheel sensor, an analog water temp sensor, a 300W fish finder transducer (1977 model), a depth sounder transducer also from the 70's, and an electrical sensor for the Bartell corrosion control system. I'm removing and re-bedding or replacing every through hull and sensor on the boat, so all of these had to come out. None of them are going back in. All of them are too old to be compatible with any modern equipment and most of the analog stuff wasn't working anyways. The replacements will be an Airmar B60 600W fish finder transducer in bronze with a 12 degree tilted element and their "Mix N' Match" wiring scheme that lets me hook up the finder of my choice at a later date. Also an Airmar DST810 N2K Triducer in bronze.

The worst of the old thru hulls was the Bartell corrosion control sensor. It looked home made and utilized a fairly standard looking plastic through hull typically used as a bilge pump discharge. It had a sensor embedded in some type of plastic cast or molded into the thru hull.

i-B26xXK2-M.jpg


All the sensors are out now and I'm working on removing the thru hulls for black water discharge, a salt water wash down pump supply, the generator's old raw water feed and a bait tank pump inlet that I'm going to glass over.

I also drew up a duplicate logo and had it made in vinyl to put on the side of the cabin. The original logo would have been made of cast metal. I decided a vinyl logo would be fine, this isn't a restoration.

i-nfVJpXB-L.jpg
 
Mine was raised plastic,
What's going to go on her original location?

20180821-133751-2-1536337689640.jpg

For now, I'm not putting anything there. Once I re-fit the arch I'll see if I want to put a logo up there.
 
Looks good... that's the emblem location for 42, 48 convertible.
Aftermarket arch? Since her original factory arch was all molded into the upper superstructure...
 
Looks good... that's the emblem location for 42, 48 convertible.
Aftermarket arch? Since her original factory arch was all molded into the upper superstructure...

Original factory arch. It may appear to be molded in, but it is a separate piece, I took it all apart myself.

The original arch was constructed of plywood covered with fiberglass and gel coat, and screwed to the flybridge surround, you'll find the heads of the screws under the inner skirt of the surround. It was then faired into the surround and cabin top with filler and blended in with gelcoat.

I removed it for over the road transport and after refurbing it will bolt it back onto the flybridge surround in it's original location. I do not plan to fair it back into the surround though so it can be removed somewhat easily. This will happen after launch since it cannot be attached prior to transport back to the launch facility, it's too tall with it attached.

The cabin top/roof is also a separate piece from the cabin sides. The top is screwed onto the cabin under the aluminum trim pieces on each side of the cabin. I think it may be bonded as well, but I'm not sure I haven't taken that apart and don't plan to.
 
As a point of interest, the entire flybridge surround was originally easily removeable with quick disconnects for the hydraulic steering and all electrical running through a couple of large multi conductor cables.

The arch being faired into the surround as well as the cabin top was done after the surround was fitted and makes removal difficult. It's evident from how it was built that the flybridge console and helm were all assembled in one piece including steering, instrumentation, etc. and then fitted into place in one piece. In stock form with no arch, it would be fairly easy to remove the entire flybridge by just unplugging some things and removing a bunch of screws.
 
Working on the bottom, doing some fairing into the night.

i-HL5WWwj-L.jpg
 
Gotta love working on your bottom... Did I say that correctly? I am in awe of all the work you are getting done.
 
Gotta love working on your bottom... Did I say that correctly? I am in awe of all the work you are getting done.

Thanks! I'm finding working on the bottom to be a lot easier than I thought it would. I'm able to call it 'good enough' a lot easier than I was on the hull sides or cabin because it just isn't as critical that it be super smooth and perfectly fair.

The process I used to remove the bottom paint and most of the gel coat left a lot of surface imperfections that I am fairing with an epoxy filler. I start with a coat of Interprotect 2000 as an epoxy 'primer' and then put the two part fairing compound on that with a semi flexible metal blade over the entire surface. Let it cure, sand it fairly flat, some more touchups with filler and then a fresh coat of Interprotect which then usually reveals a few more spots that need some filler and sanding. Touch that up with fairing and paint and I'm done. Perfectly smooth and fair? Not quite, but pretty good.

Will be followed by 5 coats of Interprotect to build up sufficient film thickness to protect the fiberglass and then bottom paint will be applied.

The composition of this photo wasn't what I hoped it would be, but it's looking good in grey!

i-5Mkr8pR-L.jpg
 
That looks pretty fair to me. Man, I don’t envy your back...
 
That looks pretty fair to me. Man, I don’t envy your back...

The bow is the hardest part. Once I'm under the chine and in the flatter sections, It's mainly a sit down situation so I can use arms/legs to support the sander quite effectively, it moves along pretty good.

The flat/matte finish on the bottom paint products help a lot with how fair it needs to be!
 
The last time I did a bottom job on one of our boats the yard brought the boat to our house and blocked it on the driveway. Then I was able to use a creeper to do most of the work where the bottom was close to the driveway. My shoulders still didn’t like the job...
 
Just a bit of sanding to do...

i-jC4gckt-L.jpg


I switched from Jamestown Distributors 'Total Fair' to System Three 'Quik Fair' and I like the Quik Fair a lot better. It has a smoother consistency and is much easier to apply. I'd compare it with nicely softened, room temperature butter.
 
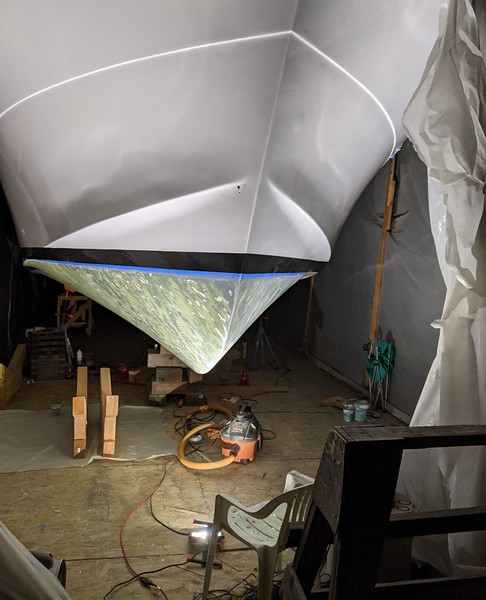
Still plugging along. Have been chipping away at completing all bottom tasks before I am able to paint the barrier coats and bottom paint.

Spent a few days getting all of the undewater valves and thru hulls for the engines serviced and completed, ready for installation. I modified the strainers so that they can be removed for cleaning without hauling the boat (no holes through the bottom) so I can have a diver remove for cleaning if I desire.

All new thru hulls, backing plates and a combination of Groco and Buck Algonquin plumbing for the other two thru hulls, salt water wash down and black tank discharge.

Remaining thru hulls are the 3in1 NMEA sensor and the fish finder transducer, putting me at 6 holes under the water line total. All of the other ones were glassed over.

Prepped my oil drain/fill solution for the port engine.

i-Nb2BL99-L.jpg


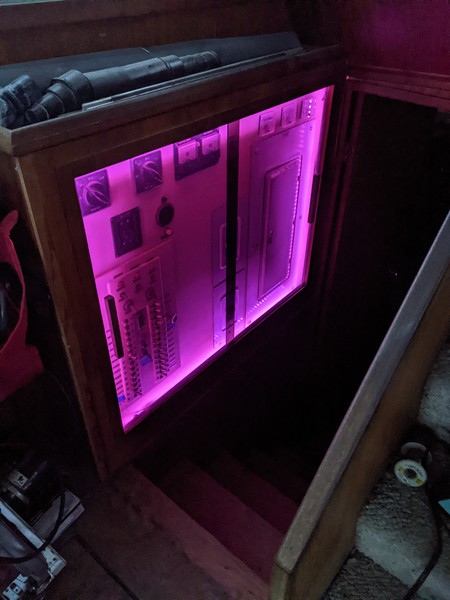
Have been going through the electrical panel and cleaning up wiring, removing old unused circuits, pulling old unused wires, making sure all circuits are properly fused, and decided replace the old burnt out incandescent bulbs in the panel surround with something more modern.

i-Dq2CD4N-L.jpg


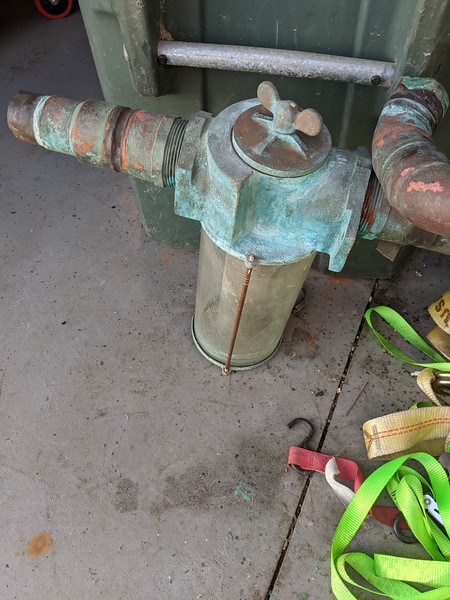
Sea strainers have been overhauled with new seals throughout. I left the patina on them, didn't see the point of making them shiny.

i-SkDss76-L.jpg


Everything requires a lot of time to complete!
 
Four months later... the bottom is done and ready for anti foul. Many, many hours of fairing and sanding, fiberglass repairs to blistered areas, new thru hulls and backing plates and valves installed, engine sea cocks reconditioned and reinstalled, new transducers installed and sealed up, it's been a big job for one person, but it looks great. 6 coats of Interlux Interprotect 2000E on the entire bottom per their instructions and additional coats in some areas as well.

i-jGDDtbx-L.jpg
 
Almost hate to say this, but you bottom is beautiful!
 
Yes, he is doing an epic refurbishment. Glad he keeps posting.
 
I really wish sbman had a Youtube Channel. I enjoy this thread.

Thanks, I am glad it is of interest to some. I don't have enough time to work on the boat, adding a video production to it would push it over the edge of never launching.

Those who say the cheapest boats are the most expensive are absolutely correct, especially when you factor in the time involved. However, it is a nice sense of accomplishment to see it coming together and that has an undefined value that would not be replicated with simply buying a better boat to start with. I'm looking forward to taking my painting tent down soon and getting pictures of the overall transformation.
 
I had a Uniflie 42 aftcabin for 18 years. It was hull #7(1971). I kept it in excellent condition all those years. Many of the jobs you are doing I was able to avoid by staying ahead of the maintenance and by not having a blister vintage boat, none the less I can certainly relate to most of the jobs you have had to do. I never saw another Uniflite as nice as mine but I think sbman will have the only one nicer when he is done.

I always thought the Uni 42 was the perfect size. Some days it was to big and some days it was to small, which tells me it was truly the right size.

Looking forward to all new pictures and progress reports.
 

Latest posts

Back
Top Bottom