Thai Trawler - new foredeck

The friendliest place on the web for anyone who enjoys boating.
If you have answers, please help by responding to the unanswered posts.

Phuket

Veteran Member
Joined
Jan 14, 2009
Messages
77
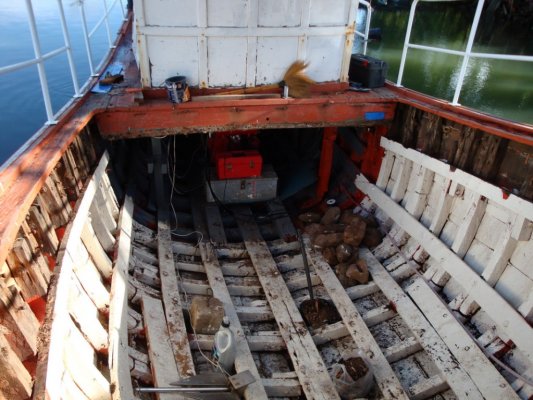
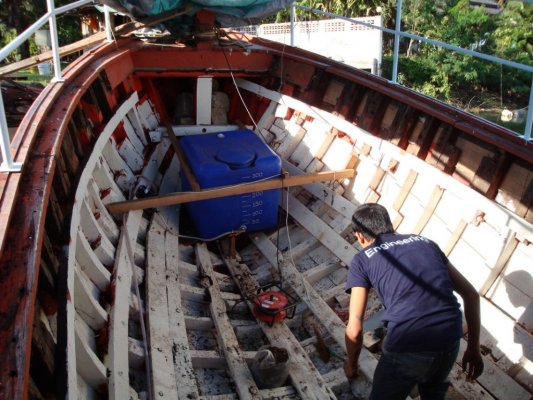
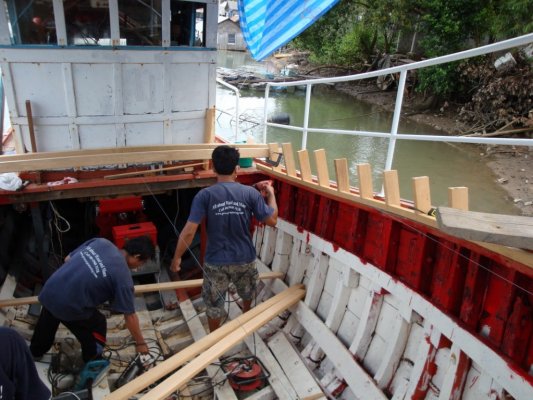
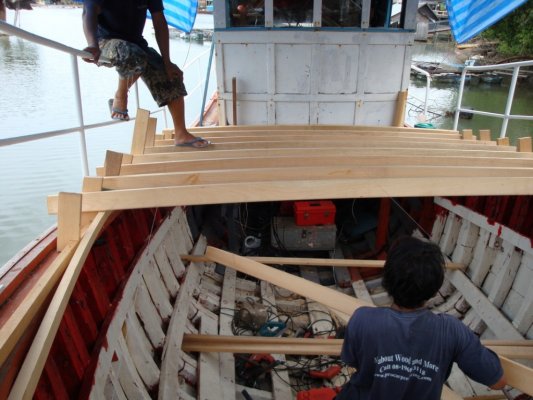
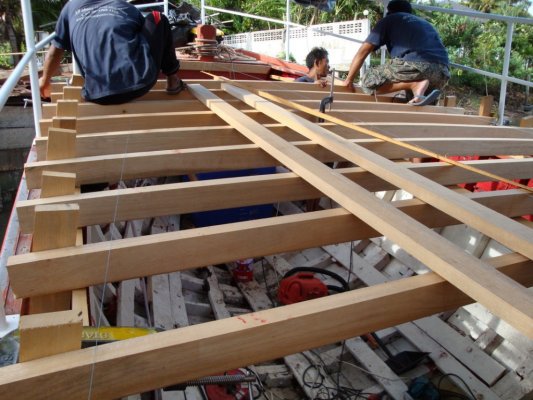
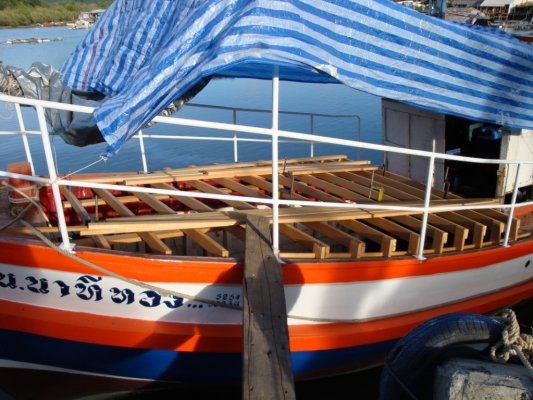
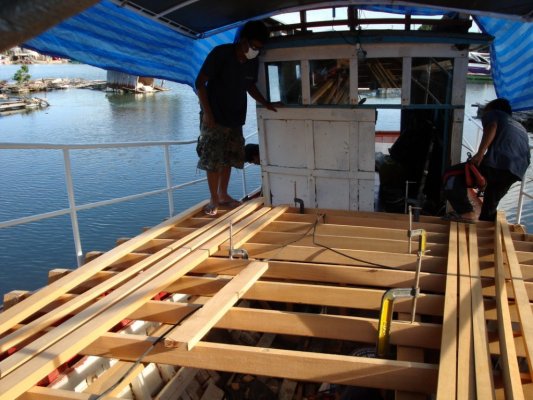
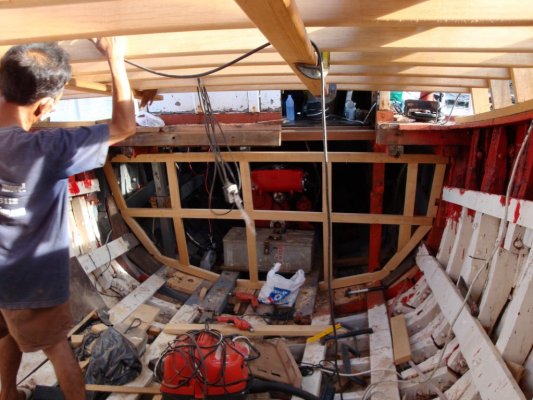
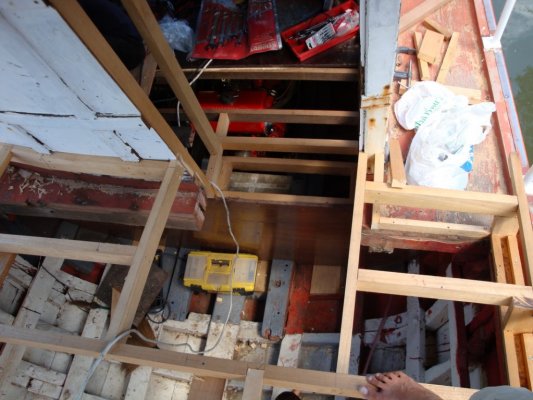
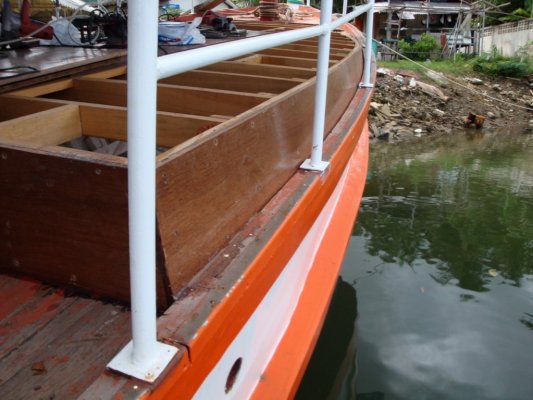
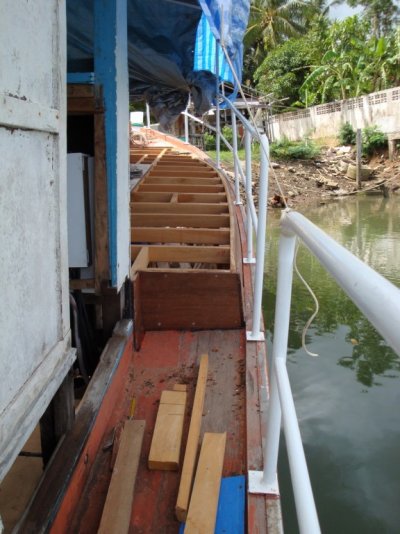
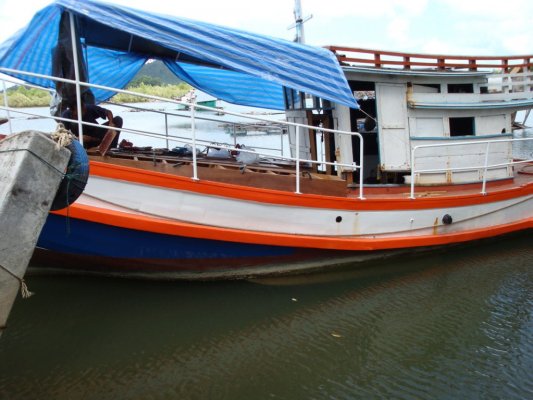
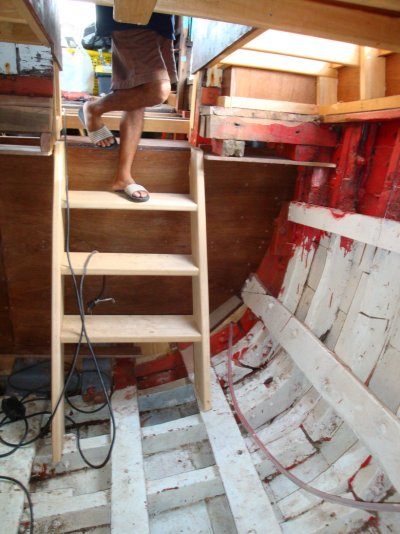
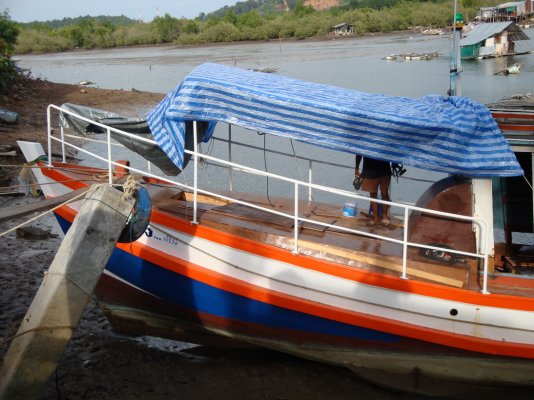
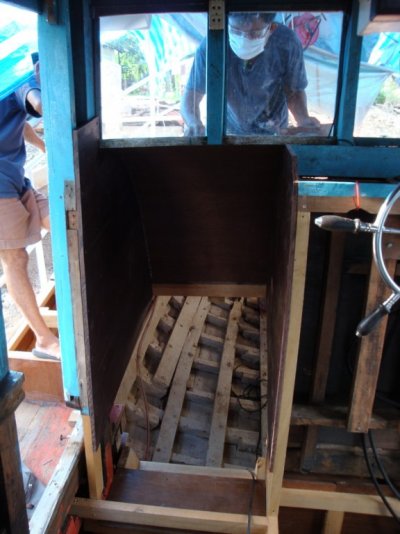
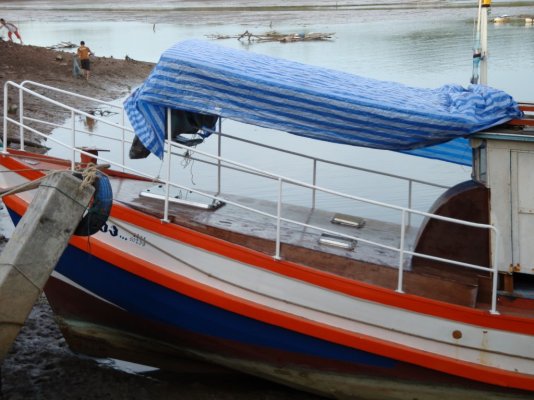
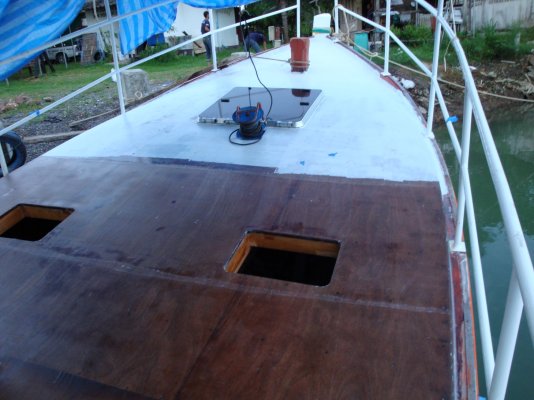
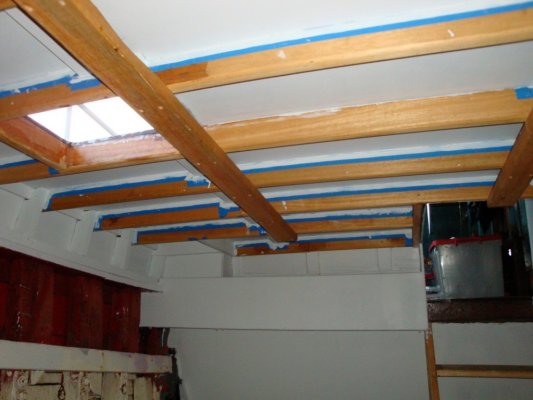
Carrying on with the conversion from fishing trawler to family weekend trawler I have started with the new raised foredeck. *I have it parked in front of a carpenters shop, still in the water, for the next couple of weeks. *Today they removed the rotten foredeck and started shaping the new deck support beams.

I will post progress shots over the next couple of weeks. *Feel free to offer suggestions as I am just making it up as I go along. *


Cheers, Leon.
 

Attachments

  • deckless1.jpg
    deckless1.jpg
    214.8 KB · Views: 149
  • deckless2.jpg
    deckless2.jpg
    227.1 KB · Views: 140
From a blank sheet things look they are moving ahead quickly. *Some pics of progress on day two.

Cheers, Leon.
 

Attachments

  • day2-1.jpg
    day2-1.jpg
    209.9 KB · Views: 144
  • day2-2.jpg
    day2-2.jpg
    179.3 KB · Views: 139
  • day2-3.jpg
    day2-3.jpg
    208.5 KB · Views: 150
Thanks for the feedback. *The beams are cut to shape to put some camber in the deck, maybe an inch drop from centre out to the sides. *

That is the height I am going to stay with, I really did not want to change the profile look of the boat by putting a raised cabin - plus it is stronger and quicker (read cheaper) that way. *The boat will be used mostly for weekend trips in our warm climate so I do not think it is strictly necessary to have standing headroom in the cabin. *Most importantly it will make the foredeck so much more useable by being wide and open for sitting, eating etc. *


I have some sailboat hatches that were donated from a big swan that we are going to pick spots for today. *


Cheers, Leon.
 
Today the carpenters got the rest of the deck beams cut to length and mounted, although they are still to be braced more strongly. *They also cut the hole in the front of the wheelhouse where the companionway will go and began work on a bulkhead to divide the engine room from the rest of the boat. *We also chose the spots where the hatches will go. *
 

Attachments

  • day3-1.jpg
    day3-1.jpg
    210.3 KB · Views: 153
  • day3-2.jpg
    day3-2.jpg
    200.7 KB · Views: 155
  • day3-3.jpg
    day3-3.jpg
    194.9 KB · Views: 159
Excellent work. What is the beautiful type of wood? Looks like the lower edge corners of the boards have a radius. Will the beams be exposed?Steve
 
Thanks Steve, the wood is a mid-range local hardwood called takien sai, sorry I don't know the english equivalent. *Yes the plan is to leave the beams exposed and appreciate the wood. *The deck above will be ply so I will epoxy then paint that, but will varnish the exposed beams to have some natural finish wood.Tomorrow afternoon the ply deck should start to go on so that will be a big step forward. *today they got the engine room bulkhead and started on the frames for the deck hatches, plus the surround for the companionway stairs.
Feeling a little light headed now after drinking beers with the carpenters and owner of the company after finish today, big Swedish guy who does not want to stop once he has started!
Cheers, Leon.
 
Some more progress shots. *Sides went on yesterday with one centre deck panel also down. *Work has slowed as two of the three carpenters have to work on an other job for a few days.
 

Attachments

  • companionwayframes.jpg
    companionwayframes.jpg
    184.2 KB · Views: 157
  • daysix-1.jpg
    daysix-1.jpg
    168.3 KB · Views: 161
  • daysix-2.jpg
    daysix-2.jpg
    124.7 KB · Views: 147
  • daysix-3.jpg
    daysix-3.jpg
    178.1 KB · Views: 161
Good visual progress today, companionway stairs, cover for the companionway and also important started on the stereo with amp and speakers mounted.
 

Attachments

  • day8-2.jpg
    day8-2.jpg
    199.7 KB · Views: 152
  • day8-1.jpg
    day8-1.jpg
    334.3 KB · Views: 192
  • day8-3.jpg
    day8-3.jpg
    384.8 KB · Views: 139
  • day8-4.jpg
    day8-4.jpg
    101 KB · Views: 149
Cover for the companionway looks great. I see the steps are fastened to the hull. Where will the level of the floor be?Steve
 
Good question Steve, must admit I still have not fully decided how it will be inside the cabin. *Most of the space will be taken up with beds, two singles and a double V berth in the front, so the floor will only be a narrow strip down the middle. *At the base of the stairs it may only be a partial floor so as to maximise internal height - not quite head room unless you are quite short. * I do plan a toilet in the aft starboard opposite the stairs, not a shower, just a small area walled off for a toilet. *

For the carpenters it is down to tidying up now for the deck and next they will be working on the wheelhouse roof and sides. *For me it is time for epoxy sheath, painting in and out and then fitting the hatches and some lights inside.


Got the tunes going this afternoon, big improvement. *Here is a picture showing the hatches, they are just sitting in place to see how they will look.
 

Attachments

  • day9-1.jpg
    day9-1.jpg
    183.8 KB · Views: 154
With the carpentry finished on the foredeck things have slowed down a little. heavy rain for the first few days of this week did not help either. But Kao and Geng have been plugging away at the boat and I have spent as much time on board as I can.

Saturday afternoon I got into the fibreglass covering of the new deck. First I had to seal the very bow part of the deck which is still traditional planks with big gaps between them. Gaps were filled with epoxy glue and then fibreglass cloth laid over the planks with epoxy resin. All the new work is getting a single layer of 200 gram biaxial cloth (suplied by Kevin of Solidair) and the bow section has that plus a heavy layer to give it good abrasion resistance when anchoring etc. I had a really sore back by the end of the day from all the bending over sanding, cutting the cloth and applying the resin.


Yesterday the weather got better so I did the second half in the afternoon. With a few lessons learnt from Saturday it was easier this time and Kao helped out which made it go that much quicker.


Now the deck is epoxy sheathed and has one coat of high build primer. Inside the boys have been painting the engine room bulkhead and the underside of the new deck - beams will be varnished and the rest painted white with Jotun enamel.


Kao has also been busy re-mounting gear and lube oil coolers, oil change pump, steering ram and alternator bracket. I took the exhaust elbow back to the shop and have extended it into a riser to reduce the chance of water finding it's way into the engine. Tomorrow we will insulate it and then it can go back on with some new salt water piping.


Next week the carpenters start on the wheelhouse which is going to get similar treatment to the foredeck. Looks like another month yet.........
 

Attachments

  • deck glassing.jpg
    deck glassing.jpg
    491.4 KB · Views: 151
  • deckheadpainting.jpg
    deckheadpainting.jpg
    137.6 KB · Views: 149
Back
Top Bottom