Wood Trim finish used on MS30 PilotII

The friendliest place on the web for anyone who enjoys boating.
If you have answers, please help by responding to the unanswered posts.

Olebird

Senior Member
Joined
Aug 23, 2019
Messages
413
Location
USA
Vessel Name
StarLite
Vessel Make
Mainship 30 Pilot II - 2003
Does anyone know with reasonable certainty, what finish coating was used on interior wooden trim in MS boats (~2003) - polyurethane, lacquer etc ? Working on cleaning up the salon trim - which has a tendency to blush with any water exposure. Do you have a similar problem - any successful fixes? Blush goes away when surface dries.


Thanks
Larry
 
Larry, I solved the blush problem by keeping the place dehumidified. Not knowing what is on there, I am uncertain that light sanding and overcoating with something like Min Wax clear semi-gloss would help or even screw it all up. I am letting you poke this sleeping dog and intend to stand clear and stand down for now. :)
 
Last edited:
What ever happened to "damn the torpedoes ..."? lol


Humidifier is cranking away and seems to help a little. But even the slightest splash from the sink results in a instant white spot. As soon as it dries - it's gone. Several places on head door, cabinets are more permanent - but subtle like a haze. I'm pretty sure the finish is a lacquer. Mohawk's super blush retarder will soften it up to let the trapped water out - may have to add a clear sealer to what's there to stop it completely - but more than I want to tackle right now - may be Feb when the humidity is below 95.(Hey it's Alabama!)


Another issue -- where is 12 vdc connected to your engine block? I've got a dirty connection in a high current connection somewhere - haven't crawled under the steps yet. Some whered between battery neg and neg bus bar behind the panel!
 
I don't believe I am having the instant blush issue nor any permanent spots. Could a hand waxing help or just make things worse?

The negative DC connection to the engine is aft near the starter.
 
What ever happened to "damn the torpedoes ..."? lol

The damned things are self-guided now; so nowadays, unlike 1864 in Mobile Bay, we talk nicely to them.
 
Rich,

If you wax it will be very difficult to remove for a re coat if you ever want to do that.

Alcohol based finishes (like shellac) will often blush when wet. I think it is unlikely an old school finish like that was used on your boat.

A wipe down with paint thinner or alcohol, light sanding with say #150 and a urethane re coat as mentioned above should solve the issues.

Rob
 
Yeah, and the one's we tracked were pretty quick too!


Usually it's a build up of furniture wax that turns white so quickly. Been wiping her down with denatured alcohol or mineral spirits to get rid of the wax (and silicone's) and its looking a lot better. Just ran across this Mohawk product - but it only works on nitrocellulose based lacquer.


Nothing about finishes on Baccus's BOM list


May try it on some obscure panel - just to see what happens. Lacquer finishes are cheap, quick and look good - likely used by MS. :rolleyes:
 
Thanks for chiming in Rob. Unfortunately too many folks reach too quickly for the Pledge. It's waxes and silicones can make refinishing a pain in the tush!! I can live with what I've got right now on the little MS. The deck hands washed the boat last week and sprayed some water into the salon by accident and the spots told on them!!! My old Sea Ray has a lot more wood trim - much prettier than the more recent plastic boats but - what a pain to keep up (shes down in the barn getting new motors).
 
Rich,

If you wax it will be very difficult to remove for a re coat if you ever want to do that.

Alcohol based finishes (like shellac) will often blush when wet. I think it is unlikely an old school finish like that was used on your boat.

A wipe down with paint thinner or alcohol, light sanding with say #150 and a urethane re coat as mentioned above should solve the issues.

Rob

Yes, I can see your point about waxing and the resultant difficulty in removing the finish. For some reason Larry seems to be having a bigger issue with his cabin finish than I am. My best guess at this point is that maybe I simply don't pay attention to it or don't care. :) In either event, I have no intention of refinishing or adding any treatment to any part of that small cabin. If I sanded and varnished it with my suggested MinWax semi-gloss or satin, I'd have to leave the boat open for a year with fans going to aver get the admiral to attempt to sleep in ot to even enter the space. Not worth the time and effort. She was constantly on my for varnish smells on the Grand Banks, and woe to me if I had painted or varnished inside within six months of starting cruise.

I see where the affluent Larry has "deckhands" washing his boat for him. My oh my, I wish I had that sort of service, or maybe not since they apparently rinse his interior for him too. hahahaha. Just kidding, Larry..:hide:
 
You mean like mowing the grass?


If this covid thing will die down some so I can get this other bad knee replaced - then maybe I can climb around on the deck myself without falling in the lake!
 
You mean like mowing the grass?


If this covid thing will die down some so I can get this other bad knee replaced - then maybe I can climb around on the deck myself without falling in the lake!

Trade ya for two bulged disks which put me away for a month. Living epidural to epidural now.
 
Jeez, you guys are falling apart. Actually, I'm interested in this because I have a couple wood doors that are scratched. I'd like to sand them down and refinish them, but I don't know what the original finish is. I also don't know what kind of wood they are.
 
I’ve never been able to match the finish in my boat either. I redid the piece of trim along the bottom of the cockpit doors with a flat minwax. It looks fine, but doesn’t match exactly.

I know mermaid is planning on messing around with it to see if she can match it, as she is installing a storage are under the dinette seat. She is confident she can get it right.
 
Jeez, you guys are falling apart. Actually, I'm interested in this because I have a couple wood doors that are scratched. I'd like to sand them down and refinish them, but I don't know what the original finish is. I also don't know what kind of wood they are.

Yeah, but guess what? We don't have sense enough not to continue enjoying our boats cuz we're tough guys. :thumb:

I am sure the wood portions of the MS interiors were prefabbed in a cabinet shop with all the special ways they have of applying unique finishes. Any attempt on the owner's part to refinish will in my humble opinion alter the finish, maybe for better, maybe not. It's not good ol' thick teak or even thin teak veneer (which, yes, I have indeed sanded right through :facepalm:) but rather a very thin coating. I will be interested in Larry's and others adventures in this regard, but the very last thing I want to mess with on my particular boat is its interior wood finish. If it ever got really bad, I'd be breaking out the Grand Banks beige Awlgrip.

I remember a discussion on the finish of the interior varnish of GBs when I had one, and the consensus was that it was best duplicated by mixing a couple of different types like satin and semi-gloss.
 
She was constantly on my for varnish smells on the Grand Banks, and woe to me if I had painted or varnished inside within six months of starting cruise.
[/QUOTE]

Hi Rich,

I know you don't want to add a coat but if you ever get to that point one of the water born finishes by Basic Coatings or Bona are very good and low VOC.

There are many other water born finishes as well but those two are the ones I use.

Just an option.

Rob
 
Wash all the woodwork w Murphy’s oil soap. Wife does this a couple of times a season and we don’t have any issue. We do keep the dehumidifiers running when in water and lots of damp rid when winterized.
 
Porman,look at Mohawk Finishing Products web site. They specialize in refinishing furniture. Interesting color wheel for matching finishes and several products for fixing scratches, stains & blushing problems, without doing a total refinishing project.
Overall, the finishes in my little salon are in good shape - just don't want it to go down hill with higher use. One wall has a small 6" dia bubble in the laminate. May try to inject a penetrating epoxy if I can come up with a good way to clamp it back together in place. Magnets maybe??


As for "falling apart" - had I known I was gonna live this long I would've taken better care of my self!
 
Overall, the finishes in my little salon are in good shape - just don't want it to go down hill with higher use. One wall has a small 6" dia bubble in the laminate. May try to inject a penetrating epoxy if I can come up with a good way to clamp it back together in place. Magnets maybe??
[/QUOTE]

Olebird,

Two boats ago I had to re glue some veneer. I used an expandable boat hook. Here is how I did it.

Inject glue of your choice. I used several coats of contact cement. Have to keep the sides from touching while the glue dries.

Cover glued spot with wax paper, cover wax paper with a plywood pad to spread the load.

Extend the boat hook to slightly more the the distance you have to the brace point and lock it.

Use another plywood pad at at the brace point (second end), cushion, if needed to prevent marring the second surface.

Since the pole is slightly longer than the distance you can just pull it into position rather than trying to hold a pad in place while locking the pole.

Not much clamping force is needed if just re gluing veneer. You can also cut sticks to length if you don't have an extendable boat hook.

If the boat hook is not long enough, hose clamp an extension to it.

Rob
 
Rob, thanks again - good, simple solution.
 
update. Spoke with Mohawk's customer support - very helpfull. Almost certain finish is nitrocellulose lacquer. - any standing water will produce near instant white spot. Three or four coats of blush retarder and two coats of pre cat clear semi gloss should seal and protect. We shall see this week.
 
Last edited:
Of course using a finish that shows water spots makes absolute sense on a boat...
 
Respirator?
 
Duh!! All logic and reason aside - $$


3M - top of the line!
 
Of course using a finish that shows water spots makes absolute sense on a boat...

Welcome to Mainship world. Got a century? I can start telling you about their "duhs" anytime.
 
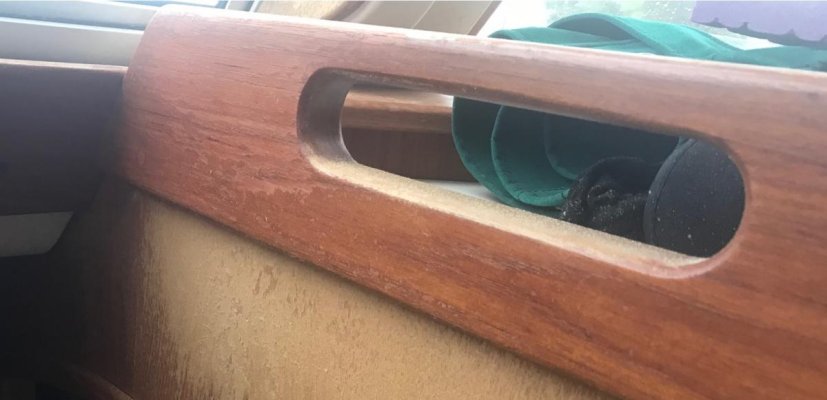
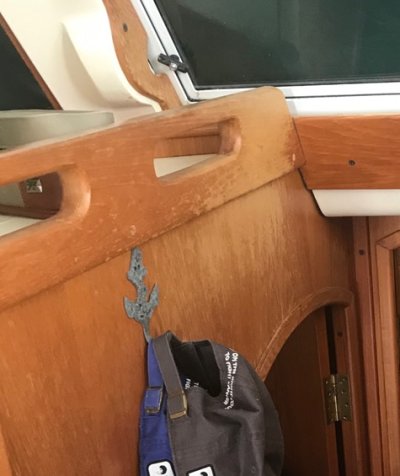
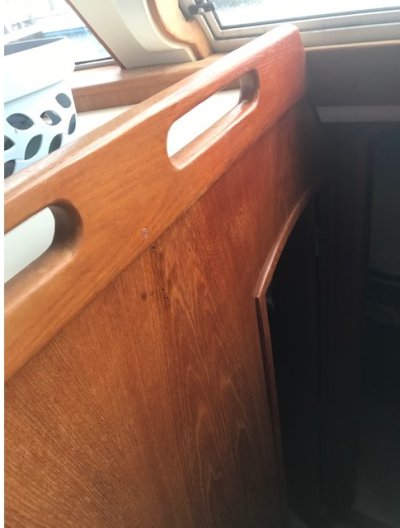
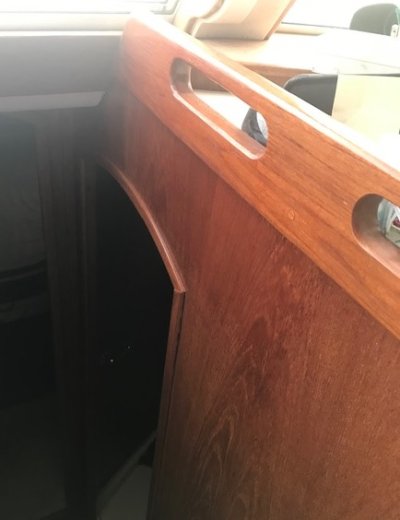
The MS390 has lots of interior teak wood. The one we picked up this July had lots of sun damage [windows and companionway] and galley area heat damage to the interior wood. Clearly two previous owners were intimidated to doing anything about it and just "let it go". (Original finish visibly flaking off! Damn shame.) First attempt: Sand paper + Watco Teak Oil. No good. (It took to the bare wood too differently compared to the places where original finish was still intact, and the transition between the two was even worse!)

Second attempt: Sanded all the Watco down, and sanded so there would be a more distinct line between bare wood and original finish (no "transition" with partial original finish and bare wood). Then experimented with Minwax Wood Finish Penetrating Stain "Gunstock 231". That worked great for the large forward facing windows and the companionway going down below forward. I did a generous overlap of several inches over the original finish as well as on the newly exposed bare wood. It matched up perfectly, and end result is mere mortals would not be able to tell the old from the new. Recommend a second coat or three with Minwax fast-drying Polyurethane "Clear Satin" in the badly sundamaged areas. Declared success.

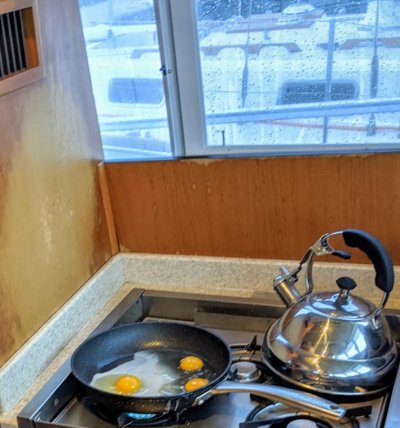
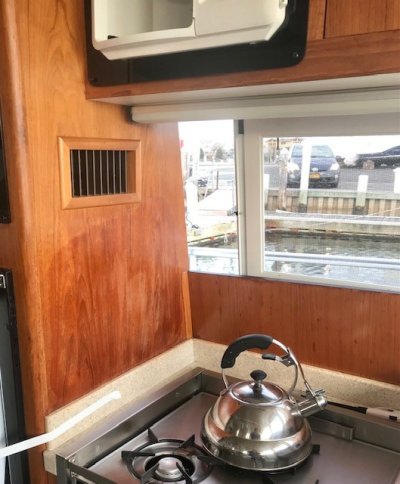
To left of the galley/stove area, tried the same procedure with the same products. The "Gunstock 231" came out a little bit darker than I'd like in comparison to the original surrounding wood. So, if proactively looking for it, mere mortals could see there is a slightly darker refinished area and lighter area surrounding. Perhaps I should have ONLY used the Minwax fast-drying polyurethane "Clear Satin" in that area (several coats)?
Too late now! But frankly, very much good enough for a 2000 Mainship 390, 20-year old boat. Looking much better inside now.

My advice: "Can't be scared!" Go for it. Not a scary project for this non-pro.
(I wish I had before and after pics... small 4" electric sander w/velcro pads and vacuum saved the day.)

By the way, the Watco Teak Oil did a VERY nice job throughout the rest of the salon's teak wood where there was no sun damage. It really polished things up nice. So, we'll do that again every season... VERY light coat with lint free rag (carefully dispose of rags... risk of spontaneous combustion.)

I am not affiliated with any of the products named here! I just know how helpful it can be to have those details! Good luck.

Fortunately, the previous owners did a great job of taking care of everything else besides the interior wood.
 
Last edited:
Thanks Capt Ray. Any and all first hand experience is appreciated. I'm trying to take premptive action at this point. My interior is in fair shape - just showing some white blushing - no flaking. Mohawk products came in this week but haven't made it to boat to try them. Maybe tomorrow. Will take some pix.
 
Stay tuned...

I found some "before" pics on my phone. We still have access to the boat, and will get some "after" pics tomorrow.
 
Spots When Wet? Is lacquer

Builders use lacquer because it sprays on quickly, dries instantly and can be reapplied if there are any imperfections. On any surface that come into contact with water, sand very lightly and put on two coats of polyurethane semi-gloss or whatever matches your lacquered finish. The battle will be over forever.
 
Stay tuned...

I found some "before" pics on my phone. We still have access to the boat, and will get some "after" pics tomorrow.

Here are the "before" and "after" pics.

The pic named "FirstTry..." shows what the Watco teak oil looked like... not good enough for me.

The pic named "GalleyFixed.jpg" looks like that area needs a couple more coats of the Clear Satin, Fast-Drying Polyurethane. Wood that close to a working propane stove appears to take a beating, so it needs to be protected. The morning sun also hits this area when in its normal berth.
 

Attachments

  • FirstTry-Top-Teakoil-Stbd-Companionway-Lower-Untouched.jpg
    FirstTry-Top-Teakoil-Stbd-Companionway-Lower-Untouched.jpg
    62.9 KB · Views: 6
  • Before-Galley-Stove-Area-Flaking.jpg
    Before-Galley-Stove-Area-Flaking.jpg
    173.6 KB · Views: 6
  • Before-Port-Companionway-Teak.jpg
    Before-Port-Companionway-Teak.jpg
    70.9 KB · Views: 5
  • GalleyFixed.jpg
    GalleyFixed.jpg
    88.9 KB · Views: 6
  • PortFixed.jpg
    PortFixed.jpg
    76.4 KB · Views: 6
  • StbdFixed.jpg
    StbdFixed.jpg
    52.7 KB · Views: 6
Back
Top Bottom