Peeling vinyl fabric wall covering.

The friendliest place on the web for anyone who enjoys boating.
If you have answers, please help by responding to the unanswered posts.

Kenmaki

Member
Joined
Sep 3, 2014
Messages
5
Location
USA
Vessel Name
Ice Breaker
Vessel Make
Mainship 40T 2004
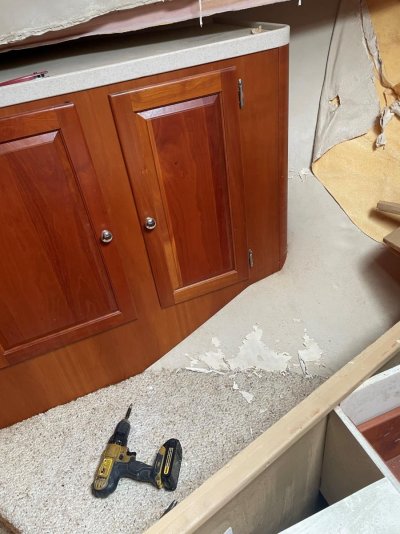
The vinyl fabric on the stateroom walls of my 40 Mainship Trawler is peeling and cracking. Looks like a big project to replace it. Has anyone had success painting this type of material. Also, anyone used a filler or caulking to patch the peeled area?
 
I had this type of vinyl fabric installed on my boat in refit (its still in refit). The material didn't even make it unto the water and it started to peel. I actually liked it more than I thought I would. It was removed from the walls, walls sanded and filled, and painted instead.
 
Agree that removing it and painting may be your best bet. Even if you can restick the peeling places, what is to stop it from peeling somewhere else?
 
Ours is doing the same thing, especially in the master. I'm thinking it is going to need to be removed and replaced. The furniture is built over the top of it though, so new tracks are going to have to be installed. It's not glued to the hull, it's stretched and pushed into tracks, like a headliner. Pretty sure it is foam backed headliner material.


My guess is that the inside of the hull is too rough to sand and paint.


My plan is to get some canvas guys in to look at it and give quotes, see how they come in, and maybe do it myself. It's going to have to wait though, as the actuator on my port side Microcommander throttle control just died. $1,300 for a rebuild. Yay! There went the 2020 expendable budget.
 
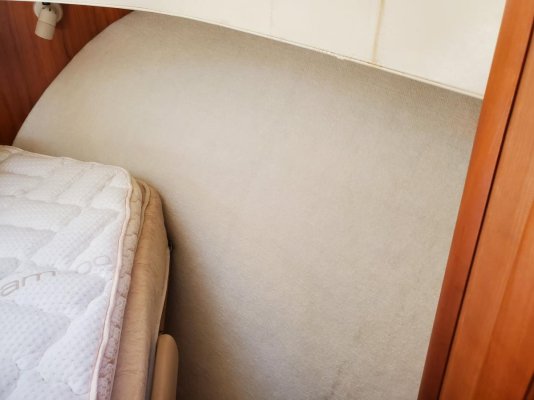
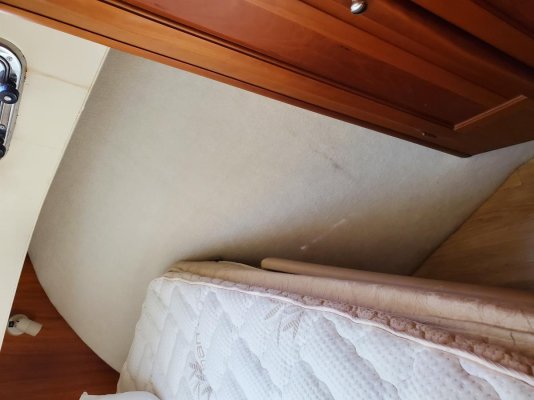
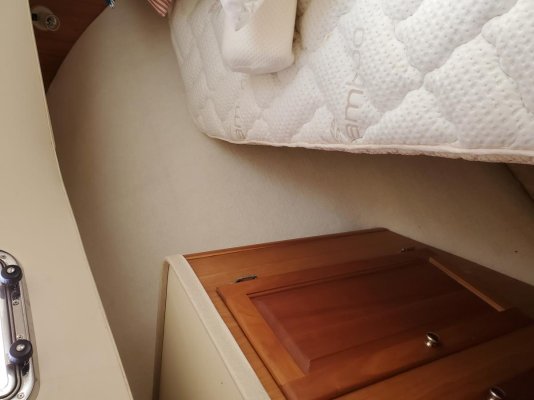
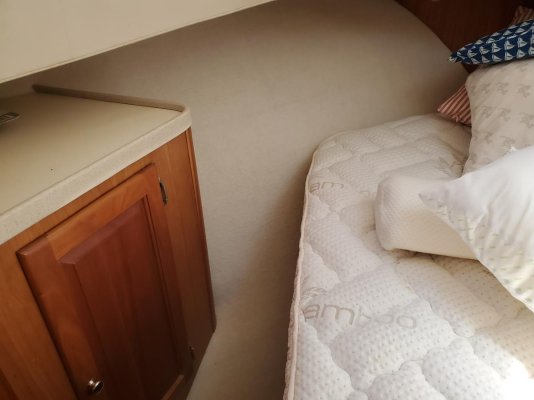
I tackled this project earlier this year. My cushion guy had experience with this.

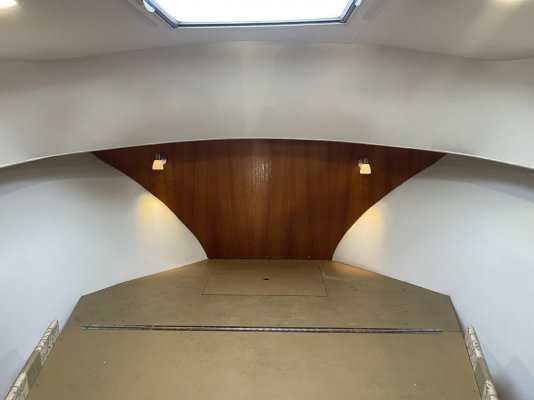
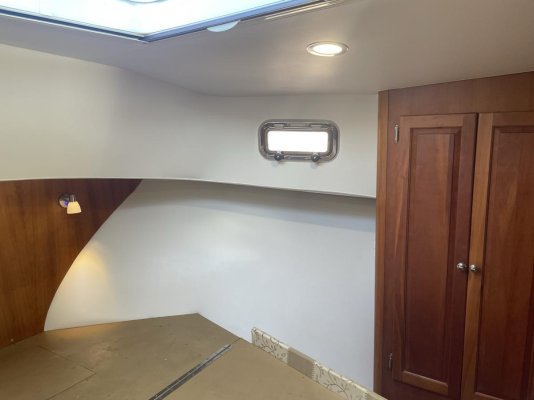
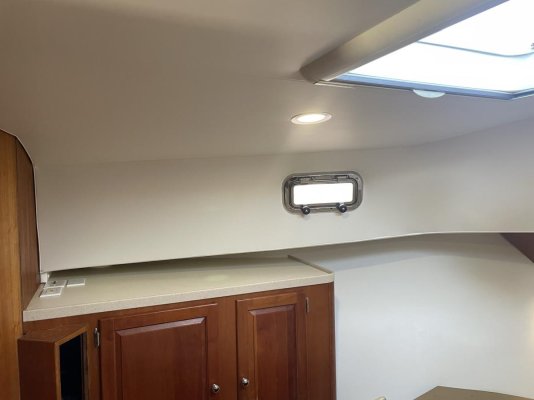
He discovered that the vinyl material is a laminate, so he removed the top, peeling layer - basically ground it off.

He then glued (compressor/contact cement) a headliner/carpet material on it.

Very pleased with result.

Total cost about $1k.


Nice. Can you post a pic or two?
 
Will do. I'll take some photos this weekend.
 
Looked at many boats with that covering - wife liked this one - all teak walls throughout - in very nice condition after 30 yrs. :thumb:
 
As promised, here are photos:
 

Attachments

  • 20200620_140414.jpg
    20200620_140414.jpg
    82 KB · Views: 67
  • 20200620_140424.jpg
    20200620_140424.jpg
    88.1 KB · Views: 62
  • 20200620_140451.jpg
    20200620_140451.jpg
    71.8 KB · Views: 62
  • 20200620_140500.jpg
    20200620_140500.jpg
    73.5 KB · Views: 60
Looked at many boats with that covering - wife liked this one - all teak walls throughout - in very nice condition after 30 yrs. :thumb:
Not sure what year your MS is but my walls are a faux cherry / teak laminate with real wood trim and cabinet doors, drawer fronts. Have to agree It looks good and is easy to keep looking good. I found a sheet vinyl PlasTeak material that matched exceptionally well when I redid fwd cabin flooring and wanted a material for step risers that matched existing walls.
 
2004 MS 400T. To my knowledge, I believe all of these had the vinyl covering.
 
That looks great Skip. Did you just do the fwd cabin?
 
Yup. That was the only area that was peeling/degrading.
 
Hi saiorskip: could you possibly give me the name of your upholstery guy, as I have tried to explain the process to several vinyl companies and I am not getting any favorable response. Thanks Alan
 
We also have vinyl wall coverings. Some areas are sticky. Any ideas about removing the stickiness?
 
Never thought this was a thing, till I read this thread today. Then, following some of the links I find folks with high $ cars getting parts replaced due to stickiness!
Six years ago I bought a 12yr old car in the desert. The knobs on the dash were sticky, to the point of it coming off on my fingers. I tried a few different cleaners before one worked. Not knowing this is an expensive problem for others, I simply cleaned mine off and have not had any recurrence in the following 6 years. Who knew that there is a whole industry spawned by sticky dash knobs!
No, I don't recall which common cleaner I used, as I haven't needed to do that job again.
On a related subject, the extra brake light lens, the one along the edge of the trunk lid, fell off. The joint between the red and clear (the red part is clear too, just this section has no colour) failed and the red part was in danger of falling out on the road. I tried several different kinds of glue before one worked. Gorilla brand CA (cyanoacrilate) worked as a permanent bond on that type of plastic.
 
The vinyl fabric on the stateroom walls of my 40 Mainship Trawler is peeling and cracking. Looks like a big project to replace it. Has anyone had success painting this type of material. Also, anyone used a filler or caulking to patch the peeled area?


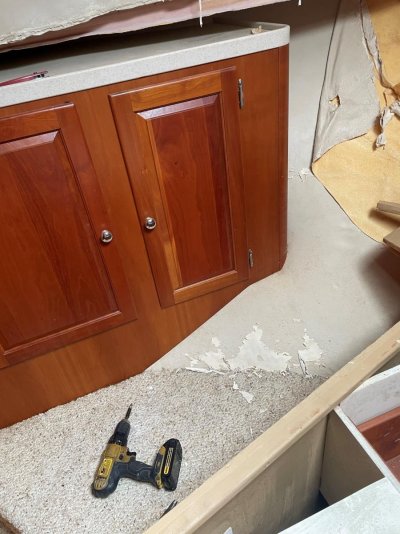
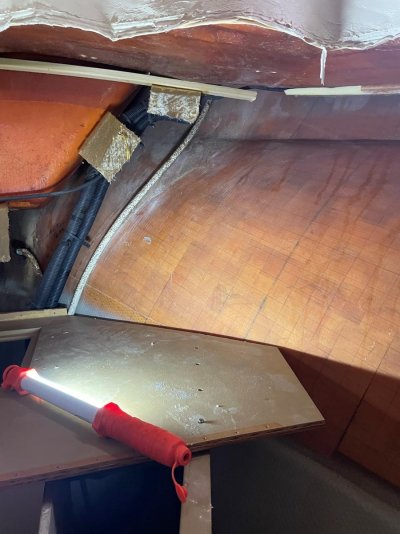
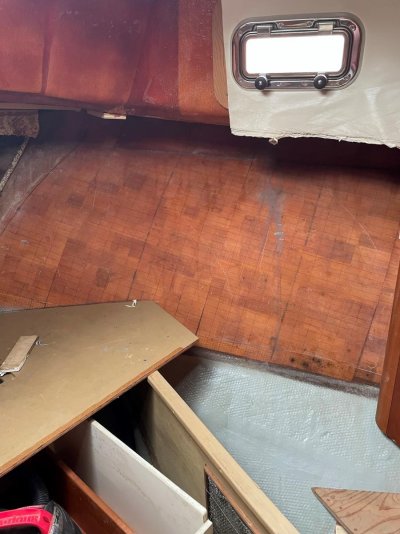
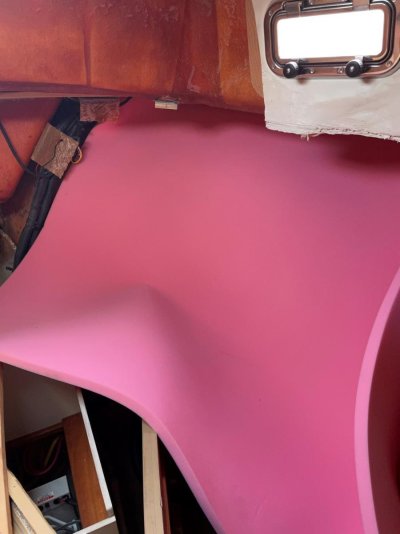
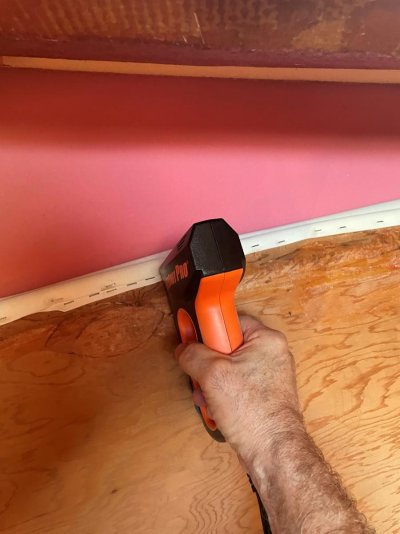
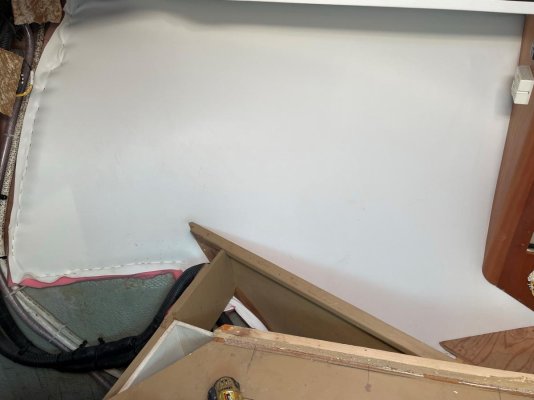
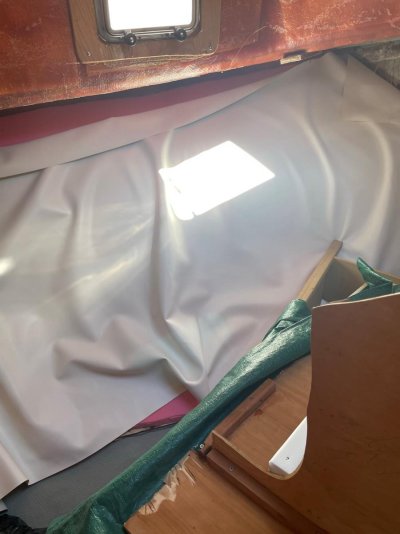
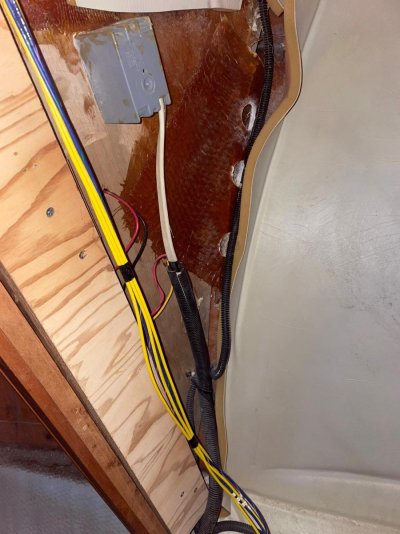
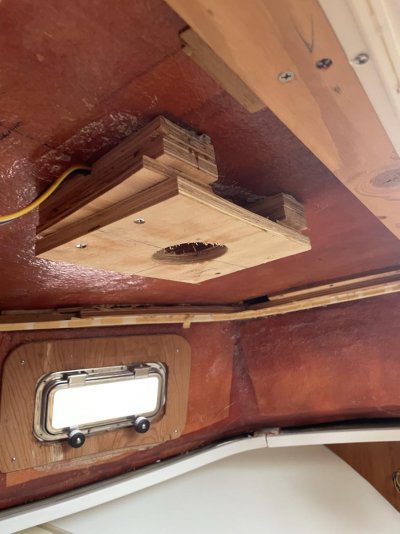
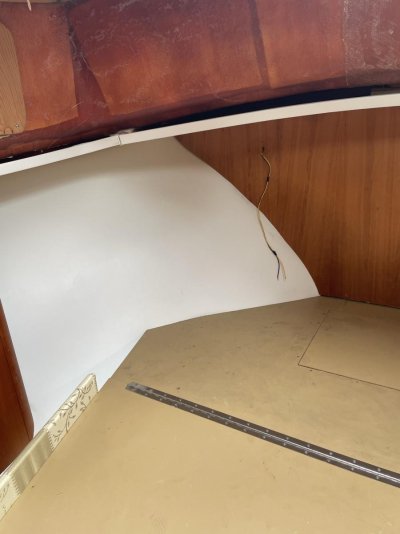
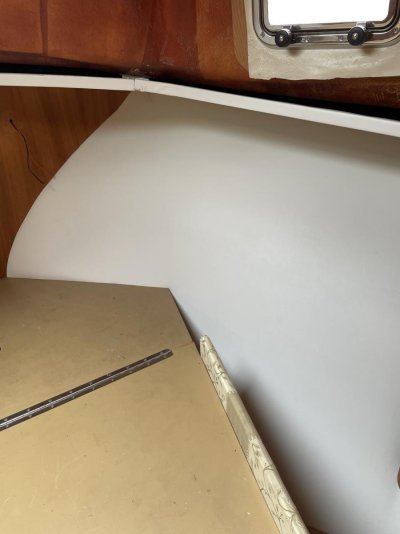
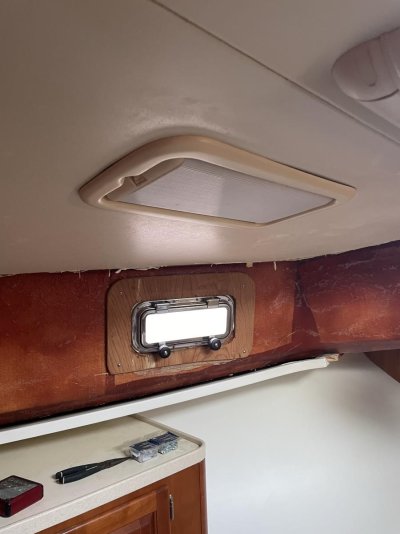
I removed the vinyl in the forward V-birth and found it was installed over foam. Neither foam nor vinyl were glued down. All edges were stapled. This was a PITA to do but I am almost done. I did have to remove the lower soffit panels, headboard, port hanging locker and floor boards at the bed. The SB locker did not need to be removed but I did remove the interior. I ended up gluing staple strips inside the port locker, under the floor boards and behind the head board. Once done I installed the foam and then laid the vinyl over the foam. Once I had the vinyl in place I stapled to the wood strips. I also replaced the ceiling vinyl and installed wood panels just under the material to install new LED ceiling lights.
I only have the vertical piece of vinyl left to install.
This job is not for the faint of heart. But I like a challenge.

Included are a few pictures.
 

Attachments

  • Forward V-Birth1.jpg
    Forward V-Birth1.jpg
    151.5 KB · Views: 23
  • Forward V-Birth2.jpg
    Forward V-Birth2.jpg
    130.8 KB · Views: 20
  • Forward V-Birth3.jpg
    Forward V-Birth3.jpg
    128.7 KB · Views: 18
  • Forward V-Birth4.jpg
    Forward V-Birth4.jpg
    69.1 KB · Views: 20
  • Forward V-Birth9.jpg
    Forward V-Birth9.jpg
    91.9 KB · Views: 20
  • Forward V-Birth10.jpg
    Forward V-Birth10.jpg
    74.7 KB · Views: 20
  • Forward V-Birth11.jpg
    Forward V-Birth11.jpg
    81.2 KB · Views: 19
  • Forward V-Birth12.jpg
    Forward V-Birth12.jpg
    135.4 KB · Views: 19
Finished V-Birth Vinyl

I removed the vinyl in the forward V-birth and found it was installed over foam. Neither foam nor vinyl were glued down. All edges were stapled. This was a PITA to do but I am almost done. I did have to remove the lower soffit panels, headboard, port hanging locker and floor boards at the bed. The SB locker did not need to be removed but I did remove the interior. I ended up gluing staple strips inside the port locker, under the floor boards and behind the head board. Once done I installed the foam and then laid the vinyl over the foam. Once I had the vinyl in place I stapled to the wood strips. I also replaced the ceiling vinyl and installed wood panels just under the material to install new LED ceiling lights.
I only have the vertical piece of vinyl left to install.
This job is not for the faint of heart. But I like a challenge.

Included are a few pictures.


I finally finished the forward V-Birth and it came out very nice. The hardest part was installing the last piece of vinyl that goes on the area between the upper headliner and lower soffit panels. I ended up doing it 3 times before I figured out a system. I used Armor-all/water/bleach solution to lubricate the track and vinyl. Then using a medium putty knife with rounded edges I was able to get the vinyl pushed into the track. See my post about doing the main headliner for pictures of the tool.
I also have another post showing much the same with a few more pictures.


The one thing I'm glad I did was once all the vinyl was removed and the wood soffit pieces (3) and headboard were out and the staple strips were glued down, I fitted the headboard and soffit panels BEFORE final install. I'm not sure why but it seemed nothing fit as well as when originally installed. The headboard and soffit pieces needed to be trimmed and sanded to fit back together. But once this was done and then covered, everything fit perfectly.
 

Attachments

  • Forward Birth Headliner.jpg
    Forward Birth Headliner.jpg
    59 KB · Views: 17
  • Forward Birth Headliner2.jpg
    Forward Birth Headliner2.jpg
    62.1 KB · Views: 18
  • Forward Birth Headliner3.jpg
    Forward Birth Headliner3.jpg
    57.7 KB · Views: 18
  • Forward V-Birth1.jpg
    Forward V-Birth1.jpg
    151.5 KB · Views: 19
  • Port new ceiling light mount.jpg
    Port new ceiling light mount.jpg
    102.2 KB · Views: 21
  • Port new vinyl.jpg
    Port new vinyl.jpg
    72.6 KB · Views: 16
  • Starboard V-Birth new vinyl.jpg
    Starboard V-Birth new vinyl.jpg
    65.9 KB · Views: 18
  • Forward Birth with ceiling light.jpg
    Forward Birth with ceiling light.jpg
    83.2 KB · Views: 16
Really, really nice work. It looks great and I am very jelly.
 
The ceiling fabric on my Island Gypsy 32 has a tear in it. I've tried sticky patches, but they don't stay on. Is there some way to patch over the tear without buying yards of ceiling fabric, which won't match anyway!
 
Probably not any way to repair it. Most likely have to replace it.
 
Back
Top Bottom