Refinishing teak parquet?

The friendliest place on the web for anyone who enjoys boating.
If you have answers, please help by responding to the unanswered posts.

WayneDana2

Senior Member
Joined
Feb 15, 2019
Messages
148
Location
USA
Vessel Name
Serendipity
Vessel Make
1977 37' Puget Trawler
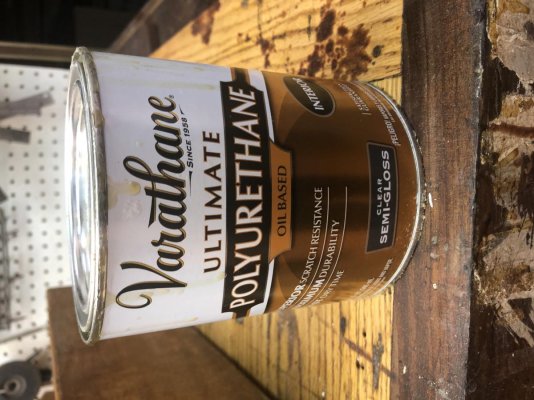
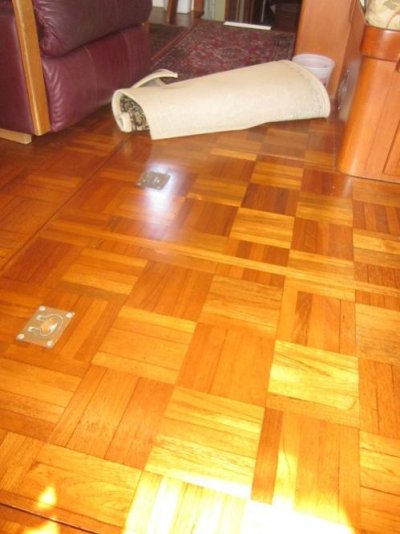
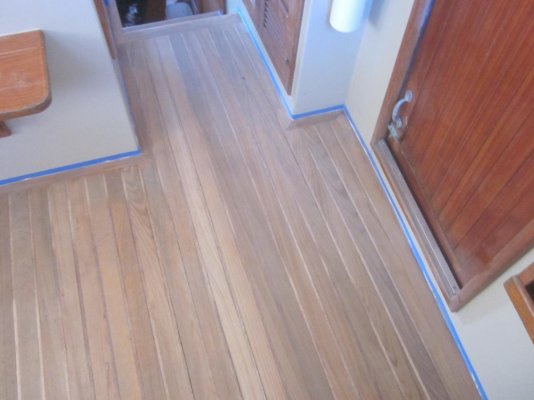
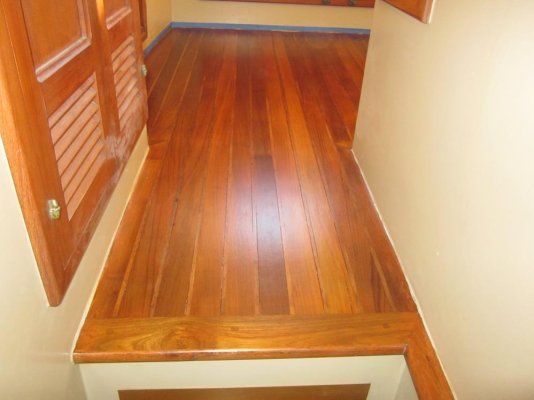
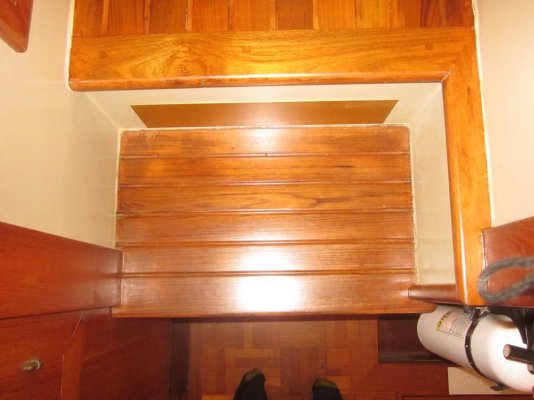
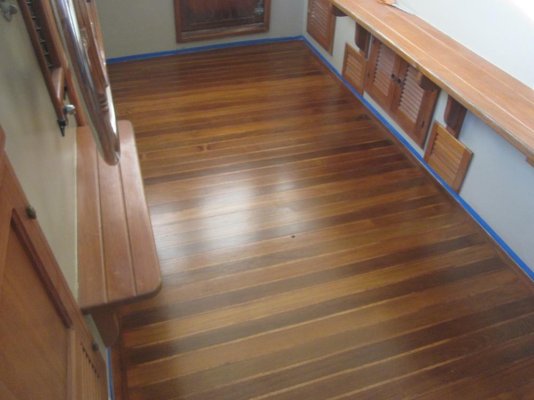
Spent today with a heat gun as a first day at renewing the finish on the teak parquet cabin sole. Kinda a pain to try and scrape in 2 different directions. I was wondering if anyone had done this job and if so, what did you use to strip it. Just sand? Chemical stripper? Heat gun?
Whatever the original finish was, it sure resists being scraped even after being heated to the bubbling point.
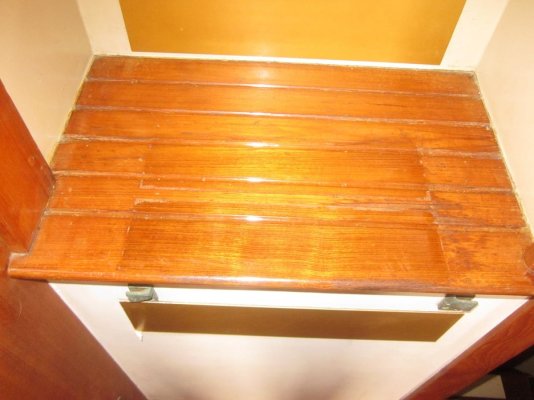
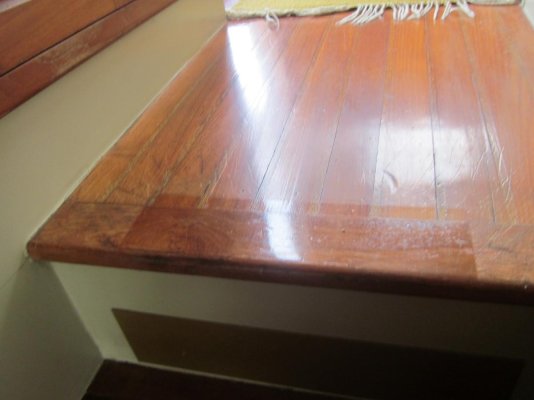
After stripping a test patch, sanding didn't go well either as the surface isn't very level. Lots of minor cupping and gouges is making sanding a huge job.
Whatever, it looks like it will still be a huge job, just wondered if anyone had found something that worked well for them?
 
I was thinking about doing our cabin soles at some time in the future too. There are the inevitable small dings in the galley area which would be difficult to sand out. My plan was to just clean it really well, then scuff the surface, then add two or three coats of satin varnish. It won't be mirror smooth but neither is the original parquet.
 
Random orbit sander with fairly course grit disks followed by a more fine disk. Like 80 or 100 followed with 200 or 220.

Then brush on polyurethane. Mine is about 8 years old and still looks new.

pete
 
I'm looking at doing my saloon sole as well so I'll be following this thread closely. Pete, how did you handle the corners?
 
I was thinking about doing our cabin soles at some time in the future too. There are the inevitable small dings in the galley area which would be difficult to sand out. My plan was to just clean it really well, then scuff the surface, then add two or three coats of satin varnish. It won't be mirror smooth but neither is the original parquet.
Our finish is completely burned through in several places. No choice but to completely sand and refinish. Recoating would be a sweet sweet choice otherwise. Bare wood will be hard to obtain.


Random orbit sander with fairly course grit disks followed by a more fine disk. Like 80 or 100 followed with 200 or 220.

Then brush on polyurethane. Mine is about 8 years old and still looks new.

pete
I was going to use Cetol Natural Teak 'cause I have it on board already and it looks like it will be close to the finish on the surrounding cabinets. I was wondering which poly you used?


And I just stopped and bought a random orbital sander at Home Desperate this evening with a bunch of 60 grit pads. I'll use my finish sander after that with 80 and 120. This was my next attempt as 4 hours with a heat gun only stripped about a quarter of the salon and I'm getting old enough that the knees aint what they used to be. :(
 
Last edited:
Cabin floors get light scuffing and occasional catastrophic dings.
At least mine do. I once left the pipes that support the table on the settee, only to have a wash knock them off. The crescent shaped dings on the floor weren't the first and not the last.
Despite that, a light sanding with a 1/4 sheet sander, 120 grit or so and a couple of coats of Helmsman gloss polyurethane has lasted well and brought me many compliments.
 
Was wondering if polyurethane or varnish should be used for the finish. I've used poly in the past on floors in my house and it worked well. Any advantage to varnish? Also, gloss or satin coat?
_____________
George
 
My father sanded and cleaned the previously oiled teak parquet in my galley and heads probably 10 years ago and gave them a few coats of gloss poly. They've held up great. Galley has been lightly sanded and re-coated to touch up a few dings and scrapes. Heads haven't been touched and they're all holding up quite well.
 
You may find that the DA sander will be very slow removing the finish. We refinished our teak deck on our sundeck last winter. The DA sander took forever. So I pulled out my belt sander and it did a reasonable job, you just have to keep moving and keep it flat on the surface or it will gouge quickly. I took the majority of the finish off with the belt sander and then followed up with the DA to get the last bit off.
 
You may find that the DA sander will be very slow removing the finish. We refinished our teak deck on our sundeck last winter. The DA sander took forever. So I pulled out my belt sander and it did a reasonable job, you just have to keep moving and keep it flat on the surface or it will gouge quickly. I took the majority of the finish off with the belt sander and then followed up with the DA to get the last bit off.


The issue with parquet is that the grain runs in 2 different directions so a belt sander will tear it up when sanding across the grain. And yeah, a DA is sllloooowwww...and the paper tends to clog which is why I was using a heat gun to begin with.


Still looking for first hand on this. LOL, someone out there with a magic bullet?
 
True, the teak deck is one direction grain only. I forgot you have parquet.
 
Does anyone know a source for the teak parquet tiles? I know I'm going to have to replace a few.. Preferably in the central east coast of Florida.
---------------
George
 
You know, I might still give the belt sander a try in an inconspicuous place and see how it does. If you don’t overdo it and then follow up with the DA it may come out ok. The DA is going to take forever...
 
Does anyone know a source for the teak parquet tiles? I know I'm going to have to replace a few.. Preferably in the central east coast of Florida.
---------------
George
I've had a few pieces come up when the glue failed. From what I can tell, these are just small strips of teak that were glued down in a pattern, then sanded and finished in place. Old school in Taiwan at the time yeah?

So Home depot has laminated teak tiles you could buy and adapt to fit. Or just get someone to mill the pieces that you need and pop them up and replace them strip by strip with construction adhesive or waterproof glue.
 
We refinished our salon floors (picture attached) by following the advice of Rob on Datenight who has 50 years in the floor finishing business. Here are some excerpts from a thread:

“The sanding depends on the condition of the sole now and what you want it too look like when you finish.

If worn and scratched or uneven you may have to sand a lot more. I would start with #60 on a high speed orbital like a 6" Fein with dust collection. Work up to #80 and #100. Go no finer than #120. You don't want to burnish the wood. This seems to fly in the face of popular opinion but is the recommended method and it works! Use 4-5 coats of your favorite finish. Sand with #150-220 between coats. The goal here is to fill the grain. Build coats should be gloss and may take more to get the look you want. Use satin for the last coat if you do not like the gloss look. No need for a marine varnish inside.

My standard finish is Lenmar. It is available in satin or gloss and holds up well. MoistureCure urethane is a commercial duty finish but hard to find. Be sure to use a respirator with that.

Also very durable is Street Shoe by Basic Coatings. It is a two part waterborn finish. There is a learning curve with it and you must use their sealer first to prevent edge bonding-the finish is so hard it will glue the boards together and the wood can split rather than seperate at the joints with seasonal movement.

Other good finishes are Zip Guard and Lasts and Lasts. I have not had good luck with Minwax although I always use their stains“.


http://www.trawlerforum.com/forums/s32/refinishing-salon-hardwood-floors-5688.html
 

Attachments

  • EF0D6567-D4ED-43F2-8961-52AA9F06AA53.jpg
    EF0D6567-D4ED-43F2-8961-52AA9F06AA53.jpg
    42.4 KB · Views: 87
With our Defever, we hired a flooring contractor. He used a traditional floor sanders and then applied a swedish finish... The floor looked great and held up well and the cost was a few boat units...
 
For sanding, screens will be much less clog prone than sandpaper if you have to do more than a light sand. So use a sander that will take a floor screen or drywall screen (ideally with vacuum to keep the dust down). The reduced clogging should make sanding faster too.
 
Larry M - that's a beautiful finish. Thanks for the information.
----------------
George
 
Larry M - that's a beautiful finish. Thanks for the information.
----------------
George

Thanks but the credit goes to Rob. His advice was spot on. It took a day to prep the floors and maybe an hour for each coat. I don't remember if it was Rob or someone else who said, "it's a floor, not a piece of furniture". It made the project go a lot faster.

Here are some pictures of the pilot house floor/stairs we did shortly after with the polyurethane we used in the salon and pilot house.
 

Attachments

  • a.jpg
    a.jpg
    105.1 KB · Views: 61
  • b.jpg
    b.jpg
    70.8 KB · Views: 60
  • cc.jpg
    cc.jpg
    75.4 KB · Views: 61
  • d.jpg
    d.jpg
    83.3 KB · Views: 61
  • floors 002 (2).jpg
    floors 002 (2).jpg
    62.4 KB · Views: 61
  • floors 004a.jpg
    floors 004a.jpg
    76.9 KB · Views: 71
  • floors 008 (2)a.jpg
    floors 008 (2)a.jpg
    66.5 KB · Views: 62
  • 771329[1] (2).jpg
    771329[1] (2).jpg
    45.6 KB · Views: 66
Great info, Larry, and beautiful work!

Thanks.
 
Thanks Larry! That is exactly the info I was looking for. I will be down on ma knees with a 5 inch RO with #60 grit today. See how that goes.


Did you sand between coats? How many coats did you lay down?
 
...Did you sand between coats? How many coats did you lay down?

Wayne: Yes on the between coats but just with a sanding block by hand. The finish was pretty smooth but the sanding gave a good visual break for the next coat. I used a 4” brush. If the sanding between coats took 15 minutes I’d be surprised. If I remember right, 4 coats.

When I sanded and applied the poly, I left the hatches in place. I had a few drips between the floor and the hatches. I cleaned those up after easily. It made for even sanding and a quick application.

Also, I taped a shop vac to my random orbital and put it on the back or side deck (I have a couple of hose lengths). The amount of dust inside was minimal.

Best to Dana. :)
 
I've had success with good quality chemical stripper, try it in a corner, lay it down and let it sit for 10 minutes or so... it should lift the varnish off nicely.
 
I have had very good luck with CitriStrip on everything from model trains to an airplane (full size) to the teak on my boats. It isn't as powerful as the traditional chemical strippers but is environmentally and human friendly, even use it inside the house. Notably, it was highly recommended by Rebecca Wittman in her well-known books on finishing brightwork on boats.

I've never tried it on something like a parquet floor but think if you're careful not to let it seep too much into the joints where it loosens the glue it would be easier and less damaging than sanding with a power sander. I'm going to try it on the bottom paint on my sailboat this spring...that might be more of a challenge.
Joe
 
And I just stopped and bought a random orbital sander at Home Desperate this evening with a bunch of 60 grit pads.


Is that similar to Lousies?!?


On the belt sander sanding against the grain on half of the parquet squares, isn't a DA or a random orbital sander sanding against the grain almost ALL of the time? I think the major difference is the coarseness of the sanding paper. I would be tempted to still use a belt sander to hog off the top coat, then finish off with DA or orbital. That worked for me on our old Monk 34. Turned out decent and still looked great 6 years later.
On the corners, the only way I was able to address that was painstakingly sanding with sandpaper tucked around the end of a paint stick . . . not fun, but it turned out fine!
 
Refinish Teak Parquet

Use a random orbit sander only. Never use a belt sander anywhere on your boat! I start with about 100 grit and go to about 200 then varnish with the poly shown.

Inside corners are done with a vibrating sander.

I used this on my parquet about 6 years ago and it still looks great. If you need to touch it up just hit the spot or wear area with 220 on a random orbit and then receipt.

This is my first successful post with a picture, Ill figure out how to turn it later

pete
 

Attachments

  • IMG_0452.jpg
    IMG_0452.jpg
    143.7 KB · Views: 51
Add ON.. I was so excited to be able to post a picture I forgot to mention..

I buy only quarts, sometimes 2 or 3 at a time. It is more expensive but the unused poly keeps better in quarts and if I use any type of stain it will contaminate the poly.

This stuff comes in High Gloss also. I have used both and kind of prefer the high gloss but since all the other wood in my boat is semi gloss, I went with that.

You can buy this stuff anywhere. MinWax also makes the same stuff, it is all good.

I use the exterior on the rails and outside doors.

I put several coats down and do not sand between coats generally unless there is an area I don't like.

Don't use stripper. It makes a mess and gums up the sanding disks. Old, hard varnish sands off easily. We did the whole cabin in an afternoon.

pete
 
I finished my parquet sole a couple of months ago.

I wanted to go down to the wood before varnishing.

I tried the belt sander but it left a very rough, uneven finish and i found the gouging risk unaceptable.

I found the random-orbital sander was not able remove the varnish or, at least was extremely slow and inefficient.

So I used a heat gun and scraper which was a pain because of the changing direction of the wood grain and because of the working position.

I had a paid helper who actually did most of the work.
 
As to never using a belt sander on the boat, I have used mine multiple times on my boat with great success. I used it to take off the top several coats of varnish on my teak decks and then took the final coats off with a D/A sander. It probably saved me 60% of the time it would have taken with a D/A alone. I know because I timed it on a couple of square feet and compared the time it took. And when I was kneeling on my bad knees that time savings was wonderful. However I have a lot of experience using a belt sander when I used to work at a custom furniture making shop. If you are not careful you can go too deep with a belt sander. But if you are careful it can save a lot of time.
 
The "mouse"(mini,not mickey)versionof a random orbital sander should do corners etc.
 
Back
Top Bottom