1976 Marine Trader 36 Europa Sedan project boat

The friendliest place on the web for anyone who enjoys boating.
If you have answers, please help by responding to the unanswered posts.

Max1

Senior Member
Joined
Sep 14, 2021
Messages
404
Vessel Name
Bermuda Belle
Vessel Make
Marine Trader 36 Sedan
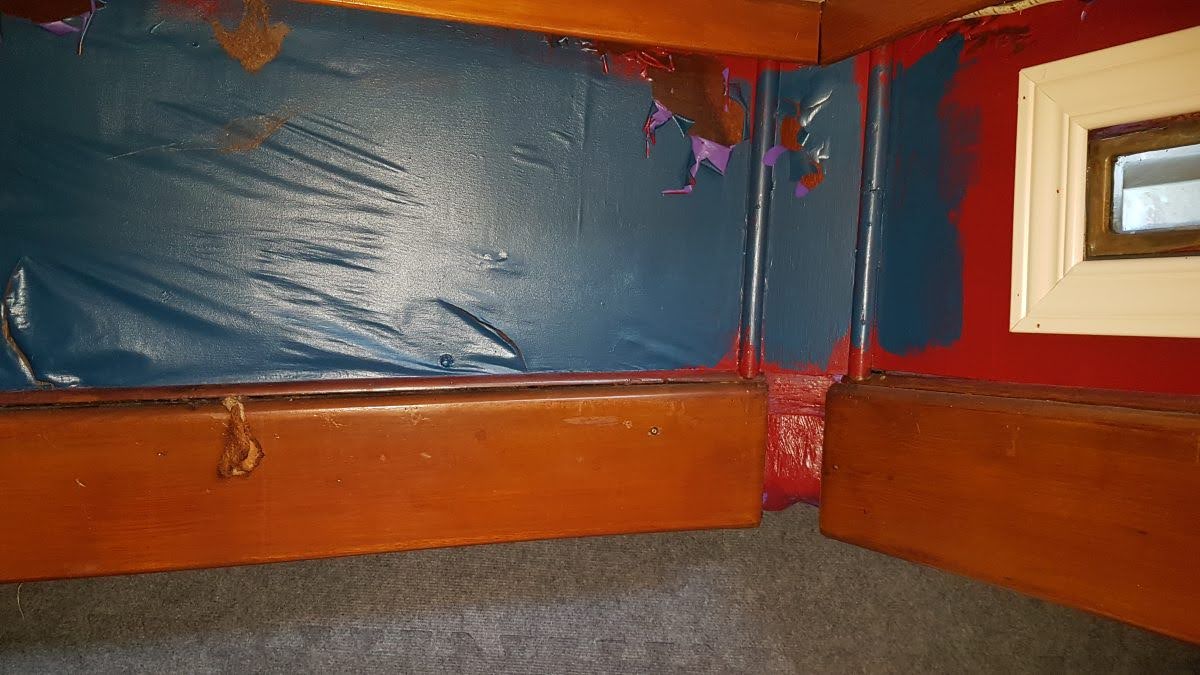
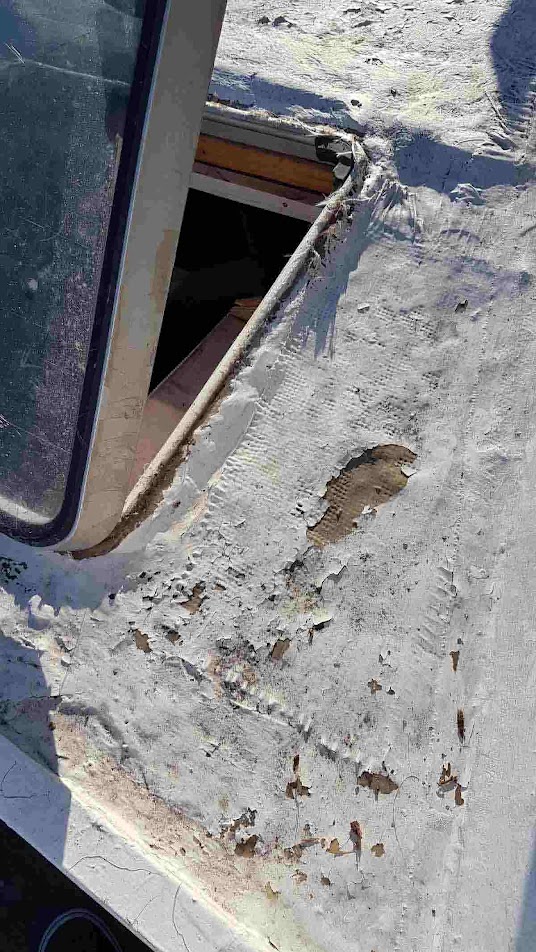
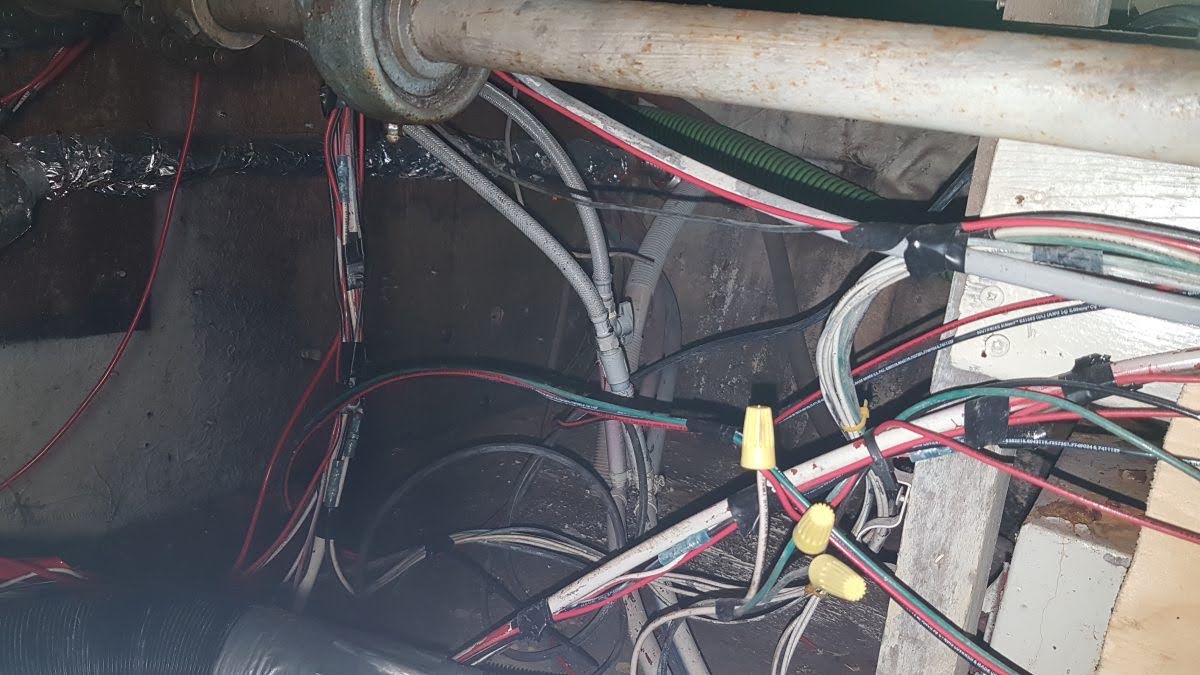
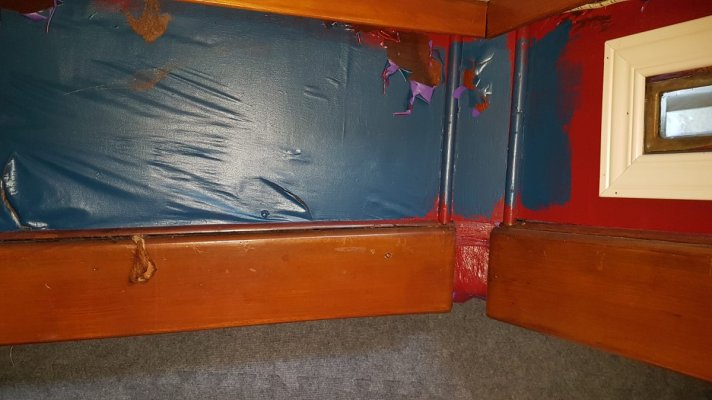
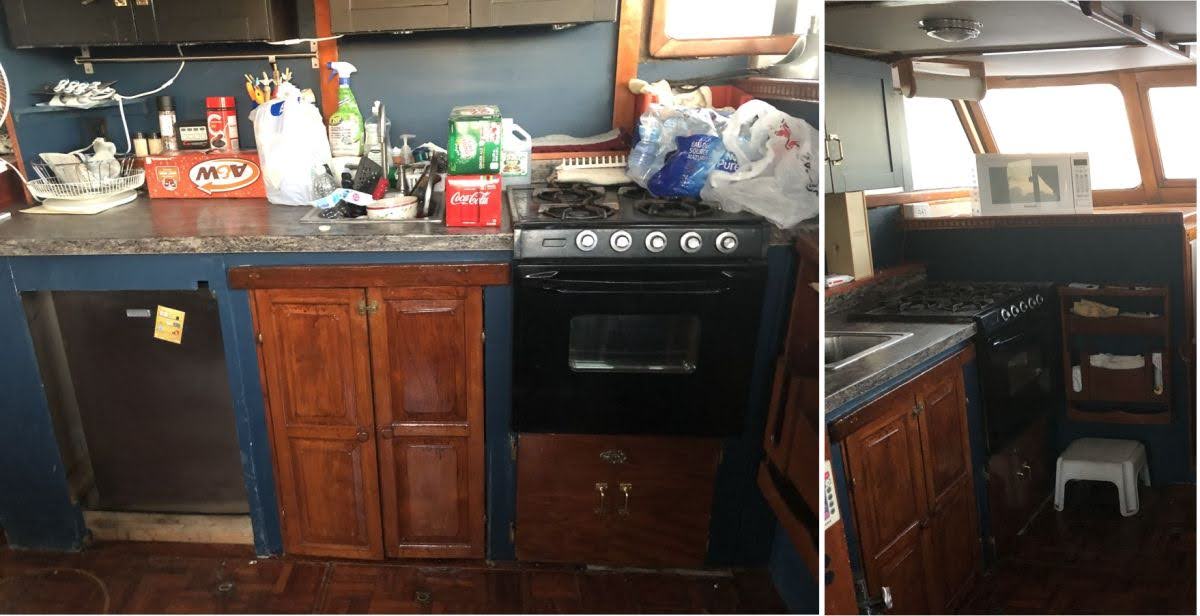
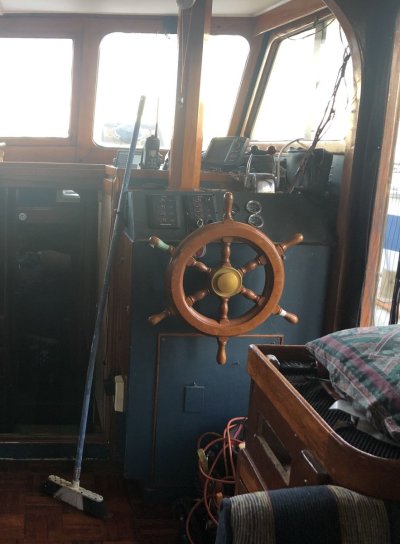
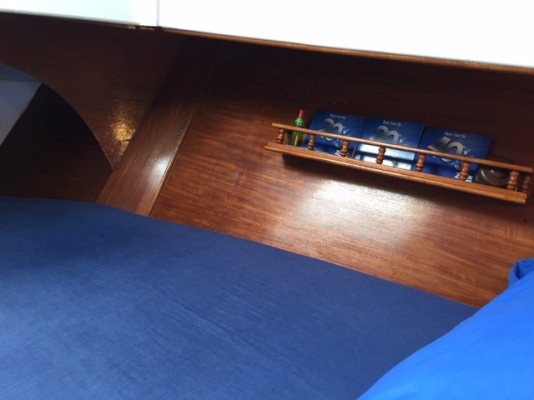
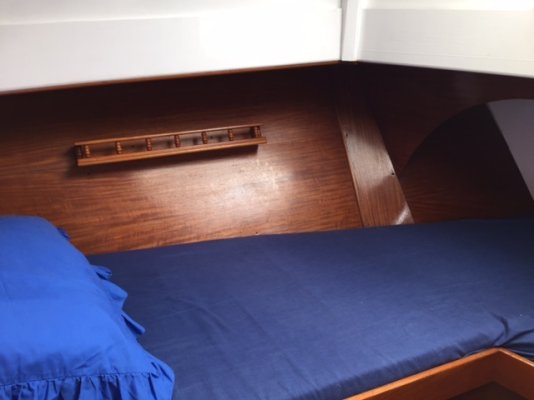
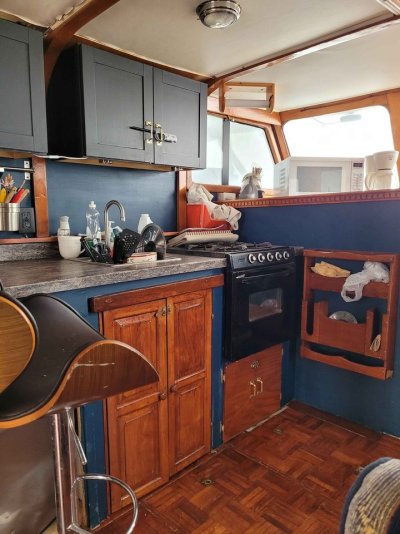
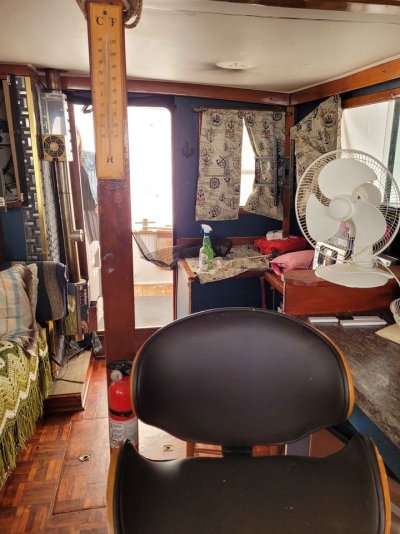
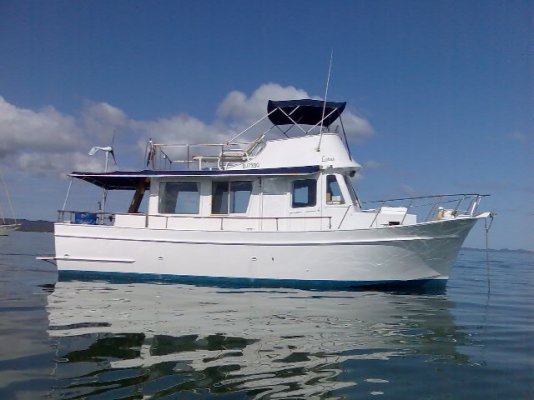
Hi everyone. I've been contemplating whether or not to do a build thread on the work that we will be doing on our 1976 Marine Trader 36 Europa sedan.

While this is definitely a project boat, it will be needing a lot of work that I consider Sweat Equity. There will be some cost, but my wife and I are quite handy do-it-yourselfers, and we thoroughly enjoy renovating and restoring projects. We consider it “a hobby” :) so we figured by purchasing this project boat at a great price, we could be enjoying a summer on the water in 2022.

Before I get into the boat, little background about my wife and I:
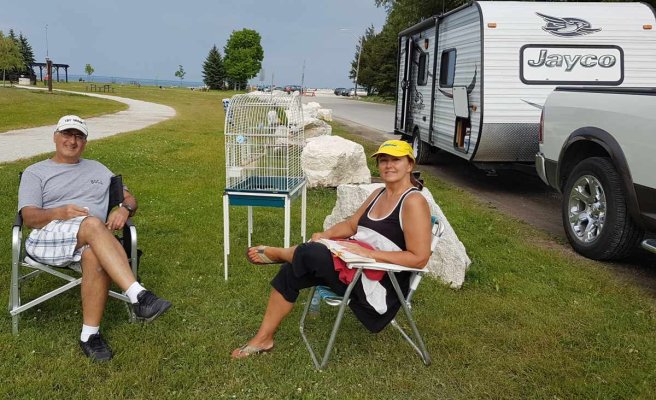
My wife and I love the adventures of being outdoors, and travelling. Since we met and married, we have gone up the slope to overnight RV’ing. We started with tents and campsites when our children were young. Eventually we got tired of sleeping on the cold or wet ground, and moved up to a pop-up trailer. After a few years of that, we got tired of the limitations of a pop-up trailer, especially during the commute, so we graduated to a small camper trailer. A few years later we got something larger, a couple's trailer which we still have today. We travel quite a bit in the summer with it, mostly local due to the covid situation, but in years prior we have travelled extensively in the US, each trip being an amazing adventure.

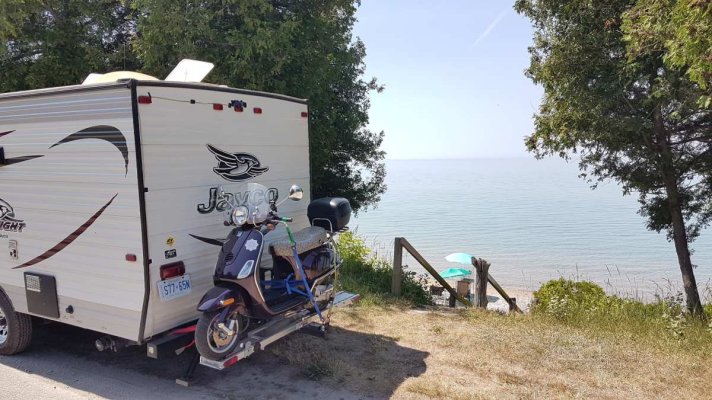
My wife and I enjoy overnight RV’ing, especially around the water. Our favorite destinations are any of the Great Lakes. We are always happiest when we can be near the water or the beach. It makes the RV lifestyle so much more enjoyable. Michigan is one of our favorite destinations. So many beaches! :)

Last summer we were doing a trip around Ontario and Quebec, and we're very disappointed by the lack of beach time, especially in Quebec. Somewhere during that trip my wife and I started discussing the option of renting a houseboat for a week or two every summer in order for us to get Beach time that we so much enjoy.

The conversations and searches went from renting…to buying a house boat. Then we talked to our boat friends, and all strongly advised against houseboat. Along our travels we stopped at many marinas and were surprised at how many strangers we met that were willing to allow us to look in their boats and talk. By the end of each visit with the strangers, we left as friends. Needless to say we ended up deciding that we wanted a trawler with a diesel engine. We spent the end of summer and beginning of fall looking at trawlers. We saw the entire gamut of quality and cost.

Ultimately, we had to decide between breaking the bank, or starting off economically. Now I don't want to get into a debate with anyone here about the virtues of buying a good quality boat and not having to do anything versus the amount of cost, time and money that will be required to restore project boat. We've already made up our mind and have decided that a project boat is what we want. Emphasis on “What WE want”….

As I stated at the top of this post, I was debating whether or not to start this project thread. My main reason for not starting a thread is because I'm “a get ‘er done” kind of guy. I belong to several other forms(not boats) and have chronicled a few of my other projects there, but I do find there are times when I get so engrossed in the work, that I forget to stop and take pictures. So in the end I have a project that I started with bare bones here and end up with a finished product there, with very few photos or posts in between. LOL. That's just the way I roll.

On the other hand I do enjoy chronicling what I do, especially when I'm proud of the before-and-after situation. So after much debate, I've decided that I might as well start the project right here.

So the next few posts I make here will be the history of the boat, as well as trying to catch up on what we've done so far. I hope you hang on, grab a drink, and enjoy our thread.
M&H
attachment.php


By the water. That's how we like it!
attachment.php
 

Attachments

  • Jayco1.jpg
    Jayco1.jpg
    149.8 KB · Views: 845
  • Jayco2.jpg
    Jayco2.jpg
    149.3 KB · Views: 841
Last edited:
As it was offered:

Below are the photos that were listed in the advert.
There were surprisingly no outside shots in the ad, save for a small thumbnail.

Now before anyone says anything, this is how it WAS when we got it.
There were so many issues with it it's not funny. However, I tend to look at things through a mechanic's eye. I will admit, one of the reason's the boat was being sold was it had a lot of problems that over time built up to one big frustration for the previous owner. So while it had (has?) a lot of issues that caused problems, I tend to look at them and see how easy it can be fixed (for me at least).

I learned from the previous owner that he bought it as a project boat as well. He did invest some time and energy into it, but he also had to have a lot of paid help to fix the problems he could not do himself. Hence the cost and frustration for him. I also leaned that the owner prior to him greatly neglected the boat to such a point that it was nothing but trouble.

On the plus side, the two important things to me, the hull and the engine, are in great shape.
So here she is as it was advertised:
 

Attachments

  • B2B.jpg
    B2B.jpg
    87.3 KB · Views: 67
  • C.jpg
    C.jpg
    103.4 KB · Views: 67
  • C1.jpg
    C1.jpg
    101.3 KB · Views: 63
  • E1.jpg
    E1.jpg
    90.2 KB · Views: 65
  • E002.jpg
    E002.jpg
    138.1 KB · Views: 74
  • G2.jpg
    G2.jpg
    114.9 KB · Views: 58
  • H2.jpg
    H2.jpg
    77.6 KB · Views: 57
  • P2.jpg
    P2.jpg
    103.4 KB · Views: 57
  • R3.jpg
    R3.jpg
    164.1 KB · Views: 55
  • R4.jpg
    R4.jpg
    121.3 KB · Views: 59
Best of luck with the refurb, etc, Max. The boat you have there is what over here in Aus we had as the Blue Seas 36, and for many years was my dream boat. However, back then they were priced just out of my fund-without-borrowing range, so in the end we settled for its slightly smaller brother, the Clipper 34 pictured below, also known in the US as the CHB 34, but in sedan version like yours.

We looked long and hard for it, because my wife vetoed a tri-cabin version, which was the most commonly available version back in the late 70s and 80s. She wanted the indoor/outdoor living style without too much up and down steps. Ours was a 1975 hull. It was later that the sedan/Europa versions became more or less the norm.

Good choice, and if as you say the hull and engine are fine, (like ours was), then the rest, as they say, is just time, persistence, and getting it done. Oh, and a lotta love... :flowers:
 

Attachments

  • 77B4EAFD-90E1-4C63-B525-3A72FC4B4D8A_1_105_c.jpeg
    77B4EAFD-90E1-4C63-B525-3A72FC4B4D8A_1_105_c.jpeg
    91.7 KB · Views: 51
Thanks Peter!
We've already been out to pat the boat twice this winter. We miss it so much.

Fortunately, I have lots of photos of what we have done so far, as well as many small projects to work on at home.
So for the rest of this winter, I will keep myself engaged on this thread by posting those pictures as well as the at-home projects :)
 
Hello Max,
We also got a boat at a price we were happy with. While some may look at ours as a project boat, I don't. I just have a few things to do on it. But we wanted something to enjoy for this coming season. I just wish the boat was closer to me, right now it is four hours away and they marina doesn't allow boat work on the weekends.

I look forward to seeing your updates!1
 
Max - as the owner of a fairly recently acquired “project” Marine Trader, I shall be following your chronicles with great interest. Good luck and have fun!
 
Good luck with the project. We bought our's as a project boat (although it was serviceable) in 2018. While we did travel over 2500 miles (rivers) over the past three years, during that time I have completed an almost total refit, except the engines and interior, which were in good shape. New generator, new inverter, new batteries, new electronics incl auto-pilot, new toilets and lines..... The fun never stops.
also painted it with AlexSeal, and had new enclosures made - as I said, fun never stops, for some like us that like to do renovation projects.
 
Last edited:
Hi guys. Thanks for the kind words and encouragement.

Like I said... I CANT WAIT FOR SPRING :) :)
 
The laundry list:

I guess the next chapter in this boat's background is the laundry list of problems the previous owner had to deal with. This will bring the condition of the boat into context as the previous owner(s) saw it, and what ultimately led to him wanting to sell it.

There is no way of knowing who is responsible for the litany of problems this boat has, and I am certainly not seeking to lay blame. But I figure you would want to know what the problems are when we got her.

I have done my homework trying to trace this boat's history and I was surprised at what info I have found (that I will share later in this thread). For now, suffice it to say that I am probably owner #6. So somewhere between owner #3 and me, things got worse for this poor little girl.

In no particular order, here is a list of what the previous owner had to deal with, but is nowhere near what this boat needs to have fixed(I'll save that for another list...LOL ;) ) :

  1. Pulpit smashed
  2. Vberth port side plywood rotten
  3. Rear hatch rotten
  4. Cockpit mushy deck port side
  5. Dashboard inop
  6. Kill switch inop
  7. House batts always end up dead
  8. Prop shaft leaks continually
  9. Teak deck leaks (cause of most of bilge water when on hard)
  10. Stateroom hatch leaks
  11. Flybridge deck (main cabin roof) leaks
  12. Water pump leaks
  13. Bilges full, bilge pumps not working
  14. Water pump not cooling engine
  15. Engine room stinks of diesel constantly
  16. Electrical nightmare
  17. Many electrical devices not working
  18. Front window mounts broken
  19. Drinking water pump does not work properly, no water at sea, only on shore
  20. Propane Gas line short
  21. Windows blocked
  22. No flybridge gauges
  23. Stinks of poop
  24. Toilet does not flush and poop back-flow
  25. Pump-out ineffective
  26. Rudder fell off

The PO told me that when he purchased the boat, it had a bent propshaft.
He worked with a mechanic to source a new propshaft and had it machined to specs and then helped the mechanic install it. That was $$ #1 for him, I guess.

But after that there were a lot of additional costs bringing the boat up to operation
The PO (or the POPO..LOL) did invest in some new goodies:
  • New Water heater
  • New Water tank
  • New alternator
  • New starter motor
  • New Prop Shaft
  • Rebuilt transmission unit

From the list of problems 1 through 26, the straw that broke the camel's back was the broken rudder. When the rudder broke off and disappeared into the deep, the Previous Owner had had enough. That's where we come in.

Next post I will update this list with all the observations I have made regarding each issue and will comment on why I think I can fix all of these.
Then after that I will show an even larger list of all the tasks my wife and I have documented that WE want to fix on this boat (remember, this will be a "hobby" for us..LOL:angel: At least I'll keep telling myself that:lol:
 
Last edited:
Whoa! That's quite a list. I'd move the poop thing to #1 though :) Your pretty brave couple taking up such a project. Regardless I'll follow your thread and even throw in some encouraging words. Good luck!
 
We are on our 24th boat now. We have done extensive work on some of them. I love working on boats. What I would recommend is to approach it like medical triage, fix the things that are causing more damage first. Stop the bleeding. These may not be the most fun things to do but they will help you get a handle on the overall project without getting in deeper as time goes by. Things like leaks and leaking decks will only get worse and cause more damage if you let them. Good luck and post photos here. We love to give advice.
 
Whoa! That's quite a list. I'd move the poop thing to #1 though :) Your pretty brave couple taking up such a project. Regardless I'll follow your thread and even throw in some encouraging words. Good luck!
Thanks!

What I would recommend is to approach it like medical triage, fix the things that are causing more damage first. Stop the bleeding.

Ha! That's funny. Those are the EXACT words I use when I discuss the priorities of this boat with my wife :thumb:
But 24 boats? Man! you must love working on them. :)
 
The laundry list Part Deux: ! Max can fix it!

So here in red, is what I thought of when I looked at this boat before purchasing it/ (and I also listed what I have done since)


  1. Pulpit smashed I can rebuild that. It will probably need some doweling to hold it firmly
  2. Vberth port side plywood rotten I’ll have to cut out and replace it with a new piece of ply… AFTER I stop the leaks
  3. Rear hatch rotten I can rebuild that (edit…after bringit it home for the winter, I realise it is not going to work. I will have to make a new one
  4. Cockpit mushy deck port side remove the top Fiberglass and scrape out rotten core, replace it and re-fiberglass the top back on
  5. Dashboard inop I can build a new dash with the instruments I want. OH BOY!! :)
  6. Kill switch inop Meh… Easy fix
  7. House batts always end up dead Even with the power off, the batts would be dead. This was an easy one. I discovered later that some dum-dum connected some remote-control house lights to the BILGE circuit. So when the switch was off (Bilge always on) the phantom-load of the remote control light switch would drain the house batts. JEEZ!!
  8. Prop shaft leaks continually Another easy one. Or so I thought. First the stuffing box was incorrectly packed. Then I discovered later that there was an additional OLD AND ROCK HARD stuffing way in the back. I can re-stuff this properly in the spring. BUT WAIT..THERE’S MORE: I discovered later that the engine and prop-shaft are misaligned. This caused the other problem in my above post regarding the rebuilding of the transmission. I suspect the misaligned shaft was hard on the tranny as well!! I’ll fix that in the spring as well.
  9. Teak deck leaks (cause of most of bilge water when on hard) Original plan: Re-seal the joints. HA..Easy!... (later… we realized…”Its all gotta come out”. That will be one of our first jobs this spring while its still on the hard
  10. Stateroom hatch leaks Hoo-boy. I don’t know where to start with this one. Whomever installed the hatch did a real sloppy job. I mean sloppy. It was improperly installed and improperly sealed. It’s gotta come out in the spring. Rebuild the frame and re-set using proper sealants
  11. Flybridge deck (main cabin roof) leaks It took me a while to figure this one out. After a few weeks on the boat after we bought it, it looks like there is some rot in the brow (or whatever its called) where it sits/fits on the flybridge deck. This spring the entire brow is coming off and the whole top deck will be cleaned of the rot and re-fiberglassed. Then the brow will be re-installed
  12. Water pump leaks I brought the pump home the first week after we bought the boat. When I took the pump apart, I was shocked to find that two of the impellor cover bolts were rotten. They had no grip in the threads. Hence, the cover was never on tight. I re-tapped the threads and replaced the rotten screws
  13. Bilges full, bilge pumps not working 3 down from here I wrote “electrical nightmare”. Yeah….. Electrical nightmare. Easy fix for me though.
  14. Water pump not cooling engine When I took the water pump home to fix it, I took the impellor out. It was destroyed from age-hardening. I have since learned that these are perishable items and will need to be replaced at a regular service interval.
  15. Engine room stinks of diesel constantly I discovered that the Racor filter bleed screws are leaking. Have not fixed it yet but it’s probably the O-ring seals. I shut off the fuel line for the winter. Last time we went to “pat the boat” this winter, the boat smelled lovely! :)
  16. Electrical nightmare What was there just won’t do. It will have to be re-wired (my hobby!) I already started attacking this problem. Some of the wiring strategies really had me scratching my head. Like…”Why?” and “amateurish”. I already pulled out reams of useless wires and as of this writing I have new bus-bars, new terminal blocks and a few spools of new wire on hand. Cant wait for spring. “Let me at ‘er!!” :)
  17. Many electrical devices not working See above…Yeah. For real!
  18. Front window mounts broken Was the first thing I fixed the day we bought the boat. It is only temporary as a new hardwood mounting block will need to be made
  19. Drinking water pump does not work properly, no water at sea, only on shore I discovered later that the water pump was installed backwards. DOH!!! (also, when I looked into that, I discovered a plumbing nightmare. But that will be added to the “additional fixes” list that I will add later)
  20. Propane Gas line short The propane tank that is used for the cooker ends up in the middle of the side decking on the port side of the boat. Making that side inaccessible. Who’s idea was that? Anyway, easy fix. I will redo the gas line to put the propane tank at the stern
  21. Windows blocked Somebody thought it was a good idea (I am told owner #4) to add new(and ugly) galley cabinets right smack where the windows were on the port side. My wife and I agree that we are getting rid of those and reclaiming those windows!
  22. No flybridge gauges Oh boy!! I get to make a second dashboard! :)
  23. Stinks of poop Because of the problem below
  24. Toilet does not flush and poop back-flow This was a triple-whammy. Even though the toilet was “new”(-ish), I found that the Jabsco base valve gasket was improperly installed and destroyed. So it would not pump very well and would allow a back-flow into the head. In addition to that, the sewage line was improperly fitted and improperly hung, such that it encouraged a lot of back flow. I already fixed the sewage line and the replacement gasket is on hand waiting for spring. The third problem is below- the poop tank was not venting causing poop-water to squirt back into the head! (gross!)
  25. Pump-out ineffective I found that the vent line was improperly installed. Without proper venting, poop-sucking would be impossible because of the vacuum in the tank. By the same token, flushing the head would also be a problem as the pressure in the tank would prevent the poop-water from the head from flowing into the tank! A $1.50 PVC elbow from Home depot solved that problem!
  26. Rudder fell off Idea 1: I can get my scuba gear and metal detector and find it!!” (yeah right.. Nope! I did not realise that you cant swim in Marina’s when they have boats hooked to shore power (and now that I know more about big boats, I know why!!)
    Idea #2: I can make a new one for 2/3 the price the previous owner told me he could make one.
    It turns out this was another big can of worms. But I will save that story for another day (and it’s a good one to! Worth your wait :) :)

Well, that’s enough for now. See you next time!
 
Last edited:
Love the detailed list. Thats a ton of work! But I love those Europa style boats. Definitely keep us up to date and post lots of pictures!
 
Max, I am absolutely in awe of your can-do attitude. Whatever you do - try not to lose that. That list is large, and a bit daunting, but when you analyse it, not a threat to the overall seaworthiness of the vessel. A bit more than cosmetic, for sure, but all do-able - albeit some of it will cost a bit - like the new rudder.

Here's a tip I found helps. After you've triaged the list into descending order of priorities, as Comodave suggested. To help get to sleep at night, (yes - it works - beats counting sheep/whatever), think about the next planned fix-it job, and rehearse it all from go to whoa in your mind. It's amazing how you'll think of various approaches, discarding many, and ultimately come up with the best. Next thing you'll be waking up, but when doing the job, it will seem like deja vu all over again. Ask me how I know... :D
 
Some "BEFORE" Pictures.
You know... To whet your appetite!

Might as well show the "before" state, so that I can show the after pictures later this year..erm.. or next year?.... Or maybe next decade??...LOL:rofl:

Port side V-Berth. Looks like a facial peel ready to be pulled off... :eek:
And who chose the colors? "Professional" paint job!!
and for the observant, what's missing from this picture?

AM-JKLUGkxusGOBRoIT6_RTj0PkeZMCI_HnY7-2PrJ5qVZVoqPxzDK8GWTq_qCSY-weleEfw96aEVymOPY4gz9AJe80vra9oUbcq_NUbE8Khh9X-XwUHGIr5I6u12sYonx_qIQg5XDja3d3J8GX6Ndv6zalI=w1200-h675-no


Bilges weren't working. Besides the (always) dead house batteries, this is what I was greeted to when I pulled the hatch for the forward bilge....:facepalm:

AM-JKLUAeH1fVMC6M9eR3TW-y_E4HnO8Wwfm2PPPp-_o3YMXax6LHdYxHfUBsm0tfPUWbtGI94sdrPlSXHxMy7VjMqOlZOZxAz2DWk3OSgeKKAvm3A7dOwMwH2QR42rzhHlC_bw-6Q7yKrFpoVq2MLXk2ovf=w1200-h675-no


This is the port side hatch that is in the side stateroom. It leaks. Is it any wonder why?
AM-JKLWOsS3rPtJw4uLg0ZiAlYzWMs_FYYDjAiQN2Jy1HhsmIZipan4mTaXoCi-L_NidEL7zMWvxTJDcL1ERbJQPaZg3sAahhpWtXNWSwqyTK_0TvcID0AF3cLWADLu4g9xYSDLLxVYhBVS-gZHe5qniNxe2=w536-h952-no


What the heck happened to this pulpit? Did it run into an iceberg? "Iceberg right ahead!!!!" I can see it now....
It was broken in four places. Luckily the broken bits of wood that had come off were found laying on the deck.
AM-JKLVUZpkYAph1oxonPFYyLMHuRrzl2ajCGzns4jTpvVRE5U_rmELQqYBG_5DAAQ_RVTLOmE2rAkdhXmdRYIDaho1J1t3r9B5zMjz-9XGj3mzlpDnS4Te3n-CBYNm91NlUcZwxj7CtXSInzUsrxnQy7ZUr=w1200-h675-no


A plumbing nightmare. See if you can figure it out.
AM-JKLUdyy_5QGVyDn3xSSIXO2vni5et54mly8i0y-Vvox0Vm2niX5erh87qoJ75GPCkvmVh23Nai_Nazq7cJX87nRMFBo0HTjAXIlNjbjrYQaPi9Orxm1LBk9S7GVdWubAcSH-RrjLqY5xPyMhluOQbx8WO=w1200-h675-no


Below deck under the wheelhouse. Looks like fun, right?
AM-JKLULZYpMW5gvPTR4jOL6VsnaV6JUXL8M8xj-cc0WQ9AcWMq8smJ0vh_olOQUDLg1etCfpILl-eoM3G_6uYTyeLhof37ePWTFxJHnlLTxjakg4AThkWryEgqLHJ23XGx5S9twgryjT5cOfoPADxrY-F12=w1200-h675-no


This is behind the electrical panel. And this is AFTER I spent some time sorting out the wires and organising it a bit. Honest!! I did!!!
AM-JKLVhiqscqLG3J5BvkdtMArN7eXpQBCyObOBTJNhpwpp2ZkFBtxpOZ04aWwy8BoaU-i7TUNqR8CaR_Gqn4JVuR--wixI0bbPhBti8i9j0nODi3Z5tPmi-wzLgkDIioUotxWr-QgTOqItYT_eog3FouZMS=w1200-h675-no
 

Attachments

  • Yikes01.jpg
    Yikes01.jpg
    147.1 KB · Views: 226
  • Yikes02.jpg
    Yikes02.jpg
    146 KB · Views: 224
  • Yikes03.jpg
    Yikes03.jpg
    169.9 KB · Views: 227
  • Yikes05.jpg
    Yikes05.jpg
    145.2 KB · Views: 223
  • Yikes04.jpg
    Yikes04.jpg
    148.2 KB · Views: 228
  • Yikes06.jpg
    Yikes06.jpg
    148.4 KB · Views: 229
  • Yikes08.jpg
    Yikes08.jpg
    149.7 KB · Views: 226
Last edited:
Some "BEFORE" Pictures.
You know... To whet your appetite!

Might as well show the "before" state, so that I can show the after pictures later this year..erm.. or next year?.... Or maybe next decade??...LOL:rofl:

A few more pictures:

The electrical panel lower view
attachment.php


Behind the wheelhouse hatch, looking up
attachment.php

Also wheelhouse hatch looking down
attachment.php


This is the "dining room" Don't worry. This is the before picture. I have plans for this space... My winter project while I am hibernating this winter...:angel:
attachment.php
 

Attachments

  • Yikes09.jpg
    Yikes09.jpg
    149.5 KB · Views: 714
  • Yikes10.jpg
    Yikes10.jpg
    146 KB · Views: 717
  • Yikes11.jpg
    Yikes11.jpg
    149.1 KB · Views: 711
  • Yikes12.jpg
    Yikes12.jpg
    149 KB · Views: 714
Looks like a project English TV series "Yes Minister" character Sir Humphrey Appleby would have called "courageous, approaching character forming".
 
OMG. You're gonna have fun..! :D

But it'll be worth it in the end. I can tell you are not only a glass half full typaguy, but also work to the mantra my grandfather often quoted. "If a job's worth doin', it's worth doin' well..!" :)
 
Looks like a project English TV series "Yes Minister" character Sir Humphrey Appleby would have called "courageous, approaching character forming".
Yeah! You gotta have guts to tackle this job. But she does have potential, And the price was right.

OMG. You're gonna have fun..! :D

But it'll be worth it in the end. I can tell you are not only a glass half full typaguy, but also work to the mantra my grandfather often quoted. "If a job's worth doin', it's worth doin' well..!" :)

Or as Red Green used to say: "If the women don't find you handsome, they should at least find you handy" :blush:
f62583fabebefd760c492322a92d3e2a.jpg
 
Looking forward to your progress. You have taken on a challenge. I hope you are retired, have the boat in a heated shed so you can work on at your schedule during the winter without being weather dependent.

Sweat equity can accomplish the otherwise impossible. I guestimate 500 hours of your time will bring it back to new condition.
 
Max - I just sent you a PM with a link to some photos showing deck re-work on my boat by the PO.
Regards,
Nick
 
Max - I just sent you a PM with a link to some photos showing deck re-work on my boat by the PO.
Regards,
Nick
Thanks Nick. Looks like Dave did an awesome job. You acquired a lovely boat!
The pictures were helpful and the Wife and I spent yesterday afternoon reviewing each photo. We feel a lot better about our boat seeing that Dave had many of the same problems and did a lot of the work that we are planing to do.


We realise....We are not alone!
artworks-000466796376-2fz2cm-t500x500.jpg
 
My next post was going to be about an additional list of items that my wife and I would want to repair on this boat. This is not the same as the previous list which were the glaring issues that were on the boat as it was being sold. This list is more of what we'd like to do to make it comfortable for us. But I think now would be a good time to stop and give you a bit of background of what we are aiming to achieve with this boat, before I get into the second list of items “nice to have” items that require time and money, I would like to explain what we really want out of this boat.

As I mentioned in my first post, my wife and I love the RV lifestyle. Our intention here is to transfer our getaways from the RV into a boat. The intention is to do the exact same thing as we did with the RV, but on the water instead of on the road.

Our typical RV travels would be extended weekend adventures. Short hops lasting a week, and longer trips of two or more weeks.

Because I am still working, the majority of our travels up to now have been extended weekend trips. My work allows me to take vacation days singly, and I use some of them on Mondays in the summer. So that gives us a four-day weekend, leaving Friday afternoon and returning Monday night. We would take one or two long trips in the summer as time allowed. Now as retirement looms, we would like to take more and more of the longer trips rather than extended weekend trips. Summer 2021 woke us up to the fact that we really (and I mean REALLY) love the beach. Not being able to get our RV to the beach during our 2021 travels is what prompted my wife and I to consider boating, which ultimately led us here.

Our objective for 2022 is to fix up the boat so that it is operational. We know it will not be perfect, but it will allow us to enjoy using it such that we can start taking as many extended weekend trips as possible. Up to now, my boating experience has been with small sailboats and powerboats. We have owned a 21 foot Sylvan, and still own a small sailboat that has a sleeper, toilet and cooktop. We used to take the sailboat for many 3 day trips until we got our first pop-up. Then the boat took a backseat because it just wasn’t as comfortable as the trailer(s), and we could take longer trips in the trailer.

Now that we are getting a larger boat, we KNOW that there is a lot we don’t know about big boating. So for summer 2022, our intention is to get up to speed and learn slowly. We also know there will be lots and lots of little issues that will spring up as we start to use this boat. Short hops will allow us to learn to use the boat as well as find and fix any issues while still close to home-base. In the following year, 2023, we're hoping to take longer 6 week vacations on the boat.

I don't expect this boat to ever be perfect, and for summer 2022 it will be a far-cry from perfect. We just want it operational so we can start enjoy weekends on the water. No everything will be fixed in 2022, but if it floats and the motor runs and we can sleep in it, we will be good :) .

So this year our repair scheme it's broken down into four phases.
  • Phase 1: Will be to build (& rebuild) some of the interior components that we brought home with us for winter hibernation. Basically from now until spring.
  • Phase 2: will be getting as much work as possible done on the boat while it’s on the hard from spring until launch. In Canada it could be anywhere from the beginning of April to end of April. Launch for us will be our Victoria Day / American Memorial Day weekend.
  • Phase 3: Once it's in the water, the third phase will be to take short vacations on the boat while continuing to do the work on the boat. Of course by that stage, our focus will be to enjoy ourselves but as I can never sit still for very long, I can see myself getting the itch to do something early in the morning or late in the evening when the wife is taking it easy. So that's the plan.
  • Phase 4 will be in the fall when the boat comes out of the water. Whatever big jobs need to be done, we can get some of these jobs tackled on the hard until the boat is wrapped and put away for the winter.
 
Good On you Max, we sound very similar in reasoning and ambition. I have a couple projects to complete prior to the maiden voyage. Then our goal is to enjoy her for the summer on Lake Champlain, while doing minor things(I can't sit still too long either). Then pull her for the winter again but somewhere closer to us. Right now it is four hours away at a marina/boat yard that doesn't allow boatwork on the weekends. I too still work full time and usually adjust my vacation days to get 3 and 4 day weekends.

Look forward to your updates!
 
The “Other” List:
Okay folks. I have an admission to make.
I am a “listmaker”. Not all the time. But when situations require it. Restoring this boat has a lot of “to do” items, and we need to prioritise them.

The first list I shared on page 1 shows the problems that were apparent when we got the boat.
Below is a list of improvements that my wife and I identified for both the short and long term.

Between the first list and this list, I have 90 major items/tasks. Each one obviously needing to be broken down into smaller steps/tasks.
Finally, I have these all on a master spreadsheet and we have taken to prioritizing these tasks, and then breaking down these major tasks into a series of smaller sub-tasks.
As mentioned in my 2022 “four-phases”, some of the tasks will have to be done ASAP on the hard, some of the minor tasks I can do while on the water, and others can wait a few years.
  1. Purchase and Install Windlass
  2. Wire windlass and switches
  3. Portholes replace on Port sides
  4. Porthole replace on front V berth
  5. Fabricate new Vberth cushions
  6. Remove Stateroom drawers and replace with new wall unit
  7. Relocate Diesel Heater
  8. Vberth Locker Shelves
  9. Lower Staircase storage drawers
  10. Install Headliner in stateroom
  11. Install Deck Lighting sides and stern
  12. Aft gunwale entrance door rebuild
  13. Side rails install
  14. Scrape/Sand & Varnish gunwale rails
  15. Install Solar(3 banks)
  16. Hook up new Nav Lights
  17. Solar powered vent in engine bay
  18. VHF Radio install
  19. Depth Gauge operational
  20. Install new Start/Stop Buttons top and bottom
  21. Install new Horns and buttons top and bottom
  22. Install Battery Monitor
  23. LED lighting in Engine Room
  24. Replace Fuel Lines
  25. Service Fuel Filters
  26. H Channel and Windscreen
  27. Flybridge Hatch: make it sliding
  28. Solar powered vent in Flybridge
  29. Assemble/Install Bimini Top
  30. Renovate galley. Relocate appliances and build new cabinetry
  31. Install new, larger refrigerator
  32. Remove galley cupboards and open port windows
  33. Strip and polish stove-top. Reinstall
  34. Gut and replace shower stall
  35. Vanity Cupboard over toilet
  36. Shower Stall ceiling light
  37. Sand and Varnish Swim Platform
  38. Bottom Coat
  39. Swim Platform Ladder
  40. Install Bow Thruster
  41. Name boat
  42. New Registration board
  43. Rub Rail: strengthen or replace
  44. Fabricate and Install Dining chairs
  45. Fabricate dining chair seat cusions
  46. Restore and Install Dining Table
  47. Remove & relocate water heater
  48. Install Headliner living quarters
  49. Make sofa into Sofa-Bed
  50. Repair Front window mounts
  51. Install water tanks
  52. Install Tankless Hot Water
  53. Install Low-Point Drains and HW bypass
  54. Remove Bathroom hatch and replace
  55. Remove front deck side flanges and patch
  56. Remove ugly STBD portholes, patch and replace
  57. Wheelhouse Folding Chair
  58. Window Wiper motor replace and Install

I know some of you folks would look at the two lists I have shown on this thread and walk away shaking your head. Others have already noticed that I am a “glass half full” kind of guy. I cant wait to get at these tasks because….I truly enjoy doing this kind of stuff.
 
Last edited:
What happened to this boat?

This will be my last post of the condition of the boat as it was. (I promise! )

I will call this one “enough to make you weep” aka “what the hell happened to this boat??”

Before, during and after the purchase of this boat, I needed to learn more about this model boat. In my search for information on MT 38 trawlers, I did a lot of internet searches for information. I happened to be searching for information on Lehman diesels and came across a thread on engine compartments right here in this forum. In that thread, I came across a photo that looked like a Marine Trader 36 engine compartment. I looked closer and realized “holy crap, that’s MY boat”. Not like “my” as in “same as my model”, but my EXACT boat. The fellow posting the photo called himself “kyle911” on these forums.
I looked into kyle911 and found that he lived in Ontario not far from where I live, and was a live-aboard boater back in 2014 on the boat I now own. I looked into his post history and on another thread, he happened to post a video of his live-aboard poor weather conditions that winter.
From there I looked up his youtube channel and found he posted a video called “a tour of my boat”. It was not the greatest video, and it wasn’t much of a tour, but I was fascinated to see the condition of the boat when he owned it. Kyle was owner #3 of this boat. Owner #1 was the original owner hailing from New Jersey. Owner #2 bought it from him and brought it to Ontario where he owned it for quite a few years.
In Kyle’s video, I was dumbfounded to see how BEAUTIFUL this boat was, “once upon a time”. There was so much beautiful teak on the boat and the layout was perfect. Somehow, it went to hell somewhere after that video was taken to the present. From what I hear from the guy who sold it to me (owner #5), a lot of the ugliness in the boat was like that when he purchased it. So somewhere between owner #3 and #4, this boat went completely to hell.
I took some still shots from the video (again, not very good video) but I did the best I could. Then I looked through my photo library of the boat that we have taken to put together a before/after collection.
The following photos are not intended to prove anything, other than to share with you guys what I have found when looking up the history of this boat. At least I can share with you readers what I think of its past, what I think of its present, and what I would like to do going forward. I don’t think the boat will ever be restored to its old glory, but we will do our best to make it look as nice as we can. After all, it can only get better from here (I hope!!)
M&H

The Dining seating: In this photo, we can see the boat had a U shaped seat cushions with a pedestal table in the center of the U. This dining area was located in the rear port side of the salon. It has lovely green leather or vinyl seat cushions and nice warm-wood table. I love this layout and am disappointed with what is in the boat now. Also note the beautiful hurricane lamp in the corner.
AM-JKLVPMGiwjHKHAy41eHf6UW4KgLEjQWVPe4fILkGIQ49hft8zEYOYWPFMHsi2Df4-HfaWwmj0ub73uRpVyGyq-fEoCw5Qyb27hiyY_10EHFZ_J8CKRr6rCnzizPYJ-86ENOT5kwYkgZ3YzeZzuOsGIexP=w1500-h879-no


Here is how it looks now. The seats and table are gone. In its place is a large cabinet that holds the hot water tank, and an ugly looking desk that is useless, though I did host a few zoom meetings for work from that desk after we acquired the boat and were working on it :). I plan to remove the cabinet and relocate the hot water tank back to where it belongs in the engine compartment. I also want to build a new dining area in that part of the boat.
AM-JKLWZsN98b7-DD5JGgkjY-5P2rZR8fyTXzv700PiaP59axHZ2rka7YFlW92etiHYUgfnUvpptiHwttqcYIrJnNGJVVFINKnGOJxYacDKfeSMAYSv4Ro0jnO7s3YtDXa-LpLVhoMaAoidCWcpohuDNx3I5=w1200-h900-no


Here is the galley
. It looks pretty basic. One thing to note is the cabinetry that divides the dining area from the galley. The camera was never pointed down so I never got a look at where the fridge might have been or what kind it was.
AM-JKLVutwKVouBZU7YD1uAz83kzKnP4SKMhQRPMEhHlUV-zrzbrX5nWMUpSF4ZQRi151ilRYuv2szjRSUoEmne1kde-q8vIUNBtoE7v8mIrfF4KSyOLBA2FeZuDPLgLD1WhbYX3AydxkMAfgVHAjg-JiA-X=w1500-h880-no


The after picture shows a new countertop. Everything is painted blue. The dividing upper cupboards are gone and instead two cupboards have been mounted on plywood that covers the two windows. The fridge is ill-fitting and 120V. The cooktop/stove was replaced with a different unit that is ugly but still works. Our plans here are to get a 12V high efficiency refrigerator, get rid of the upper cabinets that are there and remove the plywood covering the windows. We really want those windows back. To make up for the loss in cabinetry, I would like to rebuild the base cabinets to add sliding drawers for kitchen utensils. Also, the lower cabinets are not that well laid out. If we get rid of the upper cabinets, we would have to make up the lost storage by improving the lower cabinets to make the storage space more efficient. We might gut the entire kitchen and start from scratch. At the moment, this is not a priority.
AM-JKLVSHqUJywjOjvwET9sjA_0qE2eSvCgJy03qAy9NeUY2Q2ARaEbdv8JXlNEFoOIWRuB1G0yXSvvXLYzfoPCOchgbWz3F7CWFQtNT6BgSjhVdXi4LEVoeVQZUDN1MtZ0WL_ySgv7BZbkwIGUlVlgAjj2W=w1200-h616-no


The electrical panel.
All I said when I first saw the video was “look at all that beautiful wood!!” Also note the hurricane lamp.
AM-JKLVL1aP5BtzD7-YH1mPr0iWelYJpoSRq0fU_Gjzc8649kDb85z1b6QmOWcS-zPzuxNeIaqbfSCIU3WusYAa-Cy7nkAgv56SHZCj8LHNA9ej32p9xG2DQUwf2j-CAwzXyd1JOBHtDJWOSQhep5mP7i0VI=w1500-h879-no


Here is what it looks like now.
All that beautiful teak is gone and instead there is an ugly black panel made from paperboard.
The lower half of that wall is also paperboard and painted blue like the rest of (parts of) the interior.
I don’t know what to do here, other than to just leave it alone for now. Behind the panel, I will be completely re-doing the electrical because right now it looks like a dog’s breakfast and many of the connections are what I would consider poorly done.
AM-JKLVbPQKJCVvMmLAgyCwJGn1iAwaTcdTgE9qSOF5K3aA417oLE6ZbL32qBBOhCp0Cw4V3wslWjIiJ8A3f2m0rJEp0kTL9Amubp8rRbgSEKV5KAMc0F7kJUBP2_-hhKS2lg1UMZwYEJvo9aZhjb0hury8l=w715-h952-no


This is the Sofa, and you can see parts of the electrical panel in this shot as well. This is the rear starboard side of the boat.
Like the dining area, the cushions are a nice green leather or vinyl with separate cushions at the rear. There is also a Sig Marine heater near the rear-entrance door on the right of the photo.
AM-JKLWkmPXzxvjfYlWDcJBf8kqN0525bWbF_kjVJjUfOcLWEaWEss4TD4b6PTdR0s8a8DBb8fnQqm5DATrm1zAvN1gQjG4nfK2x0VGQqFDje6HGSU5K8LnA_dNL5zNuSPEFtA-fYE4F96d4XeDjrXOIRJ9T=w1000-h879-no


In the after photo, the cushions are replaced with very well worn and threadbare blue and white foam cushions.
We have already purchased some fabric and The Admiral will be making new covers for the cushions over the course of this winter. Sometime in the future, I would like to make this into a folding bed.
Also under the frame is a whole bunch of useless crap (speakers, a vent that goes to nowhere, etc) that serves no function. Our long range plan is to get rid of those items and replace them with pull-out cabinets so that we can get to the under-seat storage without having to lift the cushions every time.
AM-JKLWQ-hN9-m_YSwShE_1Q75TruBqrGys2mdMbcmmATX0lNvfjB-TuXtQcDxTMQwk29aD_LvcaiCCX4QRpLvYB3FBhgFpONQezJBDrlE1i9pb2hm9vbn8GLOqr9CneRJvhfGma3E1N8kwpWmSzh9DKiB2t=w941-h952-no


This is the lower wheelhouse. Other than the mess, “look at all that beautiful wood!”. Also note the Hurricane lamp. There are no lamps anywhere on the boat at present. We wish we still had them, not because we want to use them, but because we feel they give the boat some character.
AM-JKLXMKctn2QSYlhF8kP7JWdZWcuU8HlsF5PvsXyzk9F5qtVWVPbhi02EW7fwD-TcIduk6RjvfvpUCHz0h3xRv1OjMB59Vl6Bw13Cuq1XgE2o9HpxX4SXvI6B4KhBnGULACjuEEujeuAPW46nROH7mjIBZ=w536-h952-no


Here, the teak is gone and blue-painted plywood in its place. The teak dash is gone and once again replaced with paperboard painted black. The Tach is missing too. Only two metal and non-illuminated buttons on the front. One is for start. The other does not work. No button for stop. PO had to jump into the engine compartment and manually pull the stop lever when we tested the engine before we purchased the boat. Yikes!!
There is also a mess of wires coming up on the right. Some of those wires also appear in Kyle911’s video. I have no idea why they are there but I will definitely be re-routing or getting rid of these wires!
I will be fabricating a new dashboard with a full complement of gauges. Also, I have purchased nice big new and illuminated start, stop and horn buttons, in green, red and yellow for both the lower and upper wheelhouse.
AM-JKLXKiw_LRG3Kn7eO3wBqPc7JlRnTsa9CN0EtO6OreUYKeL8mnZNAuZj3eeDT4E5_BspvrTwmCX_C0wf_K5wp5jS7c3pKAWXAzR1JhNMO8EHbwloGZ3eui1bUe5sDaB9FIGQD3a2rnDRk2QABc90Mfup9=w701-h952-no


My wife was near tears when she saw the before video and what a beauty this boat once was. The only silver lining in this whole before/after debacle is: I keep telling my wife" "But we got the boat for a great price.." Virtually bargain basement price, and perfect for our budget. Had the boat been in the condition it appears on the video, the purchase price would have been a lot more. A LOT LOT MORE!. Perhaps more than we were willing to spend.
 

Attachments

  • KyleMT01.jpg
    KyleMT01.jpg
    62.3 KB · Views: 128
  • KyleMT01a.jpg
    KyleMT01a.jpg
    181.8 KB · Views: 126
  • KyleMT02.jpg
    KyleMT02.jpg
    73.3 KB · Views: 127
  • KyleMT02c.jpg
    KyleMT02c.jpg
    103.9 KB · Views: 127
  • KyleMT03.jpg
    KyleMT03.jpg
    79.5 KB · Views: 132
  • KyleMT03b.jpg
    KyleMT03b.jpg
    126.7 KB · Views: 124
  • KyleMT04.jpg
    KyleMT04.jpg
    66.9 KB · Views: 125
  • KyleMT04a.jpg
    KyleMT04a.jpg
    160.6 KB · Views: 129
  • KyleMT05.jpg
    KyleMT05.jpg
    60.3 KB · Views: 126
  • KyleMT05a.jpg
    KyleMT05a.jpg
    124.7 KB · Views: 132
Last edited:
I looked at a Marine Trader 36 when I was shopping.
Yes it had all the teak of the before pictures BUT the teak did not look shiny new like those before pictures.
All the teak looked tired, dated and worn out. IMO that happens from lack of maintenance as in oiling every few years. Also from sitting in the cold and damp.

A previous owner like many here did not care for teak and rather than clean and rejuvenate, painted it. You may find teak under that paint. A good sanding can bring it back. The electrical panel with pressboard is another quandary, WHY was that done.
 
Very sad evolution indeed. Clearly whoever did it had no real appreciation of the unique qualities of teak, thought it looked 'old-fashioned', and was attempting to 'modernise' the appearance, rather than apply the elbow grease necessary to return the teak to its former glory.

Not to worry - what's done is done. However take heart from the fact that you can/could do what I did. In restoring the rotted cabin walls, ruined from leaking windows, etc, and the water-stained teak lining the for'd cabin, nearly all the original teak lining the walls of the saloon and for'd cabin had been removed and, in the case of the saloon, replaced with marine ply. In the for'd cabin, the PO had not got round to doing anything but removing all the damaged wall lining and just leaving the bare ribs and black tar-like coating of the inside of the hull.

I decided to bite the bullet, obtained a qood quality teak veneer type sheeting from a nearby timber yard, and completely covered the marine ply walls in the saloon, and, with the same sheeting, relined the for'd cabin walls, taking advantage at the same time while doing this, by stuffing the voids between the ribs with insulation, which greatly improved the temperature in that cabin, and reduced the water lapping sound at anchor as well. Amazing how good it all came up. Teak beading to cover joins and minor defects did wonders.

Although I have no before photos, if you can imagine the walls in the for'd cabin showing bare off-white fibreglass ribs about 8cm deep, and the surface between just mat black, and all the walls in the saloon just an unpainted pale plywood colour, and then see how both areas appeared in after photos below, it will give you a good idea of what is possible.
 

Attachments

  • 922D6CC3-F700-434E-822B-619332E25438.jpg
    922D6CC3-F700-434E-822B-619332E25438.jpg
    83.3 KB · Views: 25
  • 551A4CC7-8ABB-4BC1-88E2-97B1C6252B82.jpg
    551A4CC7-8ABB-4BC1-88E2-97B1C6252B82.jpg
    101 KB · Views: 30
  • E15E1883-BC2C-41A0-B43A-9658721F20A4.jpg
    E15E1883-BC2C-41A0-B43A-9658721F20A4.jpg
    106.2 KB · Views: 24
  • F903CFB5-63F5-4697-9043-8BD6DAB42643_1_105_c.jpeg
    F903CFB5-63F5-4697-9043-8BD6DAB42643_1_105_c.jpeg
    73.7 KB · Views: 23
  • 71733035-2B8F-492D-ACC8-C90950AE9A85_1_105_c.jpeg
    71733035-2B8F-492D-ACC8-C90950AE9A85_1_105_c.jpeg
    65 KB · Views: 24
Last edited:

Latest posts

Back
Top Bottom