Our 34 classic maintenance & upgrades

The friendliest place on the web for anyone who enjoys boating.
If you have answers, please help by responding to the unanswered posts.

boomerang

Guru
Joined
Apr 29, 2016
Messages
1,398
Location
united states
Vessel Name
Wandering Star
Vessel Make
PSN40
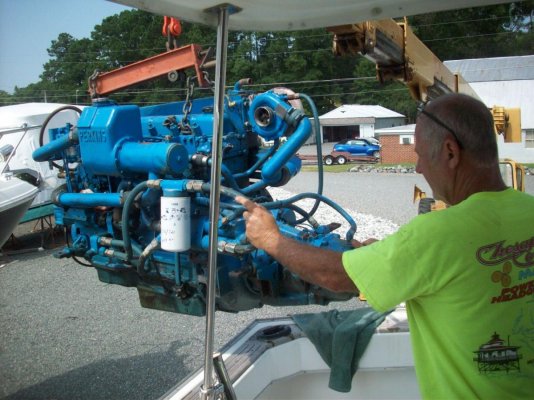
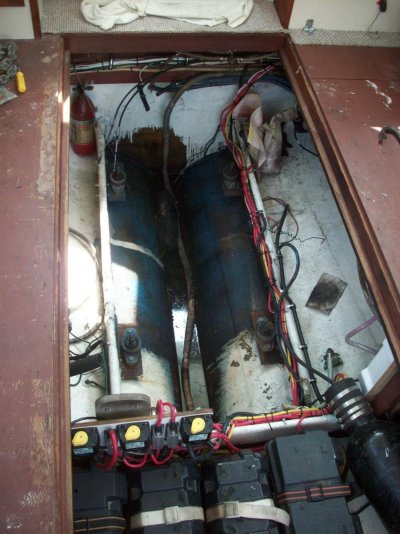
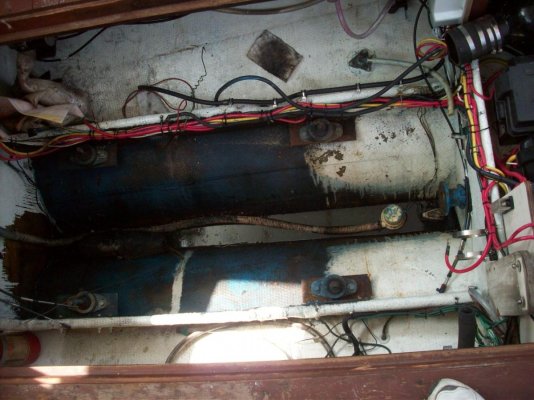
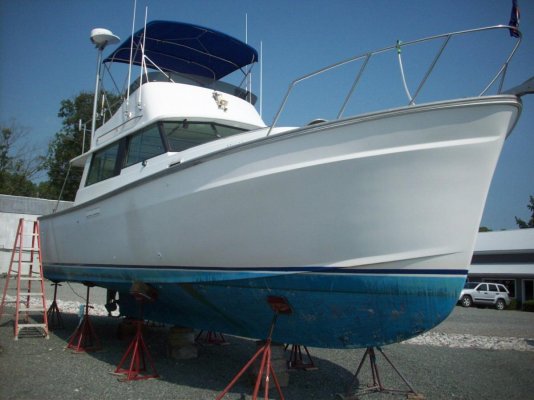
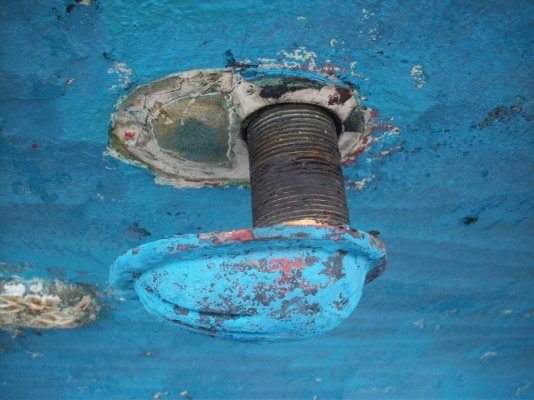
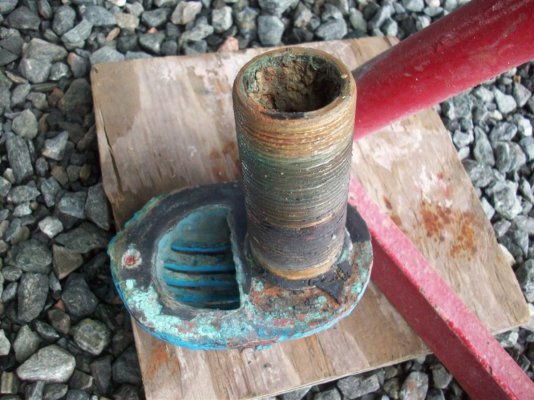
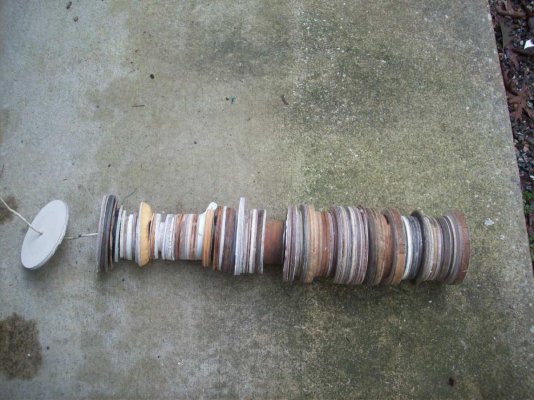
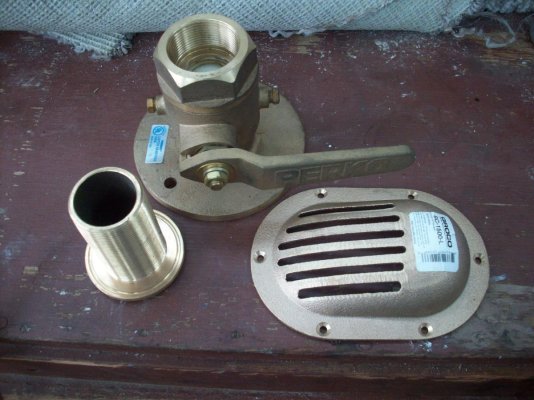
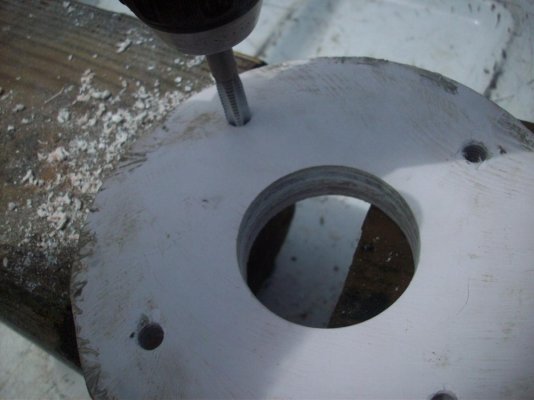
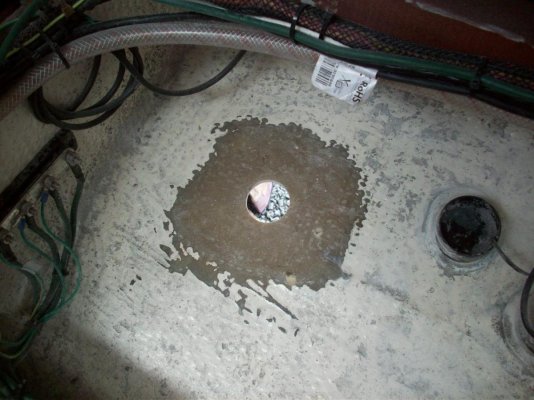
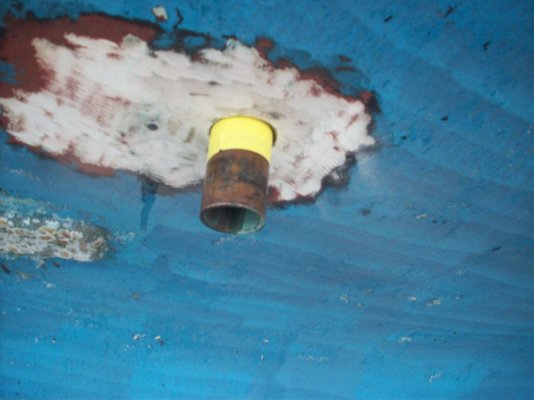
Well ,we finally got the boat around to the boatyard , Chesapeake Cove in Deltaville ,this morning to take care of the annual bottom painting ,hull waxing and zinc replacement. Also upcoming will be the engine cooling water intake seacock replacement & plucking the engine out so we can replace the 43 year old seals & gaskets that are finally showing their age and leaking when the engine is run 1850 or above.
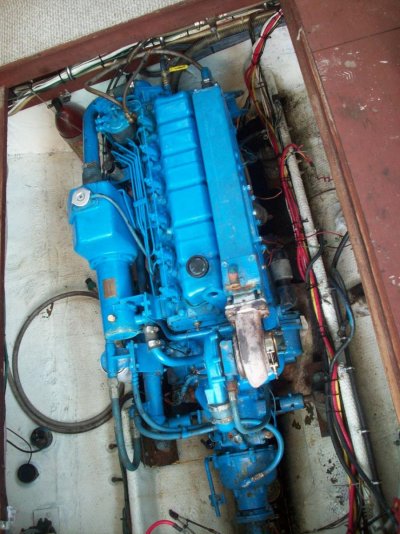
For some reason, when we keep the RPM's around 1650...which is our normal low-cruising rpm anyway ,the bilge stays clean. When we need to push the rpm's to make a bridge opening or fight a tide, the darn thing leaks oil. Not hardly a drop at low speed though. Go figure. I'm pretty sure the majority is coming through the rear main seal. Anyway, oil in the bilge is unacceptable ,as is not being able to run at a higher rpm if we want to, so out comes the engine!
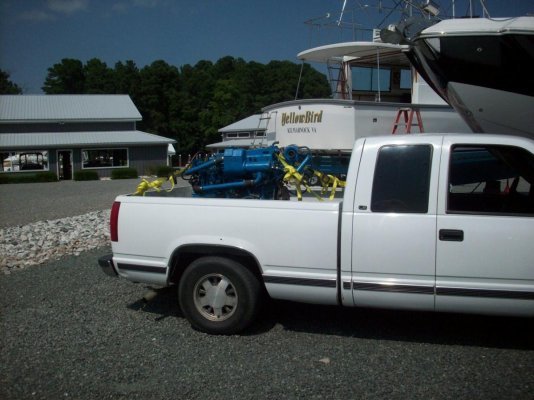
This past winter I called Trans Atlantic and spoke with Sherri. She said that they were really busy at the time but indicated summer would be a better time to get them to spruce up our Perkins. Well, I called them today (sherri was on vacation) but I was told that they were now booked until December! I'm happy that Trans Atlantic Diesel is busy but very disappointed that they won't be able to accommodate us. Luckily for me,I have a friend, Mike West, who owns a diesel repair business and he happened to be installing a generator in a Luhrs at the boatyard where we are. I explained to him my predicament and he said if I bought the motor to his shop, he would go through it for me. So yay! The day was saved! While the engine is out, I'll also replace the clutch damper if it needs it (I'm sure it will) and get Chesapeake Cove to put a clutch pack and seals in our Velvet Drive clutch. Updates for those who want to share my pain to follow!
 

Attachments

  • 102_0141.jpg
    102_0141.jpg
    122.9 KB · Views: 35
  • 102_0142.jpg
    102_0142.jpg
    134.5 KB · Views: 39
  • 102_0143.jpg
    102_0143.jpg
    137.3 KB · Views: 42
  • 102_0144.jpg
    102_0144.jpg
    165.6 KB · Views: 40
First pic, furniture removed.
2nd- carpet up and hatches removed. Damn that's some ugly paint mainship used to treat their wood.
3rd & 4th- AC pump & strainer removed, raw water strainer removed , exhause system disassembled, alternator removed, electrical ,fuel & water lines to the cabin heater & water heater removed.
Tomorrow, I'll uncouple the shaft & pull it back and unbolt the motor mounts. Maybe it'll be pulled out tomorrow too, if they have time.
 
I few drops now and then can be accomodated by a "diesel diaper".

pete
 
I few drops now and then can be accomodated by a "diesel diaper".

pete

I've stuck them everywhere I can reach but the trouble is ,on this boat, the engine is tucked down so deep in the middle and so close to the hull in places that it makes it darn near impossible to lay diapers in a lot of places. I wish that ,when Mainship built the boat, they incorporated a couple of bulkheads under the engine with a limber hole tube so the bilge water to pass through but any oil leaks would be contained. There's really not any room for a drip pan.
Like I said, I'll use the engine removal opportunity to replace the damper plate,go through the clutch and perform any other engine room feats that are hindered with the engine in place.

I'm keeping my fingers crossed that I don't open up another can of worms with this project like I have with a couple of the previous projects.
 
The top side of the engine is nice and clean, I'm envious of that. Mine was repainted with poor prep and the wrong shade of blue as well, it really look bad. As I have been replacing cooling components, I have been working everything back to the original blue color.

I have been able to squeeze small disposable backing pans under the engine and laid oil sorb pads across the top of them, I removed them all when I cleaned the cleaned up the port side of the engine during my cooling refresh and need to replace them. I am anxious to see where exactly your oil is/was leaking from. Best of luck.
 
Do you know about the starboard forward engine mount bolts and their reputation for leaking oil?
They are actually studs, and two of them are threaded into a pressurized oil gallery.
You can remove them , one by one, clean the thread and reseal them.
Mine were leaking to the tune of about a quart every 8 engine hours.
After resealing, zero.
Hope this helps.
 
The top side of the engine is nice and clean, I'm envious of that. Mine was repainted with poor prep and the wrong shade of blue as well, it really look bad. As I have been replacing cooling components, I have been working everything back to the original blue color.

I have been able to squeeze small disposable backing pans under the engine and laid oil sorb pads across the top of them, I removed them all when I cleaned the cleaned up the port side of the engine during my cooling refresh and need to replace them. I am anxious to see where exactly your oil is/was leaking from. Best of luck.

I prepped ours the best I could when we put the new riser ,turbo ,blankets & manifold on a couple of years ago but it's still hard to get everywhere prepped & painted.
I'll come clean with our paint. The flat ,drab Perkins blue just didn't do it for me. I definitely wanted to keep a blue but wanted to add a little pizzazz to it, especially with the shiny new turbo blankets . I used what they call a safety color in Ace Hardware stores. The safety blue almost has a glow to it & that's what you're looking at!
 
Do you know about the starboard forward engine mount bolts and their reputation for leaking oil?
They are actually studs, and two of them are threaded into a pressurized oil gallery.
You can remove them , one by one, clean the thread and reseal them.
Mine were leaking to the tune of about a quart every 8 engine hours.
After resealing, zero.
Hope this helps.

Jay, yes ,you were the one who explained to me about the front starboard studs being drilled through into the oil passage. I did ,in fact, pull them out 1 by one and reseal the threads. It took me 2 tries with Permatex #2 being the winner but that sealed the big leak at that time. Now the rear main seal is in need of attention so it's time to bite the bullet & pull the engine.
 
I used what they call a safety color in Ace Hardware stores. The safety blue almost has a glow to it & that's what you're looking at!

I used the same Ace paint on the outlet elbow on the front side of the engine coming off of the thermostat housing as well as the pipe it connects to along the coolant path to the heat exchanger tank. It is a pretty close match to the paint from my new expansion tank as well the oil& transmission cooler. I wire wheeled and painted everything I could reach on the port side of the engine block and oil pan while I had the raw water pump off. I'll slowly get it the right color and the engine cleaned up in the process. I just got the system back together this week and hopefully am done with engine work for the rest of the season, now it is time to cruise a little further from home.
 
Have you considered any bilge modification to catch miscellaneous drips under the engine while it is out?
 
Shawn, do you have a water cooled turbo ? Looks different than mine. And you have a muffler, I don't. Always wondered about that.
Anyway, big job ahead best of luck and hope it doesn't go south. All my projects seem to also. I'm adding an electric pump to the fuel system next trip to the boat. Can only get 1900 - 2000 rpm out of mine. Like you I run at less but want to have it if needed. I'm thinking air in the lines but I can't find anything loose. Due for a filter change anyway.
 
Have you considered any bilge modification to catch miscellaneous drips under the engine while it is out?

I have.indeed, but I really don't have the time to add another fairly simple but time-consuming project to my plate. It sure would be a nice improvement to the boat ,having an incorporated drip pan under the engine, but the plan is to not have any leaks when the engine goes back so I'll put my attention towards the more pressing modifications, like replacing the crappy engine seawater seacock!
 
Shawn, do you have a water cooled turbo ? Looks different than mine. And you have a muffler, I don't. Always wondered about that.
Anyway, big job ahead best of luck and hope it doesn't go south. All my projects seem to also. I'm adding an electric pump to the fuel system next trip to the boat. Can only get 1900 - 2000 rpm out of mine. Like you I run at less but want to have it if needed. I'm thinking air in the lines but I can't find anything loose. Due for a filter change anyway.

No, the turbo is oil cooled. I can't remember the model but I'm pretty sure it's a Holset.
Dang if I wouldn't look at those fuel filters first. That seems like the usual culprit for a slow-turning engine.
I added an electric pump in the fuel system but it's to assist with priming the system if needed. It ,in theory, can be used to run the engine if the lift pump goes bad but I've never used it that way. I can't remember who it was ,but somebody from this forum warned me that the Cav injection pumps used on Perkins engines were susceptible to blowing out internal seals if they were supplied with too much pressure. Like I said, I haven't run the engine with the electric pump (it's a cheap Chinese e-bay special with the advertised output of 2.5-4 lbs of pressure ,but for all I know it's putting out 25lbs of pressure. I don't think the manufacturing standards in China are too stringent :rolleyes:), I've only primed it (way easier than trying to purge the system with that little plunger on the side of the Perkins lift pump). Guess what? After I installed the electric pump (and at the same time a selector valve to be able to select the tank where the excess fuel returns), our injector pump developed a small leak at [I think] the throttle lever. Nothing that a small piece of absorbent diaper doesn't handle but it sure is a big coincidence that the leak showed up after I modified the fuel system. Another thing that'll be easier to diagnose & repair while the engine is out and sitting in front of me instead of in the boat.
The purpose of my rambling is to warn you of the pressure sensitive Cav pumps being supplied by an electric pump.
 
No, the turbo is oil cooled. I can't remember the model but I'm pretty sure it's a Holset.

Holset 3LD I believe.
You can also use a Holset H1C if you modify the intake hose. This model Turbocharger was used on the early Dodge/Cummins pickup trucks and is very easy to find at a reasonable price and you can still but rebuild kits for them.
 
Solly, I have had the same problem of only reaching 1900-2000 RPM two times in 6 years and each time the problem was fuel restriction cause by the engine mounted filter. After changing the engine mounted fuel filter WOT was no problem.
 
No, the turbo is oil cooled. I can't remember the model but I'm pretty sure it's a Holset.
Dang if I wouldn't look at those fuel filters first. That seems like the usual culprit for a slow-turning engine.
I added an electric pump in the fuel system but it's to assist with priming the system if needed. It ,in theory, can be used to run the engine if the lift pump goes bad but I've never used it that way. I can't remember who it was ,but somebody from this forum warned me that the Cav injection pumps used on Perkins engines were susceptible to blowing out internal seals if they were supplied with too much pressure. Like I said, I haven't run the engine with the electric pump (it's a cheap Chinese e-bay special with the advertised output of 2.5-4 lbs of pressure ,but for all I know it's putting out 25lbs of pressure. I don't think the manufacturing standards in China are too stringent :rolleyes:), I've only primed it (way easier than trying to purge the system with that little plunger on the side of the Perkins lift pump). Guess what? After I installed the electric pump (and at the same time a selector valve to be able to select the tank where the excess fuel returns), our injector pump developed a small leak at [I think] the throttle lever. Nothing that a small piece of absorbent diaper doesn't handle but it sure is a big coincidence that the leak showed up after I modified the fuel system. Another thing that'll be easier to diagnose & repair while the engine is out and sitting in front of me instead of in the boat.
The purpose of my rambling is to warn you of the pressure sensitive Cav pumps being supplied by an electric pump.

My CAV pump leaked at throttle lever before rebuild. Since rebuild, not leaking with Walbro electric pump at 6 to 8 psi pressure
 
I have the Holset H1B turbo and having a hard time finding a rebuild kit for it. H1C yep, B no. Hard to find a water cooled turbo at a good price


I bought the Chinese electric pump off Amazon too. Rated for 6-9 lbs pressure. The lift pump is rated for the same from what I have seen and read. I'm sure it will turn out to be a major project
 
Here's our poor girl on the hard. She's in desperate need of a good hull washing. I bought a buffer so maybe it'll make the hull shine one more time. The gelcoat is wearing thin but I'm not in a hull painting mode this year.
The shaft was a SOB to slide back this time. I've slid it back in the past with no issues but this time it didn't want to budge. I loosened the packing gland and removed the set screws from the carrier bearing and then sprayed everything liberally with PB blaster. After emery-clothing the shaft ahead of the bearing I could pry it back a few inches by sticking a screwdriver and then pry bar between the shaft couplings but I wasn't too keen on wedging the shaft back via the couplings. I'm not sure whats going on with it. It must be in the bearing.
A big reason we bought the boat in the first place was the shaft, cutlass bearing & housing ,carrier bearing and stuffing box was all rebuilt just prior to us buying it. Everything still looks about as good as it did when we got it.
I thought removing the doors was going to be a piece of cake because when we rebuilt the flybridge floor several years ago, we also rebuilt the salon door threshold. I removed the doors & frame, rebuilt the threshold under the frame and reinstalled the frame. It admittedly was a little tight because I got too rambunctious with the crown in the cockpit and the center is a little high, but the doors went back in without too much problem. Well this time ,they absolutely would not come out of the frame without me jacking the roof up with a bottle jack. It must be the way the boat is blocked but I can't say I'm looking forward to reinstalling them. That ordeal put me behind a few hours and by the time I was done, I was too hot & tired to tackle the engine removal, so now that's been put off until Monday.I can't seem to ever get ahead of schedule but oh well...at least we're moving in the right direction.
 

Attachments

  • 102_0146.jpg
    102_0146.jpg
    114.1 KB · Views: 19
  • 102_0150.jpg
    102_0150.jpg
    131.3 KB · Views: 17
  • 102_0152.jpg
    102_0152.jpg
    133.6 KB · Views: 20
  • 102_0153.jpg
    102_0153.jpg
    118.8 KB · Views: 22
OK, we're getting serious with it now. Gee wiz a shooting boom cherry picker makes engine removal easier. That and the engine leveling thing the boatyard let me use instead of just a piece of chain.
The engine came out without a hitch, other than me forgetting to disconnect the throttle cables.:banghead:
We picked the engine up until it was clear of the salon floor & then kept shortening the boom until the engine got to the transom. We swung the engine around in a athwartship position which allowed the boom to clear the cockpit room overhang where we could pick the engine up & over the transom. It sounds harder than it was.
Once on the ground, I pulled the bell housing off to be able to remove the damper plate. I was figuring on replacing it anyway, just as a matter of preventative maintenance but it was definitely time for replacement! 2 of the springs were broken!
We loaded the blue beast into the back of my pickup ,where I made the 45 minute drive to Gloucester VA to the mechanic. Now shes in his shop where she'll get new seals & a pan gasket. The 2.10:1 Velvet Drive clutch is in the marina's shop where they're going to go through it & replace the seals also, again ,for preventative maintenance.
This weekend I guess I'll wet/dry vac the bilge to get it ready for a new coat of paint. There's still lots to do but there's less than there was!
 

Attachments

  • 102_0155.jpg
    102_0155.jpg
    164.7 KB · Views: 13
  • 102_0159.jpg
    102_0159.jpg
    203.4 KB · Views: 13
  • 102_0165.jpg
    102_0165.jpg
    170.1 KB · Views: 12
  • 102_0166.jpg
    102_0166.jpg
    131.9 KB · Views: 15
Oh, I forgot to post a picture of the engine area. It's not too impressive with no engine in it. You can tell how tightly the engine was tucked in between the stringers and down close to the hull by not being able to thoroughly clean clean it much less get a paint roller in there! That'll all change here, in the near future.
 

Attachments

  • 102_0156.jpg
    102_0156.jpg
    146.2 KB · Views: 26
  • 102_0157.jpg
    102_0157.jpg
    144 KB · Views: 24
It rained Sunday but we washed the boat with cleaner to remove the brown ICW mustache. I played with the buffer a little today but it's going to still take a lot of elbow grease to make the hull shine much.
The 2 areas midships and aft are where the giant ball fenders we have on the dock rub the hull (We don't have a traditional slip with spring pilings. It just lays on the face of the "L" at the end of the dock). I guess I ought to get some fender covers made.
 

Attachments

  • 102_0154.jpg
    102_0154.jpg
    110.1 KB · Views: 20
How is the project going? Best of luck.
 
I'm going to jump back on the boat this upcoming weekend. My plan is to get the new thru-hull installed & the engine room cleaned & painted. I'm loosing my helper Sunday because school starts up again so Liz lives at our house in SC where her district is & I stay here. We commute on a lot of weekends, which kills our spare time. Since "retiring" after I sold my business, I went back to work full time until Liz retires from her teaching career in a couple of years (hopefully!). It was a whole bunch easier getting projects done when I was self employed and could take off whenever I needed and as long as I needed!
I'll report back with my anticipated progress!
 
With the engine out it's also a good time to re-plumb the domestic water system if it has not already been done. Pex or pvc, and make it so you can drain it for winter.
Might be time for new fuel hoses/tubing as well.
Looking good.
 
I went to the boat today but yesterday was a wash. Literally, since it rained all day & we just stayed home, read & drank wine!
I was anticipating the engine raw water seacock removal to be a SOB since it probably hasn't been touched since it was installed 43 years ago. Luckily for me, I was able to disassemble the whole thing with nothing but a large pair of channel lock pliers which was extra lucky since I forgot to bring the pipe wrench I thought I was going to be needing. It probably also helped that the boat has spent most of her life in the brackish waters of the upper Chesapeake & Potomac.
The strainer stabilizing bolt was completely deteriorated yet the actual through hull was in ok condition. It wasn't leaking but it was bedded in something that looked like roof tar. The main reason I'm replacing it ,other than the completely unorthodox/incorrect way the seacock was mounted to the through hull, is that the existing seacock was hard to open & close since the rubber cone was distorted.
I also gave the bilge a good scrubbing and vacuuming with a wet/dry vac & it'll get a fresh coat of paint before the engine goes back in.
The pic below shows the infamous Mainship seacock mounting. I would shake my head every time I looked at it!
 

Attachments

  • 102_0201.jpg
    102_0201.jpg
    93 KB · Views: 12
The whole assembly was really easy to get apart! I was amazed! I was also amazed that it wasn't leaking. The lone strainer bolt wasn't doing much good.
 

Attachments

  • 102_0202.jpg
    102_0202.jpg
    99.4 KB · Views: 12
  • 102_0203.jpg
    102_0203.jpg
    103.8 KB · Views: 10
  • 102_0204.jpg
    102_0204.jpg
    105.3 KB · Views: 11
  • 102_0205.jpg
    102_0205.jpg
    109.3 KB · Views: 10
Again, it was a rarity that this stuff came apart with ease after 43 years. I guarantee the one I put in won't be as easy to come out in 2064.
 

Attachments

  • 102_0206.jpg
    102_0206.jpg
    126.7 KB · Views: 8
  • 102_0207.jpg
    102_0207.jpg
    109 KB · Views: 10
  • 102_0208.jpg
    102_0208.jpg
    137.5 KB · Views: 7
  • 102_0209.jpg
    102_0209.jpg
    155.2 KB · Views: 9
Last edited:
When I was in business for myself, every time I would get a good cutout from an instrument or speaker install, I would keep it. Everyone would ask me what I was doing with a string of fiberglass donuts. Well, here's one of the uses! I found 2 6" speaker cutouts, which were perfect for the Perko seacock flange, and laminated them together to make a backing block 1/2" thick.
I had to enlarge the hole in the hull from the cutout for an 1 1/4" through hull to accommodate the new 1 1/2" one.
I drilled and tapped the backing plate for the new flange, ground and leveled the bilge for where the plate sits and epoxied the plate in.
 

Attachments

  • 102_0196.jpg
    102_0196.jpg
    186.4 KB · Views: 13
  • 102_0210.jpg
    102_0210.jpg
    62.3 KB · Views: 13
  • 102_0213.jpg
    102_0213.jpg
    139 KB · Views: 10
  • 102_0217.jpg
    102_0217.jpg
    83 KB · Views: 8
  • 102_0215.jpg
    102_0215.jpg
    111 KB · Views: 11
  • 102_0214.jpg
    102_0214.jpg
    139 KB · Views: 12
  • 102_0216.jpg
    102_0216.jpg
    136.7 KB · Views: 9
  • 102_0218.jpg
    102_0218.jpg
    130 KB · Views: 9
When the epoxy kicks and when I get time,maybe sometime this week, I'll back out the piece of pipe I have in there to keep everything lined up and screw in the new through hull...after I cut it to the correct length, UNLIKE Mainship did. :banghead: At least I hope I'll be able to back the pipe out! The yellow tape is so hopefully the little bit of excess epoxy will stick to the tape & wont stick to the pipe!
I'll also add the strainer scoop. The hull is 1/2"+ thick in that area so I'll be real careful with a marked drill bit and fasten it with 3M 5200 adhesive/sealant & some stainless self-tapping screws.
 

Attachments

  • 102_0220.jpg
    102_0220.jpg
    86.8 KB · Views: 7
Below the water I like to use bronze hardware because S/S can get crevice corrosion. Work looks great so far.
 

Latest posts

Back
Top Bottom