Boathouse Construction Projects

The friendliest place on the web for anyone who enjoys boating.
If you have answers, please help by responding to the unanswered posts.

syjos

Guru
Commercial Member
Joined
Nov 8, 2012
Messages
2,315
Location
USA
Vessel Name
Sandpiper
Vessel Make
Bluewater 40 Pilothouse Trawler
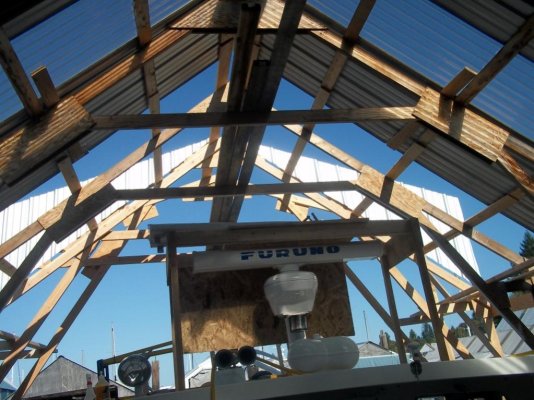
Our Yacht Club is nearing the renewal of the Washington State Department of Natural Resources Aquatic Lease. The State owns the water and the bottom underneath the major portion of the clubs docks and leases it to the club. The club was told that all styrofoam dock floats need to be encapsulated before renewal, along with other requirements such as replacing all creosoted wood pilings.

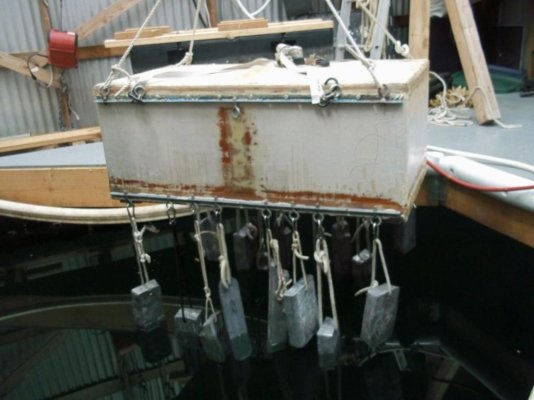
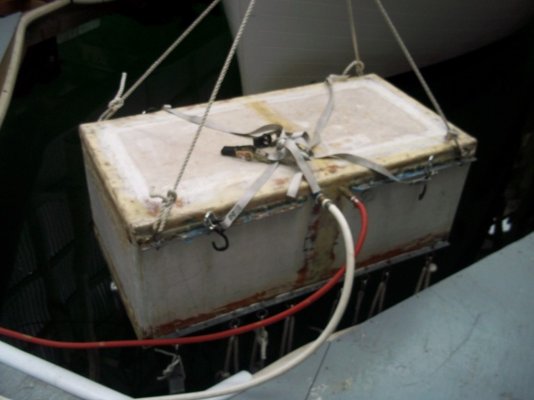
I own the boathouse so have been replacing 10 floats per year for the last two years with foam filled rotational molded tubs. The tubs are 2' X 2' X 4' and have 866 pound buoyancy. I built a submercible tank to sink and install the tubs under the boathouse.

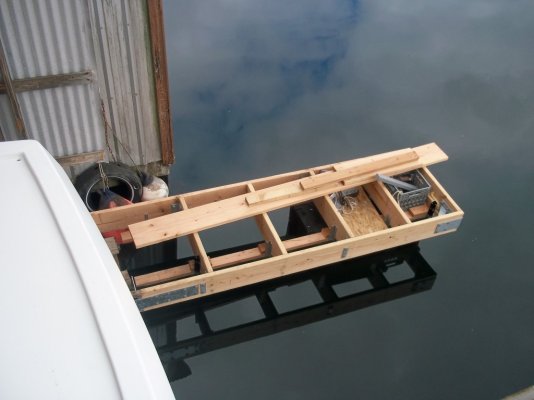
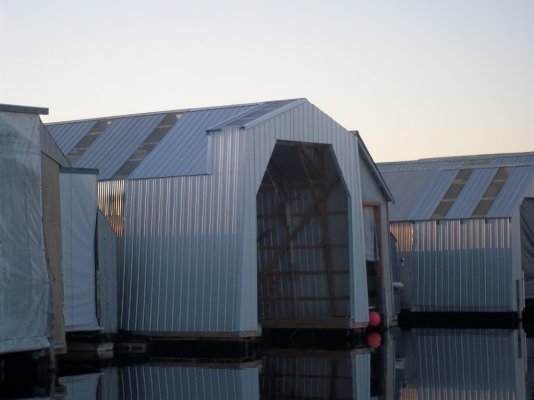
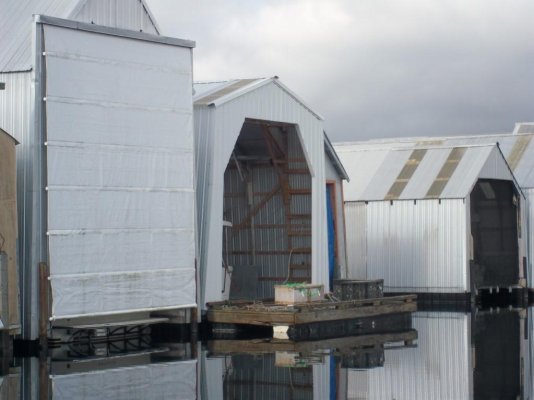
These pictures show the dock with the tubs and submercible located at the water side of the BH. The club has several movable floats and a push boat to move the docks.

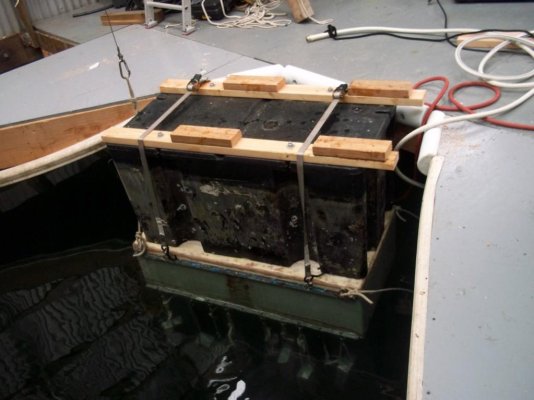
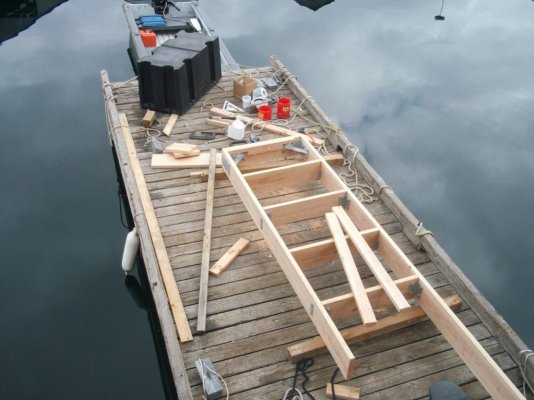
First project this year was to remove the 2' x 2' x 4' tubs installed two years ago on either side of the large opening and replace them with a 2' x 3' x 4' tub with 1297 pound buoyancy. That end of the boathouse became heavier with the installation of a curtain and track causing that end to sag.

The dock was securely tied to the BH so as to hold that end from dropping too low after the tubs are removed. Too much sag and installation of the tubs would require more weight.

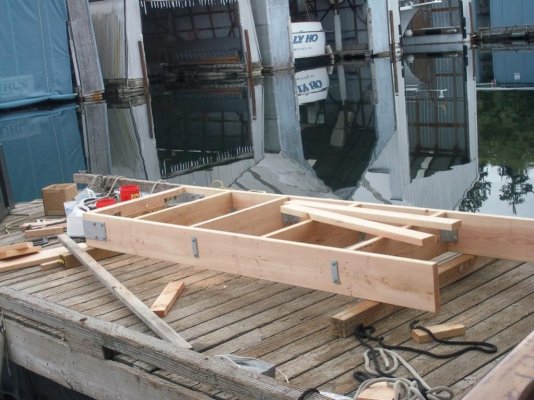
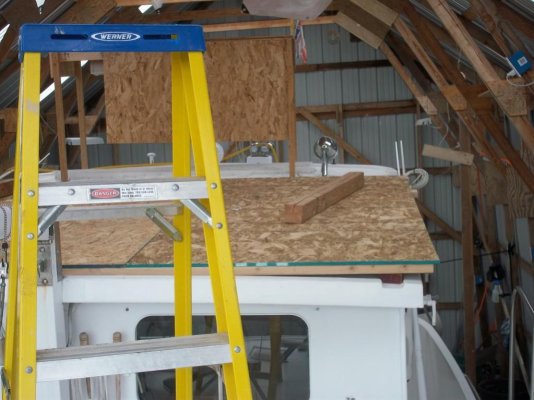
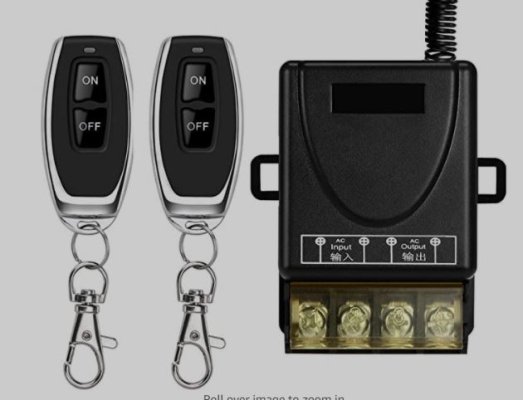
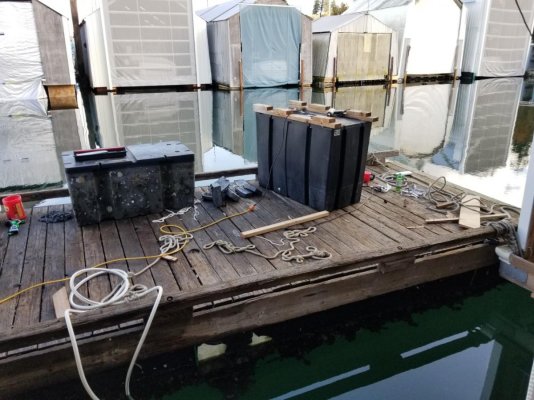
Second picture shows the larger tub next to the small one that was removed. The tubs are removed with an electric winch attached to the opposite side of the BH and a cargo strap around the tub.

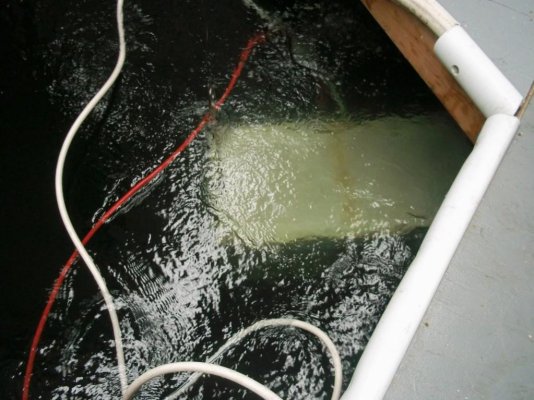
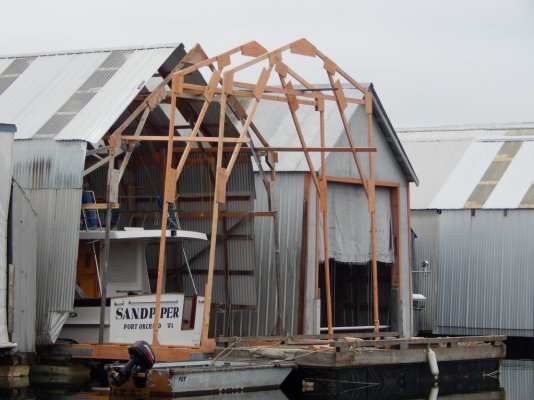
Third picture shows the two removed tubs after pressure washing off the growth.

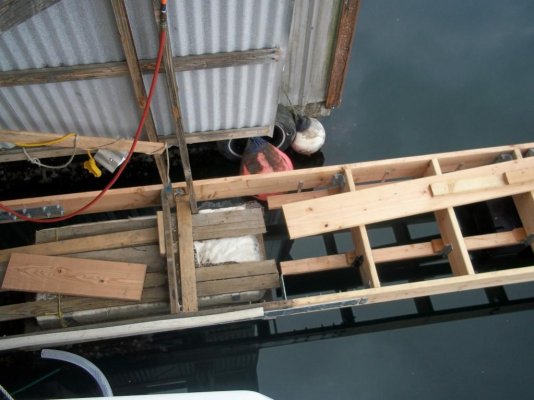
The pictures of the removal and installation at this end was accidently erased. Oops!

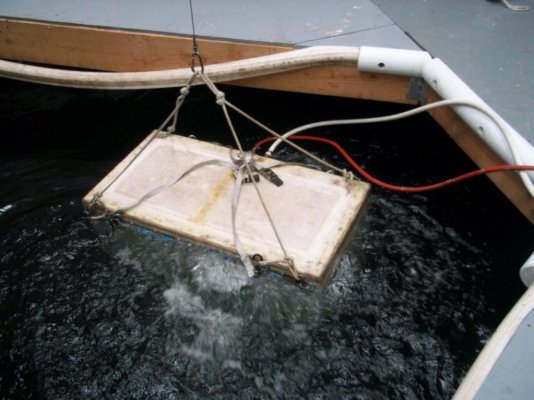
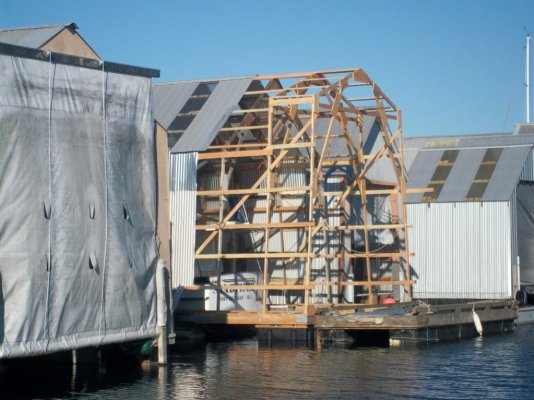
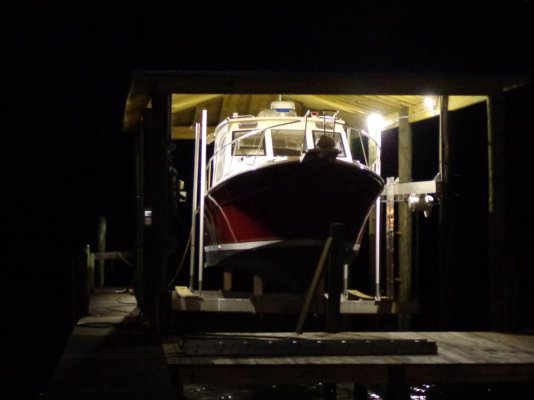
4th picture shows the installed deeper tub.
 

Attachments

  • 100_3799 (Medium).jpg
    100_3799 (Medium).jpg
    73.9 KB · Views: 34
  • thumbnail_20201020_131134.jpg
    thumbnail_20201020_131134.jpg
    149.9 KB · Views: 32
  • 100_3801 (Medium).jpg
    100_3801 (Medium).jpg
    114.8 KB · Views: 31
  • 100_3805 (Medium).jpg
    100_3805 (Medium).jpg
    99.5 KB · Views: 29
Last edited:
The two removed tubs will be installed at the middle of the BH continuing the replacement of the old floats. The old styrofoam floats are removed with the electric winch, pulling from the opposite side.

Here is the submercible suspended from the roof truss with enough lead to sink the tub. These 2 foot deep tubs will require around 650 pounds of lead.

The second picture shows the tub fastened to the top of the submercible. The 2X4's on top will fasten to the underside of the decks.

Third picture - Going down and placed.

The bottom of the submercible has a large hole and I sink it by opening a valve on a hose connected to the submercible which allows air to 3scape and water to enter from the bottom hole. I use an air hose attached at the top of the tank to blow the water out the bottom with compressed air.
 

Attachments

  • 100_3807 (Medium).jpg
    100_3807 (Medium).jpg
    74.3 KB · Views: 31
  • 100_3811 (Medium).jpg
    100_3811 (Medium).jpg
    78.2 KB · Views: 32
  • 100_3814 (Medium).jpg
    100_3814 (Medium).jpg
    66.5 KB · Views: 28
Last edited:
Tub in position, pop air into tank to raise the tub so it's tight against bottom of dock, install brackets to fasten 2X4's to dock frames, disconnect straps holding tub to tank.

Let out air from tank, sinking it slightly, pull it out from underneath dock with the attached cable. Picture 2.

Third picture shows water being blown out bringing tank to surface.

Fourth pictures show the submersible hoisted out of the water after two tubs installed. You can see the straps used for securing tub to tank and the two hoses. White hose for letting air out and the red hose for air from compressor.
 

Attachments

  • 100_3815 (Medium).JPG
    100_3815 (Medium).JPG
    190.3 KB · Views: 25
  • 100_3820 (Medium).jpg
    100_3820 (Medium).jpg
    109.6 KB · Views: 24
  • 100_3809 (Medium).jpg
    100_3809 (Medium).jpg
    88.3 KB · Views: 25
  • 100_3808 (Medium).JPG
    100_3808 (Medium).JPG
    175.9 KB · Views: 24
Here are pictures from my boathouse extension project completed last year.

Pictures show club docks used to move supplies and a stable platform for removing the end of the boathouse and building the dock framing.

Picture 1 and 2 shows dock extension assembled from Douglas Fir lumber is used since it has more strength and rot resistance Than Hemlock. One tub will be attached to the bottom of the dock prior to placing in water. Very tipsy. Until the dock section is bolted to the existing dock, it is top heavy and will turtle if not careful.

Third pictures after the curtain side of the boathouse removed. Lots of steel to build and connect the new dock sections.

New section attached with one float for now, Pic 4. Not enough weight to submerge the tub to correct depth with two tubs making lining up and connecting the new section to old difficult. Especially since working alone.

Pic 5 shows the lead weights on top of the OSB and in the milk crate to sink the tubs to correct depth. After the end is framed and sheathed, the second tub will be placed using the submersible tank.
 

Attachments

  • 1 (Medium).jpg
    1 (Medium).jpg
    92.4 KB · Views: 15
  • 9 (Medium).jpg
    9 (Medium).jpg
    124.3 KB · Views: 15
  • 2 (Medium).jpg
    2 (Medium).jpg
    81.4 KB · Views: 13
  • 3 (Medium).jpg
    3 (Medium).jpg
    85 KB · Views: 13
  • 10 (Medium).JPG
    10 (Medium).JPG
    189.9 KB · Views: 13
Last edited:
First picture shows OSB placed on pilothouse roof to provide a stable place to work.

The OSB box was built around the radar antenna to protect it from accidental damage.

Built the trusses/frames against the existing truss/frame on the end using it for a pattern. The slope of the roof was changed on the last two trusses to create a raised opening for the curtain to slide across the opening. Previous curtain was a roll up.

To move and place the truss/frames, they were secured to the top of the boat and the boat was moved to locate the truss in the correct position.

2nd pictures shows the three truss/frames in place.

Lath installed in pic 3.

Sheet metal being applied on the end wall of the raised curtain box.

5th picture shows siding sheet metal installed, the rest of the floatation placed and awaiting the curtain. You can see the different roof slope of the curtain box from the rest of the boathouse.

That end ended up lower in the water then the rest because of the additional weight from the curtain and it's track. That necessitated removing the 2' deep floats and replacing with the 3' deep floats installed in post #1 above. That gained over 800# of buoyancy.

This extension is the last project on the boathouse, other than finish replacing floats. Since purchasing the boathouse in 2002, the roof had to be raised 3' to get Sandpiper to fit, widened 2 feet, installed new roof sheet metal with 25% clear panels and the 10' lengthening.

At the time of boathouse purchase in the early 2000's, boathouses were selling quickly at the YC, before being advertised and there were no boathouses for sale that Sandpiper could fit into. Purchased a 18" X 42" boathouse with a low roof and raised the roof right after purchase to get Sandpiper under a roof. Modified the BH over the years where it is now 20' X 52'. Until the lengthening, Sandpipers anchor was against the dock side end wall and the swim platform stuck out of the boathouse 1 1/2'.

Some of the work such as the clear skylights on the roof and encapsulated floatation tubs were required by the State.

The boathouse to the right of mine in the pictures is what the boathouse looked like at purchase.
 

Attachments

  • 7 (Medium).jpg
    7 (Medium).jpg
    94.8 KB · Views: 14
  • 4 (Medium).JPG
    4 (Medium).JPG
    193.4 KB · Views: 12
  • 8 (Medium).jpg
    8 (Medium).jpg
    110.9 KB · Views: 14
  • 5 (Medium).jpg
    5 (Medium).jpg
    120.4 KB · Views: 13
  • 6 (Medium).JPG
    6 (Medium).JPG
    188.6 KB · Views: 16
Last edited:
Great write up on boat house upgrades. Are you not allowed to use the rectangular blocks wrapped in heavy vinyl? That is what is mandated down here in PDX for any new dock & boat house flotation for foam encapsulation. I am guessing the floats you are using are much more expensive. I was involved in purchasing new floats for our 8” dredge pipe, those were rotational molded & filled with foam, they were over $400 each delivered to our club moorage ?.
 
I greatly admire the ingenuity involved in that work. Luckily for me, my recent boat shed/cover/whatever total rebuild was in large part an insured recovery from a hurricane (Michael in 2018), and I did not have to lift a finger during the work. However, since the original shed had no overhead lighting, I was on the hook for all the parts and labor, and I am extremely happy with the resulting 24,000 lumens (1,600 Watts incandescent) provided by the wirelessly (one fob each on boat and in house) controlled four LED fixtures. It was a chore monkeying around up there running all the wiring and conduit, especially with the admiral harassing me about my recent back emergency, but got-r-dun. I can work topside after dark in better-than-daylight lighting. Here are the fixtures and the remote switch. I recommend this sort of lighting projet to any who can have it.
 

Attachments

  • DSC02945.jpg
    DSC02945.jpg
    66.7 KB · Views: 13
  • DONJON Wireless Remote Switch,AC 110V120V240V Relay RF Remote Control Light Switche.JPG
    DONJON Wireless Remote Switch,AC 110V120V240V Relay RF Remote Control Light Switche.JPG
    40.6 KB · Views: 13
  • CINOTON 50W LED Flood Light LED fixture.JPG
    CINOTON 50W LED Flood Light LED fixture.JPG
    32.2 KB · Views: 11
Great write up on boat house upgrades. Are you not allowed to use the rectangular blocks wrapped in heavy vinyl? That is what is mandated down here in PDX for any new dock & boat house flotation for foam encapsulation. I am guessing the floats you are using are much more expensive. I was involved in purchasing new floats for our 8” dredge pipe, those were rotational molded & filled with foam, they were over $400 each delivered to our club moorage ��.

Thanks!

Styrofoam can be used if encapsulated in HD reinforced truck tarp material. The State has a puncture test requirement for any foam covering, that has to be met. The cost of materials was about 60% of the cost of tubs. The time to wrap and seal the covering on each tub was substantial and the life of the adhesive used to seal the wrap was questionable. Plus I could not come up with a good way to secure the floats to the underside of the dock. Strong winds can lift the boathouse and if the floatation is not secured, can float away - not cool!

Pre Covid, I bougut 10 2' X 2' X 4' foam filled rotational molded tubs from Walmart for $150 each, delivered. I ordered 2 per day and Fed Ex delivered to my home. Having two delivered dailey was great since I could install them immediately instead of having to move them around and store them. Prior to finding them at Walmart, I bought 10 from the manufacturer at $90 each but shipping was $800 from Louisiana.
 
Last edited:
I greatly admire the ingenuity involved in that work. Luckily for me, my recent boat shed/cover/whatever total rebuild was in large part an insured recovery from a hurricane (Michael in 2018), and I did not have to lift a finger during the work. However, since the original shed had no overhead lighting, I was on the hook for all the parts and labor, and I am extremely happy with the resulting 24,000 lumens (1,600 Watts incandescent) provided by the wirelessly (one fob each on boat and in house) controlled four LED fixtures. It was a chore monkeying around up there running all the wiring and conduit, especially with the admiral harassing me about my recent back emergency, but got-r-dun. I can work topside after dark in better-than-daylight lighting. Here are the fixtures and the remote switch. I recommend this sort of lighting projet to any who can have it.

Thanks!

Luckily, there has not been any major windstorm here in the PNW for at least 20 years. The last one was in the 90 's. I was not a member then but many boathouses were destroyed by the wind and others lost floatation and had the boathouse land on their boats, sinking many.

I need to switch the lighting to LED. I currently have 8 - 4' flourescent fixtures with daylight bulbs. I can't decide if I should relamp with LED flourescent replacements or install fixtures like you used. Does the 4 LED lights cast shadows? The 4' flourescents are currently spread throughout the BH so there are minimal shadows.

I don't use lights often since I don't work there at night and the 25% clear panels provide lots of natural light. But on dark overcast winters days here in the PNW, lighting makes working in the BH more pleasant.

What kind of light are those? And the remotes?
 

Latest posts

Back
Top Bottom