I'm about to start a project on an older Chriscraft

The friendliest place on the web for anyone who enjoys boating.
If you have answers, please help by responding to the unanswered posts.

Scary

Guru
Joined
Apr 1, 2012
Messages
887
Location
USA
Vessel Name
Cary'D Away
Vessel Make
Hatteras 48 LRC
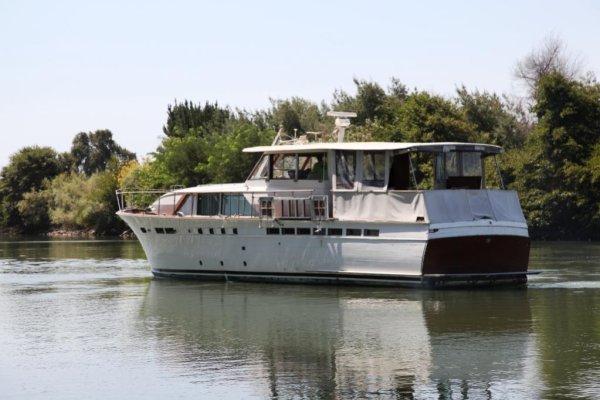
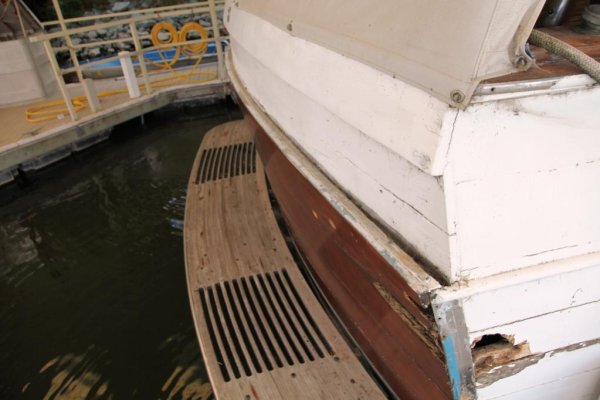
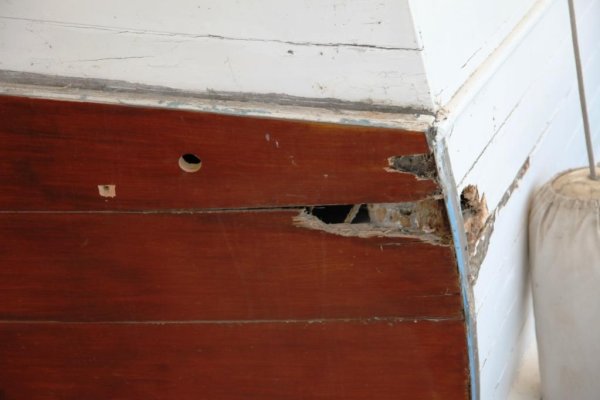
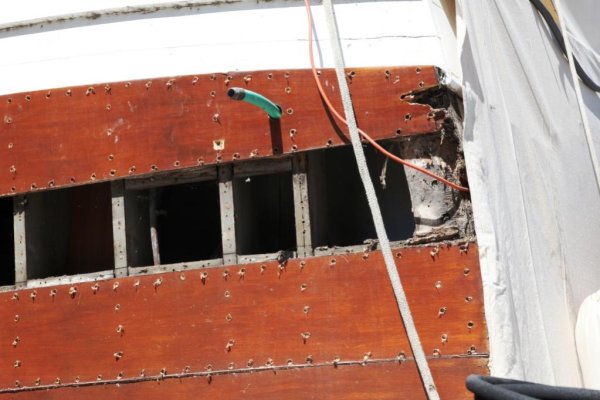
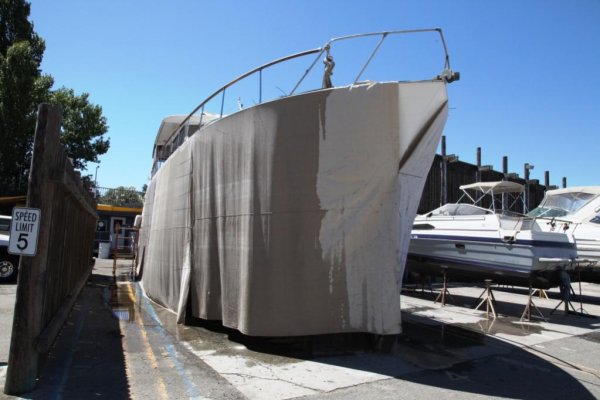
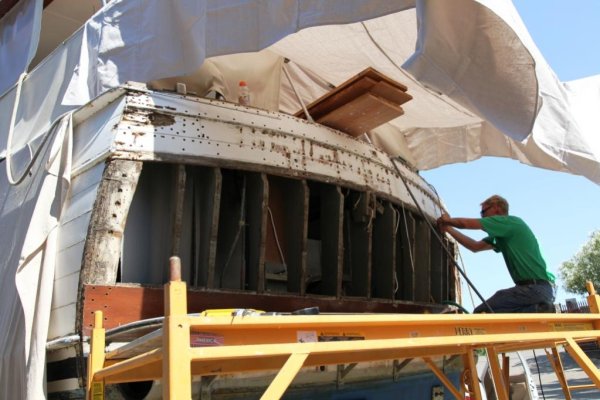
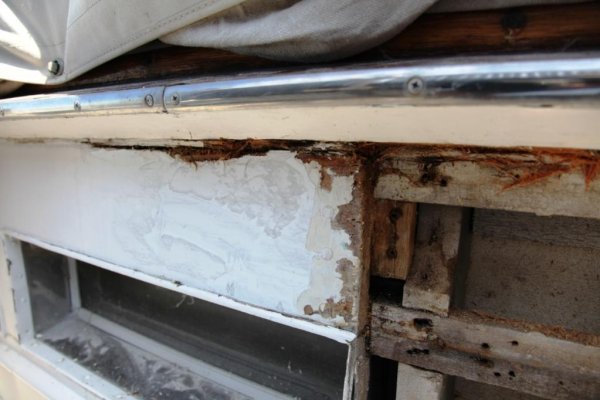
I'm about to replace the transom and five or six planks above waterline planks on a mid 50's 57' Chris.j Dry rot has eaten up the starboard corner of this lovely boat. I'm stabilizing the rough 4 quarter Philippine Mohagony on the dock now and plan to mill it to 7/8" planking next week. Unfortunately the rub rail pulled away allowing water to penetrate the starboard corner, I may be sistering the frame and replacing rotten wood on this frame. I'm asking opinions on caulking materials as it's been years since I've done this, and I no there must be better products out there than the oakum and oil based putty I used as a youth. I've purchased Life Caulk poly-sulfide caulking in brown for the varnished transom. The hull sides are painted with one part poly paint. There has been some suggestion that I use 3M 5200 or 4200 for the sides. I want this boat to be repairable in the future should planks be damaged. In the old days we used Weld-wood glue or Weld-wood two part glue. I've used tight bond water proof glue for years with excellent results since. I'm open to comment on glue and caulking technique. At this point it seems the Chris was put together without oakum and appears to have a flexible caulking possibly a poly-sulfide. Sealing the back sides of the planking seems like a good idea. These old planks seem to be bare or possibly sealed with oil that has failed over the years. Replacing the planking looks to be very straight forward, there may only be one that will need steaming to bend. Any comments are welcome, I will post photos as we make the repairs.
 
Polysulphide was explained to me for anything below the waterline. Polyurethane sealants like 4200 take weeks to fully cure and tend to release, although they can work above the waterline. Was also told to avoid epoxy unless it is really flexible formula as old wood likes to move.

Good luck and would love to see pictures.
 
Have you considered the Sika products? I've used a number of them and they work well...

Bonding
 
Greetings,
If possible, try to use Honduras mahogany rather than Philippine. It is a denser harder wood. To the best of my recollection, framing (ribs and battens) on CC's was white oak (WO) NOT red oak. I have successfully used epoxy to sister and laminate WO ribs, battens and chines. When replacing planks, I used to paint all sides and edges before installation. Inside you can use a grey or neutral color.
It has also been years for me since I undertook such repairs and I can't remember what caulk I used at the time but I would probably use Dolphinite (sp?) for bedding planks. One could probably use it to fill small voids as well and then paint over it.
You're right IMHO to stay away from 4200 or 5200.
 
Mohagony

The Chris-crafts were made from Philippine Mahogany and in this case the frames are as well. I thought they would be white oak as well but in this case not so. The Sika products may be better, they are about half the cost. My knowledge as a wood worker is equal coats of finish all four sides of wood that is exposed to the elements. That is not practical on the transom where I plan on 8 to 10 coats of Captains or Epifanes. I have read that kerosine used as a penetrating sealer whatever I do they will be sealed from the back side.
 
The person you might want to ask your questions to is Bob Lowe on the Grand Banks Owners forum. As former owner and operator of Oak Harbor Boatworks, a yard specializing in the repair, restoration, and upgrading of Grand Banks and most other makes, wood and glass, Bob is one of the most knowledgeable and experienced shipwrights around anywhere, particularly with regard to wood boat repair.
 
For parts that can be removed , the bedding is required to be replaced on a time (or damage) sked.

We use Dolphinite as it works better than most "modern" products , and re bedding is a snap.

The new PL glues seem to be waterproof and their expansion means less perfect woodworking skills are required.

FF
 
Greetings,
As an addition, I also seem to recall a wood filler product made by Petit that was available in mahogany color to fill cracks/voids in the brightwork. Could be this stuff. I used to apply one or two coats of varnish so the stuff wouldn't impart any additional stain to the wood then apply the filler and continue varnishing.
Pettit Paste Wood Filler Stains
The memory fades.....
 
Thanks for the tips

Keep them coming.
 
The work begins

Tomorrow we haul her out to begin the replacement of the transom and most of the starboard stern quarter. Unfortunately the owner had left exposed and neglected for 7 or 8 years. The boat is a good handler with only 1600 original engine hours on 8V71 Detroit's. 1969 57' Chris Craft Constellation. She is now in the yard waiting haul out tomorrow morning. Planking is 7/8 Philippine Mahogany. Unfortunately summer is not a good time to be hauling a wooden boat but the owner who lives aboard is currently traveling so now's the time. We will have to bust butt and get her back in the water quickly to keep her from drying out.
 

Attachments

  • Bella Carmen.jpg
    Bella Carmen.jpg
    91 KB · Views: 353
  • Compressed picture 2.jpg
    Compressed picture 2.jpg
    83.9 KB · Views: 329
That's going to be quite and undertaking.Are the keel and frames in good shape?
 
Graphic details

The gunnel pulled loose exposing the corner frame and back side of transom and hull planking to rot.
 

Attachments

  • Cause and effect.jpg
    Cause and effect.jpg
    72 KB · Views: 331
  • Rot one.jpg
    Rot one.jpg
    50.4 KB · Views: 332
Ladd's in Stockton. They were willing to let us work on the owners boat and have years of wood boat experience.
 
Do not ever quit. She is a magnificent boat.
I would establish a good relationship with the sales guys from the following brands. Sika, already mentioned, Tubolit, and 3M. These guys got a bunch of new products to keep water away from wood. Yet, nothing is more efficient in that task than epoxy resin/compounds.
I would also make the best effort to use epoxy extensively and as much as possible as glue and also as impregnation system that you must use in no moving pieces. However, the most modern epoxy compounds are now elastic but they are pricy.
Yeah! You’ll have a lovely boat!!!

Good Luck
 
I use the dry poly filla mixed with what ever paint or primer I am using. For fill / caulk / fairing above water line and for fill bellow fairing bellow. For clear coats I use the wood dust filler. YMMV

The Grenfell was not as bad but was on its way. Very comon issue with the old woodies IMO.

Just ensure no water from above ever gets in there again :banghead:
 

Attachments

  • IMG_0008.jpg
    IMG_0008.jpg
    101.9 KB · Views: 334
  • IMG_0010.jpg
    IMG_0010.jpg
    103.1 KB · Views: 335
Last edited:
Scary said:
Ladd's in Stockton. They were willing to let us work on the owners boat and have years of wood boat experience.

I may swing by Friday and take a peak. Sounds interesting.
 
Shes out and on the hard

The valley has been very hot, to mitigate shrinkage as much as possible we are keeping her as wet and cool as possible. It's still a losing battle. the hull is in good shape for the most part however Chris's are double planked with canvas between the planking.
Some think to kept them tight for initial launch other figuer it's just another place for dry rot. It looks like we will have to caulk everything to the waterline. No broken frames so far. A little termite dodo in one spot but it looks old and not much damage if any. A trick for removing plugs is with a top secret drill bit that takes seconds. It 's agood thing as there will close to a thousand screws in the transom alone to pull and replace.
 

Attachments

  • 50,000lb.jpg
    50,000lb.jpg
    122.2 KB · Views: 331
  • Hard at it.jpg
    Hard at it.jpg
    103.6 KB · Views: 300
  • Disasembly.jpg
    Disasembly.jpg
    84.2 KB · Views: 329
  • Drapped and wet.jpg
    Drapped and wet.jpg
    78 KB · Views: 315
Farther into the demo

Removing screws is time consuming to say the least. They call this discovery for a reason, it looks like we are repeating a prior repair. The design of the deck to the transom planking lead to water intrusion relying on caulking and paint to keep it out. The corner frames have been replaced and will need replacement again. Meanwhile we are trying to keep the hull from opening with the wet canvas drapery. This job is getting bigger by the minute and the longer it takes the more recaulking will be needed in the hull.
 

Attachments

  • Slow going many many screws.jpg
    Slow going many many screws.jpg
    94.4 KB · Views: 325
Scary-big job, I think you will find it gets bigger every day-just the nature of old wooden boats. I sued to rebuild old Trumpy's on the East Coast many years ago. One thing you can do to help the dry out problem is to keep water in the bilge while on the hard. Can help keep the planks from shrinking. When you splash her, plan on having a big gas driven pump on baord and ready to start! Also, while she is out, I would recommend doing spot checks on the fasteners all over the hull. Better to find out now if a major refastening is needed. The last Trumpy we did was 85', with double planked 1" planks on 16" white oak frames. Had close to 72,000 screws to replace. But, once you are done, she will be beautiful.
 
72'000 screws at 68 cents apiece.

Your right is is getting bigger, where does it stop.
 

Attachments

  • when will it stop.jpg
    when will it stop.jpg
    100 KB · Views: 262
  • more surprises.jpg
    more surprises.jpg
    76.8 KB · Views: 266
Your right is is getting bigger, where does it stop.

If you're lucky, before your wallet becomes too thin. :socool:

Amazing job. I'd love to get involved in a project like that to learn some old school techniques. Thanks for posting pictures.
 
Nice photos great idea on trying to keep her wet. Show the finished product !
 
Scary-Welcome to the Wonderful World of Wooden Boat Repair! Does look like you are committed to doing it right though. Keep us posted, it will be iinteresting to see the job progress (have faith, it will progress eventually!). It will look great and be a sound hull when you finish.
 
A shipwright I know applies what he calls the "rule of 5" to wooden boat rot repair; there is usually 5 times the rot you see before starting work. Your job seems to bear that out. Courage! It`s a lovely boat well worth the effort. BruceK
 
Work continues

Rule of five seems to be about right. it's really tempting to cut corners and leave a little cancer behind. But just like cancer the rot will come back. I'm a little disappointed in the way ChrisCraft set up conditions that lead to the failures on this boat. this is the second repair for the same problem originating at the cap rail. The inner gunnel in this case is only protected by the varnish beteen the cap rail and the outer gunnel. Once the vanish cracks, deck moisture migrated down into the unprotected inner gunnel and lower into the planking, also the transom planking again was subject to moisture from the deck as the decking is finnished flush with a butt joint again protected only by deck caulking which always fails at some point. Again the step out at the transom creating a ledge for water intrusion was again only protected by caulking and paint. The average owner would never understand the importance of maintaining these points against water intrusion. Another condition leading to the failure this time was the previous repair that didn't understand the problem and did a less than thorough repair, trying to do only what was necessary to get the boat back looking good without addressing the cause of the damage. At this point we are working on a solution, possibly sealing the inner gunnel with epoxy and the use copper flashing hidden under the cap rail and bedded in Sinkaflex. Because of the design it will be hard to resolve with out pulling the caprail. I 'll post more pictures as progress continues, right now we are still removing planks from the Starboard side. the ever chearfull yard manager noted that the last Chris the refastened the screws came to over $20.000. .68 cents a piece. We've already purchased a thousand screws.
 
Rule of five seems to be about right. it's really tempting to cut corners and leave a little cancer behind. But just like cancer the rot will come back. I'm a little disappointed in the way ChrisCraft set up conditions that lead to the failures on this boat. this is the second repair for the same problem originating at the cap rail. The inner gunnel in this case is only protected by the varnish beteen the cap rail and the outer gunnel. Once the vanish cracks, deck moisture migrated down into the unprotected inner gunnel and lower into the planking, also the transom planking again was subject to moisture from the deck as the decking is finnished flush with a butt joint again protected only by deck caulking which always fails at some point. Again the step out at the transom creating a ledge for water intrusion was again only protected by caulking and paint. The average owner would never understand the importance of maintaining these points against water intrusion. Another condition leading to the failure this time was the previous repair that didn't understand the problem and did a less than thorough repair, trying to do only what was necessary to get the boat back looking good without addressing the cause of the damage. At this point we are working on a solution, possibly sealing the inner gunnel with epoxy and the use copper flashing hidden under the cap rail and bedded in Sinkaflex. Because of the design it will be hard to resolve with out pulling the caprail. I 'll post more pictures as progress continues, right now we are still removing planks from the Starboard side. the ever chearfull yard manager noted that the last Chris the refastened the screws came to over $20.000. .68 cents a piece. We've already purchased a thousand screws.

Scary – BIG Freaking OUCH on the CC’s rot progression. Back in my earlier days (1960’s / 70’s) for years on end I helped accomplish projects similar to yours; working with shipwrights in New England boat yards. I know where this is going and hope to helllll you can locate an end to the rot progression. Just cause you can’t see or feel it it does not mean living rot spores have not already impregnated adjacent wood areas. When we checked the rest of boats’ areas we would often locate items not previously noticeable where rot hat taken a firm hold, and wood was about to turn soft or already had. Paint hides rot real well until major damage is done. Even a little rot into untreated wood would resume progression once any moisture becomes present... that included condensation. Decades past, “Cuprinol Wood Preservative” was our preferred product for maintaining and rebuilding boats while halting rot’s progression: http://cuprinol.trade-decorating.co.uk/products/preservers.jsp. The only disturbing thing back then about Cup was its pungent, lingering odor... that has been remedied today, I believe. And, there are other good liquid anti rot wood preservatives on the market now. We would actually soak the new to be installed wood in the Cuprinol before installation and we would well coat all of the to be left remaining adjacent wood areas with Cup. I never saw a treated piece of wood begin to rot again. My dad used Cuprinol liquid rot treatment throughout his wooden boats... they remained rot free... I know; it was my job to help him maintain them! If seam cracks appeared on the decks, salon window frames, toe rails, transom and other locations it was my job to pressure inject Cup via a specialized turkey baster that had a reduced i.d. ejection end. That was done before rot got hold and took an area over. It worked!

Here’s an interesting side note for Eric and Marin... if they read this post: I’m actually entertaining the prospect of purchasing a cool looking classic wooden boat to dock near our home, for use on SF Bay. May do sea trials next week. See, I am salvageable to play with old wood-boats! LOL :dance:
 
Thanks for the advice on Cuprinal

We've used Cuprinal for years with mixed results. Again what are you going to do. After a week and a half I am just now starting to cut replacement pieces. I was able to find some spectacular 4/4 Philippine mahogany 12" to 18" wide and 18' long. Some of the repair will be done with penetrating epoxy. Small areas under the aft deck at the transom. The decking is in good shape. I'm making new frames for the corners of the transom and replacing most of the exposed battens. Cuprinal will be used on everything we can get to as well bilge coat to match the original ChrisCraft bilge coating. The dry rotted areas were repeats of areas rotted before and left unprotected. I hope if we can keep this boat dry it will be years before this happens again. Just as a side note the draping of the boat with wet cotton tarps has worked extremely well and will save us hours and hours of bottom work. We have very hot and dry weather and so far so good. I wish I could say this was a original idea but I saw it done years ago with burlap stapled to the wooden hull and kept wet with a soaker hose. The yard is impressed none the less.
 
After a week and a half I am just now starting to cut replacement pieces. I was able to find some spectacular 4/4 Philippine mahogany 12" to 18" wide and 18' long.
Boatgm, owner builder of "Carabao"(Tagalog for water buffalo)will be impressed with the Philippines mahogany timber choice(see his post under "Homebuilt").
Sounds like you are on the home run,shaping timber to put her back together.Must be a relief.
Those thousands of screws,are they s/steel, or silicon bronze or ...BruceK
 

Latest posts

Back
Top Bottom