need ideas for cabin steps into Galley

The friendliest place on the web for anyone who enjoys boating.
If you have answers, please help by responding to the unanswered posts.

Eddie W

Veteran Member
Joined
Sep 19, 2019
Messages
63
Location
usa
Vessel Name
Tidal Holm
Vessel Make
Mainship 34 MK1 1982
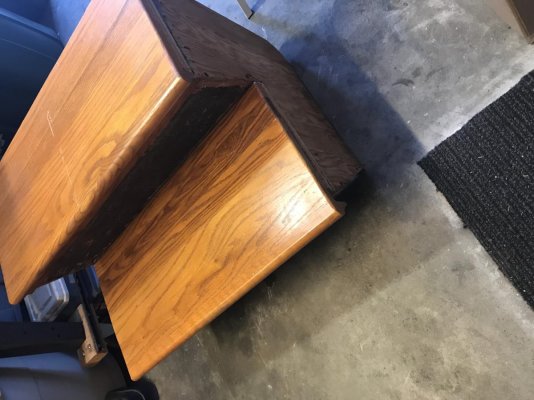
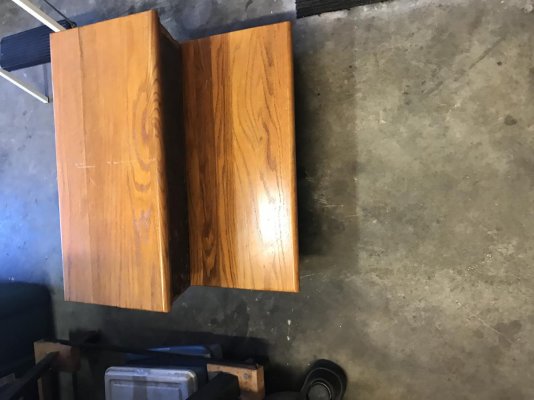
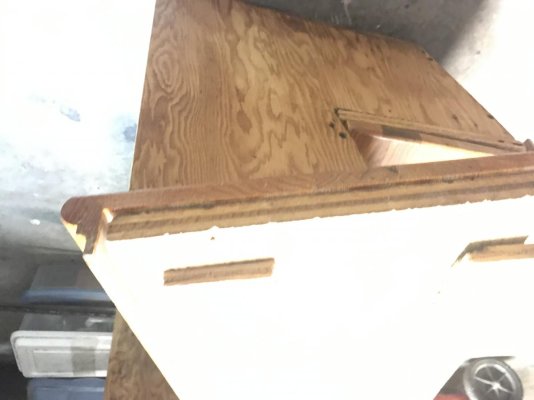
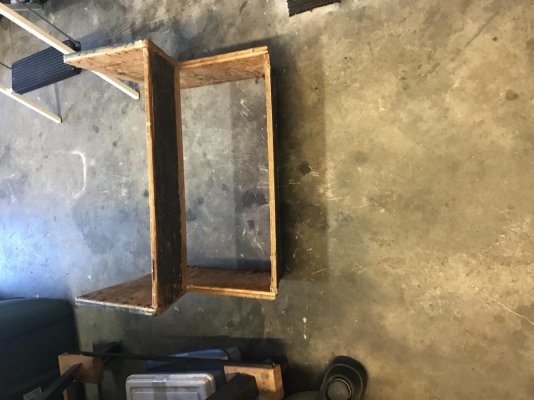
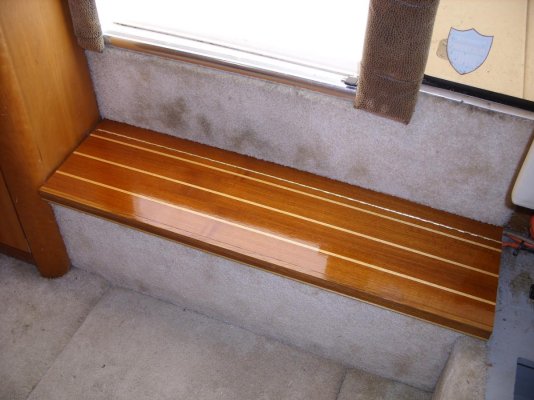
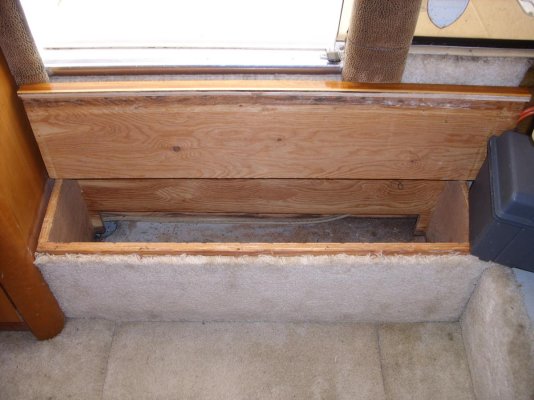
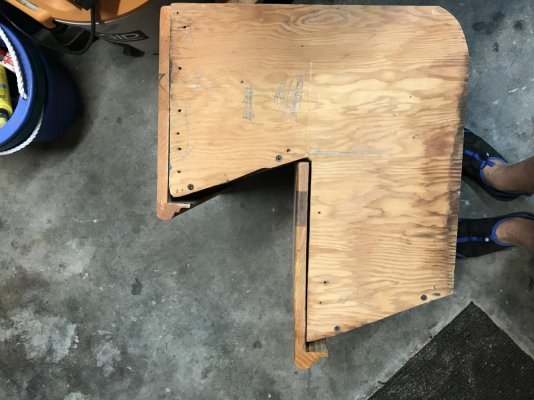
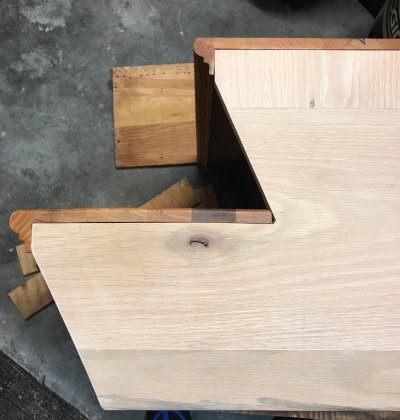
I am replacing the carpet with faux teak and holly and in that process I ripped out the two access steps to the galley and V berth. I will keep the treads, which are in pretty good shape and build a new riser out of mahogany for them.

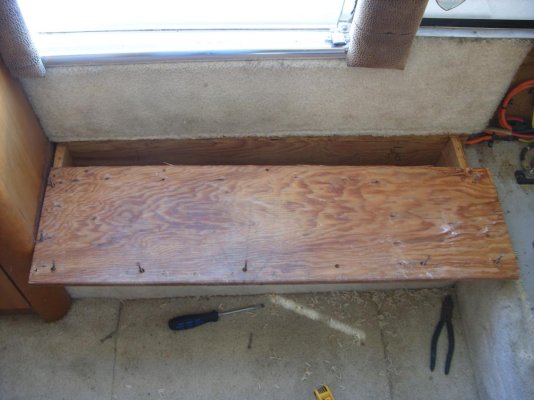
One of the previous owners attached some plywood to the bottoms of the treads, I am assuming to weigh them down to prevent them from bouncing around while underway. I want to fashion the new riser so the treads will slip into a slide built into the riser and hold them steadfast while underway but still be able to slip them out easily to access the storage the new risers will provide.

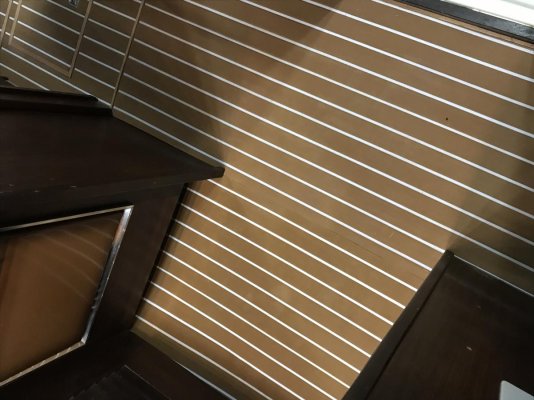
So if anyone has steps that incorporate something close to what I am proposing, please chime in and attach pictures if available. Here are a couple pics of what I am starting with and a picture of the in progress floor.
 

Attachments

  • steps.jpg
    steps.jpg
    129.3 KB · Views: 53
  • stepstop.jpg
    stepstop.jpg
    97.3 KB · Views: 52
  • stepunderside.jpg
    stepunderside.jpg
    64.8 KB · Views: 57
  • riser.jpg
    riser.jpg
    115.7 KB · Views: 49
  • riserside.jpg
    riserside.jpg
    113.3 KB · Views: 53
  • IMG_9605-2.jpg
    IMG_9605-2.jpg
    118.9 KB · Views: 51
Greetings,
Mr. EW. A piano hinge at the rear of the step perhaps?


Edit: Rear of the tread...

Appreciate the input, but I want to be able to remove the tread. I am thinking of routing a groove into the sides of the riser, with a round dowel attached to the ends of the tread that will slip into the groove, it should keep the tread snug to the riser while underway. If someone has something along those lines that they could share, it would save me some time and wood.
 
Greetings,
Mr. EW. Ah. How about a piece of 5/8" ply on the bottom of the tread that will nest into the riser? Hope you catch my drift...
 
What you are describing is how the stairs on my Swift trawler are. There is a groove in the riser that the tread slips into and the wood under the tread (in your case the plywood) fits up against the riser for the next lower stair so that it cannot slide forward.

Cannot get a picture since the boat is sealed up for the winter.

The steps as they are set up now uses a similar setup, a build up of plywood on the bottom of each tread for weight with an additional small piece attached to the front and back of the tread to prevent them from sliding or falling out on their own.

I thought of cutting an instep into the vertical part of the riser that would catch the last inch or so of the tread which would keep it in place but I figured the constant movement while underway would wear too much on the face of the wood.
I think I follow your plan and agree w capturing the rear and adding a piece to the bottom front of each step so they can't slide out. Why not also add a magnetic catch or two that would hold them down. If the front of the step can't raise they can't go anywhere and the magnets should prevent any rattle.
If you are concerned about "wear" of the rear portion of the tread you could dado the rear to hide the "tongue" that fits into the groove in the vertical piece or use a couple dowels or pins in the rear edge of step that insert into mating holes in the vertical.

I did a similar rebuild on a prior boat and made the tread removable. Can't remember exactly how I captured the tread... Sr memory and too many yrs ago. The storage was great and very accessible.
I had no noticable rattle or wear and suspect your concerned may be unnecessary.
 
Last edited:
Sliding dovetails underside of the thread and on the riser. Wax them for smoothe sliding. Can be cut with router or by hand if you dare to.
If you do not know what is a sliding dovetail google it you will find tons of examples

L
 
Would a simple cleat on the bottom front of the tread work ? Maybe bevel it to match the front riser and fit it behind the riser. And angle the back of the tread to fit also. Might wedge in.
Or get some of those really strong magnets. Rare earth, molybdenum ?? 4 in the tread and 4 in the riser. They are tough to get apart.
 
I doubt the plywood was added for weight, more likely added for strength.

Any woodworking supply will have bed frame clips which would work. (They are made for disassembling wooden or metal bed frames) I have also seen them in some boating supply catalogs.

You should build a simple "U" shaped abutment for the bottom to prevent the steps from exerting excessive pressure on the hinge or attachment device. Really pretty simple stuff, every boat out there has something you can copy, just get on a boat or two.

pete
 
I have a L-shaped cleat of wood (~1.5" x1.5" x 18") mounted on the bulkhead and the adjoining sette which the top tread sits on. There are ~3/8" holes that line up on either side of the tread and through the cleat. Two ~5/16" brass pins hold it in place.

No need for any hinge.

Works incredibly well and tight for the last 30 years.

I believe that this is Phil Pidcock's design, not Nordic Tugs.

I'm away at work for a week. Will post photos when I get back.
 
Last edited:
Here is a screenshot of the steps removed, showing the cleat. Screenshot_20200109-094340.jpeg
 
All the suggestions have been helpful. Risers are now going to be oak to match the treads, (wife's choice). I will route a groove on each of the horizontal side risers, a metal or wood dowel pin on each back edge of the tread will slip into the groove and I will use some rare earth magnets ( I have several) to secure the front. I think this will accomplish what I want and look good. To prevent them from vibrating, the groove will start out wide to make it easy to capture the dowel pins, and the last inch will be a snug fit.

Now I've got to figure out a pattern I can put on the front facia of the risers under the treads. Will probably use the space to house shoes and will need plenty of ventilation, I have some spare peg board and will experiment with the peg board holes as a template, now what is the pattern going to be? Round, square ?
 
I went the route using a piano hinge on my old Silverton. I bought some teak and holly veneer and just glued to the existing plywood step.
 

Attachments

  • STP81321.jpg
    STP81321.jpg
    143.8 KB · Views: 40
  • STP81320.jpg
    STP81320.jpg
    136.6 KB · Views: 30
  • STP81293.jpg
    STP81293.jpg
    111.2 KB · Views: 29
It is a nasty weather today, so I started on the risers. Not only were the old ones nasty looking but also a poor fit. New ones need a lot more work but I think are a big improvement.
 

Attachments

  • oldriser.jpg
    oldriser.jpg
    143.9 KB · Views: 30
  • new riser.jpg
    new riser.jpg
    155.1 KB · Views: 27
Almost done, last thing to do is attach magnets for front and pins to hold them in place. Plan to use the storage space under the treads for shoes, reason for the vent holes.
 

Attachments

  • galleysteps.jpg
    galleysteps.jpg
    145.5 KB · Views: 26
If it is too slippery then you could cut some small grooves in it parallel to the front edge. A router or even a table saw will make the cuts. Our teak steps have the grooves and it does help although our steps do not have the high gloss that yours do. Ours are more of a satin finish.
 
Greetings,
Mr. EW. Looks REALLY nice. The only thing that might give me cause for concern is the possibility of slipping on the glossy surface/edge. Ever considered clear non-skid strips?


For example: https://www.amazon.com/Welstik-Invi...rds=clear+stair+treads&qid=1580505474&sr=8-33

I've used the shower non-slip decals in the past. Its just a matter of finding the right design. You can either use the decals or a mat and cut it to the shape and design you prefer. I have tried the clear non-slip tape, but I just didn't like the look. I am on an internet hunt for some decals that will suit my and my wife's taste.
 

Latest posts

Back
Top Bottom