Marine Trader Steering

The friendliest place on the web for anyone who enjoys boating.
If you have answers, please help by responding to the unanswered posts.

Pappy Chris

Veteran Member
Joined
Oct 6, 2011
Messages
43
Location
US
Vessel Name
Moonshine
Vessel Make
Marine Trader 40'
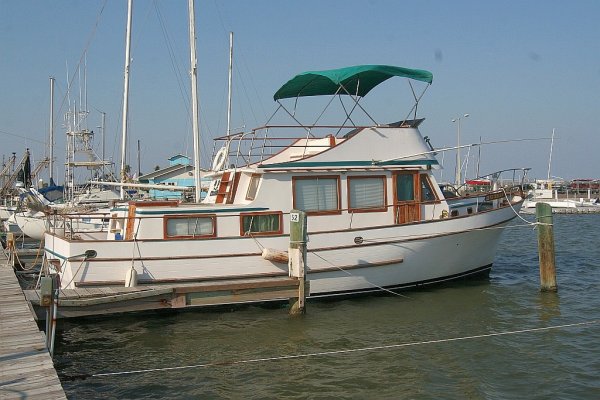
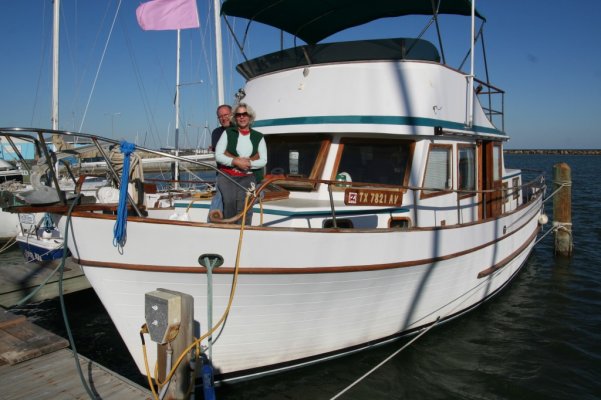
I am a new owner of a 1977 Marine Trader 40. Yesterday I made a hard turn to starboard and something has broken as there is no steering at all now. I used the Raymarine autopilot to get it back into the slip with no damage.

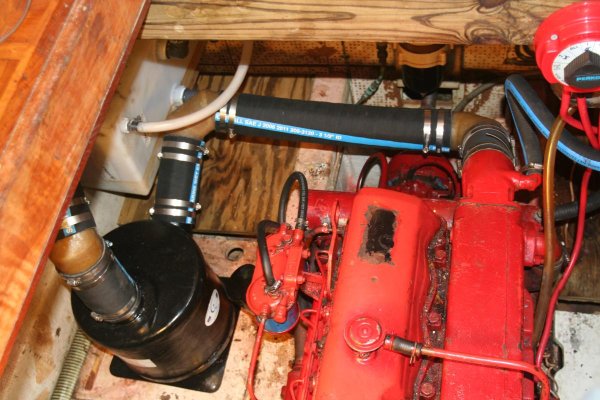
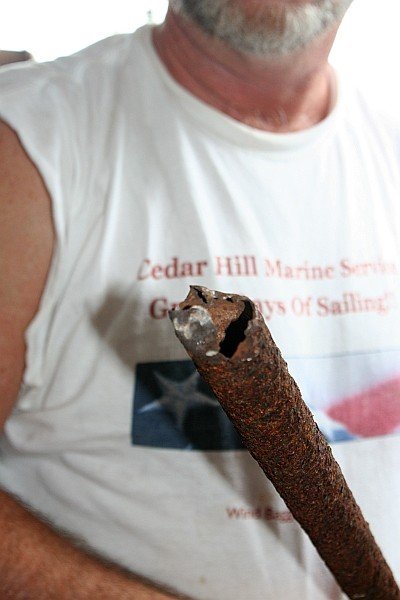
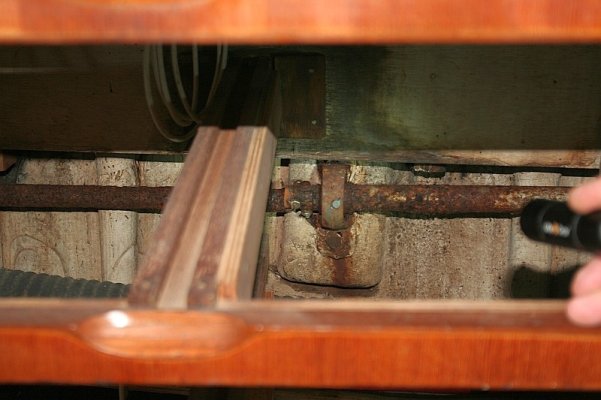
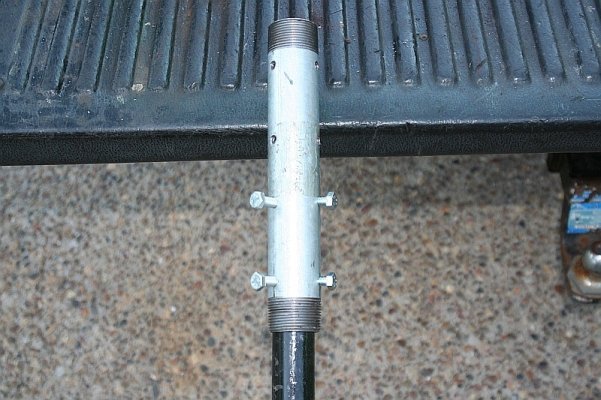
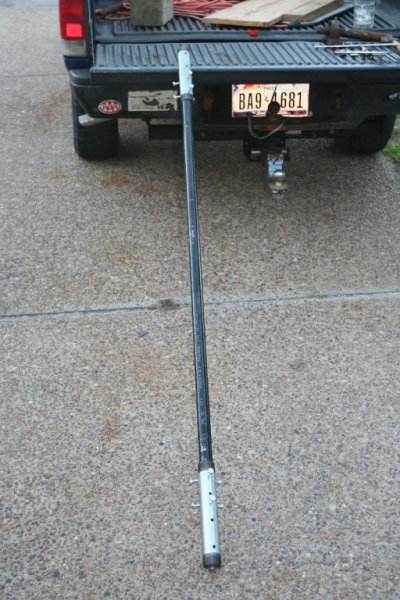
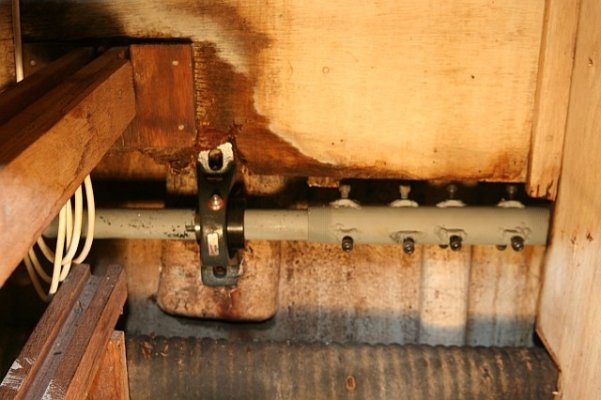
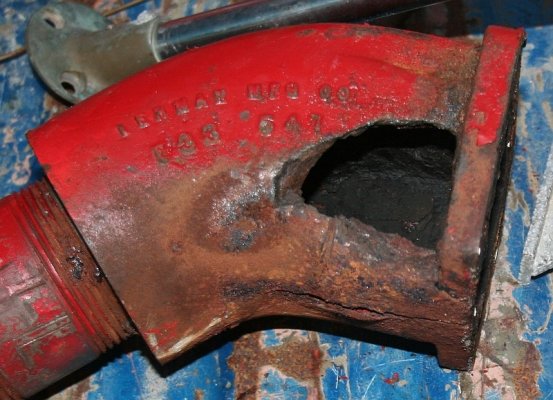
The boat is mechanical steering. I have traced the problem to the rearward outboard steering shaft. The input sprocket is turning the shaft but there is no motion at the aft end of the shaft. *There is no noise when rotating the steering. *Is this shaft a solid piece or a 2 piece that is cross bolted in some inaccessible place? *Has anyone else done a repair on this type of steering in these boats? *It appears I have to take out the cabinetry in the aft cabin and saw a hole thruogh the floor for any access.

I'm planning to go over to the marina after lunch with sawzall and measuring tape in hand.

Any ideas appreciated. Boat must be fixed this week to move to a new marina next weekend..... else I will be paying for 2 expensive slips.

*

Cheers

Pappy Chris


-- Edited by Pappy Chris on Sunday 6th of November 2011 07:56:25 AM
 

Attachments

  • 01- 001a.jpg
    01- 001a.jpg
    243.8 KB · Views: 191
Pappy Chris
Congrats on your new vessel! I have a Taiwan Sundeck with hydraulic steering and to access the top of my rudders on the Port side I can pull a lower drawer from the cabinet on that side. For better access someone in the past cut a very clean rectangular panel from beneath a stool storage area. To refasten the panel he attached a 1" "picture frame" onto the panel and used SS screws th hold the "frame" onto the cabinet. It is a pretty good way to address the problem IMO. Starboard side is accessed beneath the aft bed.
 
* I have a 77 40' sedan, there is a joint in my steering shaft in the engine room aft end. I suspect there is one in yours there also. It is a simple through bolt and is subject to wear. Congrats on your new boat & enjoy.
 
We just got back from looking over the steering situation on Moonshine.
The steering shaft rusted through and broke off just before the pillow block
bearing located behind the starboard drawer section in the aft cabin. The shaft
was severely rusted due to years if water leakage.
I went forward into the aft head and took out the compartment in the shower and
cut the shaft off in a solid non rusted area. I then got behind the drawer
section and cut the shaft 8" behind the pillow block bearing. All I will have to
do is section in a 60" piece of galvanized tube and refit the pillow block to
the hull side and its fixed. I know there is a spray on cold galvanizing paint
that we used to use in manufacturing railroad parts that works well. I will coat
everything with this paint when the job is complete.
The quadrant and cables are all in good shape but I believe I will replace them*next year with a heavier stainless cable and new buckles.

Buying a used boat of this age is a process of learning how it's built and
discovering what has been neglected due to out of sight-out of mind. I have
learned that boats don't break stuff unless you use them and you (the new owner)*don't find out until it breaks.

I will post pictures (had my photographer wife along) as soon as they approve
them.
 

Attachments

  • 1- 007.jpg
    1- 007.jpg
    43.4 KB · Views: 164
  • 1- 008.jpg
    1- 008.jpg
    86.9 KB · Views: 178
  • 1- 003.jpg
    1- 003.jpg
    102.6 KB · Views: 173
Looks like Moonshine has found a good home with a capable owner!! Tell us some more about the vessel, engine type etc.....
 
That sounds like a pretty good idea to me.
 
* My m/t has a section with a turn buckle located above the lower helm and another below the lower helm.
 
I found that every piece of chain has a turnbuckle in it. My first trip across Corpus Christi Bay I lost the upper helm because the jamb nuts we not tight. *The buckle backed off and the chain began slipping around the bottom sprocket. *

It's now a problem I will never have twice.

*

Cheers

Pappy
 
Hi

Look for a turnbuckle like you'd find on sailboat rigging. *If you don't have them I'd suggest them. *It's much easier than taking out a link... IMO.

Just have to be careful that you don't over tighten.


Cheers

Pappy
 
Not a Whole lot to tell. It's a single engine 120HP Ford /Lehman. *My first single engine of this type so docking is a bit amusing for some to watch. We are currently docked at Corpus Christi City Marina but are moving to the north side of the bay so that Moonshine is only 5 minutes from our house here in Aransas Pass TX. I was introduced to the world of trawlers about 5 years ago. Moonshine came up for sale last year but was way out of budget at the time due to moving and buying a house. We moved here from the Kansas City area last year. We are also sailboaters. I sold one of my sailboats this past August which enabled us to buy Moonshine when it came up for sale again. *Circumstances of the sale enabled up to pay cash for it this time.*

In the 2 months that we have owned Moonshine I have rebuilt the Velvet Drive (twice due to a bad snap ring), repaired the rudder post packing, replace the house water pump, changed oil and all filters, replaced zincs, replaced strainers and started sanding and coating the railings.

Recently picked up a complete 16K BTU A/C unit with a bad compressor for $40. Going to fix and install that to aid in cooling the V berth and supplement the salon. *It gets really warm here in summer. We've bought some white shade cloth and are in process of making snap on covers for every window in it.*

There are lots of things on the agenda for upgrade and improvement over the next year or two. We expect to only upgrade one more time to a 49-50' Marine Trader for our retirement.

Of course in my world, retirement will only come when I am to tired to shovel the dirt back out of my hole in the ground.

I guess this is a start. ~~~~ Cheers -- *Pappy Chris
 
Next time I am over on Moonshine with a camera I will get you pictures. Every chain has a turnbuckle to adjust it.

*
 
Moonshine has eye-eye turnbuckles. They've used a pin thru the side plates on the chain to connect them. *The pins are wired. The buckles use jamb nuts on the ends. *A trick I used from my dune buggy racing days is to put a dab of silicone on the nuts to keep them from losening.
When I lost my upper helm I found that someone had not had the jamb nut tight and one was not even there.
Pappy Chris
Old Stone wrote:
Have never noticed a turnbuckle in the system, and can't imagine how one would work with a chain other than to move the sprocket location, but I will be under there today. If there is one, I will find it. Thanks for the heads up. Taking a link out of the chain is quick and easy, but that is why I love to ask questions on the Forum. Thanks to all!
*
 
The turnbuckles on my MT 34 are accessible through the electrical cabinet.
 
Pappy Chris wrote:Same on mine except 1. *The one in the bilge that drives the outboard shaft. *It's on top, behind, in the corner far away out of reach.
*And, of course, that's the one you need to get at, right?**
 
Since I could not buy what I needed I spent 2 hours and $50 manufacturing what I needed. *It's to be installed tomorrow.*

This has been such a frustrating week trying to find a part that would work.

Pappy Chris


-- Edited by Pappy Chris on Saturday 12th of November 2011 06:31:22 AM
 

Attachments

  • 3- 003.jpg
    3- 003.jpg
    153.5 KB · Views: 159
  • 3- 001.jpg
    3- 001.jpg
    144.6 KB · Views: 159
grrr --2nd try

*

We moved Moonshine the 20 miles across the bay yesterday to her new slip. I had nary one issue with steering or transmission. We arrived in 2 1/2 hours, dock to dock.

The pillow block bearing should arrive today (from Grainger) to complete the steering repair. I will have to glass in a new mounting for it.

Having Moonshine only 5 minutes from the house will make it so much more handy to take care of projects now.

Cheers

Pappy Chris
 

Attachments

  • 1- 003.jpg
    1- 003.jpg
    162.5 KB · Views: 222
I built a new and improved steering shaft splice that has much better clamping power. Aslo replaced the pillow block bearing while I was in there. Works smooth as original.
 

Attachments

  • 4 006.jpg
    4 006.jpg
    59.1 KB · Views: 147
  • 4 007.jpg
    4 007.jpg
    72.3 KB · Views: 151
In addition to the steering I've had to deal with exhaust issues too. Found a rust bubble in the side of my engine's exhaust elbow while RnR the heat exchanger for cleaning. One thing leading to another I found the POs had rigged a series of adapters from 3.5" down to 2.875" and then back up to 3.5". So now I have all new exhaust parts of 3.5" size including the lift muffler. All new elbows and clamps to go with it. *Yesterday found a brittle fuel return hose. So next project is all new fuel system hoses.*

Just a process of rebuilding reliability back into her. PO's either jury rigged stuff or took the "don't fix it if it aint broke" approach. Feeling better now that I have had my hands on all of her systems myself. *One biggie left is the forward waste tank replacement. That will be March's project. *

I have a sailboat demanding some of the "boat fund" and time. *Hope that will be it for projects on Moonshine for a while.

Cheers

Pappy Chris
 

Attachments

  • 3 002.jpg
    3 002.jpg
    152.8 KB · Views: 135
Thanks Carl.

On to the new project. *Noisey transformer in the battery charger. *It's bolted to the blukhead in the bilge and acts as a sounding board. L O U D!It has a Guest 50A -4 bank battery charger that charges fine.*

Did some internet searches and the most logical one is to take the transformer out of the chassis and remove the thru bolts, warm it up (oven) and then dip the entire thing into shellac. They say as it cools it will pull the shellac into the windings. Leave it sit in a warm place for 2 or 3 days and then put it back together. Stay tuned. This is this weekends project.

Dang things of this caliber are to expensive to throw away without a repair attempt.

Cheers
Pappy Chris*
 
The ALL brand new exhaust of the proper size. *I shopped everything and still invested $500 and 22 new hose clamps. *This issue is put to rest.


-- Edited by Pappy Chris on Thursday 1st of March 2012 08:28:19 PM
 

Attachments

  • 4. 002.jpg
    4. 002.jpg
    189 KB · Views: 169
Feeling better now that I have had my hands on all of her systems myself. *One biggie left is the forward waste tank replacement. That will be March's project. *

Cheers

Pappy Chris

Hi Pap
I'm wondering how you are making-out on the waste tank removal .
have you started yet ?

... I'm making major improvements in that dept. on my '40:)
 
Waste tank

Wellllllllllll
I have not yet. I got the tank empty and taped the lid shut on the head. Been working on a dozen or so other projects. I'm preparing for and weekend out for Memorial day.
I have been able to measure it and I am going to replace it with a similar size (or slightly larger) poly tank.
I found a couple of web sites (Plastic Mart and Tank Depot) that look like excellent resources.

I will update when I get to this project. Right now it is sanding and varnish.

Cheers
Pappy Chris

Hi Pap
I'm wondering how you are making-out on the waste tank removal .
have you started yet ?

... I'm making major improvements in that dept. on my '40:)
 
Buzzy battery charger

The shellac seems to have quieted the transformer. I did determine that the capacitors were buzzing too. I obtained new caps at Granger for $15.
I've bench tested it and all looks good. I plan to re-install it this week.
It is a Guest 55A -4 bank battery charger. All is well!
Pappy Chris :dance:


Thanks Carl.

On to the new project. *Noisey transformer in the battery charger. *It's bolted to the blukhead in the bilge and acts as a sounding board. L O U D!It has a Guest 50A -4 bank battery charger that charges fine.*

Did some internet searches and the most logical one is to take the transformer out of the chassis and remove the thru bolts, warm it up (oven) and then dip the entire thing into shellac. They say as it cools it will pull the shellac into the windings. Leave it sit in a warm place for 2 or 3 days and then put it back together. Stay tuned. This is this weekends project.

Dang things of this caliber are to expensive to throw away without a repair attempt.

Cheers
Pappy Chris*
 
Wellllllllllll
I have not yet. I got the tank empty and taped the lid shut on the head. Been working on a dozen or so other projects. I'm preparing for and weekend out for Memorial day.
I have been able to measure it and I am going to replace it with a similar size (or slightly larger) poly tank.
I found a couple of web sites (Plastic Mart and Tank Depot) that look like excellent resources.

I will update when I get to this project. Right now it is sanding and varnish.

Cheers
Pappy Chris

Just wondering ... where is your aft waste tank located?
I only have a forward tank , and the run from the aft head is too far ( its over 12') . I'm trying to decide where to locate a new plastic tank for the aft head.
... I'm so glad to find another poor soul thats forging-forth on this project before I do. :D
 
tank-age

My aft tank is to the starboard tucked in just behind the fuel tank. The hose runs to the forward end of the ER on that side. The PO(s) had mickey moused in a macerator and a Y valve. Strangely the macerator only pumped the front tank overboard. I am going to replumb this whole mess. For now my deck pump out only pumps the rear main tank.
Front is Out Of Order. :blush:
In the picture you can see a corner of it to the left upper of the picture.
Pappy Chris

Just wondering ... where is your aft waste tank located?
I only have a forward tank , and the run from the aft head is too far ( its over 12') . I'm trying to decide where to locate a new plastic tank for the aft head.
... I'm so glad to find another poor soul thats forging-forth on this project before I do. :D
 

Attachments

  • 4. 002.jpg
    4. 002.jpg
    140.4 KB · Views: 149
My aft tank is to the starboard tucked in just behind the fuel tank. The hose runs to the forward end of the ER on that side. The PO(s) had mickey moused in a macerator and a Y valve. Strangely the macerator only pumped the front tank overboard. I am going to replumb this whole mess. For now my deck pump out only pumps the rear main tank.
Front is Out Of Order. :blush:
In the picture you can see a corner of it to the left upper of the picture.
Pappy Chris

Hi Pap
Thats where I was thinking of installing mine - behind the starboard fuel tank . I'll keep the forward tank for now , maybe replace it 'down the road ... I found a leak in the hose coming from the bottom of it , and a bad crack in the vent hose and repaired both. It's tough to get that smell out of the bilge , but after reading Peg Hall's book I have a few ideas of how to get rid of it.
good luck on your project.

Bug
 
Skunky

I used Clorox. Even bleached things white again.

Not a smell evident even after sitting closed a week. Now I put some down there for maintenance time to time. :dance:


Hi Pap
Thats where I was thinking of installing mine - behind the starboard fuel tank . I'll keep the forward tank for now , maybe replace it 'down the road ... I found a leak in the hose coming from the bottom of it , and a bad crack in the vent hose and repaired both. It's tough to get that smell out of the bilge , but after reading Peg Hall's book I have a few ideas of how to get rid of it.
good luck on your project.

Bug
 
Last edited:
Next fiasco is the drain hose from the tub in the aft cabin. I took a shower last night and before I left today I check the pump in the shower water box. Not working. I picked up the hose that drains the tub into the box and it crumbled.... PMO!!!
I can see this will be some huge project for something as menial as a shower drain.
Grrrr

Pappy.
 
Back
Top Bottom