Portugese Bridge replacement on a Bluewater 40 Trawler

The friendliest place on the web for anyone who enjoys boating.
If you have answers, please help by responding to the unanswered posts.

syjos

Guru
Commercial Member
Joined
Nov 8, 2012
Messages
2,315
Location
USA
Vessel Name
Sandpiper
Vessel Make
Bluewater 40 Pilothouse Trawler
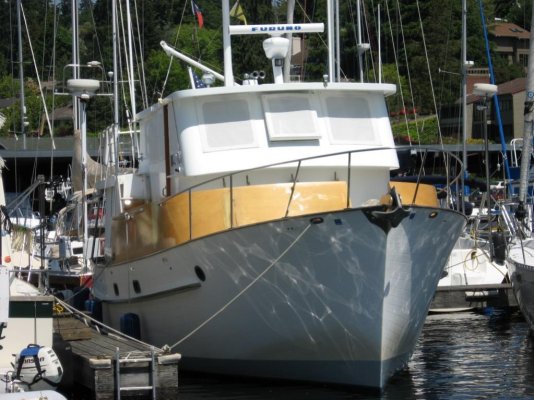
Here are pictures from my portuguese bridge (PB) replacement project that I was asked to post while attending a Bluewater 40 Pilothouse rendezvous.

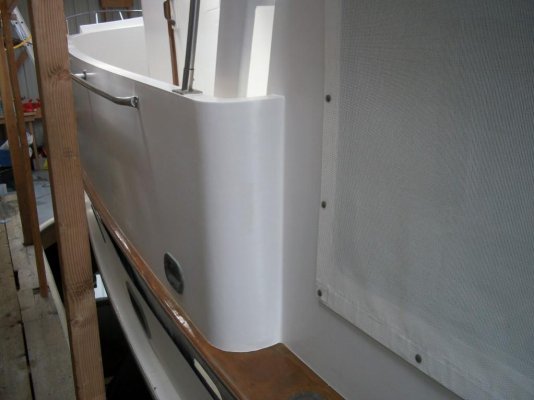
I started the project in the fall of 2007 and finished in the spring of 2009 with a two month interruption for cruising during summer 2008. I usually worked two to three days per week around 6 to 8 hours/day with an occassional week off to maintain my sanity.

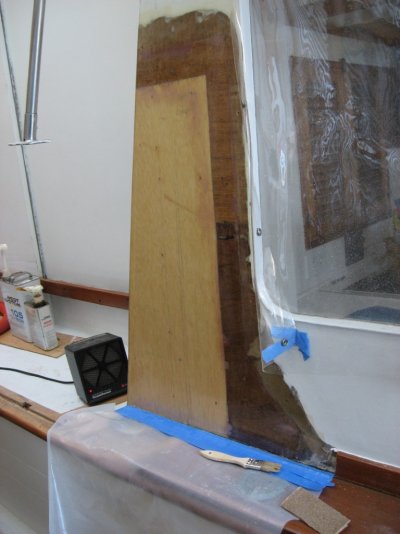
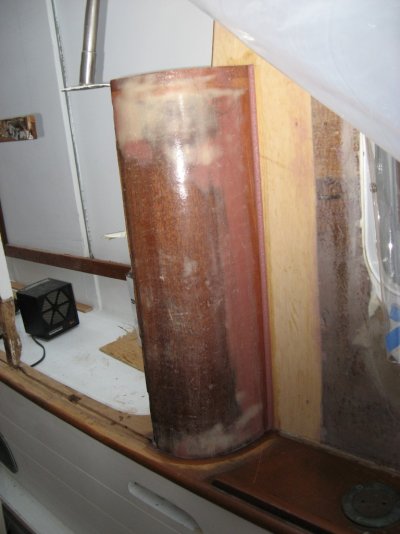
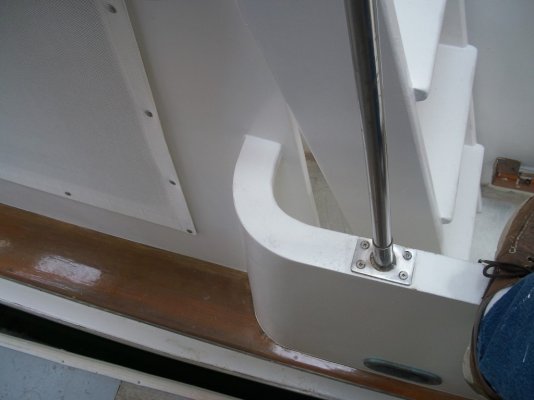
The PB was found to be full of rotted plywood and delaminating glass cloth by surveyor Matt Harris during the prepurchase survey in 2000. There were other issues more important that needed attention so the PB was patched cosmetically. Annual patching kept the portuguese bridge functional until the summer of 2007. We were rafting up to another boat that was on the reciprocal dock at Friday Harbor. The owner of the other boat was helping us raft when he used both hands to push us. He pushed both hands right through the rotted side of the PB! He was apologetic and said he didnt realize his own strength! We patched the hole with white duct tape and continued our cruise.

Upon return in September, started the PB restoration.

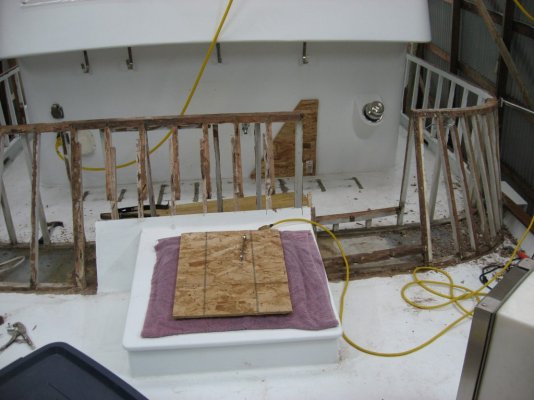
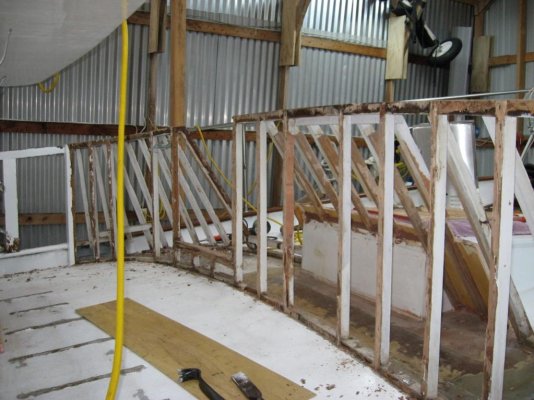
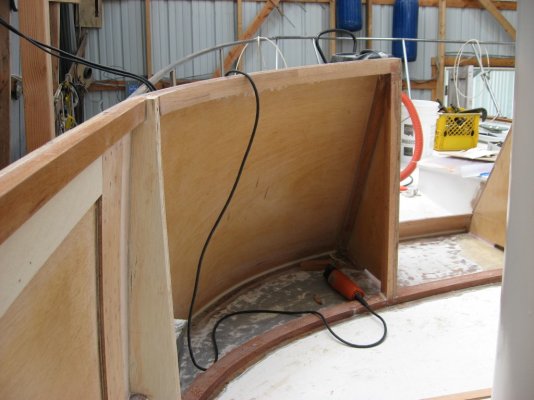
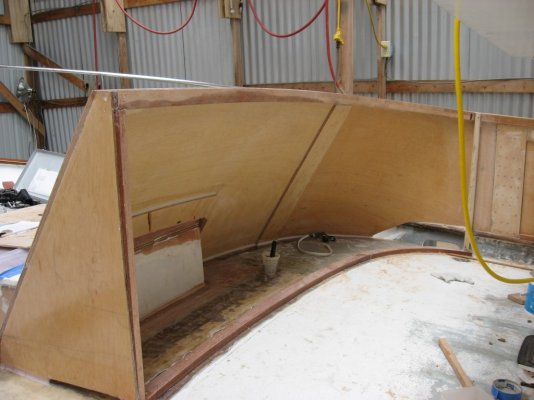
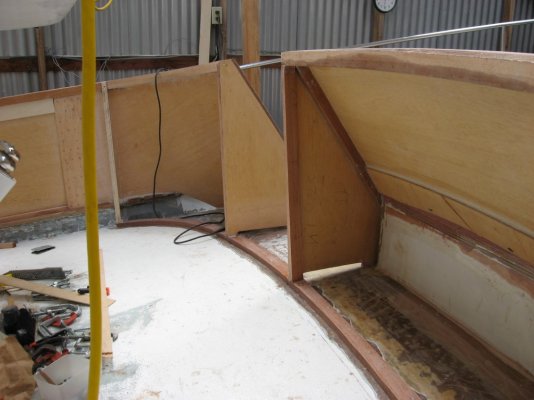
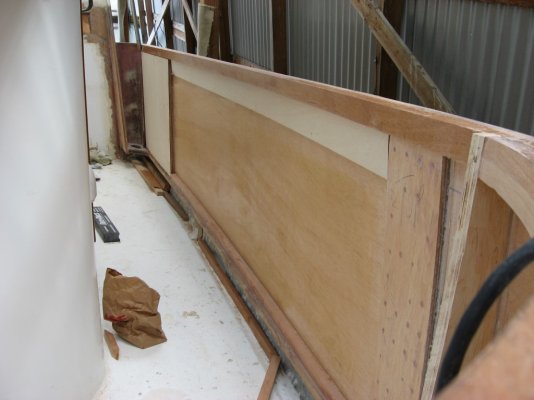
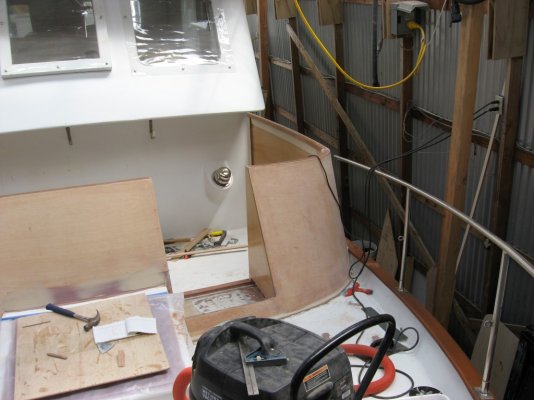
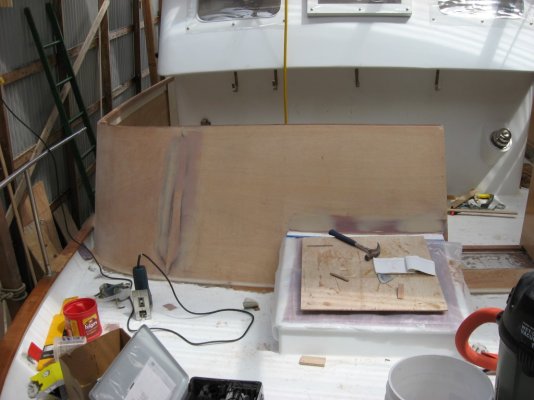
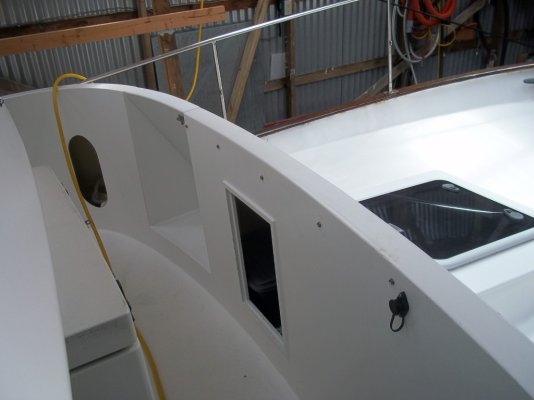
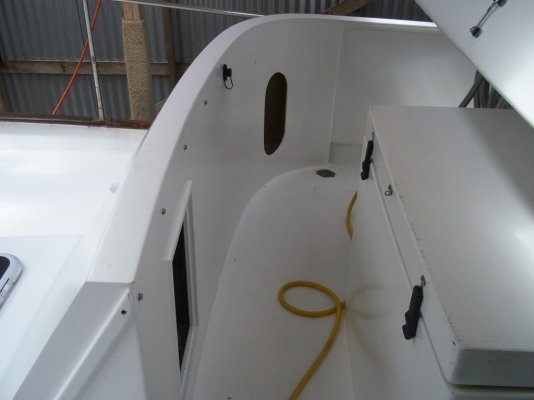
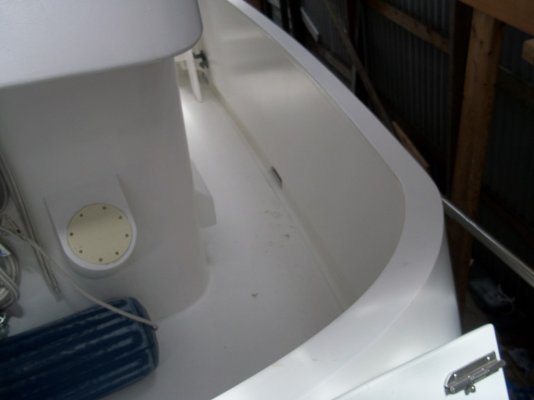
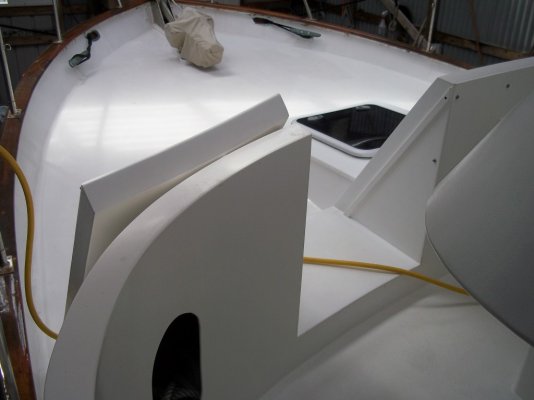
Removed the teak cap rails and plywood skin from the PB exposing the framing and allowed it to dry using a dehumidifier under a tarp. Sanded the good existing frames and replaced the bad ones with temporary frames.

I'll add to this post as I have the time.
 

Attachments

  • IMG_1510 (Medium).jpg
    IMG_1510 (Medium).jpg
    170.5 KB · Views: 129
  • IMG_1512 (Medium).jpg
    IMG_1512 (Medium).jpg
    108.3 KB · Views: 128
At the rear two corners of the Portugese Bridge (PB) are curved returns that tie the side of the PB to the sides of the salon cabin sides. These were shaped out of solid mahagony and glued and screwed to the cabin sides. Water had creeped into the curved wood, saturating them and rotting it in places.

After the paint was stripped off, the curved returns were placed in a airtight container with a dehumidifier to dry them. Took about 4 weeks to dry completely. They were power wire brushed to remove the rot and soaked in Smith Penetrating Epoxy for a week. Air dried for one week. The rough edges from wire brushing the curved returns were planed flat and mahogany pieces were shaped and glued to the ends and sidesreplacing the removed wood. Thought about making new curved returns but they had a decreasing radius from bottom to top.

The plywood on the cabin sides where the curved returns attached were also rotted. Fortunately, the plywood was only rotted in a small area and about 3/8" deep. Routed 3/8" deep to remove rotted wood off the surface and glued in a trimmed piece avoiding the refinishing of the inside surface.

Reattached the curved returns to the cabin sides with epoxy adhesive. Coated everything with WEST Epoxy.
 

Attachments

  • IMG_1520 (Medium).jpg
    IMG_1520 (Medium).jpg
    157.9 KB · Views: 109
  • IMG_1522 (Medium).jpg
    IMG_1522 (Medium).jpg
    147.2 KB · Views: 102
  • IMG_1526 (Medium).jpg
    IMG_1526 (Medium).jpg
    146.9 KB · Views: 104
Last edited:
The framing was covered in visqueen to prevent anything from sticking to it.

Two layers of 3/4" mahogany was cut to match the curvature of the PB and laminated together on top of the framing to create a top frame all the way around the PB. The top frame was made of shorter pieces to fit the curvature and joints were staggered between the two layers to create a continuous frame. The top frame was temporary fastened to the existing framing and glued to the rear returns.

On this project I used WEST System epoxy, which I have been using since the 70's, with various fillers mixed in to produce various adhesives, putty and fairing compound. After this project, I switched to System Three Silvertip epoxy for its nonblushing feature and the ability to recoat without sanding within 24 hours, which is quite a time saver on large projects like this.

The top frame was beveled to match the angle of the PB.

Two layers of 1/4" mahogany marine plywood were trimmed and laminated to conform to the curves on the front of the PB and temporary fastened to the frames with deck screws and washers. An electric blanket was used to heat the plywood at the extreme curves to prevent cracking of the plywood. The area where the pass thru door is located was skinned with the two layers of ply across the opening to make it easier to apply the ply. The door will be cut out later.

The flat sides we're skinned with 1/2" mahogany marine ply and joined to the front skin and back corner returns with a rabbit joint. The skin was glued to the top cap and temporary fastened.

The plywood PB skin was bonded to the glass/plywood deck with a large reinforced filet and the sides were joined with staggered butt and rabbit joints. Once the adhesive cured, all fasteners were removed and the holes were filled.

After a full cure of the epoxy adhesive, the original PB framing was completely removed. With the combination of the two layer laminated plywood skin and the double top frame, the framing structure is no longer necessary to hold the PB's shape.

A bottom frame was cut out of mohagany to match the PB front curvature and glued to the deck.
 

Attachments

  • IMG_1558 (Medium).jpg
    IMG_1558 (Medium).jpg
    166.2 KB · Views: 100
  • IMG_1559 (Medium).jpg
    IMG_1559 (Medium).jpg
    162.3 KB · Views: 96
  • IMG_1561 (Medium).jpg
    IMG_1561 (Medium).jpg
    154.5 KB · Views: 101
Last edited:
After the framing was removed, 1/4" precoated plywood was cut, fitted and bonded to the top cap and new bottom frame to enclose the front portion of the PB.

The sides of the PB were previously hollow, which contributed to the wood rot. In order to rebuild the PB sides without a cavity, structural foam was used to construct a plywood - foam - plywood sandwich. Areas on the sides, where rails and cleats will be fastened were backed with 1/2" plywood blocking. 1/2" structural foam was trimmed to fit around the blocking and glued to the inside of the 1/2" plywood outer skin and topped with a 1/4" inner plywood skin glued to the foam. The whole structure was vacuumed bagged until the epoxy adhesive cured.

The front of the PB was laminated as one continuous lamination, without a break for the door, in order to maintain a smooth curvature. Plywood bulkheads were glued to both sides of the door opening and a plywood step at the bottom. A frame was fabricated for the door itself and glued to the inside of the door skin leaving a 1/16" gap between the door frame and surrounding bulkheads and step. The plywood skin was cut between the door frame and surround.

The original PB door was also hollow and rotted. The new door frame and skin was reinforced with foam and plywood after separation from the front of the PB.

The holes from temporary fasteners were filled and the whole structure was faired, corners rounded and covered with 10 oz glass cloth with epoxy.

In the first pic, you can see the rear returns that were painstakingly restored. It is darker.
 

Attachments

  • IMG_1557 (Medium).jpg
    IMG_1557 (Medium).jpg
    139.6 KB · Views: 92
  • IMG_1556 (Medium).jpg
    IMG_1556 (Medium).jpg
    162.1 KB · Views: 91
  • IMG_1553 (Medium).jpg
    IMG_1553 (Medium).jpg
    149.2 KB · Views: 94
Last edited:
First picture is the summer of 2008, when I stopped work on the PB project and went cruising. Covered everything in epoxy and put hardware back on temporary.

The other pictures show the restored PB rear returns.

The hawes cleats were machined to sandwich the thickness of the sides.
 

Attachments

  • IMG_2347 (Medium).jpg
    IMG_2347 (Medium).jpg
    123.7 KB · Views: 85
  • 100_3584 (Medium).JPG
    100_3584 (Medium).JPG
    185.3 KB · Views: 88
  • 100_3586 (Medium).jpg
    100_3586 (Medium).jpg
    86.5 KB · Views: 84
Completed project in the spring of 2009.

There are no screws or nails in the PB structure itself.

All hardware was fastened to the PB in oversize drilled holes filled with epoxy to eliminate water intrusion.

The area under the front of the PB is used for storage.

No teak trim!

It's been 10 years since I completed this project and so far no cracks, delamination, water intrusion etc. Other than repaint, the PB has been maintenance free.
 

Attachments

  • 100_3592 (Medium).JPG
    100_3592 (Medium).JPG
    176 KB · Views: 94
  • 100_3593 (Medium).JPG
    100_3593 (Medium).JPG
    143.6 KB · Views: 78
  • 100_3589 (Medium).JPG
    100_3589 (Medium).JPG
    151.9 KB · Views: 90
  • 100_3590 (Medium).JPG
    100_3590 (Medium).JPG
    136.7 KB · Views: 77
  • 100_3591 (Medium).JPG
    100_3591 (Medium).JPG
    165.6 KB · Views: 88
Last edited:
Thanks RTF,

I apologize that I do not have pictures of some of the steps between the posted pics. I was not as camera conscious 10 years ago.

Stay tuned for my Pilothouse Replacement Project pictures, which is being completed currently. I took way better pictures this time.
 
Last edited:
Looks great, but if you had put teak trim on you would have had something to keep you busy varnishing...
 
Looks great, but if you had put teak trim on you would have had something to keep you busy varnishing...

Thanks Comodave,

I have been de-teaking Sandpipers exterior for 20 years. I take off or paint one piece of teak at a time so my wife does'nt notice.

All the guys at my yacht club stand around when my wife comes to the boat to see if she notices the missing teak.
 
We have a ton of exterior teak also. We started painting the teak this year. It looks great and really updates the boat. Next winter I will sand, again, the teak toerails and then paint them either white or light gray. I have had it with finishing teak...
 
The toenail and cap around the cockpit coaming is the only varnished teak remaining on the exterior.

I coated it with epoxy before varnishing and it seems to be holding up without recoating. Sandpiper resides in a boathouse so it gets direct summer sun 3 months/ year.

Once the varnish starts to lift, paint, paint, paint.
 
Very nice work. Thanks for posting your project.
 
Looks great! Went through this on our Bluewater 40 in 2004. We took a different construction approach and have been just as happy.
Tator
 
Looks great! Went through this on our Bluewater 40 in 2004. We took a different construction approach and have been just as happy.
Tator

Another Bluewater!

Tator, how long have you owned OZ?

Boats previous name?

Twin or single? Which engine?
 
Did we meet you at the Bluewater rendezvous last year? Unable to make the meeting this year as we were scheduled to leave on the ferry Columbia for Petersurg, Ak last Friday. It was canceled at the last minute due to mechanical problems and we spaced out that we could have then made the rendevous.


We bought our boat in 2003 and spent two years in Port Townsend rebuilding her. Replaced all wiring, plumbing and heating systems, decks, windows, PG bridge, front hatch, revarnished and painted interior, upholstery, etc., etc. In 2006 we took her to Petersburg, AK where she has remained. We live on and cruise in her for about 4-5 months each year. She is powered by twin 120 Lehmans. We bought her in Portland and previous name was 'Williwaw'. Our previous boats were wooden GBs-a 42' and a 50'.

tator
 
Having seen Syjos' work in person all I can say is that it's very impressive. A very skilled craftsman. He's been a huge help to me during our deck replacement project. It's great to see how things are done by those before you. I endeavor to document our projects as well as his for those Bluewater owners after me.

Thanks for posting this! I'll link to it from the FB group too.
 
Did we meet you at the Bluewater rendezvous last year? Unable to make the meeting this year as we were scheduled to leave on the ferry Columbia for Petersurg, Ak last Friday. It was canceled at the last minute due to mechanical problems and we spaced out that we could have then made the rendevous.


We bought our boat in 2003 and spent two years in Port Townsend rebuilding her. Replaced all wiring, plumbing and heating systems, decks, windows, PG bridge, front hatch, revarnished and painted interior, upholstery, etc., etc. In 2006 we took her to Petersburg, AK where she has remained. We live on and cruise in her for about 4-5 months each year. She is powered by twin 120 Lehmans. We bought her in Portland and previous name was 'Williwaw'. Our previous boats were wooden GBs-a 42' and a 50'.

tator

We missed the rendezvous last year but we attended this year.

You have done a lot. We've done pretty much the same rebuilding but spread over 20 years. I spent 6 month right after purchase rebuilding or replacing absolute essentials before we could start cruising I don't think I have enough patience to be able to do a two year rebuild all at once like that.

Too bad the boat is not here. I would like to see the work you have completed. Always looking for ideas or a simpler way to tackle projects.
 
I have a ton of pictures. I'll try to post when we get back in Sept. I'm not the handiest person on the computer.

tator
 
Having seen Syjos' work in person all I can say is that it's very impressive. A very skilled craftsman. He's been a huge help to me during our deck replacement project. It's great to see how things are done by those before you. I endeavor to document our projects as well as his for those Bluewater owners after me.

Thanks for posting this! I'll link to it from the FB group too.

Hey Steve,

Just realized Airstream was you.

Started posting here after prodding from rendezvous attendees.

I'm trying to get a moderator to create a Bluewater 40 Pilothouse section in the Builders Forum so we can consolidate posts there. It would be helpful to prospective owners, new owners and owners planning a project.
 
I have a ton of pictures. I'll try to post when we get back in Sept. I'm not the handiest person on the computer.

tator

I got one of the forum moderators to start a Bluewater Trawler section in the Trawler Builder forums.

See you there.

Pictures of the boat would be great, especially project pictures.
 
That turned out perfect. Nice rebuild.
 
That turned out perfect. Nice rebuild.

Thanks.

It was a project that I delayed starting for a long time because I new it was going to take longer than one winter. I kept patching it for 8 years until the dock helpers hand went through the side of the Portuguese bridge.

Once I started the project, wished I had not started. Was way more rot and bad wood than anticipated. Ran into several obstacles and head scratchers that defied a solution. Quit working on it more than a few times to take a break.

Being in a boathouse was nice but it would get down into the 30's some days. Tough working with epoxy at that temperature.

Glad it's done now.
You're welcome.


I've learn to bite the bullet and get it done. Projects get bigger the more they are left to time.
 
Thanks Comodave,

I have been de-teaking Sandpipers exterior for 20 years. I take off or paint one piece of teak at a time so my wife does'nt notice.

All the guys at my yacht club stand around when my wife comes to the boat to see if she notices the missing teak.

As one who did not the teak 8 inch rail cap and bridge rail cap and and and. You and I agree. Death to exterior teak!!!!

Refinishing teak takes a way from nap time.
 
As one who did not the teak 8 inch rail cap and bridge rail cap and and and. You and I agree. Death to exterior teak!!!!

Refinishing teak takes a way from nap time.

Teak care takes time away from boating.
 

Latest posts

Back
Top Bottom