Overhauling a J&T Detroit 671N

The friendliest place on the web for anyone who enjoys boating.
If you have answers, please help by responding to the unanswered posts.

sbman

Guru
Joined
Jul 25, 2017
Messages
828
Location
USA
Vessel Name
Second Chance
Vessel Make
42' Uniflite Double Cabin
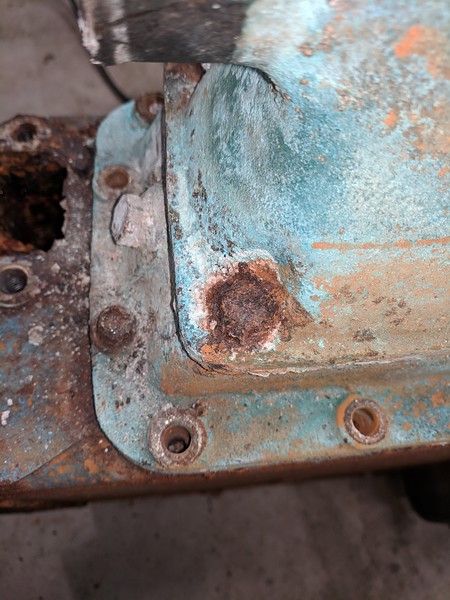
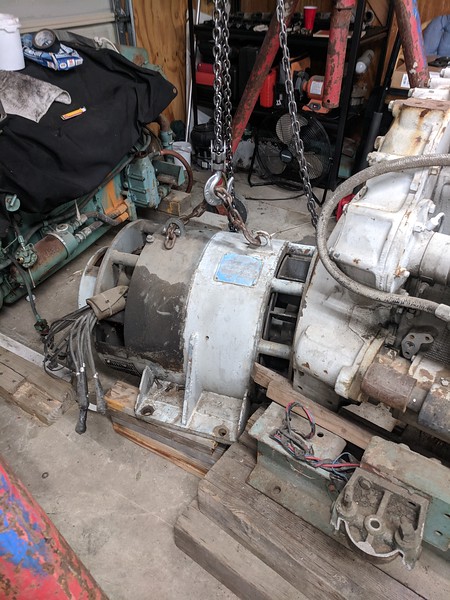
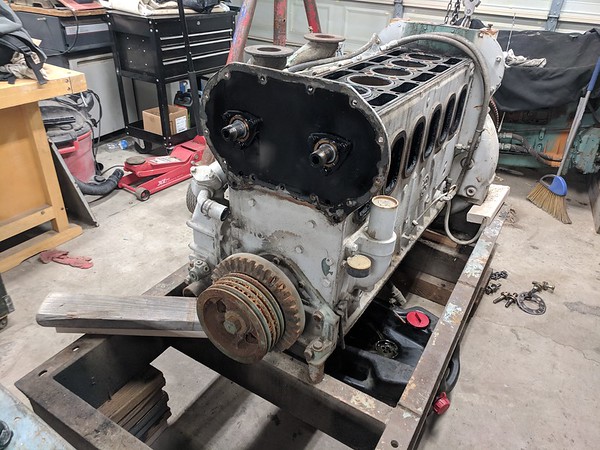
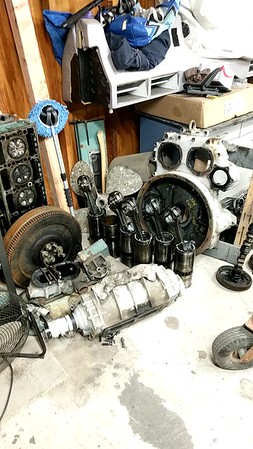
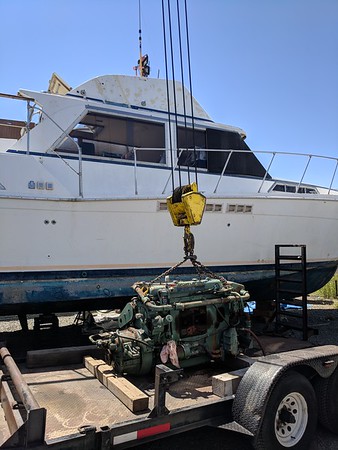
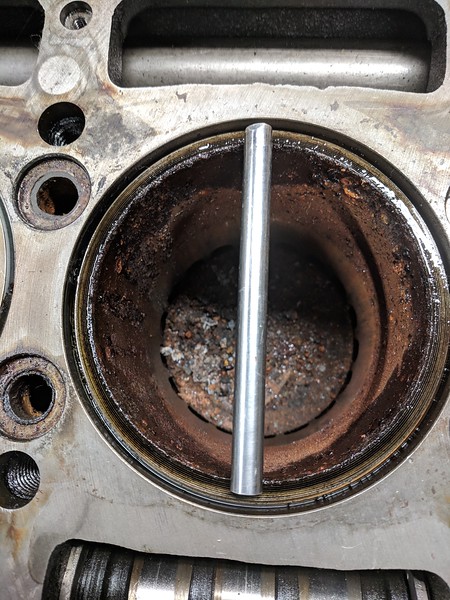
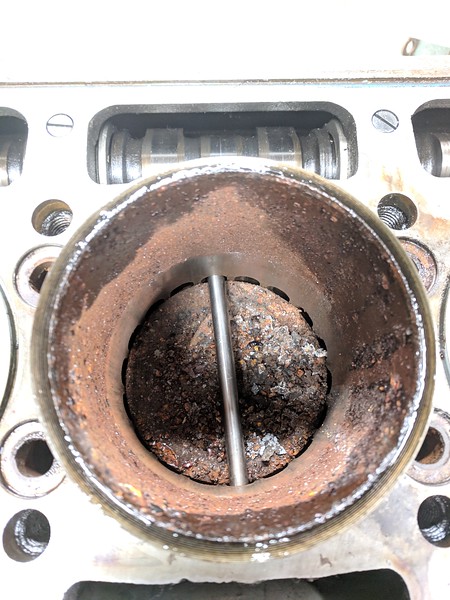
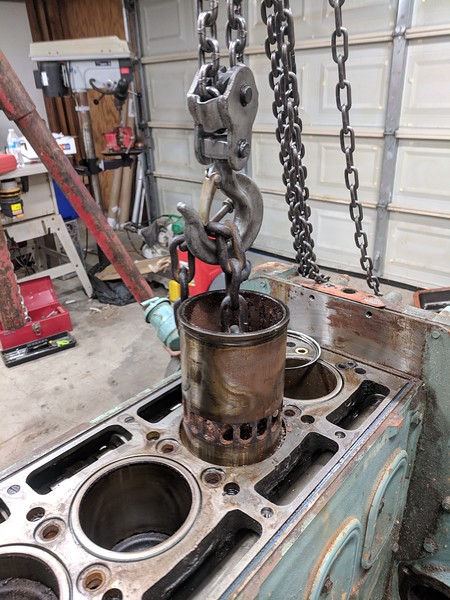
If there is interest from anyone to follow along, I thought I'd post a thread on the overhaul process of a Johnson & Towers Detroit 671 from 1977.

This really isn't a recommended kind of thing to do. If the boat was worth more, a repower would be appropriate. But my boat is a 42' 1977 Uniflite Double Cabin commonly referred to as a 'blister boat' due to a fire retardant additive used at that time. It has small bumps in various areas that would cost a lot to have repaired and then they come back over time anyways. It will never be worth much financially, but I am happy to use the boat as long as it suits my purposes. However, one engine was neglected by a former owner (along with other items) and it needs to be rebuilt, so I'm doing that.

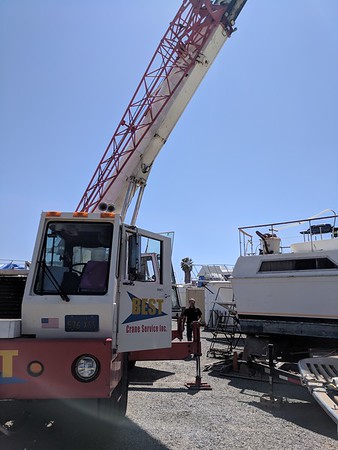
The boat is on the hard for this process along with a full bottom job, thru hulls service and a few other items.
 
The first step was to aquire some spare parts.

Detroits can be identified by the model number stamped on the block. This is an 8 digit number separated by a dash. Mine is 1062-7000

1062-7000 = Series Inline 71
1062-7000 = The next two digits are the number of cylinders, 6
1062-7000 = This digit is the 'Application designation'. 2 = Marine
1062-7000 = Engine arrangement. A code that determines rotation and accessory drive positions. 7 = Counter Clockwise rotation (viewed from rear of engine), blower on stbd, exhaust on port
1062-7000 = Head type. 0 = 4 valve, "N" type
1062-7000 = Model variation. Unclear exactly what this denotes.

This guide is very helpful in identifying a detroit diesel: http://engine.od.ua/ufiles/DETROIT-Model-Serial-number.pdf

The engine as it came out of the boat had suffered some corrosion in the blower and one or more cylinders, as well as having had water run in the cooling system which caused rust problems in the heat exchanger.

Needing parts like a blower, I found an industrial generator that was in 'running' condition and had a Detroit 671 with a model code of 1063-7000, which is almost the same motor. The blower, head, camshaft, etc... all the same. Rebuildable spares for the blower, oil cooler, etc...

The engine also came with a steel skid as well as a 75KW generator head.

i-hB3QznK-L.jpg


2,000 pounds of generator headed for the scrap yard.
 
Might be a good time to media blast the hull bottom and let it dry out while you are doing the work. SD has such low humidity that in a month or two blisters might dry themselves out. Then do a barrier coat and the blister problem is gone.
 
Next up is to tear down the donor engine and set all it's parts aside.

Mostly torn down:

i-SMMXqJb-M.jpg


A pile of big parts:

i-mcXL8zL-M.jpg
 
Might be a good time to media blast the hull bottom and let it dry out while you are doing the work. SD has such low humidity that in a month or two blisters might dry themselves out. Then do a barrier coat and the blister problem is gone.

That's exactly what I'm doing. Will be receiving a two part barrier coat. The blisters were all ground open and allowed to dry out. They are getting filled with fresh glass set in epoxy and then a final barrier coat before bottom paint goes on.
 
The engine has to come out of the boat. I needed a crane for that. Uniflite thoughtfully provided a huge, removable hatch in the salon ceiling to facilitate engine removal, so it was able to go straight up. The crane was large enough that lifting the engine was no issue at all.

i-MTtztfF-M.jpg


You can see some patching and filling of the flybridge cap going on in the background as well. The radar arch had to be removed for truck transport and will be bolted back on later after re-launch. Engine loaded on to a trailer for transport to the workshop.

i-Gqj7PQ6-M.jpg
 
Might consider going through the other engine too, even if it seems ok. Nice to have both clocks set to zero!
 
Starting the tear down on the boat engine. Lots of surface rust to deal with.

Injectors are out, head bolts pulled and rigging up the chains for head removal.

I'm using a 2 ton chain hoist and an A-Frame to manage the lifting. The head weighs at least 200 pounds.

i-TMgXf9Q-XL.jpg
 
Making notes of all the consumable part numbers to add to the operations manual on the boat.

Fuel filters.

i-HWSvx8L-M.jpg
 
Might consider going through the other engine too, even if it seems ok. Nice to have both clocks set to zero!

It was run regularly and it is decent shape. However, I'm doing hoses and other services on it as well. BOth engine only had about 1200 hours on it. The neglected engine developed an injector problem and a former owner didn't fix that and just let it sit, while using the other engine.

After a few years of neglect, the motor was stuck and would not turn over. The blower is seized up with corrosion as well as a couple of rusty cylinder liners. The rest of the motor is in good shape and shows little wear so it's a good candidate for rebuild.
 
Thanks for posting this. Please post your progress as you continue. Have you done a lot of major engine work like this before?
 
Thanks for posting this. Please post your progress as you continue. Have you done a lot of major engine work like this before?

This will be aprox. my 10th full size engine rebuild. Over the years, I've rebuilt multiple Toyota engines (including their big 1FZ-FE inline 6), a couple of ford 390 V8, a couple of honda engines, a Lycoming aircraft engine, a datsun, and a couple of others that slip my mind...

This is the first diesel though and the heaviest of them yet, the first one I need a hoist for individual parts.

I'll keep posting up as I make progress.
 
Make sure you properly fit the dry liners. They come in grades to get a slightly snug fit. Either need to test fit liners or scope block bores with an accurate bore gauge. Been a long time since I did it, but details are in the manual. Old liners should be marked on the OD, but that does not guarantee a good fit.
 
Starting the tear down on the boat engine. Lots of surface rust to deal with... I'm using a 2 ton chain hoist and an A-Frame to manage the lifting. The head weighs at least 200 pounds.

Yep it took two of us pulling my old 6-71 head off, working in an engine space with bend-over headroom. Backbreaker. Glad you are in an open shop with a chain hoist.

Regarding to the rust, can you take the block down to its skivvies and send it out to be peened and cleaned?
 
"The engine has to come out of the boat. I needed a crane for that. Uniflite thoughtfully provided a huge, removable hatch in the salon ceiling to facilitate engine removal, so it was able to go straight up. The crane was large enough that lifting the engine was no issue at all."


IF only white boat assemblers would copy this concept , common on many working boats, the cost of maintaining an older boat would go way down!!!!
 
Might consider going through the other engine too, even if it seems ok. Nice to have both clocks set to zero!

:thumb:

There is a current thread on boat diesel regarding rebuilding hours on 6-71 485 HP engines.
 
Last edited:
Make sure you properly fit the dry liners. They come in grades to get a slightly snug fit. Either need to test fit liners or scope block bores with an accurate bore gauge. Been a long time since I did it, but details are in the manual. Old liners should be marked on the OD, but that does not guarantee a good fit.

I did obtain a factory overhaul manual, all 400+ pages of it, and I'll be following it carefully throughout the process. The liners that came out of it are marked as 5113953, which I believe is STD #1 and all rod bearings are marked standard and look like new. The crank looks to be in great condition as well.

Yep it took two of us pulling my old 6-71 head off, working in an engine space with bend-over headroom. Backbreaker. Glad you are in an open shop with a chain hoist.

Regarding to the rust, can you take the block down to its skivvies and send it out to be peened and cleaned?

It would not be fun to do this in the boat's 'engine room'. ughh. I would want to rig up a chain hoist in the boat if I was going to do major service that way.

Unfortunately, there are no shops around anymore that have tank or shot facilities to clean a block this big. I've checked around. I'm sure they are available in other areas, but California has chased heavy industry away with fees and regulations to the point that it just doesn't exist anymore. What used to be a 10 minute dip in a vat of acid is now multiple billable hours of grunt work with a pressure washer, gloves, brushes and a tyvek suit. I'll be doing the clean up myself with similar methods.
 
Rusty liners

With the head off, we can see what was already known from inspecting the cylinders through the intake ports, but much more clearly.

i-2rDgnpg-L.jpg


The #5 cylinder liner is plenty rusty and #6 doesn't look great either. Unfortunately, #5 was open to the intake/blower and a pleasant sea breeze for a few years did not do it any good.

To make pulling the cylinder assemblies easy, I made a pin just the right length out of some stainless steel rod.

i-RkKJDTn-L.jpg


I slip the pin into the intake ports and then rotate the crankshaft to bring the piston up and it pushes against the pin which pushes the liner and it slides right out by rotating the crankshaft.

i-zHN8Jsk-L.jpg


Once the TDC for the cylinder is reached, I pin the intake hole at the block deck, rotate the crank a bit more to pull it down into the liner about 1/2". Then I have room to put a chain onto the pin and hook it up to the chain hoist. remove the connecting rod bolts and the entire liner/piston/rod assembly comes out in one piece. It can be slid out by hand, but it's pretty heavy and awkward.

i-N4WdSsV-L.jpg


The head is off to the machine shop for a valve job, and the blower is there also for new bearings, seals and timing setup.
 
Mark the liners coming out with the hole of origin as there may be some oversize ones and you want to know which holes they came from.
 
Mark the liners coming out with the hole of origin as there may be some oversize ones and you want to know which holes they came from.

Yes, I mark all of the components as I remove them for reference purposes. All of them in this case were marked the same and had a clean sliding fit. The bores on the block are clean and no corrosion or pitting, so that's good news.
 
In for the rebuild ride...

I've got DD 671N's in my new (to me) 1983 Trojan 44 FBMY.

Thanks for sharing...!!
 
In for the rebuild ride...

I've got DD 671N's in my new (to me) 1983 Trojan 44 FBMY.

Thanks for sharing...!!

Do you know who the marinizer was for yours? If you happen to have any pictures of your installation, would be nice to see that.

I've discovered that the Johnson and Towers marinization parts are no longer available. They have seals and gaskets, but the entire heat exchanger, inlet adapters, trans cooler, etc... are all unavailable.

Not a big surprise, but you'll want to take good care of those components as they are only available now as used parts from boats being scrapped. The heat exchanger is going to present some challenges in my case as it was obviously neglected as well.

Believe mine to be J & T's as well...
I'll get some pics in the coming days, after I get a house move done. Anyone wanna volunteer to help...? :)

This boat has low overall hours on her, but I know 2 of the 3 former owners and both were good (one meticulous) on overall maintenance and care.

BTW... she has entertained both Mickey Mantle, Yogi Berra, and another Yankee who was on the stretch of 10 Championships that I can't seem to recall right now. (sorry, I'm a Cardinal fan...) :)
 
Do you know who the marinizer was for yours? If you happen to have any pictures of your installation, would be nice to see that.


I've discovered that the Johnson and Towers marinization parts are no longer available. They have seals and gaskets, but the entire heat exchanger, inlet adapters, trans cooler, etc... are all unavailable.


Not a big surprise, but you'll want to take good care of those components as they are only available now as used parts from boats being scrapped. The heat exchanger is going to present some challenges in my case as it was obviously neglected as well.


Are you a member of boatdiesel? I imagine all of the talent on that site would help you source parts for you JT 671N. I used to have a pair of JT 671TA. Boatdiesel was very helpful.
 
Are you a member of boatdiesel? I imagine all of the talent on that site would help you source parts for you JT 671N. I used to have a pair of JT 671TA. Boatdiesel was very helpful.

I had not heard of that site, but I'll go take a look, thanks!
 
Saving the heat exchangers

One issue I've been trying to figure out how to deal with is the heat exchanger(s). They were also neglected of course and are full of deposits of minerals. A former owner also used water in cooling system instead of proper coolant, but the cast iron heat exchanger parts, I'll cover in another post. The heat exchanger system look to be the worst part of the entire rebuild.

For this post, I'm dealing with the brass/bronze/copper parts.

The first task is simply to get the things apart. Most of the fasteners came out, but a few were too far gone, 4 out of about 25 fasteners were corroded, and couple of them broke the heads off when I tried to turn them.

i-D7Hbj3V-L.jpg


This was my starting point. ugghh.

First step, grind off the heads of the corroded bolts.

i-trgHWvB-L.jpg
 
There's a lot of deposits in the primary heat exchanger as well as on the bronze fittings that bolt to the housing. I don't think using steel bolts to bolt together two bronze housings was a good idea and I'm probably going to use bronze bolts to bolt that back together. The steel bolts in the bronze fared the worst by far. All of the steel into cast iron did on with only one bolt breaking off. Three of the four steel/bronze setups were corroded beyond removal and will have to be drilled and re-tapped.

i-GHJt3gW-L.jpg


Pondering how to get this stuff cleaned out... I researched around and found this video by Barnacle Buster.


I kind of figured it was marketing hype and ideal conditions, etc... very skeptical. Discovered the products active ingredient is phosphoric acid, which is basically what is in a can of coke. I decided to give it a go and see if it works as advertised.
 
I got the components separated and all apart. I mixed up the gallon of barnacle buster concentrate with 4 gallons of water as directed in a plastic container.

Then I put the heat exchanger and the bronze housings into the solution. Just like the advertising video, it immediately started bubbling heavily, frothing and churning the water. I let it sit for 7 hours and pulled out the parts, gave a fresh water rinse.

i-2JbjF29-4K.jpg


i-cB4JB6w-4K.jpg


Incredibly, not a trace of any deposits at all. All of the salt/calcium/lime, whatever it was is gone and the heat exchanger looks to be in excellent condition. The housings are clean a bright and ready to go again as well. Still have a little repair work to do on the broken fasteners, drilling and tapping but I'm really impressed with the barnacle buster. I'm sure I'll be finding other uses for that on the boat when dealing with sea water deposits!
 
Back
Top Bottom