"Hard to Top" finally installed

The friendliest place on the web for anyone who enjoys boating.
If you have answers, please help by responding to the unanswered posts.

ctjstr

Senior Member
Joined
Nov 24, 2017
Messages
399
Location
United States
Vessel Name
"Convergence"
Vessel Make
Camano Troll
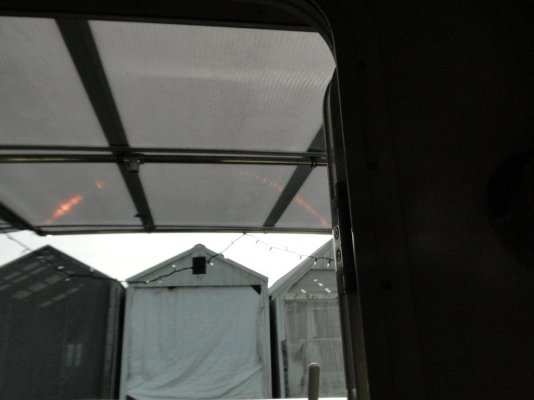
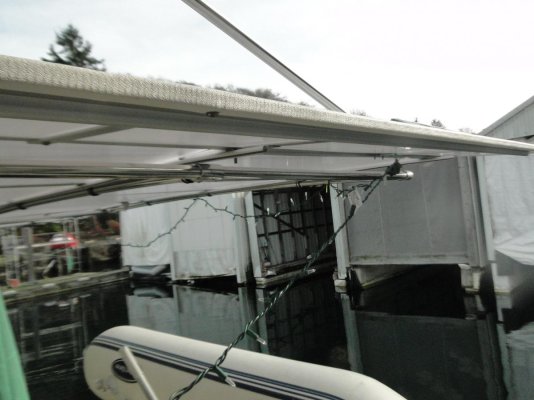
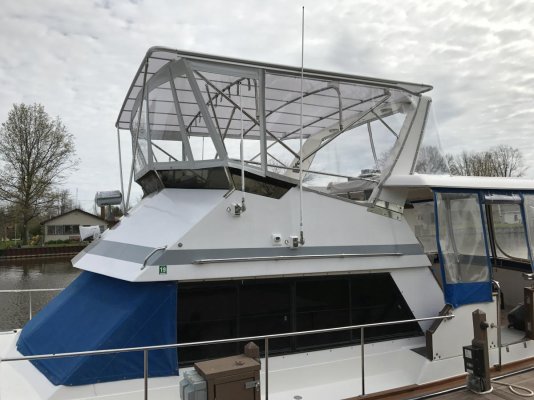
Seems like months ago I ordered the materials to add a cockpit cover. I wasn't a huge fan of canvas, weight, heat, darkness etc being a few reasons. I also wanted something that could be supported from the fly bridge, to avoid uprights down below. I finally found these guys:

Home | Hard To Top

and decided that might be good.

Jason (South of Heaven) will verify that the customer service from these folks was ....meh....not perfect.

They have you give them a bunch of dimensions, and I think promptly forget a bunch of them.

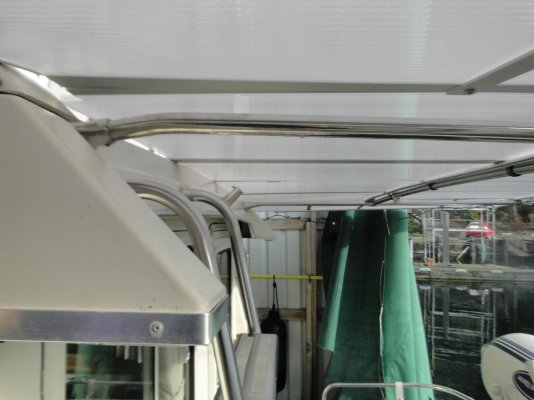
When I got the parts, it was a jigsaw figuring it all out, but with some tweaking here and there, I finally got it done. (note--I did this mostly by myeself...OMG...get help...get help....get help. too many moving parts during installation)

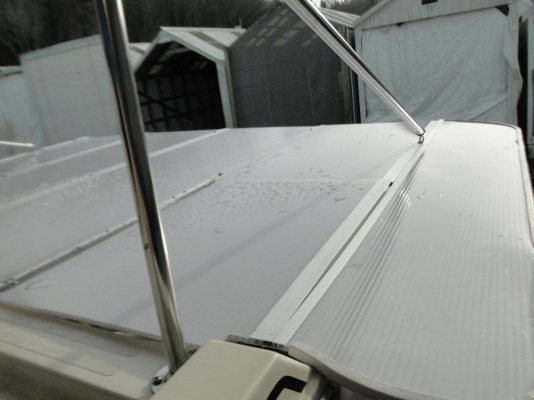
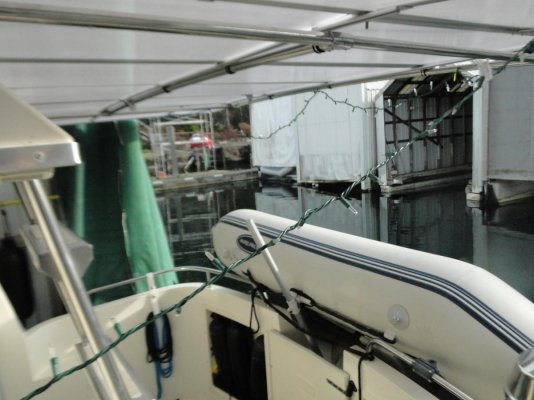
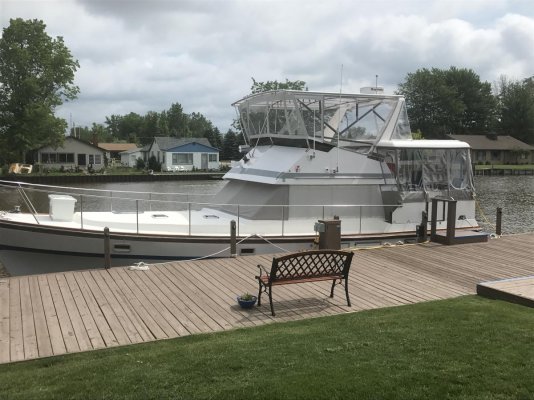
Its been in place a couple months and so far, i'm a fan. It lets the light in and keeps most of the water out....some comes in around the hatch I installed, but not bad. If I had to do it again, I'd make it a big smaller. Mine hangs out about 6" past the transom. And, it extends about 5" too far on the sides. Its not a problem, but the aesthetics would be better if slightly smaller. One nice thing about the way it is is when there's no wind, other than the hatch, virtually no water comes in to the cockpit.

Time will tell how well it lasts.

Sorry about the photos..it was tough getting decent shots in the boathouse. When its out on the dock, I'll get some better ones.

The loose wiring is the christmas lights half removed.

toni
 

Attachments

  • DSC06010.jpg
    DSC06010.jpg
    79.5 KB · Views: 180
  • DSC06015.jpg
    DSC06015.jpg
    82.4 KB · Views: 164
  • DSC06016.jpg
    DSC06016.jpg
    105.3 KB · Views: 161
  • DSC06017.jpg
    DSC06017.jpg
    97.2 KB · Views: 162
  • DSC06018.jpg
    DSC06018.jpg
    113.3 KB · Views: 166
I have put them on my last 2 boats. Agree it is somewhat a puzzle to put together but we really do like them. I live about 2 hours away from their location so I drove down and picked mine up. I apparently didn’t get adequate caulk in between the aluminum chanels and I had several leaks on our current boat. Problem is mine is not easy to access due to height. We have to put the boat in the barn and climb up in the rafters to work on it. I ended up buying 3” wide Eternabond tape and putting it over the aluminum joints. Works great and Eternabond seems to last forever. No more leaks.
 
thats a great idea. I've used it on my motorhome before. I'll see how well things stay sealed and may do that for insurance.
thanks
toni
 
Toni: Good job by you for sticking through the whole process and getting it installed. I'd like to see some more pics from a distance. It's kinda hard to visualize the whole boat from the pics. Congrats man!

Yeah, I was fed up with Rodney from Hard to Top. I did NOT have a good experience with him at all. Not a fan. Lol.
 
Looks interesting, do you have any pictures of the cover from a distance? So we can better see it..
 
I looked hard at "Hard to Top" but eventually decided against because their response to my questions was, well, not responsive.
 
They are a bit tough to get ahold of, but I think it is worth it. On this boat we wanted the top to be pretty large to make the flybridge feel open. Also on the front we wanted a reverse angle on the front panels of the enclosure. If it is raining a lot of the time we don’t even get rain on the front panels.
 

Attachments

  • 1BE7E63E-BE5F-4BC1-A382-0B5F0BB4E003.jpg
    1BE7E63E-BE5F-4BC1-A382-0B5F0BB4E003.jpg
    134.5 KB · Views: 110
  • 95AC4BE6-7E74-4BDA-8415-D23D36F03B25.jpg
    95AC4BE6-7E74-4BDA-8415-D23D36F03B25.jpg
    174.6 KB · Views: 147
i want to get one of these instead of buying new canvass . there sight suggest just using the frame i have . i know if i did that it would be gone the first hurricane that that come close. i have thought about adding cross braces but i don't know if that would be enough. how much wind do you think this would stand ? could i brace it to the mast at the rear ?
 
4F256513-797F-4919-AC4E-E45940330D48.jpgAlso loved the product, not impressed with the company. Found it fairly easy to DIY. Wanted sun/rain protection without being in a tent. It was perfect for what we wanted. Never needed the side curtains.
 
One thing to consider is the size of your bimini frame. On a previous boat we put a smaller hardtotop that wasn’t nearly as big. That boat had 1” frames. On our current boat we put a much larger hardtotop. The frame was also 1”. It was not strong enough in my opinion. I had 1.25” bows made and put them on. They cost about $700 to have made. What a difference in strenght. It is very solid now, no give whatever. So depending on what size you are going to have made, you may need to upsize your bimini bows if they are not 1.25”.
 
View attachment 85800Also loved the product, not impressed with the company. Found it fairly easy to DIY. Wanted sun/rain protection without being in a tent. It was perfect for what we wanted. Never needed the side curtains.

nice that is what I would end up with .what size was your bows ? did you gain any height (stand the bows up straighter). I also have a mast and stays to deal with . mine is 1" and has a lot of side flex so I may have to upgrade the bows size like Dave did . thanks to all of you for the ideas
 
Thank you all for this thread on Hard To Top, I have been strongly considering this product, near time to make a decision as my bimini needs replacing. So other than the mediocre customer service the product delivers to expectations? I have a 41 DeFever and was wondering what it would look like, so thanks for the pictures.
 
I did add two side to side braces on each side. One on each side comes from the harttotop aluminum frame down to the front of the flybridge brow. Another comes from the front bow down to the dash on each side. My top is very large so I wanted to make sure it was well supported. I probably could have gotten by with only one side brace on each side but I would not have known I needed two until it was too late so I went with 2 on each side to start.
 
I did add two side to side braces on each side. One on each side comes from the harttotop aluminum frame down to the front of the flybridge brow. Another comes from the front bow down to the dash on each side. My top is very large so I wanted to make sure it was well supported. I probably could have gotten by with only one side brace on each side but I would not have known I needed two until it was too late so I went with 2 on each side to start.


Can you share some pictures?
 
I don’t have any photos that show both supports and the boat is still in the barn under a tarp. This is the best photo I have.
 

Attachments

  • FDD49697-BDBC-43EC-B401-BF19295E4A1F.jpg
    FDD49697-BDBC-43EC-B401-BF19295E4A1F.jpg
    129.1 KB · Views: 99
I don’t have any photos that show both supports and the boat is still in the barn under a tarp. This is the best photo I have.


Did you just purchase the top or top and frame, from them? Just wondering if you had purchased the top & frame if they would have made any “beef up” supports.

Looks nice!
 
Originally my bimini had a 1” S/S frame. Once I installed the hardtop I realized that the 1” was not strong enough. I had a local S/S company make 1.25” frames and I replaced the 1” frames. Then it was very solid. I was not sure how much the hardtop would rack side to side in the front so I added 2 approximately 45 degree supports on each side to stop the top from racking. Looking back I think that one on each side would have been enough. I used standard bimini frame hardware to make the supports. I have one on each side inside the enclosure going from the side of the bows down to the dashboard and one on each side on the outside of the enclosure going from the hardtop frame down to the brow of the bridge.
 

Latest posts

Back
Top Bottom