Fuel tank supports

The friendliest place on the web for anyone who enjoys boating.
If you have answers, please help by responding to the unanswered posts.

Propnut

Senior Member
Joined
Jan 2, 2017
Messages
163
Location
US
Vessel Name
Voyager
Vessel Make
41' PT Europa
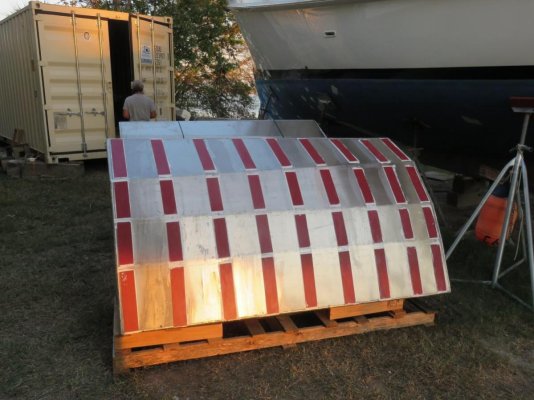
I’ve got both of my old steel fuel tanks removed (175 gal. each).
I’m getting ready to have new aluminum tanks fabricated and want to get it correct. The steel tanks are 71” long and were sitting on three cross stringers, one at each end and one in the middle, with nothing between the tank and stringers. I’m thinking about securing 3/4” marine plywood on the stringers and setting the tank on the plywood for more even support. Rather than securing plastic strips with 5200 to the bottom of the tank to keep moisture from the tank, what would be wrong with having the fabricator weld channel to the bottom of the tank , say 12” apart and then just set it on the plywood. I could even let the channel protrude a couple of inches out from the tank and thru the channel to the plywood.

Also what is the thoughts about clean- out ports? Install them or not? I’ve owned 3 previous boats with them , but never opened one up.

And lastly, to paint or not to paint? I’ve read the downside to painting but just wondering what the consensus of the group here is.

Any and all suggestions appreciated.
 
From a woodworking perspective, over time the unsupported sections of plywood will end up not carrying any load. If you're concerned about spreading the load more (which I agree with) add more stringers.

As far as paint, I've heard the hot set up for aluminum tanks is coal tar epoxy.

Ken
 
If they were my tanks, I'd have a drain at the lowest point of each tank with a valve and some plumbing to a place where I could catch whatever comes out. With a valve you can open it slightly and take a sample of what's in the bottom of your tank - water, etc. Put a plug in the end of the plumbing so if the valve should leak or vibrate open there's no leak. Depending on where the tanks are, you could plumb them together to equalize, but with valves. I have 3 main tanks plumbed together, separated by valves and a central drain. Port, center, & st'bd. I use a large 1-1/2" pipe so when fueling on one side I can fill all the tanks w/o dragging the fuel hose across.

Ditto on the plywood, too long a span, also it would need to be treated/painted and still might rot.
 
Greetings,
Mr. P. While welding channel to the bottom of the tanks may seem attractive, it only takes ONE small void or crevice in the weld to allow water to collect and initiate corrosion. I would go with strips of plastic well glued to the bottom of the tanks for an offset from whatever the strips are sitting on. Perhaps a thicker bottom built into the tanks would provide the support you think you may need.


IF you want to add stiffening channel, do so on the inside of the tanks during fabrication although you still run the possibility of crevice trapping voids if water ever contaminates your fuel.
 

Attachments

  • 653572BF-49D7-47CA-A7F8-ADD4B1C98CAE.jpg
    653572BF-49D7-47CA-A7F8-ADD4B1C98CAE.jpg
    126.3 KB · Views: 100
If you are going to go with 3/4” plywood as a base, I would want more than 3 supports under the plywood. It would be easy to add some under the plywood before putting the plywood in. Then go with a non absorbing material under the tank as others have described.
 
Check for Coast Guard and ABYC recommendations. Tank supplier may have requirements.

I have used high tech plastics for repairs where absorbing liquids would be an issue. Can't tell you names off the top of my head, but the plastic was workable like wood, using the same tools. Maybe buy where you would get plastic windows. I got scraps, cut pieces, real cheap.

Top of the tank is best for openings. Less leakage in an impact.

A sump, low point, for water and debris to settle is great. It can be pumped by way of a dip tube.

Baffles are good for stability, durability and bad for access.

Sometimes oil canning is an issue.

Here's another article:

https://www.practical-sailor.com/issues/33_5/features/Diesel-Fuel-Tank_5437-1.html
 
Last edited:
Qualify your fabricator if you haven’t already. You only want to do it once plus it will help on the resale.
 

Attachments

  • 32867823-792E-445E-947D-2E72AEBF2167.jpg
    32867823-792E-445E-947D-2E72AEBF2167.jpg
    101.2 KB · Views: 77
Absolutely go with a fabricator that builds to the specs, not just any welder. You want a certified tank and likely so will your insurance company. Also for resale as mentioned before.
 
Make sure to add extra ports in the top of the tank. We put an extra pipe thread fitting that a half inch copper pipe would fit in to creat a junk suction tube. ¼ " off bottom with fuel suction 1" off bottom. Vent was installed with a short tube to creat space at the top of tank for expansion from heated fuel. A clean out port is easy to do while building the tank, very difficult later. Use heavier metal .188" or better.
Powder coat may work very well in salt environment. For sure add support lift to the tank to keep moisture off the bottom. Boat board with 5200 gluing it to the bottom of tank will work. A drain off the bottom is great if you have room to catch the nasty stuff.
 
If you use Starboard as a spacer, 5200 will not stick to it. Rule/Sudbury Elastomeric caulk is what to use.
 
I would definitely weld channels to the bottom of the tank, and let those bear on whatever supports them on the hull. One of the most likely places for corrosion is anywhere plywood or plastic is pressed against the tank. This is an area impossible to keep dry or wash the salt out of. The corrosion will still occur, but it will be on the channels which do not hold any fluid, and can potentially be replaced in the distant future if they corrode to dust.

The other thing I would do is incorporate a sump at the low point of the tank. It need not be deep, just a few inches. It gives a place for water and crud to collect. Place an inspection port or just a threaded fitting directly above it. This allows you to pull the plug, stick a dip tube down and suck out the bad stuff that has collected there. If the tank has no defined low point, this bad stuff spreads out all over the bottom. I would not put a drain there, just another point of possible failure - suck it out from the top.

Also insist that they weld the tanks from the inside out - that is all of the welds up to the top are welded first inside, then outside. Then the top is put on which can only be welded from the outside. The reason for this is that the back side of tig or pulse mig welds are pretty ugly, while you won't see it inside the tank that is where corrosion is likely to get through first.
 
I can only speak from my own re-tanking experience.
The tank is made from 1/8th steel plate and painted with 2 pack epoxy paint and runs crossways across the boat and hold 500 litres, complimented by 2 triangular stainless bilge tanks of 250 litres each.
Baffles divide the tank by thirds (I have 2 with offset 3'' holes in the centre, 2x2''semicircles on the top and 2x2'' offset on the bottom) to stop 'surge' and allow quick even refill.
A fill pipe each end of the tank for refuelling from either side deck, 1 side fills both the bilge tanks and when full the main tank. The other side just fills the main tank.
An oblong bolted down cleaning hatch on the top allows access to each section. Its amazing what fine sediment collects in the bottom over time.
A sump in the centre with an 1'1/2'' drain cock which I just 'crack open once a month to drain water(if any).
2 extra 1'' fittings on the top with bungs in case of later modifications.
When fitted it was set on 1/8'' insertion rubber and with expanding foam between the back of the tank and the hull, the rest of the tank is covered in 1'' expanded polyurethane insulation sheets to stop condensation and reverberating noise. It works perfectly for me but I'm always interested of learn of other peoples methods.
 
Last edited:
This book covers fuel tank installation, construction, and design in considerable detail:

https://www.amazon.ca/Boat-Mechanical-Systems-Handbook-Recognize/dp/0071444564

...and a lot else besides. Indispensable, IMO.
I have sumps with drain lines in the bases of each of my steel tanks. Taking a litre out of each for inspection is part of my annual servicing routine. I've often wondered why fuel isn't drawn directly from these low points to the engines via the multi stage filters. Surely we want any crap and water removed immediately it forms and we want to know that contamination is occurring asap....as we would if it showed up in filters set up with vac gauges and a spare filter on an isolated parallel line. What am I missing ?
 
You don’t say the thickness of the aluminum. If it’s 3/8 then forget the plywood. Welding on box channel that is a 1/4” shorter than the tank and located to sit on top of the stringers will give you protection from moisture corrosion to the bottom of the tank.
 
I have sumps with drain lines in the bases of each of my steel tanks. Taking a litre out of each for inspection is part of my annual servicing routine. I've often wondered why fuel isn't drawn directly from these low points to the engines via the multi stage filters. Surely we want any crap and water removed immediately it forms and we want to know that contamination is occurring asap....as we would if it showed up in filters set up with vac gauges and a spare filter on an isolated parallel line. What am I missing ?
I get the advantage of knowing asap contamination is present, but maybe the sump system, in a way "quarantines" or accommodates a reasonable quantity of water and crud from being drawn up, to be removed by your annual draining. If the quantity exceeds the sump capacity it should present in your filters for earlier attention. I regularly drain a little from my Racors to see what the aging "no sump" tanks are sending them.
 
I have sumps with drain lines in the bases of each of my steel tanks. Taking a litre out of each for inspection is part of my annual servicing routine. I've often wondered why fuel isn't drawn directly from these low points to the engines via the multi stage filters. Surely we want any crap and water removed immediately it forms and we want to know that contamination is occurring asap....as we would if it showed up in filters set up with vac gauges and a spare filter on an isolated parallel line. What am I missing ?

I have a similar setup to what you describe, and have added a polishing system supplied from the sump drain.
This way you don’t have to wait a year to know if there’s a garden growing in your tank, a quick glance at the polishing systems vacuum gauge tells the tale, and your primary filtration should remain very clean, enabling safe use of quite low micron ratings there.
I agree that if I were wanting to add a polishing system, that would be the way to do it. However where the boat is being used regularly...say, most weekends....why have a polishing system at all? Just collect from the sump and direct flow via the Racors.
 

Latest posts

Back
Top Bottom