improving and maintaining Albin 33

The friendliest place on the web for anyone who enjoys boating.
If you have answers, please help by responding to the unanswered posts.
also had a small damage spot in my caprail….. so i fixed it :thumb:
 

Attachments

  • IMG_20190104_113308.jpg
    IMG_20190104_113308.jpg
    61.2 KB · Views: 54
  • IMG_20190104_114327.jpg
    IMG_20190104_114327.jpg
    77.4 KB · Views: 58
  • IMG_20190104_115920.jpg
    IMG_20190104_115920.jpg
    50.3 KB · Views: 59
  • IMG_20190105_112331.jpg
    IMG_20190105_112331.jpg
    45.3 KB · Views: 54
Standing on my swimming platform I broke off a corner. because I had installed a small dinghy cleat I was already planning to reinforce this corner so I did this right away.

screwed a 4mm stainless steel plate on the underside which also rested on the existing support.
 

Attachments

  • IMG_20181229_123038.jpg
    IMG_20181229_123038.jpg
    77.1 KB · Views: 57
  • IMG_20181229_123016.jpg
    IMG_20181229_123016.jpg
    71.5 KB · Views: 56
  • IMG_20181229_123323.jpg
    IMG_20181229_123323.jpg
    82.4 KB · Views: 54
  • IMG_20181229_142944.jpg
    IMG_20181229_142944.jpg
    66 KB · Views: 52
I also finally got a job done which has been the longest on my list. its on my list since the first day.
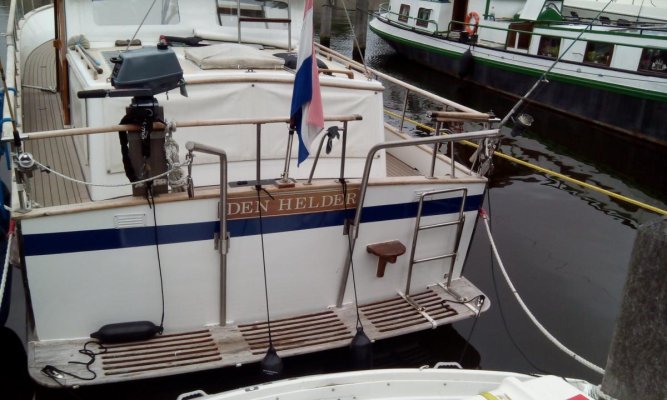
when I bought my boat, it had to be sailed to my harbor. after the first day of four, on the water I moored it at a marina. the previous owner had left a bottle of champagne in the fridge for us.
I have sailed the boat with my proud father (also a oldtime boater). because we had something to celebrate, we immediately emptied the bottle :socool:
happy from front to back :dance: we went to our cabins, closed the doors and went to bed.
the next morning I thought I had a hangover. I was sick, nauseous and dizzy all day which did not go away. it must be something else.
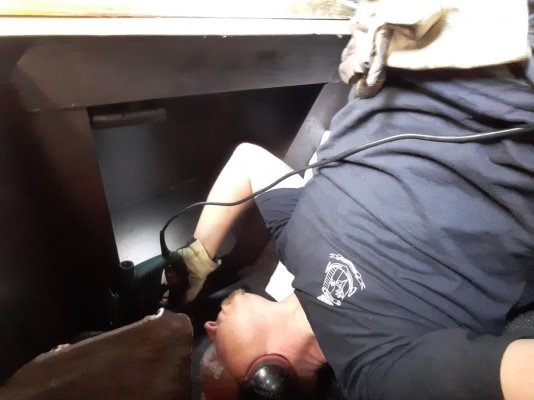
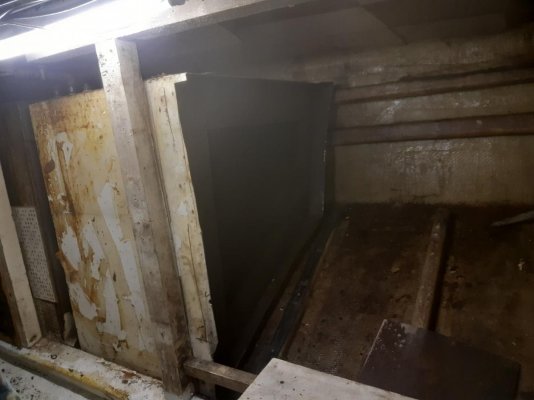
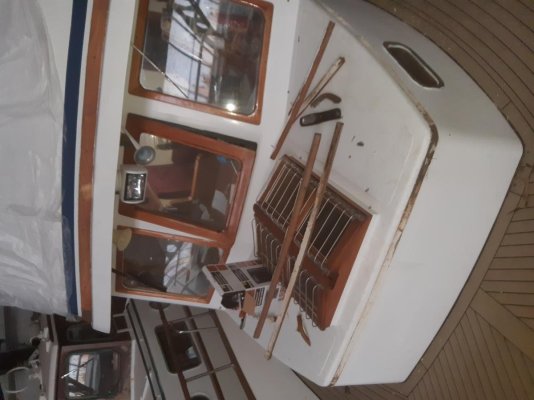
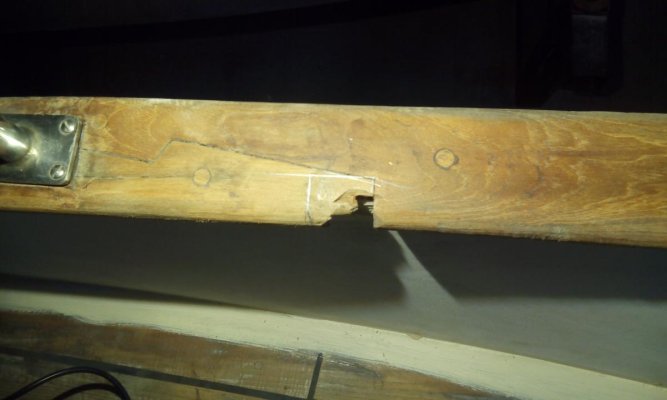
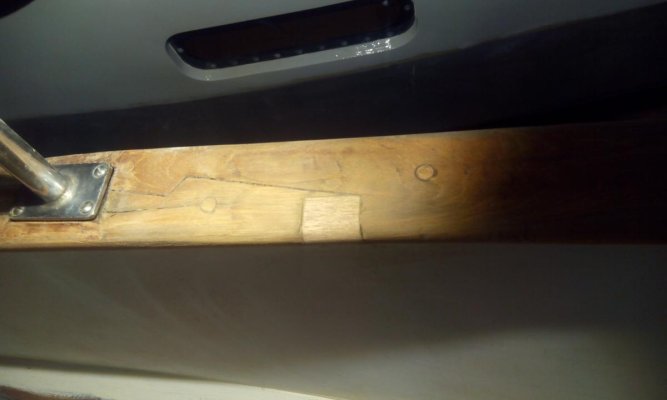
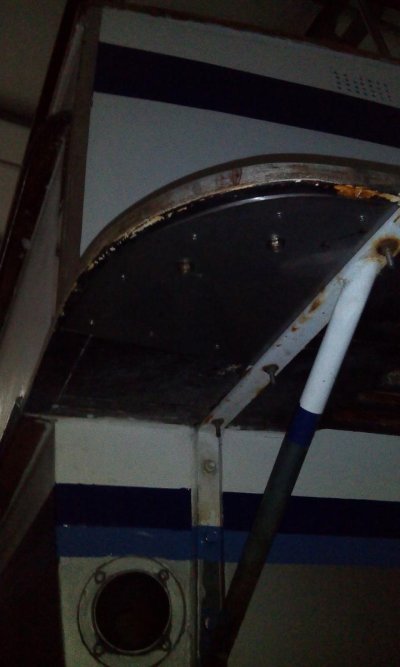
when we arrived at the second port on our trip I went to investigate and found a hole underneath the stairs in the back cabin. probably an old heater ventilation port. the heater was removed but the venthole was never sealed up so there was an open hole to the engineroom.
that was for sure the reason I had a headache.
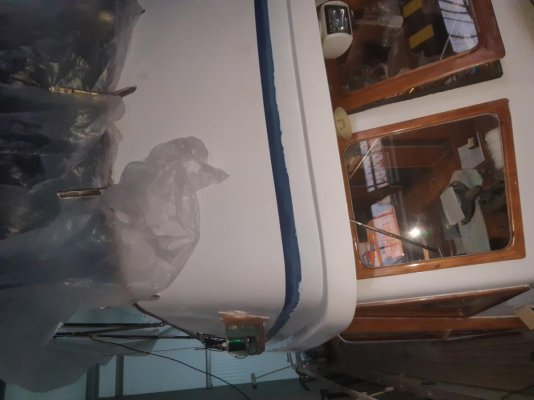
that evening I MacGyvered a piece plastic and tape and slept with the door open.

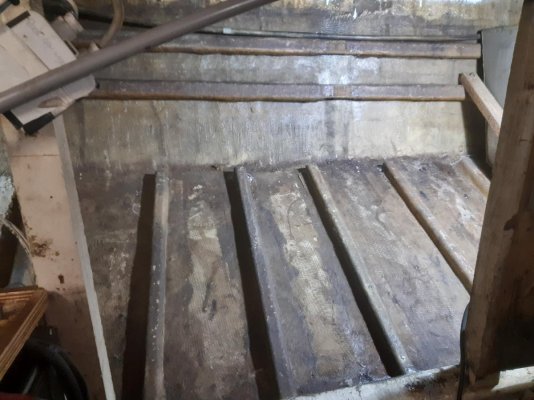
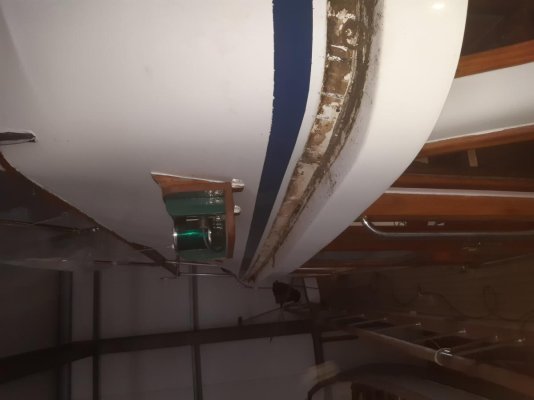
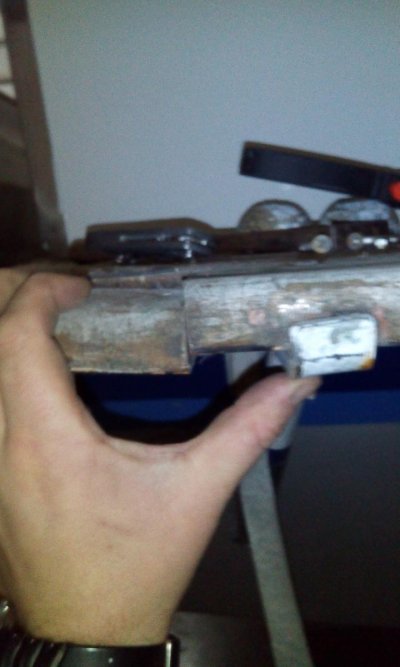
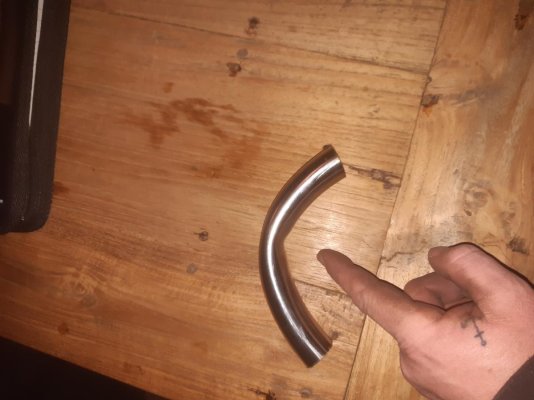
finally at my own marine I found the culprit of the whole story. a rotten exhaust! next to the old heater vent hole.

replaced the rotten one for brand new one but sailed for four years with the piece of plasic still MacGyvered over the hole.

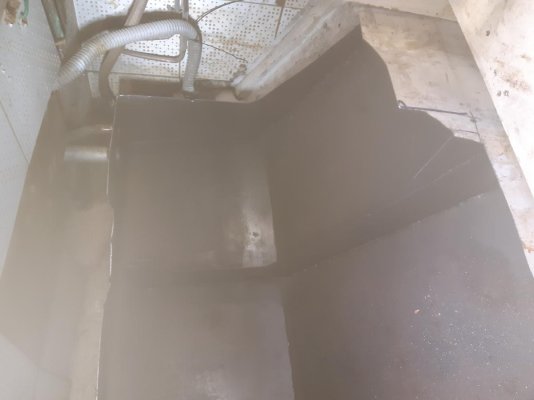
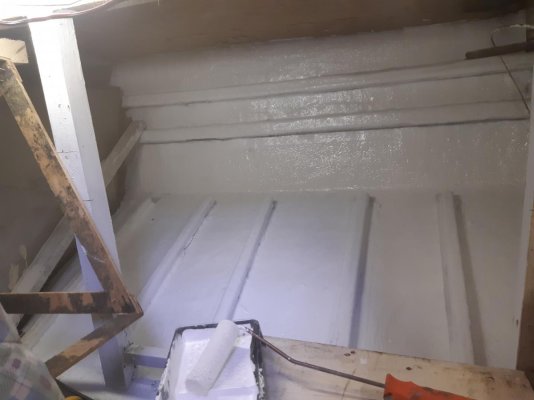
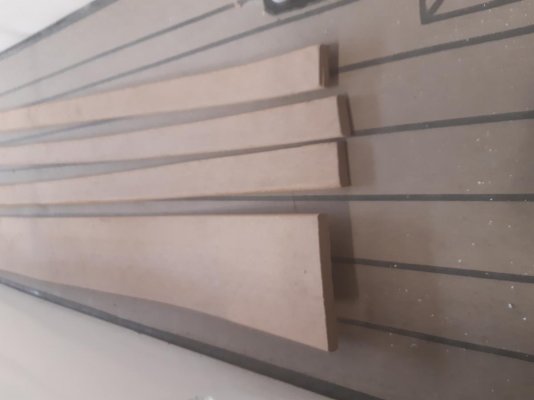
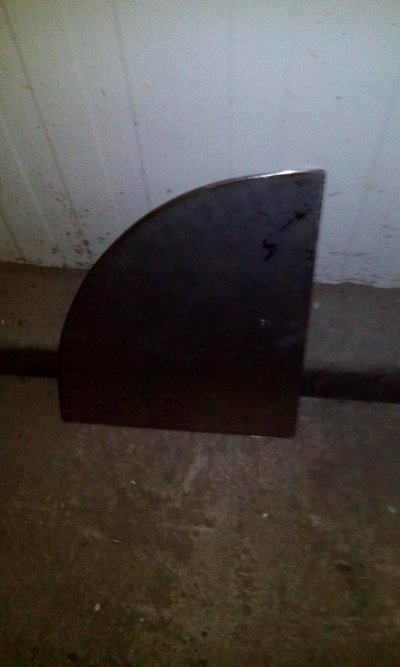
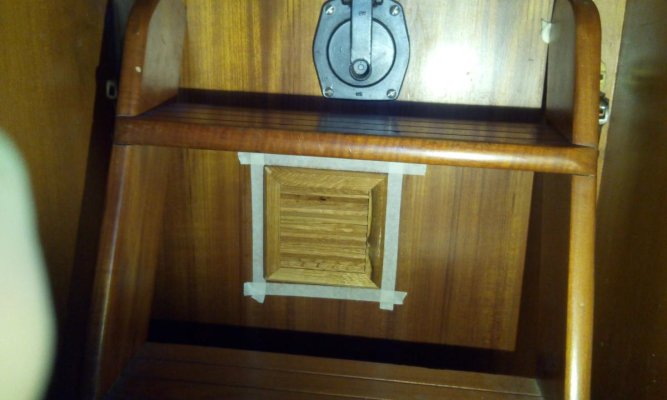
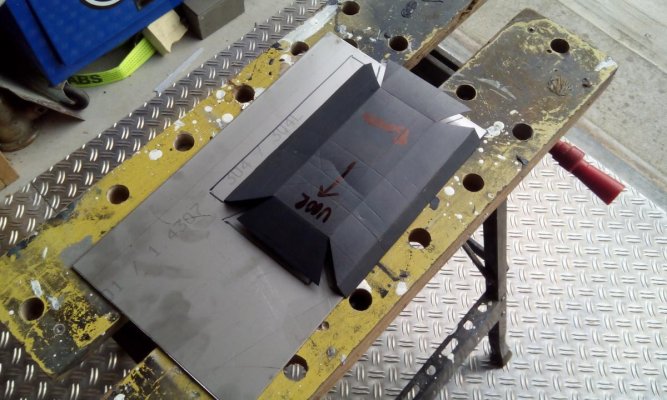
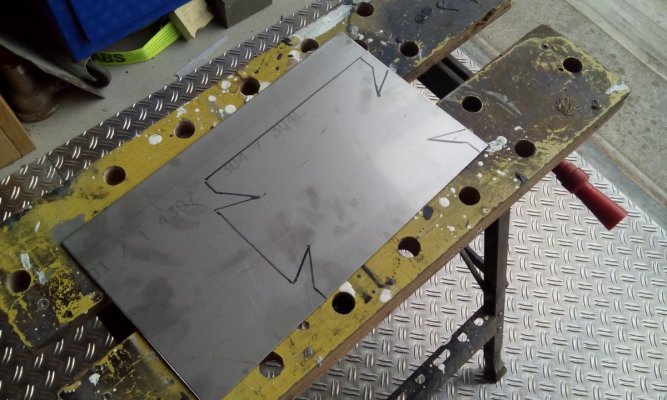
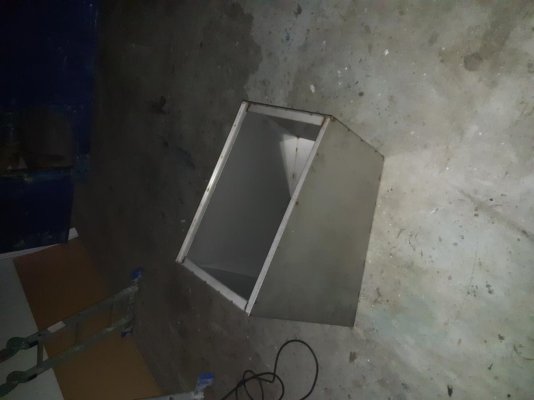
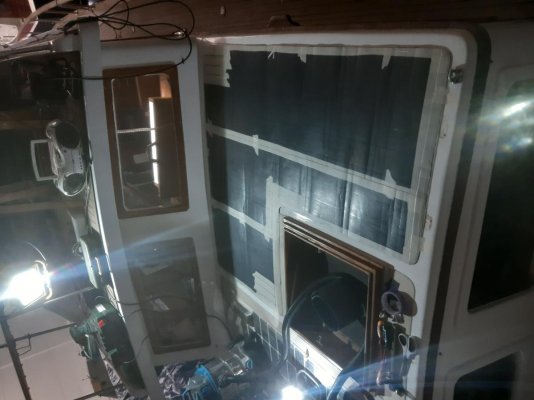
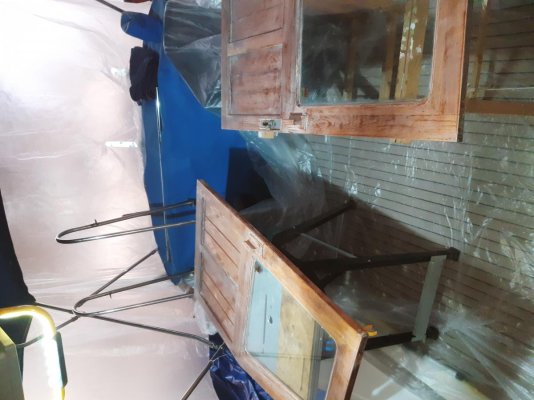
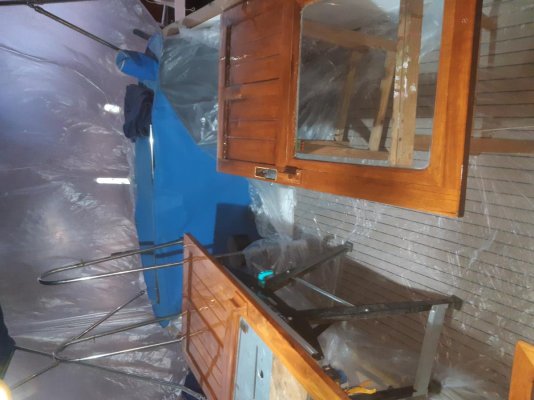
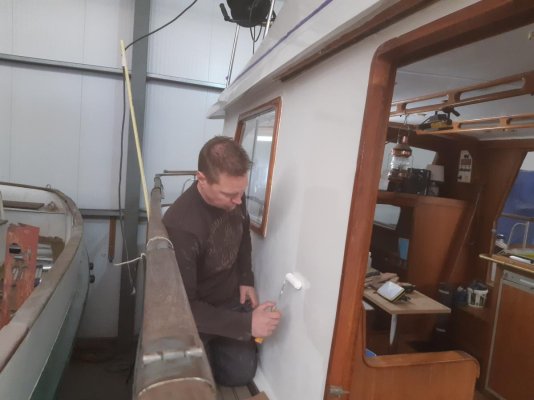
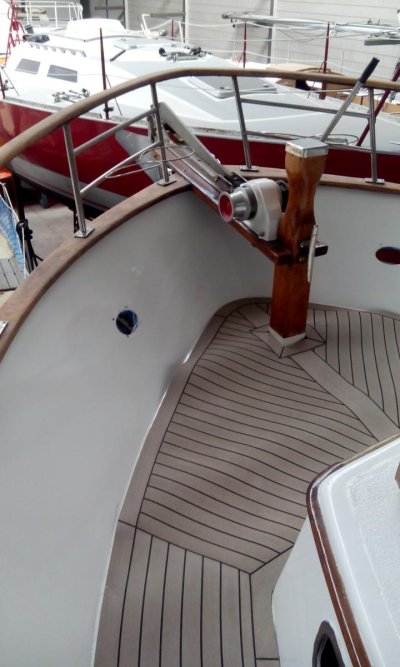
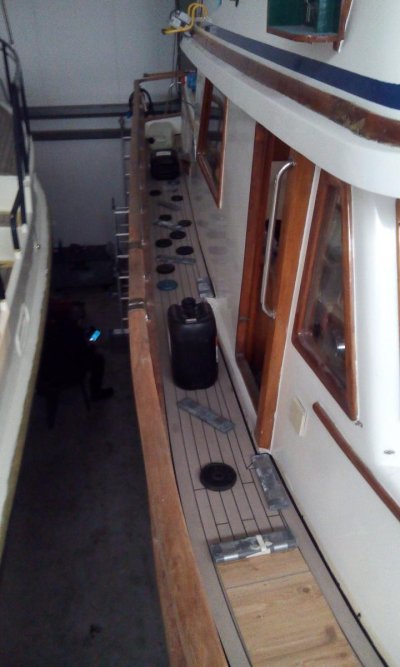
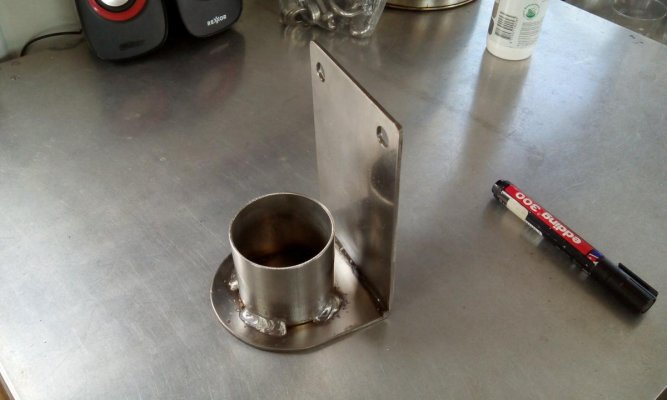
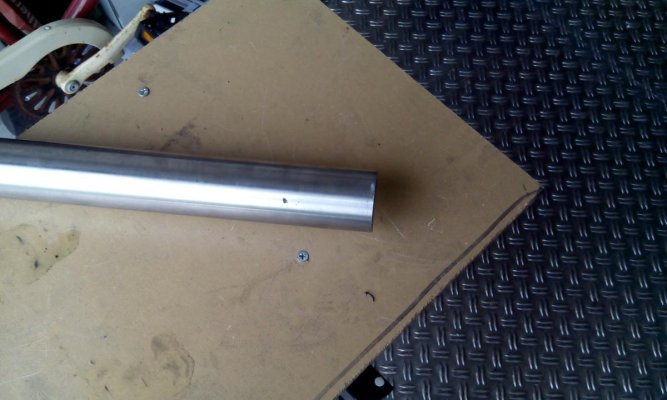
now the time has come to make it pretty. sealed the hole and placed a nice fake ventilation grate
 

Attachments

  • IMG-20141103-WA0004.jpg
    IMG-20141103-WA0004.jpg
    71.5 KB · Views: 46
  • 20150423_213747.jpg
    20150423_213747.jpg
    124.4 KB · Views: 45
  • IMG_20190105_120146.jpg
    IMG_20190105_120146.jpg
    46.3 KB · Views: 46
  • IMG_20190105_152649.jpg
    IMG_20190105_152649.jpg
    76.8 KB · Views: 47
Last edited:
my new deck has arrived so I can finish another job.
first the deck had to rest to become flat and the underlaymend had to be the primed. then it can be glued.

Because the new deck had to be laid around the samson post, a seam was created which was later welded together.
 

Attachments

  • IMG_20190302_124018.jpg
    IMG_20190302_124018.jpg
    96.4 KB · Views: 39
  • IMG_20190309_150108.jpg
    IMG_20190309_150108.jpg
    72.1 KB · Views: 43
  • IMG_20190309_134231.jpg
    IMG_20190309_134231.jpg
    93.8 KB · Views: 46
  • IMG_20190310_143305.jpg
    IMG_20190310_143305.jpg
    104.8 KB · Views: 43
  • IMG_20190310_143323.jpg
    IMG_20190310_143323.jpg
    87 KB · Views: 51
  • IMG_20190309_095401.jpg
    IMG_20190309_095401.jpg
    67.1 KB · Views: 41
  • IMG-20190312-WA0003.jpg
    IMG-20190312-WA0003.jpg
    132.2 KB · Views: 45
I also bought a solar panel. I was not satisfied with the deck transit inside so I converted the panel.


its a 90Wp, 5A. activesol.
 

Attachments

  • IMG_20190209_101212.jpg
    IMG_20190209_101212.jpg
    126.6 KB · Views: 41
  • IMG_20190209_103445.jpg
    IMG_20190209_103445.jpg
    60.2 KB · Views: 41
  • IMG_20190209_123432.jpg
    IMG_20190209_123432.jpg
    88.7 KB · Views: 59
a friend of my is a sail maker and she has started making a bimini enclosure
 

Attachments

  • IMG_20190210_135829.jpg
    IMG_20190210_135829.jpg
    84 KB · Views: 43
  • IMG_20190210_135836.jpg
    IMG_20190210_135836.jpg
    81.9 KB · Views: 42
  • IMG_20190210_153252.jpg
    IMG_20190210_153252.jpg
    71.3 KB · Views: 43
Nice upgrades you're making.
 
despite the fact that I am happy with the deck transit of the solar panel. I am still afraid that I will stand on top of it and break it.

so I decided to make a stainless steel protective cover.


first I made a template and transferred it to the stainless steel. then cut it out using angle grinder en fold over the edges. welded up the corners en give her a little buff and shine.
glued it over the deck transit using sika.

With this I have picked up my welding skills a bit which I need for my next project
 

Attachments

  • IMG_20190507_184233.jpg
    IMG_20190507_184233.jpg
    127.5 KB · Views: 64
  • IMG_20190507_184243.jpg
    IMG_20190507_184243.jpg
    127.5 KB · Views: 62
  • IMG_20190509_145241.jpg
    IMG_20190509_145241.jpg
    96 KB · Views: 71
Last edited:
now that I have picked up my welding skills, it is time to make stainless steel dinghy davits.

the transom is a bit thin and flexes a bit under heavy load so I made up some custom brackets. also the davits are placed to the center of the schip due to the placement of the swim step, therefore I had to make a spreader bar and some more bits.
finally braced it whit backing plates and made two sets of pulleys for hoisting the walker bay.

when the dinghy is lowered and the spreader bar is removed the davits can pivot in nylon bushings to the side for easy access to the swim platform.
 

Attachments

  • IMG_20190626_123100.jpg
    IMG_20190626_123100.jpg
    139.4 KB · Views: 70
  • IMG_20190722_115645.jpg
    IMG_20190722_115645.jpg
    75 KB · Views: 63
  • IMG_20190722_100826.jpg
    IMG_20190722_100826.jpg
    95.5 KB · Views: 65
  • IMG_20190722_104314.jpg
    IMG_20190722_104314.jpg
    89 KB · Views: 60
  • IMG_20190722_104437.jpg
    IMG_20190722_104437.jpg
    146.4 KB · Views: 60
  • IMG_20190715_153500.jpg
    IMG_20190715_153500.jpg
    118.1 KB · Views: 64
  • IMG_20190722_100814.jpg
    IMG_20190722_100814.jpg
    104.1 KB · Views: 61
  • IMG_20190722_113912.jpg
    IMG_20190722_113912.jpg
    62.4 KB · Views: 62
  • IMG_20190723_151430.jpg
    IMG_20190723_151430.jpg
    133.2 KB · Views: 61
Last edited:
It's been a very long time since I've been active on this site. A lot has happened since the last post. in short it comes down to: the admiral has left me and i have started to enjoy my life on my boat from that point on. m/v swordfish has floated without any problems for the past few years and has given me a lot of fun on the water. And now it's time for major maintenance again. I will keep you informed and soon there will be new photos and stories.

Hope you anjoy, see you soon
 
How do you plan to keep your dinghy from swinging fore and aft and port and starboard? Braided lines won't work. They will stretch allowing movement which causes more stretching and more movement to the pount where, in a rolling and pitching sea, your dinghy will end up swinging profoundly. Consider ratcheting tie downs instead of lines. I know this from experience, bad experience._AAA5099.jpg
 
when my dinghy is hoisted up. I ratchet it against the transom. its completely motionless
 
on 07-27-2019 I did leave you hanging with the davids system. to finish it off I turned nylon bushings to fill the slack. now the davids sits nice and snug, but can turn out of the way when not in use.
 

Attachments

  • 20211011_151056.jpg
    20211011_151056.jpg
    54.8 KB · Views: 7
Last edited:
At the end of July 2021, just before my holiday I found out that there was some fuel in the bilge. After a cleanup and a couple of days is was there again.

:banghead: 
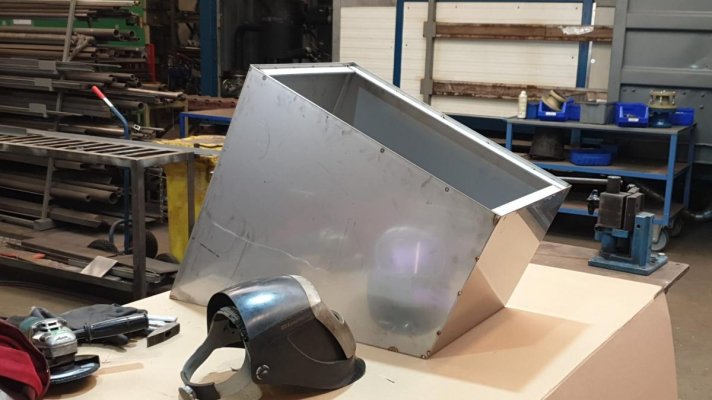
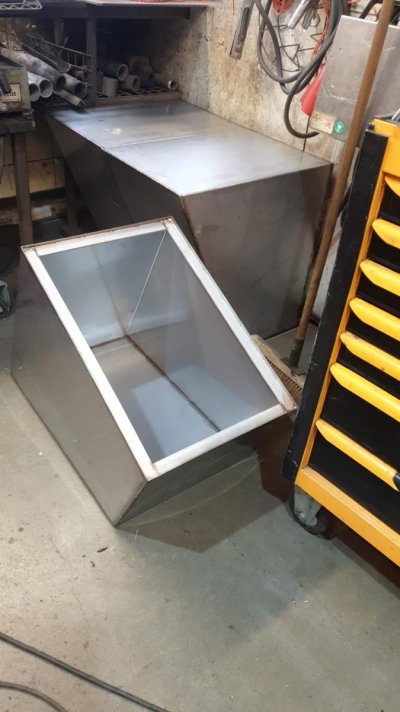
I got myself a leaky tank :banghead:

I removed the paneling of the engine room and after a visual inspection my best guess was a pinhole in a weld at the botom of the tank. I pumped out the fuel tanks in an IBC container so i can cut an inspection hole in the tank.

with a boresnake i could inspect the inside after a big cleanout. I noticed that after 44 years my tank was still quite clean. I thought I found the small leak and fixed it with a temporary solution. filled up the tanks and after that I threw the ropes and went sailing.
 

Attachments

  • 20210622_122501.jpg
    20210622_122501.jpg
    135.7 KB · Views: 9
I kept a close eye on the leak during my holiday sail. the leakage was easy to check and almost watertight. just a few drops an hour.

when I got back to my home port I once again pumped out the tanks and started taking them out.
i had to cut and grind because they were built in the ship and now no longer fit through the hatch.
 

Attachments

  • 20210818_155352.jpg
    20210818_155352.jpg
    86.9 KB · Views: 5
  • 20210819_144328.jpg
    20210819_144328.jpg
    85.9 KB · Views: 5
  • 20210819_140652.jpg
    20210819_140652.jpg
    92.9 KB · Views: 6
  • 20210819_161145.jpg
    20210819_161145.jpg
    58.3 KB · Views: 6
  • 20210819_190443.jpg
    20210819_190443.jpg
    83.2 KB · Views: 5
  • 20210829_133803.jpg
    20210829_133803.jpg
    68.8 KB · Views: 5
  • 20210829_133756.jpg
    20210829_133756.jpg
    125.7 KB · Views: 4
  • 20210830_190350.jpg
    20210830_190350.jpg
    73.6 KB · Views: 5
  • 20210831_190712.jpg
    20210831_190712.jpg
    95.1 KB · Views: 6
I also discovered that there was once a fire on board. a truss is quite damaged and never properly repaired
 

Attachments

  • 20210826_151907.jpg
    20210826_151907.jpg
    111.1 KB · Views: 6
now i will replace the damaged truss, and going to make 2x3 separate tanks. this is how they fit through the hatch to the engine room. when they are in place i will connect them to eachother .
 
Wow, what an incredible journey you have shared with us. A real joy in seeing the progress you have made both in your skill and the end result with your boat. Thank you for sharing!
 
tack welded 1 off 6 new fuel tanks for a dry fit.
im using 316 stainless.
the intire top will be a man hole and will be bolted down. fittings has yet to be installed
 

Attachments

  • 20211114_113701.jpg
    20211114_113701.jpg
    64.3 KB · Views: 6
  • 20211114_113715.jpg
    20211114_113715.jpg
    70.7 KB · Views: 5
Last edited:
in the meantime I started a repair on the flybridge deck. I noticed a soft spot had formed and the easiest way to fix it was through the bottom, i.e. through the salon roof.

first I had removed a piece from the starboard aft ceiling to get to the soft spot.
cut away a piece of polyester to get to the soft wood and restored with a piece of teak I had lying around.
laminated the piece of polyester back in place and screwed the ceiling back to gether.
I pulled new speaker wiring and screwed a false ceiling over it to cover the sawmarks
 

Attachments

  • 20211024_142448.jpg
    20211024_142448.jpg
    80.7 KB · Views: 4
  • 20211031_102346.jpg
    20211031_102346.jpg
    85.5 KB · Views: 4
  • 20211031_120735.jpg
    20211031_120735.jpg
    116.6 KB · Views: 5
  • 20211104_160000.jpg
    20211104_160000.jpg
    75.7 KB · Views: 5
also made a new faux teak deck for the aft cabin
 

Attachments

  • 20211016_122611.jpg
    20211016_122611.jpg
    87 KB · Views: 5
  • 20211025_175852.jpg
    20211025_175852.jpg
    73.3 KB · Views: 4
  • 20211017_112324.jpg
    20211017_112324.jpg
    90.8 KB · Views: 5
  • 20220130_121223.jpg
    20220130_121223.jpg
    83.6 KB · Views: 6
  • 20220130_125713.jpg
    20220130_125713.jpg
    99.3 KB · Views: 5
  • 20220123_111241.jpg
    20220123_111241.jpg
    94.8 KB · Views: 7
to all. again my apologies. it seems I've gotten pretty good at building a boat but I can't seem to get it right to post a picture well oriented.
 
I also made a new ladder and railing to get to the aft deck. here at the wharf they they are joking and say I'm making my boat wheelchair friendly.
bending the stainless steel for the first time did not go well, I needed a little more practice.
but in the end i got it right.
I have welded the ends of the bold on steps closed and covered with foux teak.

time for a test fit and some measurements
 

Attachments

  • 20220126_203511.jpg
    20220126_203511.jpg
    97 KB · Views: 4
  • 20220126_203311.jpg
    20220126_203311.jpg
    69.4 KB · Views: 4
  • 20220207_180038.jpg
    20220207_180038.jpg
    69.4 KB · Views: 3
  • 20220301_163315.jpg
    20220301_163315.jpg
    83.6 KB · Views: 4
  • 20220301_170740.jpg
    20220301_170740.jpg
    85.9 KB · Views: 2
  • 20220302_182347.jpg
    20220302_182347.jpg
    111.3 KB · Views: 3
  • 20220129_105156.jpg
    20220129_105156.jpg
    103 KB · Views: 4
in the end I got even more faux teak. i replaced various decorative edges on the front cabin and aft cabin and flybridge
 

Attachments

  • 20211214_121028.jpg
    20211214_121028.jpg
    93.4 KB · Views: 4
  • 20211214_123543.jpg
    20211214_123543.jpg
    86.9 KB · Views: 3
  • 20211214_130451.jpg
    20211214_130451.jpg
    57.7 KB · Views: 3
  • 20211215_152532.jpg
    20211215_152532.jpg
    58.1 KB · Views: 3
  • 20211218_150504.jpg
    20211218_150504.jpg
    80.9 KB · Views: 3
  • 20220206_141501.jpg
    20220206_141501.jpg
    45.7 KB · Views: 4
  • 20220213_154252.jpg
    20220213_154252.jpg
    75.6 KB · Views: 3
  • 20220213_160323.jpg
    20220213_160323.jpg
    71.5 KB · Views: 5
  • IMG-20220325-WA0001.jpg
    IMG-20220325-WA0001.jpg
    64.7 KB · Views: 8
  • 20220325_152926.jpg
    20220325_152926.jpg
    65.2 KB · Views: 4
And of course I'm busy with painting and varnishing
 

Attachments

  • 20211221_141339.jpg
    20211221_141339.jpg
    111.7 KB · Views: 4
  • 20211221_160319.jpg
    20211221_160319.jpg
    113.5 KB · Views: 3
  • 20220308_112937.jpg
    20220308_112937.jpg
    86.1 KB · Views: 5
  • 20220320_141511.jpg
    20220320_141511.jpg
    64.4 KB · Views: 6
and some more fueltanks in the making at the workshop
 

Attachments

  • IMG-20211112-WA0000.jpg
    IMG-20211112-WA0000.jpg
    75.1 KB · Views: 7
  • IMG-20211112-WA0001.jpg
    IMG-20211112-WA0001.jpg
    78.4 KB · Views: 6
  • IMG-20211112-WA0002.jpg
    IMG-20211112-WA0002.jpg
    89.1 KB · Views: 7
  • IMG-20211227-WA0002.jpg
    IMG-20211227-WA0002.jpg
    89.2 KB · Views: 6

Latest posts

Back
Top Bottom