Crusty Chief
Guru
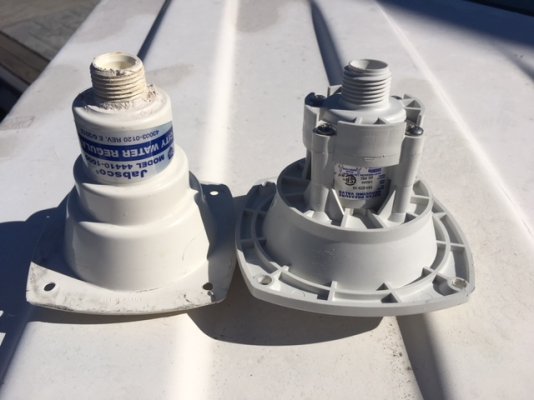
Recently we had a failure of the Shore water regulator. Of course the regulator that I replaced 2 years ago is no longer made. And the replacement, requires a larger opening in order to fit. Seems the manufacturers decided the “new and improved” requires a 3 1/2 “ opening. Wouldn’t ya know it, the old regulator fits in a 3” opening.
So how do you easily increase the opening?
Guess I could have used a big burr in the drill and ground away at the existing opening to make it fit. But I really wanted a clean opening, and I’m pretty sure the big burr would most likely get away from me and cause more damage then I wanted.
Called my “go to Guy”, Jim Palmer, who runs Palmer Marine and he sent his son out to get the hole enlarged for me. After watching how he enlarged the hole for me, I thought I would share this neat trick with you all.
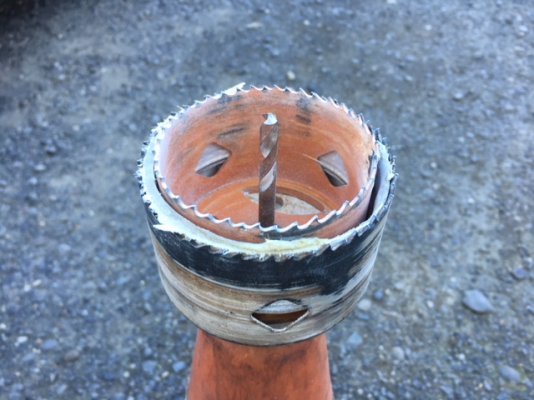
In the picture below you’ll see that he installed both the 3” and the 3 1/2” bits in the hole saw tool. By using the 3” bit as a guide, he was able to make a very clean new hole.
As an extra hint, when starting the cut, make sure you you run the drill in reverse to get thru the gel coat, or first layer. Once that is done you can use the drill in normal mode or stay in reverse. In reverse, it takes a bit longer, but easier to control.
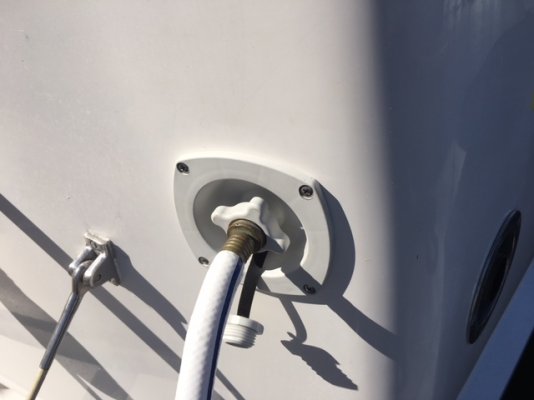
After drilling, we cleaned up the hole a bit, mixed up some 2 part West systems epoxy and coated the raw surface to seal up. Installing the new regulator went pretty simply, used some Sikaflex as a sealant and done!
As a bonus, the new regulator has a pressure reduction to 65 PSI versus the original only had 45. Admiral loves the new pressure, and after checking to make sure we hade no problems with leaks, another job is ticked off the list.
So how do you easily increase the opening?
Guess I could have used a big burr in the drill and ground away at the existing opening to make it fit. But I really wanted a clean opening, and I’m pretty sure the big burr would most likely get away from me and cause more damage then I wanted.
Called my “go to Guy”, Jim Palmer, who runs Palmer Marine and he sent his son out to get the hole enlarged for me. After watching how he enlarged the hole for me, I thought I would share this neat trick with you all.
In the picture below you’ll see that he installed both the 3” and the 3 1/2” bits in the hole saw tool. By using the 3” bit as a guide, he was able to make a very clean new hole.
As an extra hint, when starting the cut, make sure you you run the drill in reverse to get thru the gel coat, or first layer. Once that is done you can use the drill in normal mode or stay in reverse. In reverse, it takes a bit longer, but easier to control.
After drilling, we cleaned up the hole a bit, mixed up some 2 part West systems epoxy and coated the raw surface to seal up. Installing the new regulator went pretty simply, used some Sikaflex as a sealant and done!
As a bonus, the new regulator has a pressure reduction to 65 PSI versus the original only had 45. Admiral loves the new pressure, and after checking to make sure we hade no problems with leaks, another job is ticked off the list.

")
