Mainship 350/390 Toilet Waste Hose Replacement

The friendliest place on the web for anyone who enjoys boating.
If you have answers, please help by responding to the unanswered posts.

HeatherAlyssa

Senior Member
Joined
Mar 11, 2017
Messages
217
Location
United States
Vessel Name
Heather Alyssa
Vessel Make
Mainship 350/390
Hello fellow Mainship 350/390 owners,

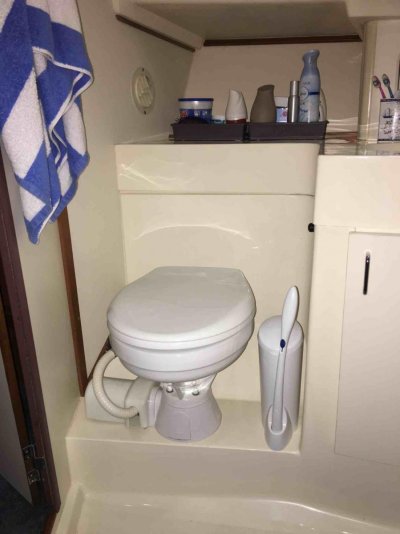
I’m trying to figure out how to replace the waste hose between my toilet and the waste tank. How do I access the hose behind the fiberglass in the head so I can pull the hose through? If anyone with a Mainship 350/390 has done this in the past, may I please have any recommendations.

Thank you,

Alex Cádiz
1999 Mainship 350/390
Solomons, Md IMG_0002.jpgIMG_0002.jpg
 
Last edited:
Easiest way SHOULD be: connect the new hose to the old at either end, using a male-male "hose mender" coupling and pull the new hose through as you pull the old hose out. Make sure that the ends of both hoses are cut cleanly so they can butt tightly against each other...you want the smoothest unbroken surface possible. Use PVC cement or any "glue" to secure both hoses to the fitting....hose clamps can get hung up, duct tape won't hold if you have to pull hard.


--Peggie
 
The extension of that hose, below decks to holding tank, may well be zip tied to bulkheads and stringers -- every couple feet or so -- for strain relief, and maybe to control slope from head to tank...

So you'll want to be looking at that from below, to the extent possible, see if you can reach and defeat -- and then eventually replace -- those strain relief ties.

-Chris
 
My 2000 MS 390 has the ties on that hose, so had to wiggle down there to cut them off, before pulling old/new hose combo through. Installed were the type of ties that screwed into the fiberglass, so to avoid having to drill new screw holes, I used the old ones. Made the job much easier. Tight fit in there to do all this. Good luck.
 
No did not take any pics. Next time down there will take some pics of finished hosing.


Many of these tasks on this trawler I want to forget about as quickly as possible when done due to the nature of the tasks...like running new wires for the radar mast after it being blown away from Irma while stored in the boat yard (187mph winds in the yard was recorded). Took almost a day of cussing to get the radar cable and end connector from the mast, to the helm, under the fly bridge floor.


Also hated running wires from my fly bridge to where the stereo was located back in the salon, as I wanted a clean factory look, and would not accept any wire surface mounts. That Kenwood wired remote at the helm is awesome as it controls all stereo functions without me going up and down the fly bridge stairs to do so.


The space between the salon headliner and the fly bridge flooring was minimal at best to feed wires through, even when I had discovered a mouse string installed by factory during production.


So perhaps I should take pics while under taking these tasks, so can offer insight to others that these tasks can be accomplished, just need to pack a lot of patience when doing so.
 
Did you check under the sink to see if you have an access panel?
John
 
Did you check under the sink to see if you have an access panel?
John


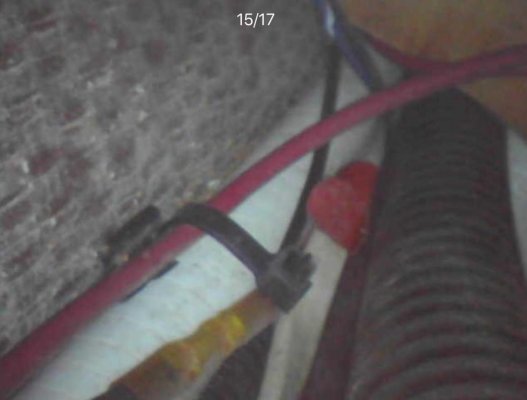
There is a panel under the sink but it has the hot and cold water supply and sink drain running through it. Not much room but enough to let me cut the zip tie I found with my borescope. IMG_6409.jpg
 
I wanted to update everyone about the completion of my project. I took your advice to connect the hoses with a barbed hose connector. I used Loctite sealant to connect both ends. It was connected rock solid. My toilet flushes perfectly to the point where I flush it just to see it work. There was a stench coming from the bilge area since I purchased the vessel two years ago. Although the initial reason I started on this project was because my toilet was having a problem flushing, the secondary and actually more welcomed result was completely no more smell in the bilges. Thank you everyone!
 
Did you also replace the pump out hose and/or the hose that goes from the tank to the macerator?

Thanks,
Hawk
 
I hope so, 'cuz any time you replace sanitation hoses, you should ALWAYS replace ALL of 'em. I'll never forget the owner who continued to have odor in the area of his boat where the holding tank was located (midship). I asked him at least a dozen times if he'd replaced ALL the hoses...he insisted that he had. He was so desperate to find the source of the odor that he hired me to come to FL and find it. It took me less than 5 minutes...the line from the overboard macerator pump was reeking! He hadn't replaced it because he "didn't think that one needed to be replaced."


--Peggie
 
Thanks for the information. Mine just smells bad and I plan to replace all four hoses in the next couple of weeks. Your book is very helpful. I am sure I would have flushed straight bleach down the head if I hadn't read your book first.
I think I can remove a plug at the top of the tank and wash it our with a hose and squirter and then pump it out several times before I enter the bio-hazard zone.

BTW, your recommendation for Raritan CP was great. The product worked perfectly.

Hawk
 
There is a panel under the sink but it has the hot and cold water supply and sink drain running through it. Not much room but enough to let me cut the zip tie I found with my borescope. View attachment 81577
I cut an access hole under sink to cut zip ties. You'll need two people. One to push and one to pull. Think of the ole tree cutters. Push pull. Lots of dish soap.
The hose goes from the head to the right with zip ties. Then it makes a hard 90 degree turn. Back towards the front. Then it makes a hard 90 degree turn to the holding tank through some fiberglass conduit. Not an easy job especially when the old hose doesn't bend or flex because of concrete solid calcium blockage.
One of the hardest things I did on my boat but this too shall pass.
You can do it.
 
I wanted to update everyone about the completion of my project. I took your advice to connect the hoses with a barbed hose connector. I used Loctite sealant to connect both ends. It was connected rock solid. My toilet flushes perfectly to the point where I flush it just to see it work. There was a stench coming from the bilge area since I purchased the vessel two years ago. Although the initial reason I started on this project was because my toilet was having a problem flushing, the secondary and actually more welcomed result was completely no more smell in the bilges. Thank you everyone!

Did the hose slide thru the zip ties or did you have to cut it?
 

Latest posts

Back
Top Bottom