- Joined
- Apr 15, 2008
- Messages
- 13,731
- Location
- California Delta
- Vessel Name
- FlyWright
- Vessel Make
- 1977 Marshall Californian 34 LRC
For years I've been considering, researching, budgeting and planning to install a sound attenuating carpet pad under my salon carpet. Something else always seemed to take higher priority but I finally got it completed this week. Here's the tale...
First, a huge shout-out to Keysdisease/Steve who provided me with great information, samples and advice about the Soundown products and relayed his own experience in his Mainship 34. He helped me find the right pad thickness and vinyl weight for my boat. (I picked the 1/2 inch foam-1 Lb/Sq Ft vinyl.) It's always nice doing business with a fellow TFer. Thanks, Steve!
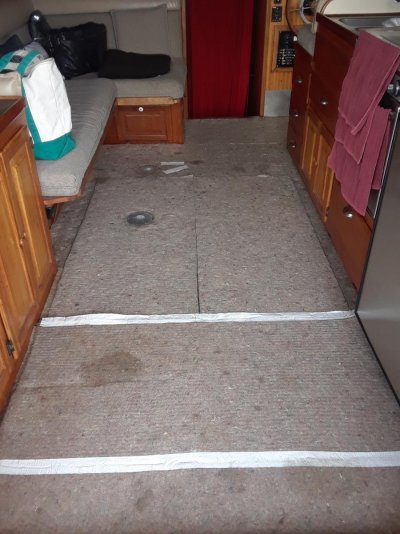
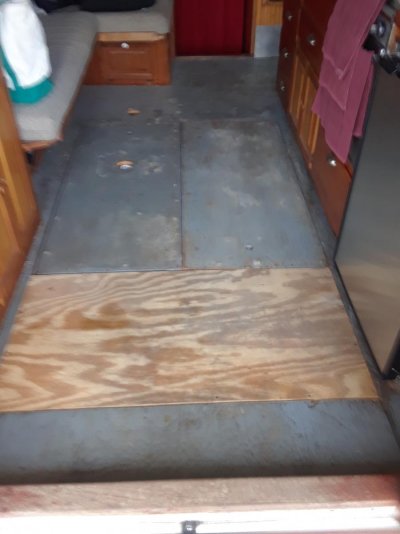
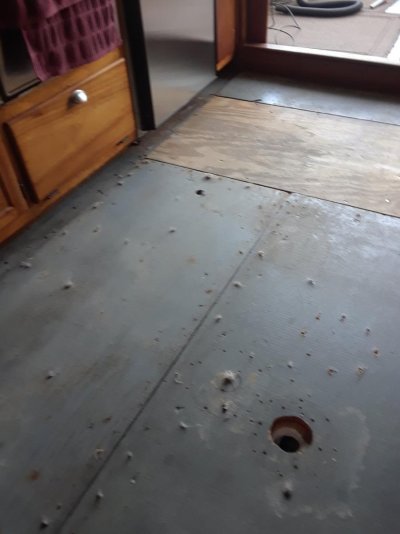
I pulled the rugs and carpet to expose the old felt pad. I don't know if the pad's original but it sure looked it! Off with the pad to expose the unpainted") facepalm floor repair after fuel tank removal by the PO. After removing the 100+ staples and about a lb of sand/dirt with a vacuum, it was time to cut and fit.
facepalm floor repair after fuel tank removal by the PO. After removing the 100+ staples and about a lb of sand/dirt with a vacuum, it was time to cut and fit.
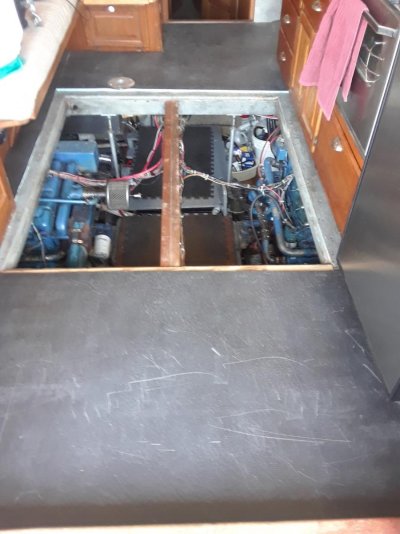
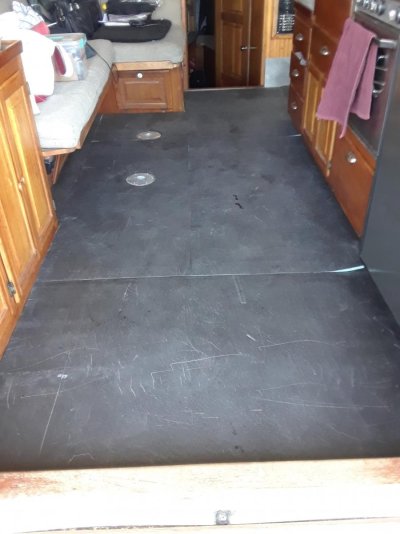
The pad just floats on the floor and one hatch without attachment except for the other hatch with a table base installed. The 54 inch width was just about perfect for covering about 85% of my floor dimensions. I cut the hatches with a 2" overhang to mitigate noise transfer through the gaps. The material was easy to cut with a utility knife and a good shear or scissors.
The 1/2 inch foam pad keeps it from shifting and the mass loaded vinyl soundproofing layer is smooth and comfortable to walk on. No issues with the carpet moving on top of the vinyl either. It all feels very soft but stationary.
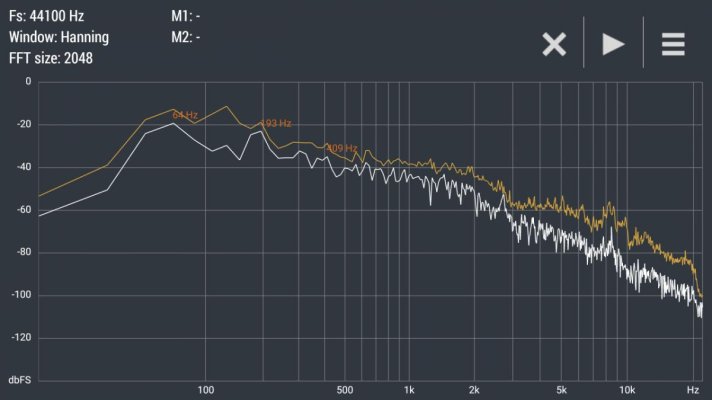
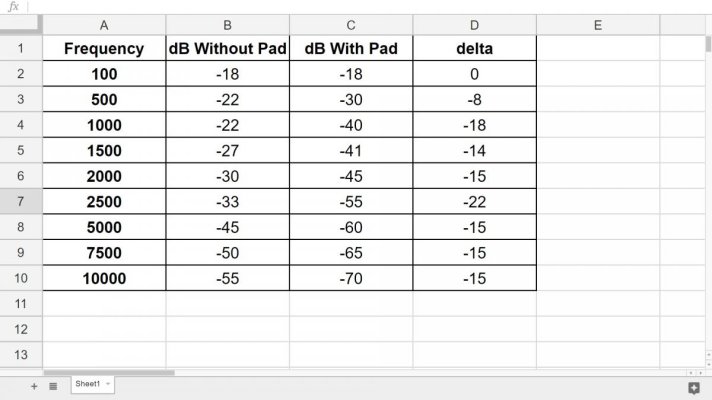
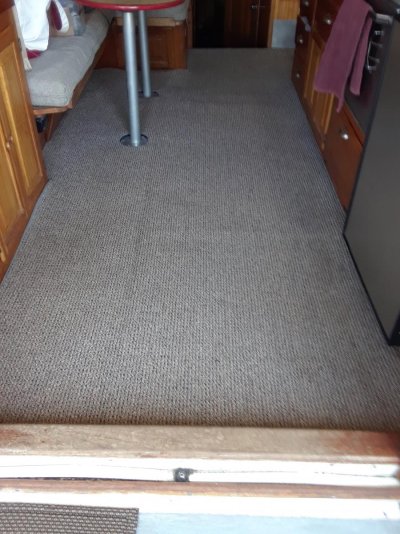
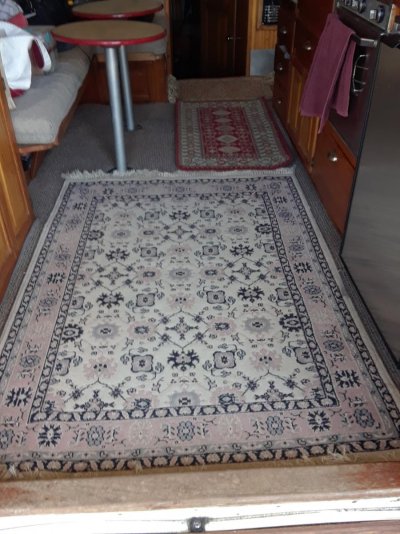
I put it all back together and it looks and feels great! It was too windy to go out today but at high idle in the slip, the sound level is noticeably improved. I did a sound test before the installation and I'll do a new sound test the next time I'm enroute and post comparison readings here.
As I was lying in bed last night reminiscing fondly about my handiwork for the day, I pondered the remnants. They were roughly 2 ft wide and 7-8 ft long total. Could they fit under the fwd 'hall' or passageway carpet? This morning I laid the carpet on the dock and figured out that if I started the coverage fwd of the ladder steps (no pad under the ladder), I could cover the entire space completely! Perfect! That area has never had carpet pad and feels fantastic underfoot now that it's there! In my book, that's a free bonus room!
I'll post more when I get the sound tests completed.
First, a huge shout-out to Keysdisease/Steve who provided me with great information, samples and advice about the Soundown products and relayed his own experience in his Mainship 34. He helped me find the right pad thickness and vinyl weight for my boat. (I picked the 1/2 inch foam-1 Lb/Sq Ft vinyl.) It's always nice doing business with a fellow TFer. Thanks, Steve!
I pulled the rugs and carpet to expose the old felt pad. I don't know if the pad's original but it sure looked it! Off with the pad to expose the unpainted
facepalm floor repair after fuel tank removal by the PO. After removing the 100+ staples and about a lb of sand/dirt with a vacuum, it was time to cut and fit. The pad just floats on the floor and one hatch without attachment except for the other hatch with a table base installed. The 54 inch width was just about perfect for covering about 85% of my floor dimensions. I cut the hatches with a 2" overhang to mitigate noise transfer through the gaps. The material was easy to cut with a utility knife and a good shear or scissors.
The 1/2 inch foam pad keeps it from shifting and the mass loaded vinyl soundproofing layer is smooth and comfortable to walk on. No issues with the carpet moving on top of the vinyl either. It all feels very soft but stationary.
I put it all back together and it looks and feels great! It was too windy to go out today but at high idle in the slip, the sound level is noticeably improved. I did a sound test before the installation and I'll do a new sound test the next time I'm enroute and post comparison readings here.
As I was lying in bed last night reminiscing fondly about my handiwork for the day, I pondered the remnants. They were roughly 2 ft wide and 7-8 ft long total. Could they fit under the fwd 'hall' or passageway carpet? This morning I laid the carpet on the dock and figured out that if I started the coverage fwd of the ladder steps (no pad under the ladder), I could cover the entire space completely! Perfect! That area has never had carpet pad and feels fantastic underfoot now that it's there! In my book, that's a free bonus room!
I'll post more when I get the sound tests completed.
Attachments
Last edited: