78 MK1 Total redo documentary thread w/ pics!

The friendliest place on the web for anyone who enjoys boating.
If you have answers, please help by responding to the unanswered posts.
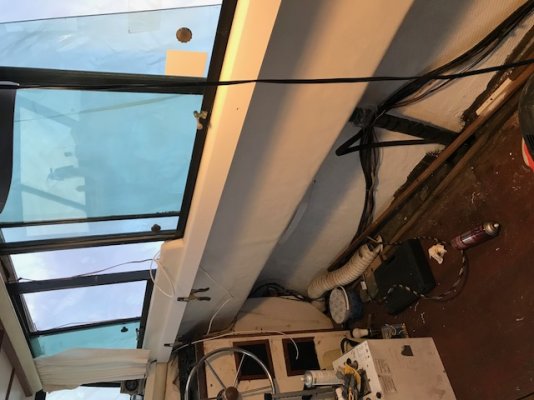
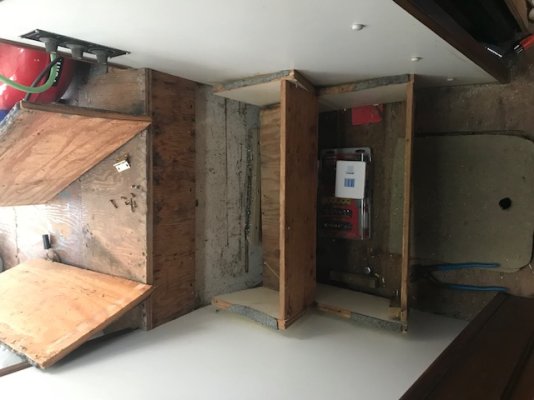
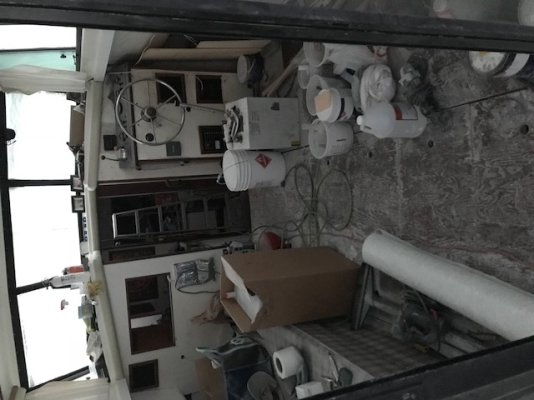
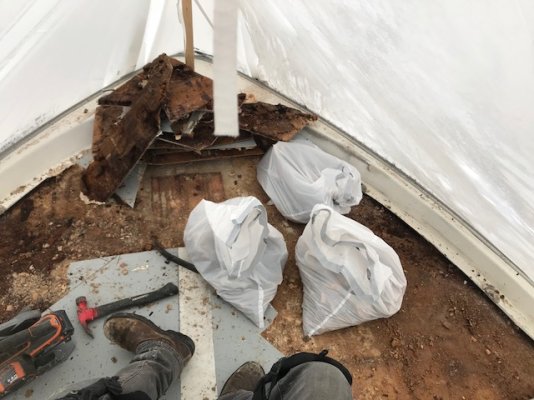
Update from today. Several hours of deck core removal. Combination of a dremel multi tool, air chisel, bars, hammer, drill. Got a good system down and after awhile you've "seen it all" so you just move to the tool needed. It's not fun work but could be worse. Thankfully I think the gunnels are all mush so will be very easy to pull out. I hope the worst is behind me. So far I can say Dremel multi tool for the win.
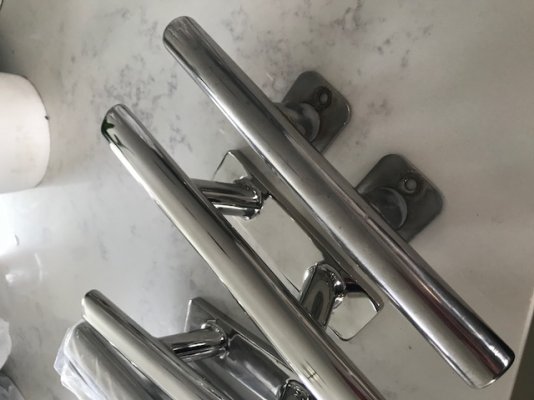
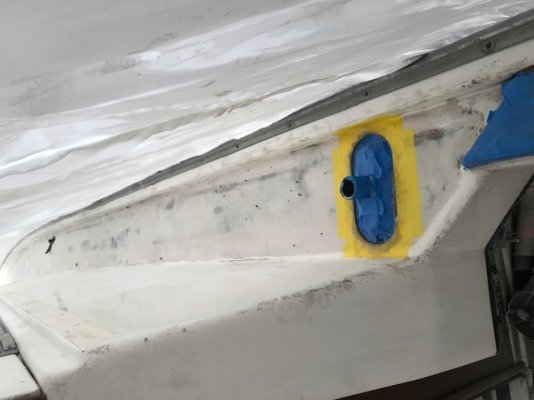
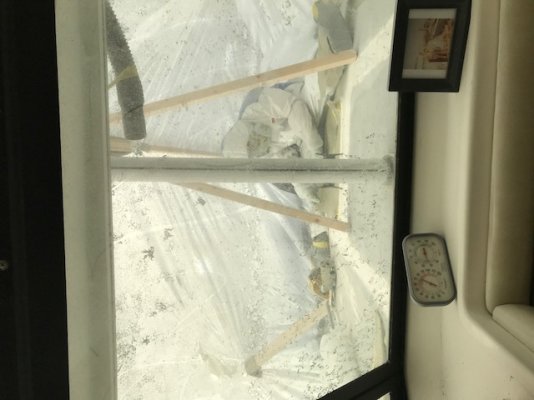
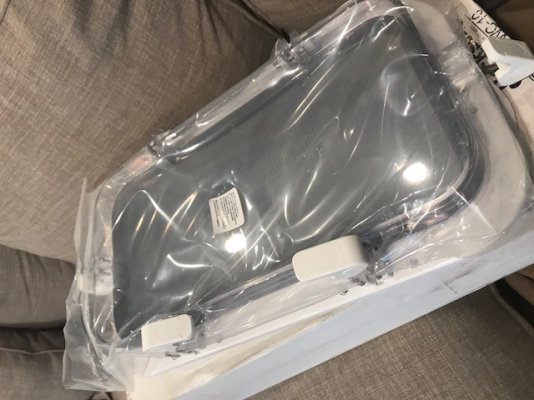
HEAD: So I tried Bondo body filler for the walls. Will sand and do a second skim type of coat, epoxy prime and paint. So far so good I think. I bought two new port/windows from the same company that made original on the boat. They upgraded the latches thankfully the old screw ones are rough.
I will add that company tomorrow and some pics of them. They are really nice quality etc.

Also SEANAIR, if you read this I Forgot to take the Hull Id down but I will and send over to you. I'm interested as you are to see what yours is as well.
 

Attachments

  • IMG_1051.jpg
    IMG_1051.jpg
    102.1 KB · Views: 86
  • IMG_1055.jpg
    IMG_1055.jpg
    67.3 KB · Views: 100
  • IMG_1054.jpg
    IMG_1054.jpg
    68.6 KB · Views: 85
Last edited:
My neighbor just bought a 34 Mainship. He is in for some of what you are doing. Looks like you are doing a great job. Keep the photos coming.
 
I wouldn't hesitate to use it, as long as it will absorb some resin.

I used a similar material; Core-Cell A500 .75 thickness
Triple Cut - but it was considerable more expensive so you may have found a good alternative.

Thanks, was going to ask you what thickness you used. I see on the bow of mine it was .75 but with adding some glass to as you or someone else said to the very thin under core layer wasn't sure if I should go 1/2 inch core. The base layer of glass is so thin..i poked through a little in two spots. Looked quick at the A500 but I will need it perforated for the bow and gunnel work which I didn't see off first look but I/m sure they have it.. no matter it's a nice option, thanks
 
quarterboards and Port windows

Quick update for those who are following.. Here is the model and picture of the windows that work for the galley and head. I presume for the V verth as well. I'm just redoing the galley and head ones at this time. Company is out of CT. I could assume the is for all the MK models so hopefully helpful info.

Also, just a shot of the old quarterboards (you can see on my OP on boat picture) I took them off and planed them down below the old groved name. Nice enough pieces of wood to just do so. Will carve in the new name when we finally pick it. ( I'm gunning for DESPERADO.. but the misses isn't a huge fanwe will see ;)

As always here open to suggestions, comments etc from anything you read in the thread. I've posted a few questions throughout as well so feel free to chat!
 

Attachments

  • IMG_1060.jpg
    IMG_1060.jpg
    53.4 KB · Views: 81
  • IMG_1061.jpg
    IMG_1061.jpg
    91.9 KB · Views: 83
  • IMG_1059.jpg
    IMG_1059.jpg
    60.4 KB · Views: 87
  • IMG_1058.jpg
    IMG_1058.jpg
    66.1 KB · Views: 79
Regarding your replacing portlights...can’t help being curious. I pulled the one in the head of an old Mark I that I had over twenty years ago, to fix a leak. Found that it was "bedded in" with double sided paper tape. Had to just chuckle when I saw it. Wonder what you found? In spite of that, really good old boat. Great fun up and down the west coast of FL, Keys, and Bahamas!
 
Regarding your replacing portlights...can’t help being curious. I pulled the one in the head of an old Mark I that I had over twenty years ago, to fix a leak. Found that it was "bedded in" with double sided paper tape. Had to just chuckle when I saw it. Wonder what you found? In spite of that, really good old boat. Great fun up and down the west coast of FL, Keys, and Bahamas!

That's a good one, thanks for sharing.Also sounds like some decent traveling you did with her! I hope to someday.
I have only pulled the galley one and no paper, no real bedding at all! Likely explains why the entire wall around it was rotted. I'll be interested to see in the head.
I can say as we all know its funny seeing how people did things on old boats with years of fixes and jury rigging. I love when you see something that requires say 4 screws and they are all different! I needed 3 different screwdrivers to remove it. But hey sometimes you just need to get it done. Just not me. :)
 
Sat 2.10.18

Very damp but warm day around 45-49 degrees. Bought a 4 inch dremel "circular saw." Really great for this work especially the gunnels, curves, tight spots. Core was frozen as a rock in most places so no need to make life more difficult and will wait till it thaws out. Currently shopping around for new deck fills etc. Worst part was the tight space to work in with the shrink wrap.
Last picture was from a ranger tug from the Boston Boat show on Sunday... inspiration to keep me going ;) Click on photos they will rorate for better viewing.
 

Attachments

  • IMG_1101.jpg
    IMG_1101.jpg
    98.5 KB · Views: 90
  • IMG_1091.jpg
    IMG_1091.jpg
    64.9 KB · Views: 103
  • IMG_1082.jpg
    IMG_1082.jpg
    100.1 KB · Views: 96
Haven't done any fiberglass work since redoing my rear deck but getting ready to tackle the flybridge. I decided to just make it solid again rather than fix the sagging rear door.. Hope I dont regret that some day but spring is creeping up on me this year.

Have you been using tile-clad on the interior(thought I saw a can?) stuff is amazingly strong(stronger than gelcoat) and a good value @ $100 for 2 gallons of 2 part epoxy paint. Roll it on or you can spray it with a cheap $15 harbor freight airgun(assuming you have a large compressor).

Going to use cheap EBAY teak and holly Eva foam peel/stick decking on the rear deck for non-skid(comparable to seadek/much cheaper). I'll let you know how it holds up(only about $150 for the rear deck).
I'm a bit sloppy so it wont look custom made but hoping for something good.
zm488xJl.jpg
 
If you make the flybridge solid and the deck is still sagging then you'll never get the sag out in the future. I wasn't planning on rebuilding our cockpit sag either but realized it was going to have to be addressed first and then the flybridge repairs followed. Getting the sag out wasn't that much of an ordeal.
 
Last edited:
Haven't done any fiberglass work since redoing my rear deck but getting ready to tackle the flybridge. I decided to just make it solid again rather than fix the sagging rear door.. Hope I dont regret that some day but spring is creeping up on me this year.

Have you been using tile-clad on the interior(thought I saw a can?) stuff is amazingly strong(stronger than gelcoat) and a good value @ $100 for 2 gallons of 2 part epoxy paint. Roll it on or you can spray it with a cheap $15 harbor freight airgun(assuming you have a large compressor).

Going to use cheap EBAY teak and holly Eva foam peel/stick decking on the rear deck for non-skid(comparable to seadek/much cheaper). I'll let you know how it holds up(only about $150 for the rear deck).
I'm a bit sloppy so it wont look custom made but hoping for something good.
zm488xJl.jpg

Hi MRwesson, not using any tile-clad. I just looked it up and looks great and I do have accounts at the local shops/SW store. I should be using it. I feel like I'm goofing around with some exterior stuff that is not gonna hold up??
Thanks for bringing the product up! Looking forward to checking it out.. No doubt especially with a discount cheaper than say epoxy primecoat by interlux.
Especially for interiors.
I agree with the post below about your sag. Do the rear door first! :)
I always follow the build from foundation up philosophy. I'd be afraid of laying down new flybridge and it will all be done per the sag from the door...that hardens and sets. Then you go to jack up door and fix issues and it has knowwhere to go. Even a half an inch or whatever can be a real pain in the ass. Unless you have a hardened core/fiberglass bender?? :D Mine is broken or I would lent it to you :rofl: Just my .02
 
I made my '78 MKI much quieter doing a few simple things. One was to "box in" the vent hoses taking air to the engine compartment. These ultra thin vinyl hoses carry engine room noise, and are in the walls port and starboard of the salon. I straightened them up vertically, used 3/4" plywood from the side deck (include the vent box) to the salon deck and glued 2lb sq ft mass loaded vinyl (1/4" thick) to the plywood. Its all screwed together with gasketed seams so it can be taken apart for access.

Really helped quiet down the salon

:socool:
 

Attachments

  • IMG_0802.jpg
    IMG_0802.jpg
    48.9 KB · Views: 603
Mass loaded vinyl???? Do you have pictures, sources, price? I assume it is a sound proofing product.

Thanks.
 
Mass loaded vinyl (MLV) is what's in most small boat insulation nowadays, basically a lead replacement product. Used in the same weights as lead, works on noise like lead, non toxic and cheap. Looks and works like a sheet of rubber. Cuts with shears or a razor knife, glue, staple, nail or screw. Google search, plenty of sources, even big box stores.

I was tight on space, not enough room for conventional insulation, the 3/4" plywood and the 1/4" thick 2lb sq ft MLV had enough mass to stop quite a bit of noise. Using 3/4" ply made "boxing in" the vent lines pretty easy without the need for lumber "cleats" in the corners. Tight fit is important, noise will find any little crack.

:socool:

Mass loaded vinyl????
 
I am buying a 1978 MS-34 #98 off the mold. It has no soft spots in deck or overhead and the rear bulkhead is fine. But this thread scares the hell out of me. I hope I dont have to ever do this!!! You have my very deep respect for even trying this job.
 
update

Thanks Jimisbell, I hope you don't either! :)

So will be updating more now as the weather is slowly getting better here.

1.So core, fiberglass, and fairing are done. Excited for the new wide drains as I love the look.
2. Put up the foam backed vinyl ( bought from sailrite)
3. replaced vinyl padding with finished PVC trim pieces. They have nice finished edges and better than having to router edges and such.
4. Had my paint account guys color match the vinyl (slightly off white)
so I can paint PVC and anything else so the "white" stays consistent throughout
5. ripped the stairs going down to the galley out. rebuild new ones (pictures to follow) and nice red oak steps from Home Depot.
6. Sanded down the black exterior panels that had the mainship logo on them and will repaint. The inside panels on the other side of the black panels have gotten the same vinyl shown here to match. Was very hard to remove the old vinyl from those panels. (pics to come)

By the way, click on photos and the turn the right way. Weather is looking good as of now for the weekend and will be attacking more work, Hoping for a couple full days as launch is May 4th!
 

Attachments

  • IMG_1270.jpg
    IMG_1270.jpg
    77.8 KB · Views: 102
  • IMG_1272.jpg
    IMG_1272.jpg
    114.3 KB · Views: 84
  • IMG_1277.jpg
    IMG_1277.jpg
    69.4 KB · Views: 89
  • IMG_1320.jpg
    IMG_1320.jpg
    53.9 KB · Views: 84
  • IMG_1319.jpg
    IMG_1319.jpg
    55.3 KB · Views: 74
  • IMG_1314.jpg
    IMG_1314.jpg
    61.5 KB · Views: 77
  • IMG_1318.jpg
    IMG_1318.jpg
    79.7 KB · Views: 76
Last edited:
Looking good
 
Few more photos, All the fairing is done and setting in the new drains. I have some guys spraying the topside and nonskid. Will update as I think as we speak they are doing it.
Here are the new 10 inch cleats to replace the old ones. Going with two on each side of the boat. Also having the fuel deck fills re cromed. They are a funny size and i don't mind the old school look. Lastly self-explanatory shot of a "boat under renovation." Soon as that non skid dries I have some wiring to jump on for new lighting, thru hulls, and 10 other things to get going before we splasg on May 4th.
 

Attachments

  • IMG_1330.jpg
    IMG_1330.jpg
    68.7 KB · Views: 56
  • IMG_1331.jpg
    IMG_1331.jpg
    66.8 KB · Views: 63
  • IMG_1327.jpg
    IMG_1327.jpg
    61.5 KB · Views: 63
  • IMG_1328.jpg
    IMG_1328.jpg
    81.3 KB · Views: 75
  • IMG_1326.jpg
    IMG_1326.jpg
    70.1 KB · Views: 67
  • IMG_1325.jpg
    IMG_1325.jpg
    45.3 KB · Views: 61
Adding a second spring cleat is a good idea & on our list of things to do. It's good to see you're progressing nicely!
 
Great weekend of weather. Got a chance to organize the disaster in the boat a little. Got the stair framing in and painted. Since I copied the old design of the stairs and built offsite in the garage I realized when i was building them on location that I would have changed some things but it's all good they are very functional and the paint looks great up close on the rise. I used Rustoleum oil base gloss white. Little button is the Macerator (will relocate some other time) Treads are oak and will put in this week with hinges for the storage underneath. A shelf will go in as well.

Got a little wiring done today as well for the new gunnel LED lights and interior light strips I am putting in.

Final sanding today and gel coat spraying was getting done just as i was leaving.

Found a 2'x2' foot delaminated soft spot up next to the mast that was not on the list of stuff to do here. I missed it when I went through the deck.. My guy was cool and I cut it open about a 3"x3" hole and shoved a pry bar in it and went and bought a cheap hairdryer. 6 hours and its was all dry! Going to just fill with resin and call it a day on it. Turns out it looks like the deck itself was allowing the water intrusion. Gotta run, will update gin this week as I plan on spending most evenings working on her and they are saying non skid will be done and all work completed this week so I can get the hatches off and get back to thru hulls and more important work. Snuck in a end of day beer and sat down for a minute to enjoy the view on Saturday. Happy boating season!

Btw, Apperently I need to download the photos to photoshop or something so they won't upload sideways but I don't have much time to look into it so I apologize forr the annoying rotated photos here. Do let me know if their is an easy fix. Thanks.
 

Attachments

  • IMG_1338.jpg
    IMG_1338.jpg
    80.3 KB · Views: 73
  • IMG_1339.jpg
    IMG_1339.jpg
    71.5 KB · Views: 78
  • IMG_1340.jpg
    IMG_1340.jpg
    58.1 KB · Views: 74
  • IMG_1336.jpg
    IMG_1336.jpg
    77.6 KB · Views: 75
Last edited:
Last picture is the best part of the restoration so far. Should have started with it.
 
Just about any picture editing software will have a "rotate" function. Do it BEFORE you upload them to the forum..... !
 
Just about any picture editing software will have a "rotate" function. Do it BEFORE you upload them to the forum..... !

It's strange, they all show as being the right orientation when I upload and some just randomly resize or whatever to fit the website here. I think it's a sizing issue or the direction I take the picture.
 
Sometimes when I've posted pics (on a different site) they show sidewayr or upside down, even though normal on my computer. In those cases, opening the pic in my photo viewer, rotating, rotating back, and then saving... makes the uploaded pic correct in orientation. No clue why that would help, but...

-Chris
 
I don't know why mainship made the stairs non-opening. I modified ours so as to be able to lift off each of the 2 treads. The top houses an engine-water cabin heater & the entire lower is storage that's great for stuff like extra paper towels and galley supplies.
 
Storage under the stairs is a GREAT idea. You just added a "To Do" to my list. The list NEVER gets shorter......
 
Back
Top Bottom