Hendo's Randall 35 Cray Boat complete rebuild, Perth, Western Australia

The friendliest place on the web for anyone who enjoys boating.
If you have answers, please help by responding to the unanswered posts.
Matt Buddy... You gonna break a Beer or Champaign bottle on her bow stem at launch??!! 2018 is the year... we all hope for your, Felicity's and Solstice's sake! :thumb:


But, one thing is for sure... don't push yourself too hard... if sometime in 2019 becomes the date - then so be it! :D
 
Matt Buddy... You gonna break a Beer or Champaign bottle on her bow stem at launch??!! 2018 is the year... we all hope for your, Felicity's and Solstice's sake! :thumb:


But, one thing is for sure... don't push yourself too hard... if sometime in 2019 becomes the date - then so be it! :D


No mate. No smashing of bottles. I will have a ‘naming ceremony’ and a bit of a ‘blessing of the fleet’ thing.

My goal is to be finished on or around my 40th birthday in December this year but this will depend on being financially able. If I can’t then it’ll roll over till I can :)
 
Your anchor will never contact the hull, being out on your bowsprit, so don't bother with the bow plate suggested above. Not necessary.
But you knew that.
I am with Art...In Awe of your skills and commitment. I'll keep watching.
 
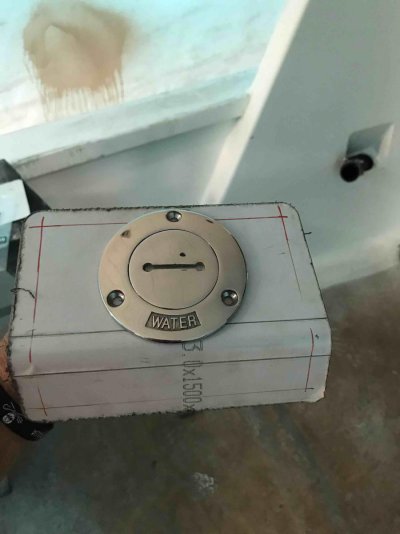
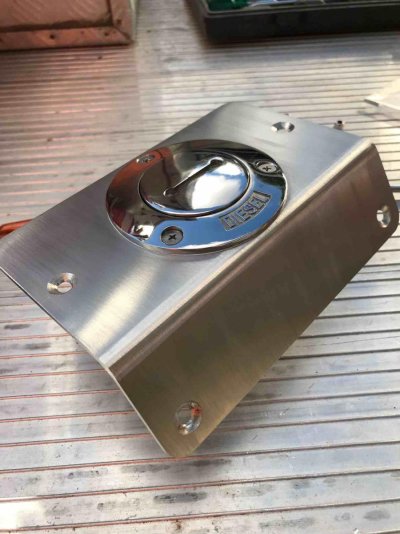
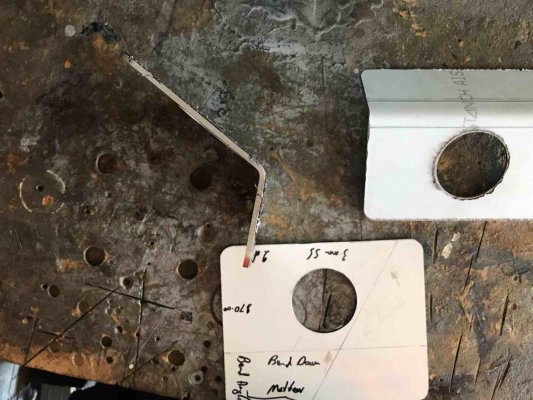
This afternoon I finished making the mounting plates for the diesel filler neck and water filler neck. I’m tossing up about giving it a grained finish or a polished finish like the filler necks. What’s your thoughts?... After that I jumped on the sander and put in a hour making dust and making the bow smooth then patched a couple of imperfections then I went all ‘Macgyver’ and moved my genset to act as an anchoring point and tied off ropes to it for the tarps and then piled a heap of old truck batteries and did the same to hold down the tarps further down then it was time to go. Back in to it tomorrow.
IMG_9775.jpg
IMG_9776.jpg
IMG_9777.jpg
IMG_9778.jpg
IMG_9779.jpg
IMG_9780.jpg
IMG_9782.jpg
IMG_9783.jpg
IMG_9785.jpg
IMG_9786.jpg
IMG_9787.jpg
 
Your anchor will never contact the hull, being out on your bowsprit, so don't bother with the bow plate suggested above. Not necessary.
But you knew that.
I am with Art...In Awe of your skills and commitment. I'll keep watching.

I agree. My bowsprit is shorter than yours, Matt, and my S-Sarca never touches the bow. Comes close, but never touches. They look nice though.
 

Attachments

  • IMG_0069.JPG
    IMG_0069.JPG
    81.8 KB · Views: 39
Last edited:
Your anchor will never contact the hull, being out on your bowsprit, so don't bother with the bow plate suggested above. Not necessary.

But you knew that.

I am with Art...In Awe of your skills and commitment. I'll keep watching.


Thanks mate ;-)
 
Fine, dont put the plate there because "it wont happen".
I would rather be safe than sorry.
 
+1 for polished and shiny like your deck fill, this would make a nice accent.

L
 
This afternoon I finished making the mounting plates for the diesel filler neck and water filler neck. I’m tossing up about giving it a grained finish or a polished finish like the filler necks. What’s your thoughts?... After that I jumped on the sander and put in a hour making dust and making the bow smooth then patched a couple of imperfections then I went all ‘Macgyver’ and moved my genset to act as an anchoring point and tied off ropes to it for the tarps and then piled a heap of old truck batteries and did the same to hold down the tarps further down then it was time to go. Back in to it tomorrow.

Shatttt, Matt me mate... MacGyver ("Rube Goldberg" reincarnate) don't hold a candle to your inventive capabilities! :thumb: :D
 
No primer sanding today. Instead I P120 sanded the mounting plates with my belt sander and fitted the filler necks to them then fitted the whole assembly to their final locations. I was going to leave these off until after I had finished painting but I made them so tight the edges were marking the primer and I didn’t want that happening to the top coats so i installed them. I’ll just have to spend the time taping them up but I’d rather that then have to deal with chipped and scratched paint work. Thanks everyone for your advice with the stainless finish. I decided to go with some recommendations for semi maintenance free finish. I’m happy with the end result so cheers boys

IMG_9797.jpg
IMG_9798.jpg
IMG_9799.jpg
IMG_9800.jpg
IMG_9801.jpg
IMG_9802.jpg
 
No primer sanding today. Instead I P120 sanded the mounting plates with my belt sander and fitted the filler necks to them then fitted the whole assembly to their final locations. I was going to leave these off until after I had finished painting but I made them so tight the edges were marking the primer and I didn’t want that happening to the top coats so i installed them. I’ll just have to spend the time taping them up but I’d rather that then have to deal with chipped and scratched paint work. Thanks everyone for your advice with the stainless finish. I decided to go with some recommendations for semi maintenance free finish. I’m happy with the end result so cheers boys

That's called a "shoe horn" fit! - LOL Really close tolerance... like all your other doings on SOLSTICE!

Long, sharp, fine tooth, flat metal file could maybe work so that width is reduced enough to slip in after finish panting. Once shortened enough painters tape, or even plastic from a baggie might insure no edge abrasion to finish paint. Seems to me, in my mind's eye, in the long run of use for years, that it might be good to have the finish paint underneath the filler neck mounting plates. Don't know what will happen as the mounting plates expand and contract in blazing sun conditions. Might even be good to have the plates filed short enough to make up for heat expansion conditions.

Just a thought! :popcorn:

Continue Mate!!! :speed boat::D
 
Greetings,
Mr. H. Mr. A has some good points regarding the "shoe horn fit" (also known as a Honeymoon fit although I have no idea why...). Might be best to heed his advice and shave a bit off the SS plate. If you ever have to remove them for whatever reason, you may appreciate a bit of clearance.
 
That's called a "shoe horn" fit! - LOL Really close tolerance... like all your other doings on SOLSTICE!

Long, sharp, fine tooth, flat metal file could maybe work so that width is reduced enough to slip in after finish panting. Once shortened enough painters tape, or even plastic from a baggie might insure no edge abrasion to finish paint. Seems to me, in my mind's eye, in the long run of use for years, that it might be good to have the finish paint underneath the filler neck mounting plates. Don't know what will happen as the mounting plates expand and contract in blazing sun conditions. Might even be good to have the plates filed short enough to make up for heat expansion conditions.

Just a thought! :popcorn:

Continue Mate!!! :speed boat::D


Hey mate.
Hard to explain on here having to type it. In its final resting place the mounting plate has around 2mm clearance. Getting it in to its location is tight because I didn’t make the angled rebate perfectly square so if I trimmed more off it would have too much clearance. Re the paint, it has Epoxy high build primer coating over epoxy resin so should be good. Thanks for your suggestions tho brother.
 
Last edited:
Greetings,
Mr. H. Mr. A has some good points regarding the "shoe horn fit" (also known as a Honeymoon fit although I have no idea why...). Might be best to heed his advice and shave a bit off the SS plate. If you ever have to remove them for whatever reason, you may appreciate a bit of clearance.


:)
 
Greetings,
Mr. H. Mr. A has some good points regarding the "shoe horn fit" (also known as a Honeymoon fit although I have no idea why...). Might be best to heed his advice and shave a bit off the SS plate. If you ever have to remove them for whatever reason, you may appreciate a bit of clearance.

Matt - RT has good point there!

RT...
"That" fit... is wished for my some! :socool: I enjoy otherwise!! :facepalm: :eek: :D:D
 
Hey mate.
Hard to explain on here having to type it. In its final resting place the mounting plate has around 2mm clearance. Getting it in to its location is tight because I didn’t make the angled rebate perfectly square so if I trimmed more off it would have too much clearance. Re the paint, it has Epoxy high build primer coating over epoxy resin so should be good. Thanks for your suggestions tho brother.

Understood... however, what RT mentions may become important in the future. It's now or never mate! Just a tiny bit shaved off may save touch-up paint need some time down the line. This is just a guestimate... but I could see you owning Solstice for many, many years. Decades are not too hard to accumulate. :thumb:
 
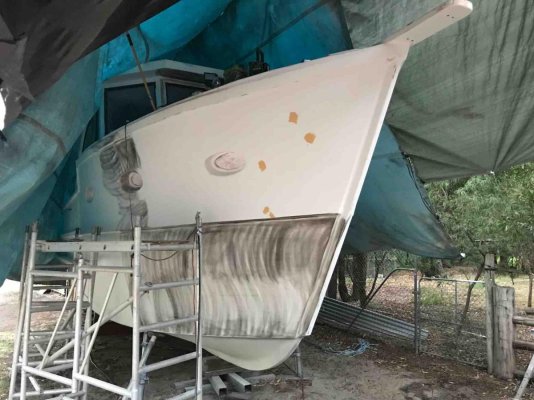
Smashed out the meterage on the sander this afternoon. Been a really productive week. Lots done with still lots to do but on track so far
IMG_9785.jpg
IMG_9823.jpg
 
Smashed out the meterage on the sander this afternoon. Been a really productive week. Lots done with still lots to do but on track so far


She's smiling! I believe those sanding swirl marks tickle her!

Now that you know your gal is ticklish... o' what fun you'll have - for years! - LOL

:D
 

Latest posts

Back
Top Bottom