Dry rot

The friendliest place on the web for anyone who enjoys boating.
If you have answers, please help by responding to the unanswered posts.

Edward14

Veteran Member
Joined
Apr 7, 2017
Messages
26
Location
USA
Vessel Name
Dreadnought
Vessel Make
1981 34' Californian Sport Fisher/Trawler
Hello all I have a 34’ Californian and there is a lot of dry rot under the over hang of the fly bridge has anyone out there experienced this issue and dose any one have any suggestions how to fix this.

Thanks
 

Attachments

  • IMG_3755.jpg
    IMG_3755.jpg
    56.8 KB · Views: 132
  • IMG_3756.jpg
    IMG_3756.jpg
    101.8 KB · Views: 133
  • IMG_3757.jpg
    IMG_3757.jpg
    86.3 KB · Views: 149
  • IMG_3759.jpg
    IMG_3759.jpg
    107.1 KB · Views: 144
No such thing as “dry rot”.
But if you’ve got rotten wood it will need to be replaced.
Not the best of news of course but it probably will go better than you think. Unless there’s much more than you see.
Are there soft sopts on the cabin rooftop?
 
There was a previous thread on here a year or two ago, by another Californian owner who also had dry rot in his overhang. I'm not good at searching the old strings up, but it's there someplace on the Californian owners tab.

It's caused by leaking fastners from the flybridge lag and trim screws above. He replaced his with new wood and resin and he was good to go. You may have to take down some of the interior ceiling panels to see the extent of the damage. As I recall, his was limited to the overhang.

I would be interested to see how you progress with this project. :popcorn:
 
Our Californian did not have rot, but if you look how the water drains from the bridge, you can see how it gets going. Anything can get wet, it's when water gets trapped and drys slowly that you have issues. Don't let water wick or get smothered. Wet wood is actually mostly okay, dry too. It's partly wet that will rot.

You can get at it, so cut new pieces and replace. Fix the drainage issues, even better (make it drain easier, prevent it from sitting). Likewise, I'm replacing some door jambs on my Tolly, that rotten the last two inches after 37 years. I'm starting with a quick coat on the replacement in clear penetrating epoxy so it can't absorb water. I'll bet you ten bucks I get at least 50 before the next ones rot.
 
I've been there!

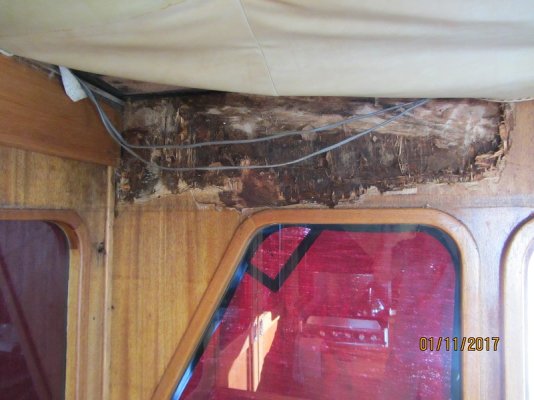
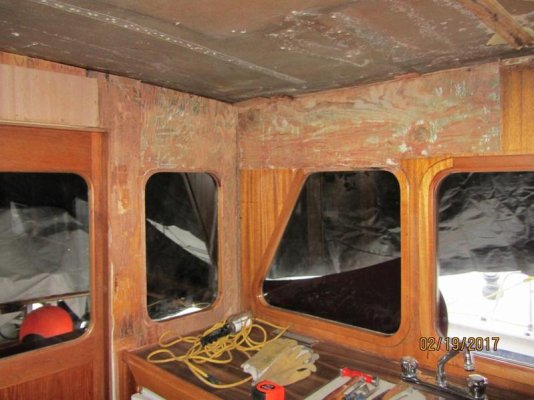
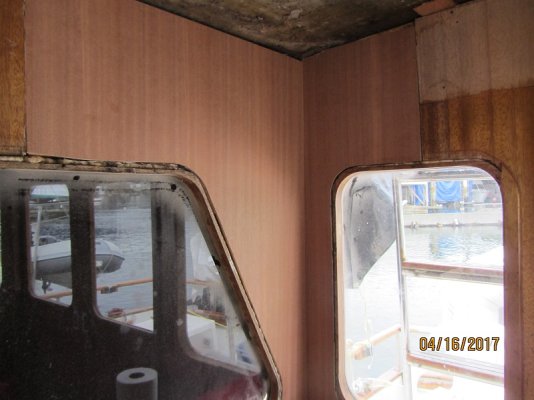
I was just about to post this on a new thread but it is relevant to this one, so here are some thoughts and musings regarding soffit (overhang) dry rot and water leaks into the LRC 34 Californian cabin. My wife noticed that there was rot in the bottom of our stbd aft overhead cabinet in the cabin. No problem I thought – I’ll just remove the cabinet, replace the bottom, and reinstall it. Well as usual this simple job turned into six months of work, which tested my patience on more than one occasion. Upon closer inspection I found rot on both sides of the interior in the upper aft side and rear walls, and the header over the rear doors. On the exterior the lateral wood soffits showed signs of water leaks and some rot. This all pointed to ingress through the cabin roof (bridge deck) which was frustrating as both the surveyor and I missed it, and one of the attractive factors in our purchase of Outer Marker was that she was a “dry boat”.
It turns out there were several areas of water ingress:
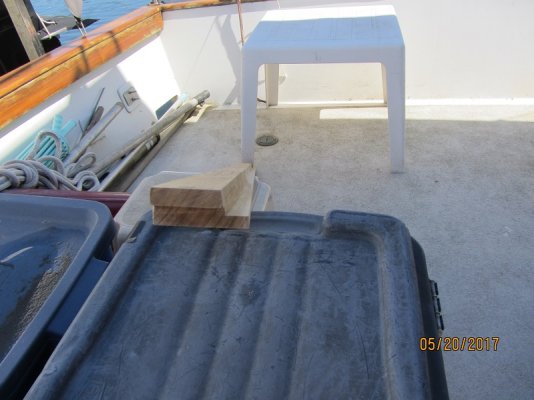
1) Fasteners through the deck, for seats, freezer retainer, etc. had insufficient caulking or it had aged and failed.
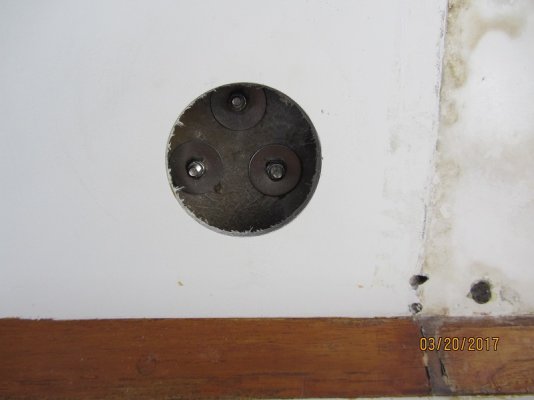
2) Fasteners (screws) securing the bridge shroud to the deck/roof were loose.
3) Rail stanchion bottoms were another entry point. Our bimini was riveted (i.e. a non water tight fastening system) to the rails, which would fill with rainwater, where the rails terminate (on either side of the bridge ladder) there was a hole in the bottom middle of the fastening plate. The bimini acted like a wing in the wind and would put a fair amount of stress on the fasteners (screws) which loosened and water in the rails leaked into the screw holes.
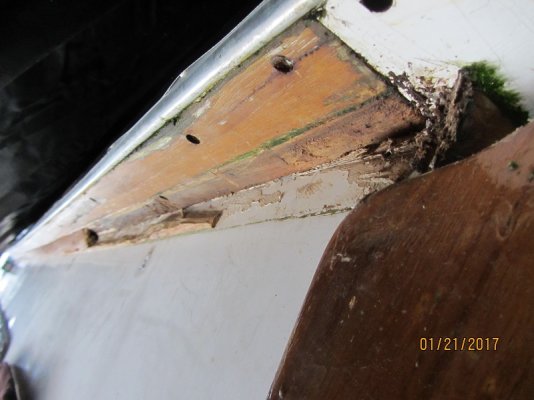
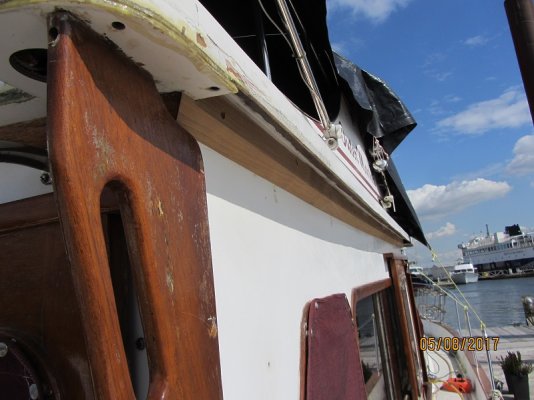
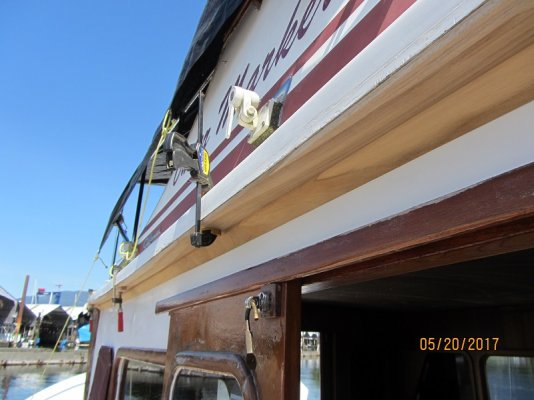
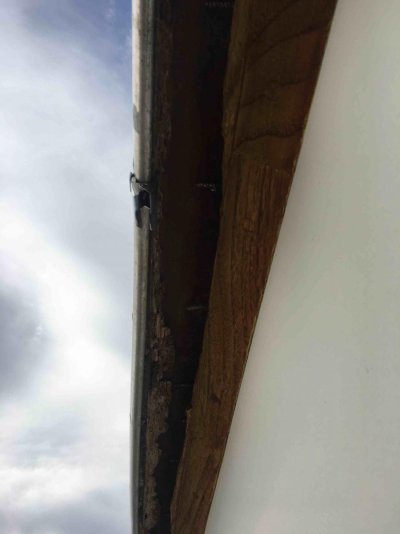
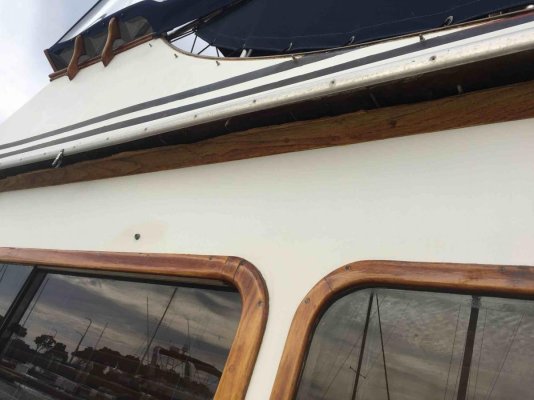
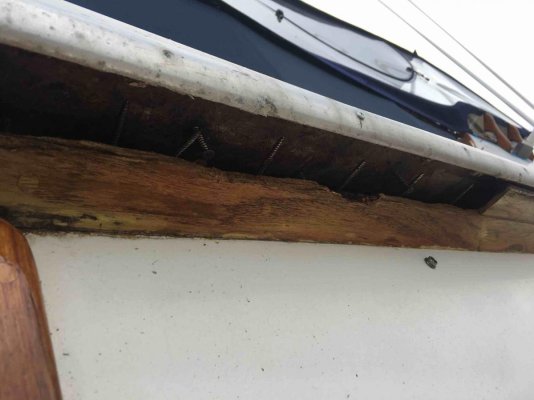
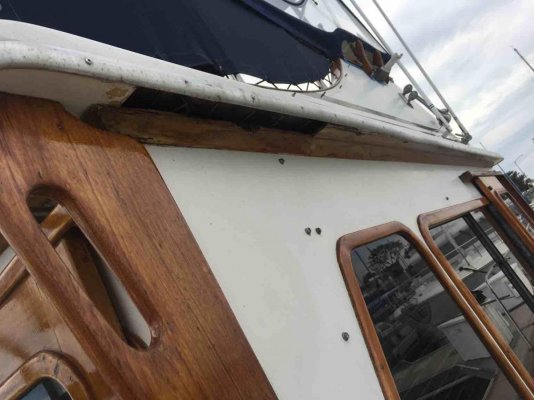
4) On the exterior the caulking on the aluminum trim around the bridge failed (it was probably due after 36 years of service) and water entered into the soffit (overhang) system and rotted the soffits, it also allowed water to flow down to the rear where it would enter the cabin. Rotten soffits have been noted by others in the forum and is discussed by Duvie. This is perhaps the most serious issue because the soffit system is structural and secures the bridge deck to the cabin walls. Note the large number of 3” screws used to secure everything together.
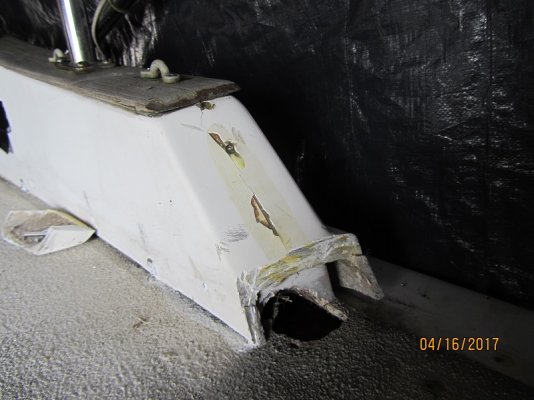
5) The final issue was a little more tricky. I had repaired all of the above, and after a rain storm there was still water entry through the roof – arg! I traced it to the aft “heel” of the bridge cowling. The only way to access it was to remove the bridge cowling (which I seriously thought about) or saw off the heel. I ended up sawing off the heel and found that way back 36 years ago when the bridge deck was removed from its mould it did not release properly in this area and there was a patch of filler which had failed (I popped it out with a screwdriver).

Solutions:
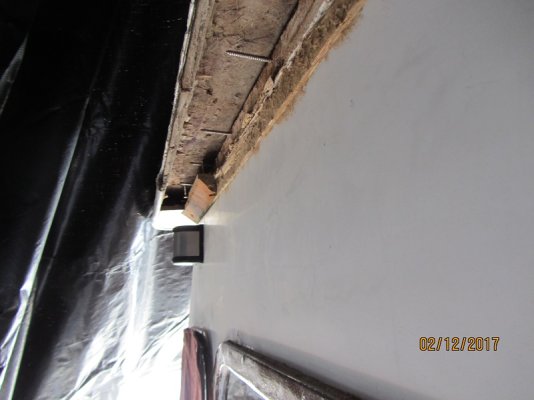
We stripped the interior, upper cabinets came out, and the head liner was removed, tarps put up and heaters turned on. All of the rotten wood had to be removed and replaced with new. The skin of the ribbon mahogany plywood was ok but the underlying ¾ plywood had some serious rot. I removed the interior plywood using a dremel multi-tool (now one of my favourite tools), wood scrapers, and sanders. Removing the soffit was completely frustrating. Although some of the butyl caulking had failed some had not and it was very difficult to remove. I used saws, knives, chisels and a heat gun to remove the remaining wood and caulking.

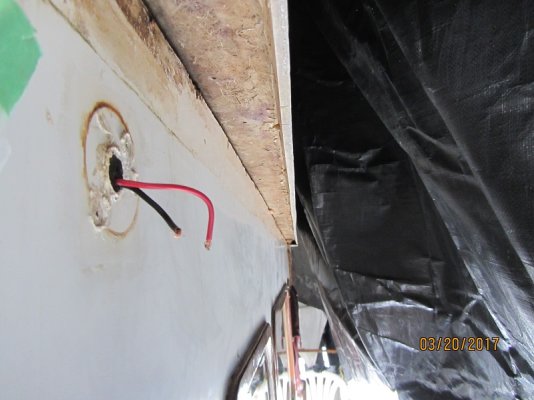
After all the rot was removed I filled holes in the roof/deck with cold cure epoxy (due to winter temperatures). All screws were replaced and recaulked. I replaced the interior plywood with ¾ marine grade and, surprisingly, ¼” ribbon mahogany was available from our local plywood store. I used fiberglass resin thickened with cabosil to attach the plywood and repair sections of the header.

I used a hole saw to cut out the fiberglass soffit below the stanchions and bolted them in using fender washers as backing plates. I figure that I can cover the holes with LED lights. I also drilled drain holes at the bottom outside of the rails.

I redesigned the soffits according to the attached figure. I ended up using 2 solid teak pieces rather than 3 wood pieces used in the original design and constructed trim from tempered aluminum square tubing One of the problems with the original design was that the rubrail/trim screws separated the teak/fir allowing more water ingress. And finally I replaced the bottom of the upper cabinet. I know this is a fairly rushed diatribe, if anyone has questions or wants more detail feel free to contact me. I have provided some diagrams and pictures but have lots more!
 

Attachments

  • 1 interior rot.jpg
    1 interior rot.jpg
    173.4 KB · Views: 110
  • 2 exterior rot.jpg
    2 exterior rot.jpg
    143.8 KB · Views: 107
  • 3 exterior rot removal.jpg
    3 exterior rot removal.jpg
    114 KB · Views: 96
  • 4 exterior rot removed.jpg
    4 exterior rot removed.jpg
    147.9 KB · Views: 98
  • 5 interior rot removed.jpg
    5 interior rot removed.jpg
    67.5 KB · Views: 101
  • 6 bridge cowl heel with patch removed.jpg
    6 bridge cowl heel with patch removed.jpg
    159.2 KB · Views: 101
  • 7 new interior wood.jpg
    7 new interior wood.jpg
    149.7 KB · Views: 98
  • 9 soffit piece 1 installed.jpg
    9 soffit piece 1 installed.jpg
    166.1 KB · Views: 100
  • 10 soffit piece 2 profile.jpg
    10 soffit piece 2 profile.jpg
    161.5 KB · Views: 99
  • soffit diagram.pdf
    173.7 KB · Views: 38
a couple more images...
 

Attachments

  • 8 new stanchion bolts.jpg
    8 new stanchion bolts.jpg
    101.1 KB · Views: 89
  • 11 soffit piece 2 installed.jpg
    11 soffit piece 2 installed.jpg
    155.5 KB · Views: 108
Really nice work on Outer Marker, Herb! I've not yet run into this issue but for reasons such as this, I keep my beloved 34 LRC in a covered slip, as did the PO.

Great find on the ribbon mahogany. What finish did you use to match the original?
 
That's great work, How did you finish the soffits?

I'm preparing to remove my salon overhead panels, remove the cork paper head liner, and recover with marine grade Naugahyde. Over the years, I've had a couple of leak areas over the fridge and on the opposite side, over the settee. I always assumed it was from rail stanchion bolts and I resealed them.

Scared to death of what I will find when the panels are removed. :eek:
 
Thanks Al, the finish I used was minwax helmsman varnish satin finish - it is readily available and relatively inexpensive, goes on easily, and had an honorable mention in Practical Sailor. I am also trying their gloss finish on the exterior brightwork....
Cheers, Herb
 
Hi Larry, I assume you are referring to the metal edge trim? For this I used 1 1/4" radius edge tempered aluminum tubing (available at your local metal store). I cut it into an "L" shape, leaving about 1/8" at the top and 3/8" at the bottom. The aluminum cuts easily with a metal blade in a table saw. I used butyl tape as sealant. One of the pluses is that rather than dealing with pre-drilled holes in the commercially available trim, you can drill the holes where you want them, and it is less expensive. To wrap around corners simply saw relief kerfs in the trim. The aluminum seems to be standing up to the marine environment, but I may have to treat it eventually.
Cheers, Herb
 

Attachments

  • trim.pdf
    157.2 KB · Views: 56

Latest posts

Back
Top Bottom