The start of a nice project (clipper 30ft)

The friendliest place on the web for anyone who enjoys boating.
If you have answers, please help by responding to the unanswered posts.
Nice job Eric. looking good. I feel for you on the rotted wall issue, I had the same problem on my Marine Trader, did the major repair from the outside first.
The paint job looks super, Much better with sprayed paint than rolled on for sure.
Will keep following your progress.
B.
 
John,

The velcro is glued on the ceiling and glued on the panels and stapled as well .... it "should" hold ....

Thin strips (as per photo) first, ready to glue the velcro on

Carpet is on .....*


-- Edited by shipshape on Monday 4th of April 2011 03:55:50 AM
 

Attachments

  • dsc02289.jpg
    dsc02289.jpg
    192.1 KB · Views: 126
  • dsc02293.jpg
    dsc02293.jpg
    145.2 KB · Views: 130
shipshape wrote:
Hoi Peter,

Yep sounds good, think "we'll splash" this Friday, maybe Monday.....

Not sure which berth we will have ....

Like to come and look at the painted engine ......

Are you happy with your wind power? Did you install yourself?
*Hi Erik.* She had her trial run Sunday, and all went well.* For pics of engine go to the 'Show us your ER' thread.* As to the Airbreeze, yes, I did install it myself.* No drama really, quite straightforward.* Good instructions.* Only tricky thing is getting the right pole to mount it on, and positioned in a place where it is vertical, secure, out of the way, and where no-one is likely to be able to reach out and cut their fingers off....and yes, it does make us independent of the need for a motor-powered genny, and we can run everything we have, frig included, out at anchor as long as we like without motoring to charge the batts.

How about you?* Have you splashed yet, and did you manage to secure that berth next to us?* It would be ideal in terms of being a blow-on, and port to dock where you pilot door is.* That makes a huge difference when it comes to docking. We were berthed to port initially, and my door is on starboard, and it was a real pain.* Nice also to have a similar boat as neighbours.* Most of the boats on our arm are what I call plastic fantastics, or go-fast boats, so not really possible to link up with them, as we are too slow.

*


-- Edited by Peter B on Tuesday 5th of April 2011 03:38:41 AM
 
Erik,

Have you strengthened the flybridge by adding extra beams or was that what it looked like when took out the headliners.

By the way is she a Mark 1 or 2(the boat, not the wife)
 
Hoi,*

We strengthened the flybrigde with extra timer rafter .... took some out, cause they showed some rot ... and put new side beams in both port and starboard.

The lining is up and looking georgeous ... fogot my camera ... soo soon .....

Not sure about Mark1 or 2 .... it's a clipper 30 ft ... how do I tell?
 
As I understand , there were 3 Clipper(CHB) models brought into Oz. The mark 1 & 2 had external timber window frames, and the seating on the flybridge ran across the boat. With the mark 3 the external windows were aluminium and the seating on the flybridge ran along the port and starboard sides of the flybridge.

Also I think the forward cabin trunk of the MK1 & 2 was ply encased in glass whereas the MK3 was solid glass.

Apparently the main difference between the MK1 & 2 was interior cosmetics, this differed from the aft cabin model and the Europa style that you and Peter have.

There are variations within each model as as I understand not all the boats came from the same boat yards. Apparently in the early days, circa 1970's it was not uncommon for the boat's fiberglass moulds to be 'borrowed' from yard to yard, it appears there were strong family connections in the boat building industry and everyone wanted a piece of the action when the popularity of these boats took off.

The guy who surveyed my last two boats, 34 Clipper & 36 IG, was the certifier who cleared the Clippers for entry to Oz.

*He has some great stories about these boat yards, often some canvass strung between two trees with all the family fitting out the boats.Apparently the*boats were brought into Oz and the engines were fitted here, the main commissioning place is what is now known as D'Albora Marina, Akuna Bay, in those days it was known as Clippers Anchorage, hence the name Clipper. The 34' sold for a bit more than $32K ready to go.

There you go, a bit of trivia for Friday afternoon.My 34' MK 1,aft cabin Clipper called 'Amadeus' now lives up in your part of the world, loved that boat, give her a wave if you come across her.
 
Thanks Andy ... indeed great information ... didn't know that .....

A before and after picture ..... more to come ....
 

Attachments

  • 492.jpg
    492.jpg
    60.9 KB · Views: 95
  • img_0259.jpg
    img_0259.jpg
    79.5 KB · Views: 124
Hi Andy. Good info that. Yes I've seen Amadeus around. Not sure where based tho, but being a Clipper 34 I take notice of names etc. As to the Mk 1, 2 & 3. As you say, the main difference was the flybridge seat arrangement, and topsides material. I don't like my bridge seating much, I'd like the room to put a proper helm chair, on the other hand it is quite practical, and we don't spend much time up there, so I don't hate it so much I am prepared to hack it about. The main other difference is the Mk 3 was all fibreglass topsides I think, whereas Mks 1 & 2 are ply cabins/deck with glass over...
Have you splashed yet, Erik?
 
By the way Erik, that nifty bowsprit is just begging to have a nice Sarca out on it....he he he...

Oh, hey, yes, Erik, knew there was something else...did you look into the blow-on berth next to me?* It won't be vacant long, or is it not up for grabs at present anyway..?

PS, I'm going to be away till end of May in the UK now visiting son and family.* See you on the water when we get back.* I'm hoping to see a nice sleek black hull next to Lotus when we do.* Beside, it would make my new white paint look good too in contrast.


-- Edited by Peter B on Friday 15th of April 2011 05:12:40 AM
 
Hi Peter,

Yep it's in the water .... splashed as they say ..... after a few issues .... it's not finished yet ... outside is ... inside needs a bit more work, which I will do ..... ran out of money
smile.gif


We decided to move it to hope harbour marina .... a few reasons .... but we will definitely make contact when you're back ... for a trip.

Safe travel to UK.
 
Erik, time for a new Avatar showing that nifty paintwork.
 
Yep Andy, forgot about that .... don't know which one ... still deciding ....
 
Looks lovely Erik and Bridget, well done you two. I look forward to linking up sometime when I get back. Off to UK tomorow.
 
Well she's finished ......

a few little issues still ... some leaking water pipes ... toilet not functioning ... a bit of finishing touches inside ..... but overall .. happy with the result ..... CFO/Admiral/chief/commander not happy with the costs ... but that's life ... you only live once ..... and if you do it right, once is enough ....

Ok ... put in new toilet ... Admiral is happy !

Fixed a few of the water leaks .... and put some picture of the cabin up.

-- Edited by shipshape on Saturday 28th of May 2011 03:07:34 AM


-- Edited by shipshape on Saturday 28th of May 2011 03:09:54 AM
 

Attachments

  • dsc02303.jpg
    dsc02303.jpg
    104.8 KB · Views: 122
  • dsc02310.jpg
    dsc02310.jpg
    81 KB · Views: 118
  • dsc01417.jpg
    dsc01417.jpg
    198.8 KB · Views: 121
  • dsc01419.jpg
    dsc01419.jpg
    151 KB · Views: 125
  • dsc02304.jpg
    dsc02304.jpg
    143 KB · Views: 157
  • dsc02307.jpg
    dsc02307.jpg
    205.2 KB · Views: 127
  • dsc02308.jpg
    dsc02308.jpg
    146.9 KB · Views: 129
  • dsc02309.jpg
    dsc02309.jpg
    202.5 KB · Views: 125
  • dsc02314.jpg
    dsc02314.jpg
    152.5 KB · Views: 126
  • dsc02317.jpg
    dsc02317.jpg
    160.1 KB · Views: 127
Dang!* Almost factory fresh.* Nicely done, sir!
 
shipshape wrote:
Well she's finished ......

a few little issues still ... some leaking water pipes ... toilet not functioning ... a bit of finishing touches inside ..... but overall .. happy with the result ..... CFO/Admiral/chief/commander not happy with the costs ... but that's life ... you only live once ..... and if you do it right, once is enough ....
*Outstanding job young man.** Fix the head and the Admiral will change her mind.

Good luck with her.* Both the boat and the Admiral.
 
Excellent work.* She is beautiful!
 
you are never finished with a boat he .... some more things done .....


-- Edited by shipshape on Friday 15th of July 2011 03:56:52 AM


-- Edited by shipshape on Friday 15th of July 2011 03:58:08 AM
 

Attachments

  • dsc02336.jpg
    dsc02336.jpg
    47.7 KB · Views: 113
  • dsc02355.jpg
    dsc02355.jpg
    103.2 KB · Views: 104
  • dsc02337.jpg
    dsc02337.jpg
    65.1 KB · Views: 116
  • dsc02323.jpg
    dsc02323.jpg
    73.6 KB · Views: 116
  • dsc02324.jpg
    dsc02324.jpg
    75.5 KB · Views: 110
That's unbelievable Erik and Bridget. The others have summed it up well, but having seen it before most of that was all done, I can add an even bigger tick, in terms of the transformation. She looks fantastic. As to the odd water leak - not hard to see why, a lot of right angle joints - but surely that is just a case of nipping/sealing them one by one. It looks soooo tidy and neat. We really must link up out there some time soon. My wife is finally back this weekend, after staying on over in the UK after I had to return, to see our new grandson into the world. Then on the way back via North America she looked up a cousin in New York and some old school friends in Canada, who go back to a time when she was schooling in India, (long story), but I know she would just love to see what you two have done.
We won't be going out this weekend, but are you thinking of issuing forth at some time in the near future..?
PM, mobile phone, or email me maybe...?

Hey, on another tack, so to speak, I don't know yet if it only applies to your pics, but probably not, but I only just discovered if one clicks on the 'view image' link, (as it invites you to do), it opens just the photo, (one at a time - on Firefox on Mac anyway), but if you click on the photo itself, it opens in a slideshow format - well beggar me....
 
Peter B,
It works that way on IE as well.
Makin water in the west.
 
Great job and helpful photos as well. Makes me tired just thinking of the work.

I noticed in photo 4 what looks like a s/s support on Flybridge right in your line of sight. Am I just seeing things?
 
That'll be his anchor light, Rebel, mine is in a similar place, but in real life it is not really an issue.
 
Hi rebel,

*

Yep indeed the anchor light ... it is removable, just plug in ..... and can be removed when driving or in marina ....

It's LED.

*

Cheers.

Erik
 
Just done some more work .....*

Added sails on the side, to protect from he elements,*

We covered the helm with vinyl, put new battery switches in from BEP, made a box for the top deck for the generator, can be used as table ....


-- Edited by shipshape on Sunday 21st of August 2011 05:24:24 AM
 

Attachments

  • img_0380.jpg
    img_0380.jpg
    56.5 KB · Views: 105
  • img_0352.jpg
    img_0352.jpg
    60.2 KB · Views: 113
  • img_0351.jpg
    img_0351.jpg
    126.5 KB · Views: 114
  • img_0382.jpg
    img_0382.jpg
    139.4 KB · Views: 113
  • img_0373.jpg
    img_0373.jpg
    139.1 KB · Views: 114
  • img_0371.jpg
    img_0371.jpg
    143.5 KB · Views: 122
Very nice.
I'm curious how you fastened down the generator box to the deck. Are you going to caulk around the base to keep the elements out?
 
Hi Chip,

We have just secured it with screws in the top deck, the box has no floor ... the generator is strapped to the deck on rubber feet, we on purpose left some gaps, so the water can drain out, if water gets in .... so basicly the water from the deck goes straight under *and back out as the deck sloops to the stern and left and right . * Hope this is a good idea.
 
Wonderful workmanship! I'm curious, however, what kind of generator is in the box? Is it gas or diesel & is that small hatch in the front for cord storage?
 

Attachments

  • generator box.jpg
    generator box.jpg
    64 KB · Views: 102
Looks really good Erik. I like that gen box too but fear it may vibrate the cabin top quite a bit. Have you run it yet? Really impressed w the idea .......and the execution!

Eric
 
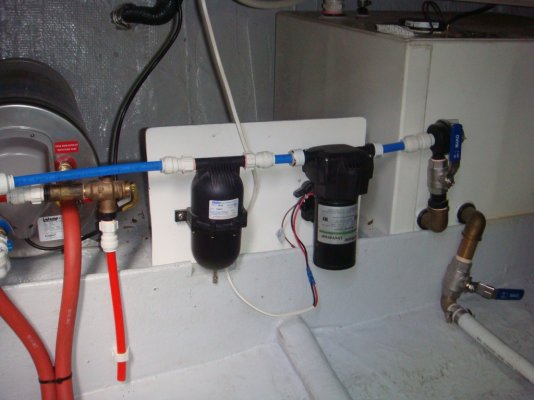
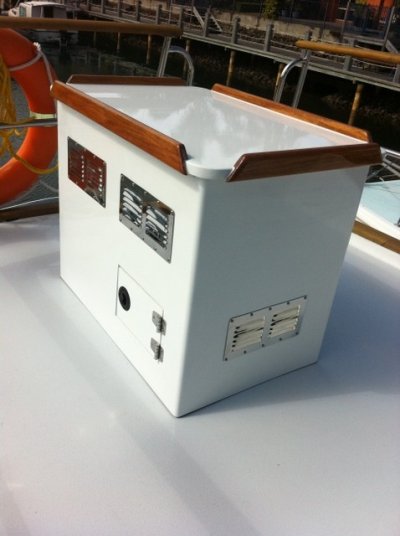
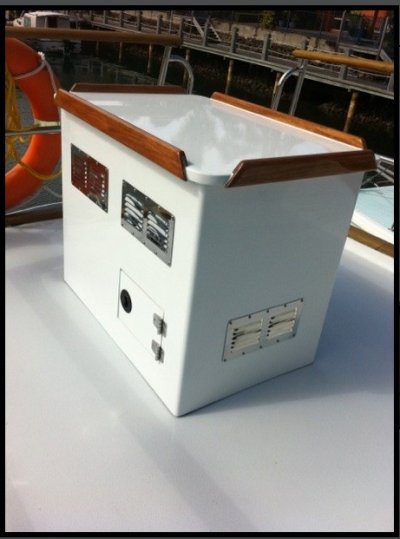
The little door is to get access to the fuel pump on/off switch and the primer .... its a petrol 4 kva ... yes it does vibrate a bit ... but we only use it to make coffee ... and in case of flat battery to charge .... :)
The*FUJI MICROâ¢*XG-SF3700 Model inverter generator has one of the lowest noise ratings - only 59dB at 4 Metres (less than that of common speech even at rated load), and will run for up to 5 hours on a single fill of fuel when used with the Economy Switch feature.

Based on*HONDAâ¢*Technology, this impressive generator*provides 4.4kVA/3500 watts of power at peak and 3200 watts at normal load*(vs. other older designs rated at only 2200W) and weighs only 28Kg. Inverter technology makes this generator ideally suited for use with sensitive electronics (e.g., computer, fax, printer, telephone, stereo,microwaves, all motorised devices) because the generator produces a clean sine wave of energy that results in no surging. To prevent any possible damage, the unit features an Oil Alert which causes shut down when the oil drops below safe operating level or in the event of being tipped over. The Remote electric start allows the ultimate convenience, where the generator can operate unattended at a distance from the application and can be fired up or shut down at the press of a button.

<table style="margin-left:20px;width:860px;font-family:Times;font-size:medium;"><tbody><tr><td>
product_01.jpg
</td><td><h5 style="font-size:18px;margin-top:0px;margin-right:20px;margin-bottom:0px;margin-left:20px;">Generator</h5><ul style="margin-top:10px;margin-right:20px;margin-bottom:10px;margin-left:20px;padding-left:0px;"><li style="padding-left:10px;line-height:21px;list-style-position:inside;">Model: Digital Inverter/Sine Wave<li style="padding-left:10px;line-height:21px;list-style-position:inside;">Frequency: 50/60Hz<li style="padding-left:10px;line-height:21px;list-style-position:inside;">Max. AC Output Power: 4.4kVA@0.8cos<li style="padding-left:10px;line-height:21px;list-style-position:inside;">Rated AC Output Power: 3.2kW/3.2kVA/4.0kVA@0.8cos<li style="padding-left:10px;line-height:21px;list-style-position:inside;">Rated Voltage: 240V<li style="padding-left:10px;line-height:21px;list-style-position:inside;">DC Output Rated Voltage: 12V<li style="padding-left:10px;line-height:21px;list-style-position:inside;">DC Output Rated Current: 8.3A[/list]</td></tr><tr><td><h5 style="font-size:18px;margin-top:0px;margin-right:20px;margin-bottom:0px;margin-left:20px;">Engine</h5><ul style="margin-top:10px;margin-right:20px;margin-bottom:10px;margin-left:20px;padding-left:0px;"><li style="padding-left:10px;line-height:21px;list-style-position:inside;">Model: XG157F<li style="padding-left:10px;line-height:21px;list-style-position:inside;">Type: OHV/Forced-Air Cooling/single Cylinder/4 stroke Gasoline engine<li style="padding-left:10px;line-height:21px;list-style-position:inside;">Displacement: 149cc<li style="padding-left:10px;line-height:21px;list-style-position:inside;">Compression ratio: 9.2<li style="padding-left:10px;line-height:21px;list-style-position:inside;">Engine Speed: 5000rpm<li style="padding-left:10px;line-height:21px;list-style-position:inside;">Ignition Mode: T.D.I<li style="padding-left:10px;line-height:21px;list-style-position:inside;">Recommended Fuel: Unleaded Gasoline<li style="padding-left:10px;line-height:21px;list-style-position:inside;">Fuel Tank Capacity: 7 Litres<li style="padding-left:10px;line-height:21px;list-style-position:inside;">Engine Oil Capacity: 0.45 Litres<li style="padding-left:10px;line-height:21px;list-style-position:inside;">Starting System: Pulling recoil starting / Electric starting / Remote starting<li style="padding-left:10px;line-height:21px;list-style-position:inside;">Continuous Work Time: 6 Hours<li style="padding-left:10px;line-height:21px;list-style-position:inside;">Spark Plug: A6RTC<li style="padding-left:10px;line-height:21px;list-style-position:inside;">Noise Level: 59db/4m[/list]</td><td class="right">
product_02.jpg
</td></tr><tr><td>
product_03.jpg
</td><td><h5 style="font-size:18px;margin-top:0px;margin-right:20px;margin-bottom:0px;margin-left:20px;">Standard Features</h5><ul style="margin-top:10px;margin-right:20px;margin-bottom:10px;margin-left:20px;padding-left:0px;"><li style="padding-left:10px;line-height:21px;list-style-position:inside;">Indicator Light: O<li style="padding-left:10px;line-height:21px;list-style-position:inside;">AC Overload Protector: Flow Pattern<li style="padding-left:10px;line-height:21px;list-style-position:inside;">AC Socket: 1 x 240v<li style="padding-left:10px;line-height:21px;list-style-position:inside;">DC Socket (12v/6A): "T" Type<li style="padding-left:10px;line-height:21px;list-style-position:inside;">DC Protector: O[/list]</td></tr><tr><td><h5 style="font-size:18px;margin-top:0px;margin-right:20px;margin-bottom:0px;margin-left:20px;">Inclusions</h5><ul style="margin-top:10px;margin-right:20px;margin-bottom:10px;margin-left:20px;padding-left:0px;"><li style="padding-left:10px;line-height:21px;list-style-position:inside;">2 Operation Key<li style="padding-left:10px;line-height:21px;list-style-position:inside;">Toolkit with 12V Leads<li style="padding-left:10px;line-height:21px;list-style-position:inside;">Owner's Manual<li style="padding-left:10px;line-height:21px;list-style-position:inside;">Dimension: 555(L)x305(W)x495(H)mm<li style="padding-left:10px;line-height:21px;list-style-position:inside;">Net Weight: 28kgs[/list]</td><td class="right">
product_04.jpg
</td></tr><tr><td>
product_05.jpg
</td><td class="right">*</td></tr></tbody></table>
 

Latest posts

Back
Top Bottom