New galley cabinets: Californian 38LRC

The friendliest place on the web for anyone who enjoys boating.
If you have answers, please help by responding to the unanswered posts.

mfreeman_1998

Member
Joined
Jul 16, 2008
Messages
23
Location
USA
Vessel Name
M/V Patience
Vessel Make
1978 Californian 38' Trawler
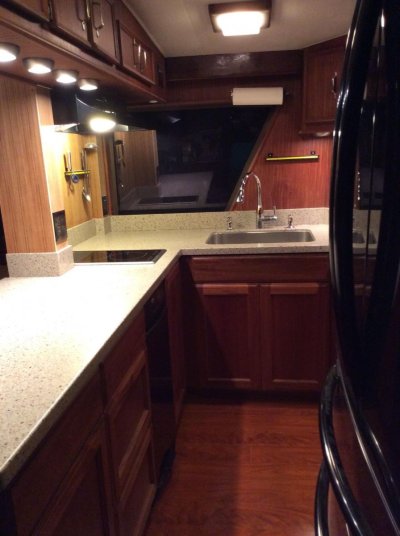
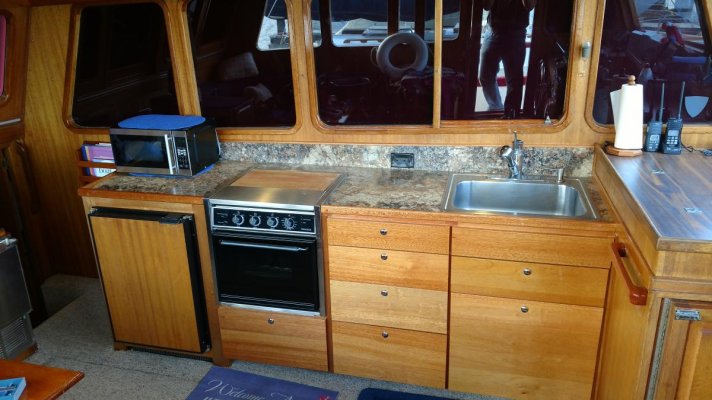
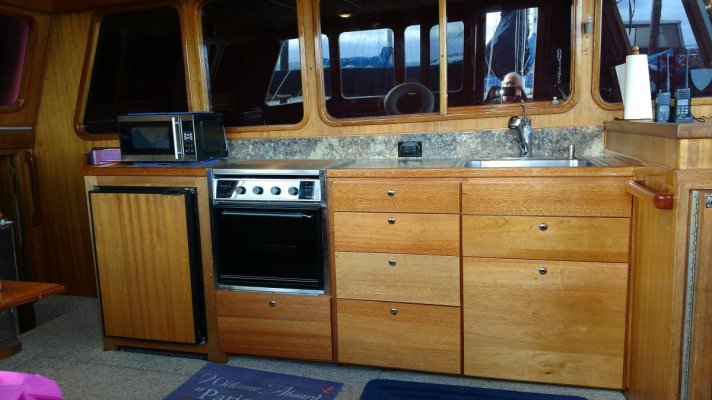
Over the winter I replaced the cabinets in my 38' Californian LRC.

Design Goals:
- 2" of rigid foam around refrigerator to improve efficiency.
- Eliminate cabinets doors which required getting on the floor to access stored items.
- Make silverware drawers deeper so spatulas wouldn't get caught when closing the drawer.
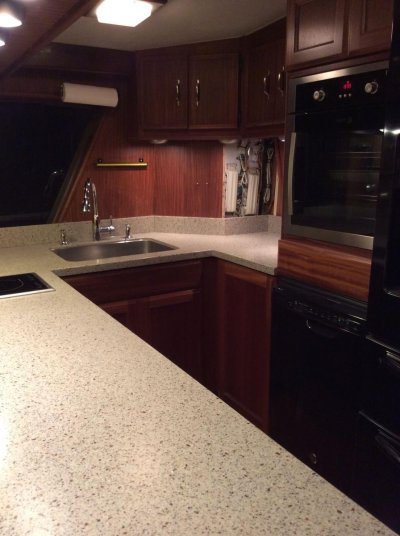
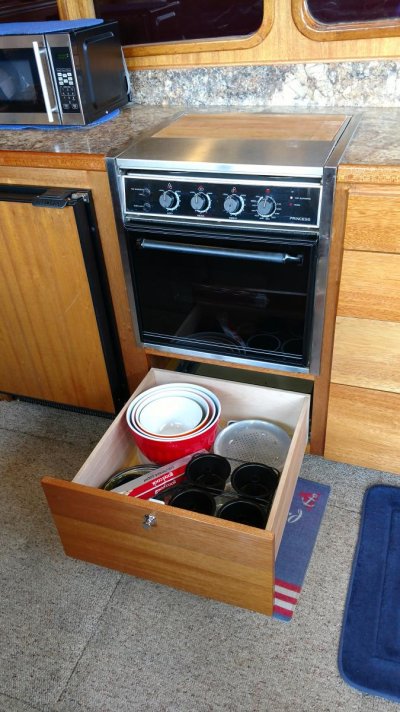
- Replace built in microwave with an oven. The Admiral likes to bake!
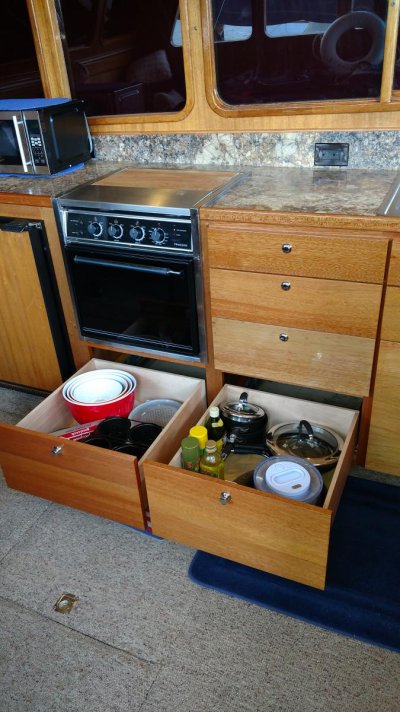
- Make the drawers deeper (21 inches) to take advantage of unused depth. Factory drawers were 16 inches deep.
- Replace double sink with a single.

Outcome:
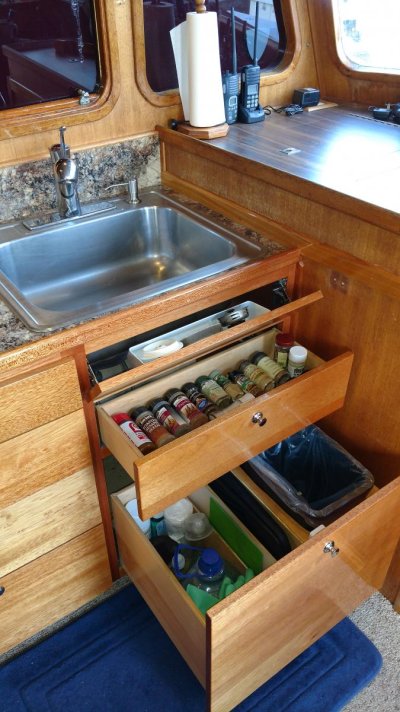
- Eliminated all doors. Only drawers in new installation
- All drawers are soft close, full extension with push button locks
- One fold down storage area at front of sink.
- The refrigerator compressor runs much less and contents are colder.
- Cabinets are face frame construction & made of Philippine Mahogany.
- The Admiral loves it!
 

Attachments

  • IMG_20170218_154101250.jpg
    IMG_20170218_154101250.jpg
    125.4 KB · Views: 117
  • IMG_20170218_154249753.jpg
    IMG_20170218_154249753.jpg
    148.9 KB · Views: 122
  • IMG_20170218_154401010.jpg
    IMG_20170218_154401010.jpg
    140.8 KB · Views: 108
  • IMG_20170218_154229128.jpg
    IMG_20170218_154229128.jpg
    156 KB · Views: 109
  • IMG_20170218_154039919.jpg
    IMG_20170218_154039919.jpg
    120.4 KB · Views: 115
Last edited:
Looks great, I would say you not only met your goals but exceeded them.
 
Very nice work . Full length extension drawers and soft close super nice.
 
Very nice, indeed! It's so satisfying to have new galley cabinets and storage space the way you want it!

For anyone considering a renovation such as this and don't want to go the route of custom built cabinets (assuming you're contemplating a DIY project like I did), I found a company right here in the US who makes some really quality cabinetry and they ship it to you, but you have to put it together. This is not the Home Depot, particle board, self-assemble stuff. If you google Barker Cabinets (for cabinets) and/or Barker Doors (for just cabinet fronts), you'll find them. I have no financial interest in this company - I'm just a very satisfied customer.

What sold me on them is that they offer solid sapele wood which matches my existing teak in the boat perfectly. I ordered mine, unsteadiness, but with clear coat - perfect match. I gutted my galley (all for the sake of wanting to install a dishwasher!) and redesigned it using Barker cabinetry. I, too, went with drawers for storing dishes. The regular cabinets have roll-out trays that I use for my pots and pans. I have some photos, although a tad dark, but you might can see how the sapele looks. It's a very nice alternative to expensive, hard to find teak. If you use sapele on the "ribbon" cut, it will look like the Mozambique teak which was used in a lot of boat from the 60s and 70s.
 

Attachments

  • IMG_0763.jpg
    IMG_0763.jpg
    100.2 KB · Views: 99
  • IMG_0764.jpg
    IMG_0764.jpg
    113.6 KB · Views: 90
Looks great!!

One item of caution... Refrigerator cooling units need breathing room/ventilation so they do not overheat and potentially cause fire. Seeing as you've considerably added insulation... Be careful to not let it overheat.

FWIK... During initial cooling of newly inserted food contents, wherein the fridge cooling unit may be maxed out for some time, overheating and fires may occur.
 
Good thoughts on proper venting of the refrigerator. That was a design consideration which was handled in the following manner.
- The heat transfer coils and motor at the rear of the refrigerator remain exposed.
- The unit sits on 2" of rigid foam on a platform. The platform has a ~3.5" tall & full width gap underneath it to allow cool air to be drawn under the unit and up the back.
- I did not vent on the top. The left back end of the cabinet has a vertical vent about 24" tall and 3" wide that allows the heated air which has passed over the coils to escape. I've monitored the temperature of the exhaust air and the air flow is more than sufficient to keep the delta-T in a reasonable range.

:thumb::thumb::thumb:
 
That looks really nice. Not only improve your functionality but make it look really good and improve resale at the same time (not that I think resale is that important.)
 
That looks really nice. Not only improve your functionality but make it look really good and improve resale at the same time (not that I think resale is that important.)

You might have different view if you were reselling! LOL
 
Very nice result, Mike!

I'm also getting tired of kneeling for anything under the oven or settee. I don't have your skills but maybe a combo is your ideas and Mermaid's Barker recommendation could make this a possible future improvement on FlyWright.

Thanks to both of you for posting!! Well done!!
 

Latest posts

Back
Top Bottom