You are using an out of date browser. It may not display this or other websites correctly.
You should upgrade or use an alternative browser.
You should upgrade or use an alternative browser.
Teak deck removal
- Thread starter kwestby
- Start date
The friendliest place on the web for anyone who enjoys boating.
If you have answers, please help by responding to the unanswered posts.
If you have answers, please help by responding to the unanswered posts.
Andy G
Hospitality Officer
- Joined
- Sep 20, 2010
- Messages
- 1,897
- Location
- Australia
- Vessel Name
- Sarawana
- Vessel Make
- IG 36 Quad Cabin
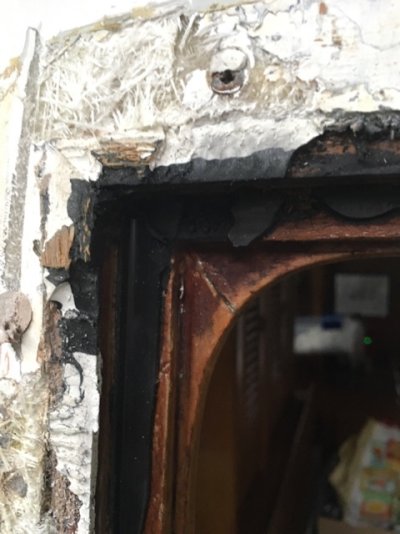
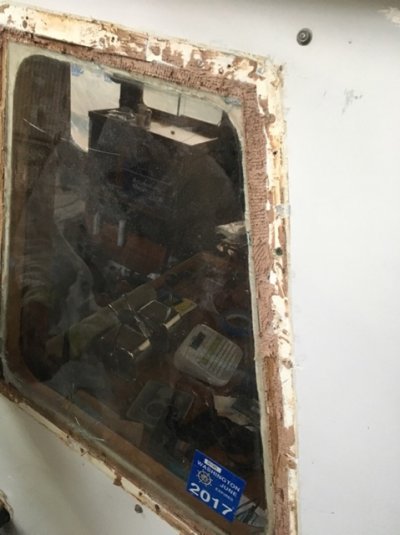
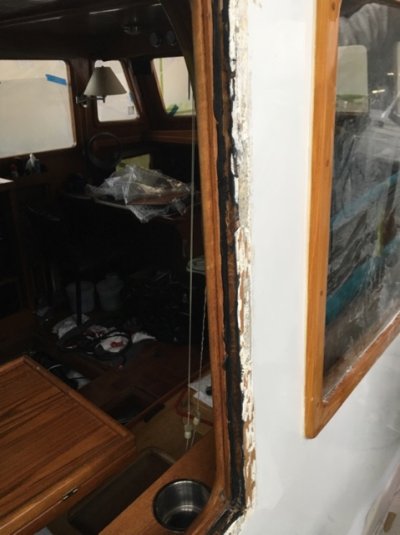
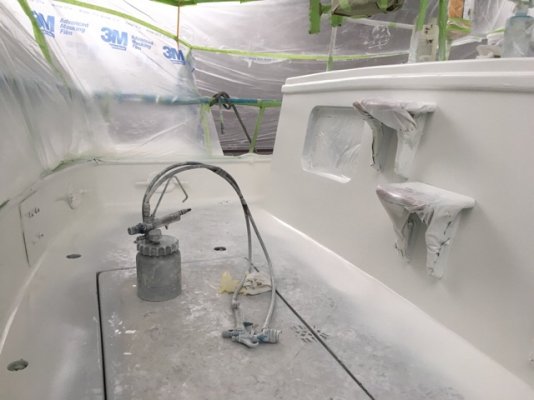
How are your windows, I only ask as I also replaced my decks etc, only to find water wicking in from the windows down the inside of the deck house, which I initially thought was from my deck.
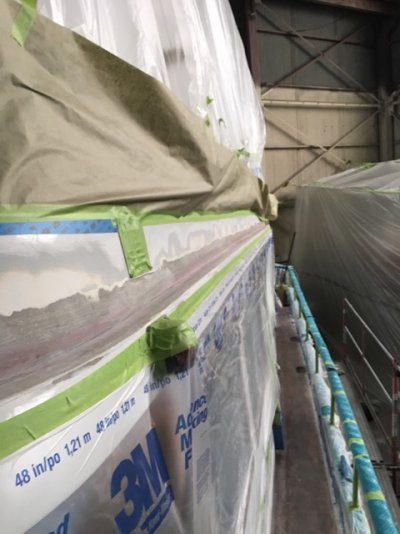
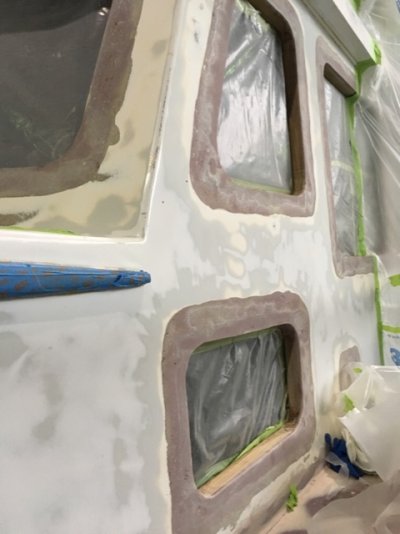
Still the decks were pretty shot anyway. Are you also painting the topsides as I noticed you seem to have taped off your deck rails as well.
Still the decks were pretty shot anyway. Are you also painting the topsides as I noticed you seem to have taped off your deck rails as well.
kwestby
Veteran Member
- Joined
- Feb 9, 2016
- Messages
- 85
- Location
- USA
- Vessel Name
- Nostra Casa
- Vessel Make
- C&L Puget Trawler 44
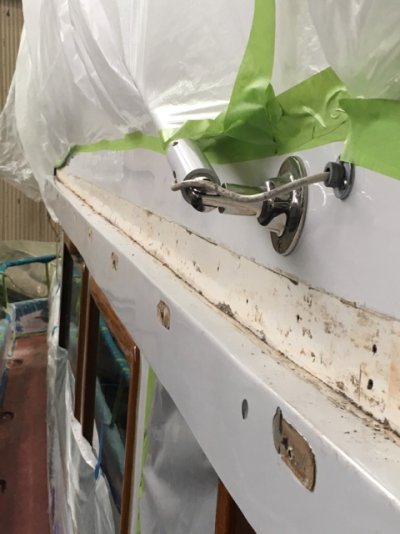
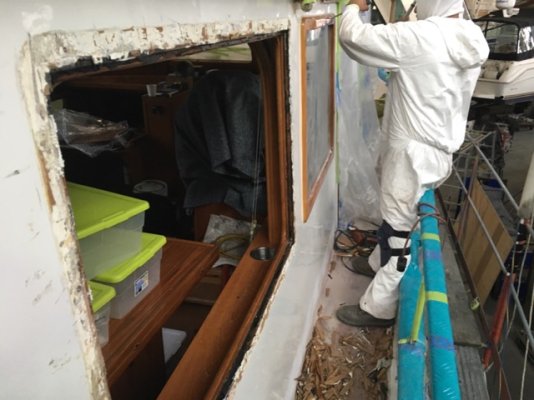
We have rebedded the sliders before but I am biting the bullet and replacing doors, windows, hatches and port lights at same time. Removing teak hand rail and replacing with stainless. Then repaint Cabin. Hopefully water tight and less bright work for another 20 years of enjoyment.
twistedtree
Guru
How is the decking held down? Had it been hard to get it up, and very destructive of the glass underneath?
kwestby
Veteran Member
- Joined
- Feb 9, 2016
- Messages
- 85
- Location
- USA
- Vessel Name
- Nostra Casa
- Vessel Make
- C&L Puget Trawler 44
Phew, now that's a project. How much are you doing yourself?
Subbing most of these projects this time, especially glass and paint. My goal is to be done before opening day and ready to go back north before June.
kwestby
Veteran Member
- Joined
- Feb 9, 2016
- Messages
- 85
- Location
- USA
- Vessel Name
- Nostra Casa
- Vessel Make
- C&L Puget Trawler 44
How is the decking held down? Had it been hard to get it up, and very destructive of the glass underneath?
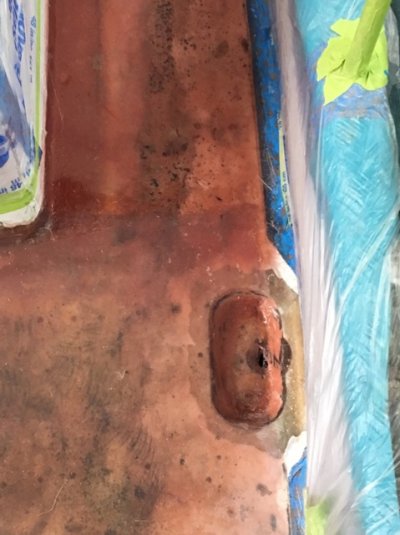
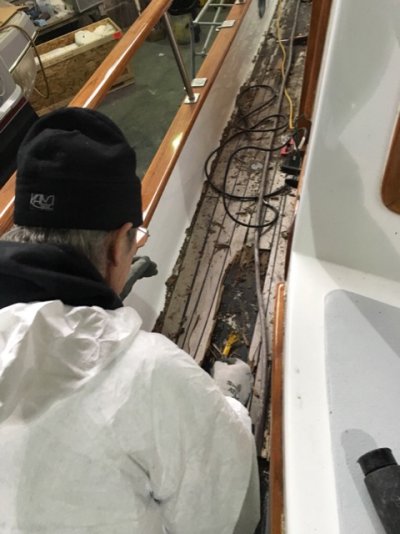
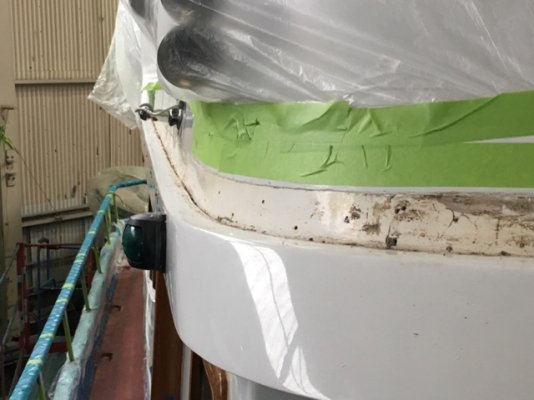
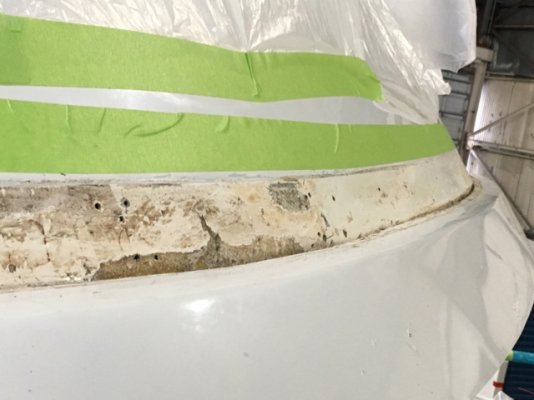
Teak screwed to deck into top fiberglass skin with a black sealer or mastic under boards. Started to pull bungs and screws and then use the Fien tool to cut/separate the mastic from the board to try and get up the teak in sections.
That was a fools errand and then went to the fast method. Using an angled flat chisel and flat bar just went through prying up boards. Then came back took out screws with drill and vise grip. Scraped deck of most mastic with a tool you would remove tile with sharpened on edge. Then all of it sanded to clean fiber.
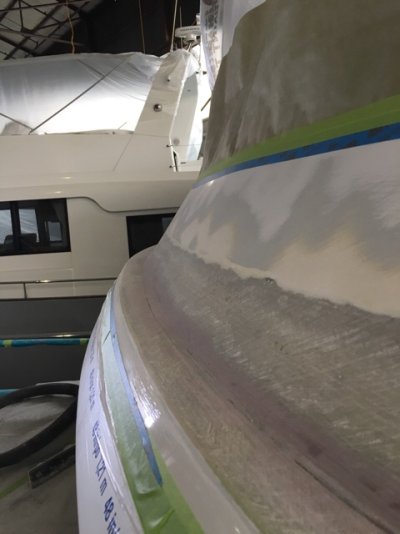
We opened multiple sections where we thought we could have wet core but it was all dry and with teak ply sections separated with decent epoxy sections. We then sanded deck and cabin side to build up glass radius and create structural and water tight joint.
Next we built up the inside edge of deck out with some high build filler to create better run off to drains. Built bigger drains into deck and then added a layer of glass across all decks and faired.
At the same time decided to remove flybridge teak trim and glass the seam underneath that wood. I did that 15 years ago on inside when I removed and glassed flybridge and aft cabin decks. Really looking forward to finished state. I will post some more pictures as I go through next steps.
kwestby
Veteran Member
- Joined
- Feb 9, 2016
- Messages
- 85
- Location
- USA
- Vessel Name
- Nostra Casa
- Vessel Make
- C&L Puget Trawler 44
Nice job so far! Did the back deck of my boat during the refit. So happy not to have the teak deck to maintain. More pics!
Ted
Hi Ted,
Thanks. What did you do with your lazerette covers?. The teak and plywood panels are not going to cut it. Thinking about laying up a GRP single panel and improving drains on channels
kwestby
Veteran Member
- Joined
- Feb 9, 2016
- Messages
- 85
- Location
- USA
- Vessel Name
- Nostra Casa
- Vessel Make
- C&L Puget Trawler 44
If anyone with a similar boat in NW would like drains, pristine shape teak doors and front hatches let me know and I can coordinate you picking them up. Also have a custom aluminum folding mast with KVH sat platform and radar platform. Awlgrip bright white. Yours to pick up.
O C Diver
Guru
- Joined
- Dec 16, 2010
- Messages
- 12,865
- Location
- USA
- Vessel Name
- Slow Hand
- Vessel Make
- Cherubini Independence 45
Hi Ted,
Thanks. What did you do with your lazerette covers?. The teak and plywood panels are not going to cut it. Thinking about laying up a GRP single panel and improving drains on channels
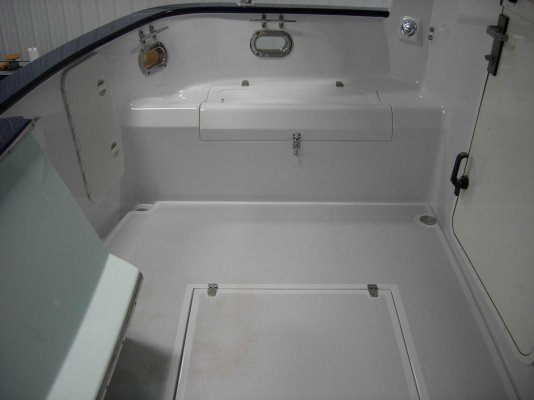
Some pics from the back deck project.
Removing the teak with a power planer after pulling screws.

The hatch down to the plywood and some glue.
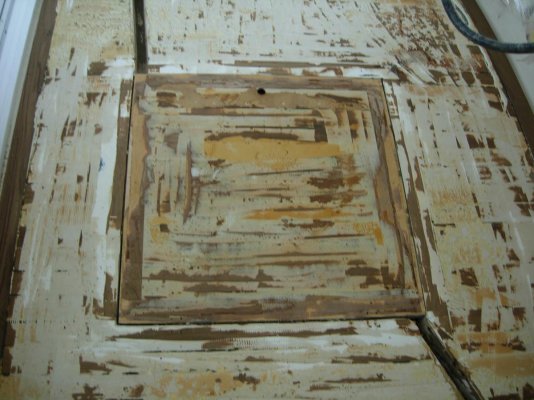
The deck, the top and sides of the hatch got 2 layers of bi-axial cloth and polyester resin. The sides of the hatch were sanded down to offset the buildup of the cloth.
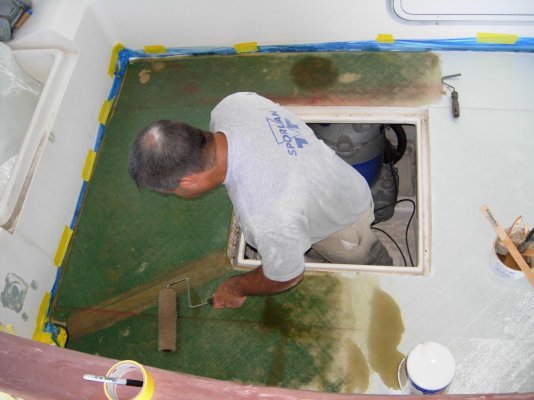
There is guttering around the hatch and 2 channels in opposite corners to carry the water to the deck drains.

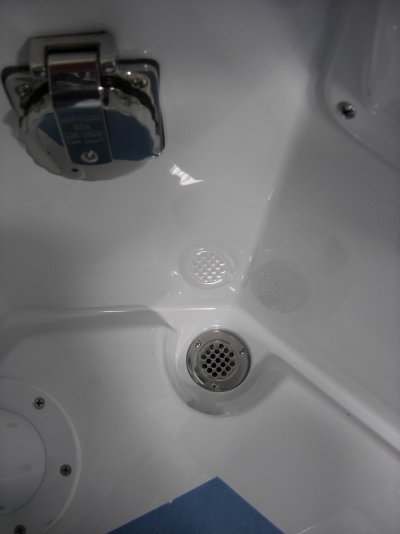
Deck drain with perimeter guttering and the channel coming from the hatch guttering.
After the 2 layers of cloth, 5 or 6 layers of gel coat were rolled on to level the surface and hide the cloth pattern. Then it was sanded, fared and awlgripped. Final top coat is Kiwigrip for non-skid.
Ted
kwestby
Veteran Member
- Joined
- Feb 9, 2016
- Messages
- 85
- Location
- USA
- Vessel Name
- Nostra Casa
- Vessel Make
- C&L Puget Trawler 44
Some pics from the back deck project.
Removing the teak with a power planer after pulling screws.
View attachment 61764
The hatch down to the plywood and some glue.
View attachment 61765
The deck, the top and sides of the hatch got 2 layers of bi-axial cloth and polyester resin. The sides of the hatch were sanded down to offset the buildup of the cloth.
View attachment 61766
There is guttering around the hatch and 2 channels in opposite corners to carry the water to the deck drains.
View attachment 61767
Deck drain with perimeter guttering and the channel coming from the hatch guttering.
View attachment 61768
After the 2 layers of cloth, 5 or 6 layers of gel coat were rolled on to level the surface and hide the cloth pattern. Then it was sanded, fared and awlgripped. Final top coat is Kiwigrip for non-skid.
View attachment 61769
Ted
Amazing job! That is one handsome and functional cockpit. I like the drain track instead of tubes in lazzarete
O C Diver
Guru
- Joined
- Dec 16, 2010
- Messages
- 12,865
- Location
- USA
- Vessel Name
- Slow Hand
- Vessel Make
- Cherubini Independence 45
Amazing job! That is one handsome and functional cockpit. I like the drain track instead of tubes in lazzarete
Fantastic job. Makes me somewhat depressed.
Thanks! Absolute home run all the way around. Helps to have a great fiberglass guy!
Ted
kwestby
Veteran Member
- Joined
- Feb 9, 2016
- Messages
- 85
- Location
- USA
- Vessel Name
- Nostra Casa
- Vessel Make
- C&L Puget Trawler 44
Still available? I'm in the middle of my own refit/refurbish of a 40 year old defever.
Yes, In addition to other items I have the back teak deck hatches if you want those as well. Everything is at CSR yard in Ballard. Just let me know when and I can meet you there.
Comodave
Moderator Emeritus
- Joined
- Jul 2, 2015
- Messages
- 21,273
- Location
- Au Gres, MI
- Vessel Name
- Black Dog
- Vessel Make
- Formula 41PC
Looking very nice. I am going to paint my bridge this weekend but am going to roll it. Wish I could spray it, but rolling will have to do... yours looks beautiful.
kwestby
Veteran Member
- Joined
- Feb 9, 2016
- Messages
- 85
- Location
- USA
- Vessel Name
- Nostra Casa
- Vessel Make
- C&L Puget Trawler 44
Looking very nice. I am going to paint my bridge this weekend but am going to roll it. Wish I could spray it, but rolling will have to do... yours looks beautiful.
Thanks. Good luck. The prep for spraying sucks so I envy your finished results this weekend. Show us some shiny pics when done.
Marlinmike
Guru
Awesome job kwestby, not only functional but a real value add for that fine vessel, thanks for sharing!!
kwestby
Veteran Member
- Joined
- Feb 9, 2016
- Messages
- 85
- Location
- USA
- Vessel Name
- Nostra Casa
- Vessel Make
- C&L Puget Trawler 44
I have 2 teak topped, plywood with stainless trim lazarette hatch covers available for free if someone want to pick them up. In Ballard/Seattle. I think they may be standard on CHB's if there is even a standard.
Kennet Westby
1979 44' Puget Trawler
Seattle, WA
Kennet Westby
1979 44' Puget Trawler
Seattle, WA
I have 2 teak topped, plywood with stainless trim lazarette hatch covers available for free if someone want to pick them up. In Ballard/Seattle. I think they may be standard on CHB's if there is even a standard.
Kennet Westby
1979 44' Puget Trawler
Seattle, WA
It would be helpful if you would post the measurements.
My C&L 44 has a single opening with a pair of interlocking teak hatches that lift out. The stainless trim covers the gap between the hatches and the surrounding deck. Roughly 24" x 24" each. If there is a standard, yours should be like mine.
When I was new to this boat, aver 20 yrs ago I had to replace one due to rot in the plywood. The other is still good.
kwestby
Veteran Member
- Joined
- Feb 9, 2016
- Messages
- 85
- Location
- USA
- Vessel Name
- Nostra Casa
- Vessel Make
- C&L Puget Trawler 44
It would be helpful if you would post the measurements.
My C&L 44 has a single opening with a pair of interlocking teak hatches that lift out. The stainless trim covers the gap between the hatches and the surrounding deck. Roughly 24" x 24" each. If there is a standard, yours should be like mine.
When I was new to this boat, aver 20 yrs ago I had to replace one due to rot in the plywood. The other is still good.
They are the same as yours and both in good shape. Yours if you want them.
Similar threads
- Replies
- 1
- Views
- 367


