How do I get the wheel off?

The friendliest place on the web for anyone who enjoys boating.
If you have answers, please help by responding to the unanswered posts.

Fotoman

Guru
Joined
Nov 12, 2009
Messages
649
I'm repainting the console and would like to take the wheel off. I didn't spend much time trying the other day but it proved a bit more difficult than I anticipated. Has anyone ever done this?

*

*
 

Attachments

  • p4273903.jpg
    p4273903.jpg
    49.8 KB · Views: 79
  • p4273904.jpg
    p4273904.jpg
    46.9 KB · Views: 90
I use a wheel puller.* Works great.* Put the pawls over the hub and tighten the center bolt with a wrench.* Wheel pops right off.* I've found that I can't coax my wheel off without one.
 
It's a taper fit. You'll need a puller. Hook the legs of the puller on the bronze part of the wheel and tighten the center bolt. It will come right off. Protect the bronze with something to keep from marking it.
If you don't have a set of shiv/sheave/pulley pullers you can get a cheapy at Harbor Frieght.

Yes. Take the bolt out.

*


-- Edited by Anode on Friday 29th of April 2011 11:45:56 AM
 
Oh you definitely have to take the bolt off, but goto you local O'Riley's and get a 3-legged puller. You need the bigger of the two they have. It will have long legs and l-shaped feet on one end. They are only $15 or so. Of course, mine was on a hydraulic pump for the steering, so YMMV. But you should have a general puller in your toolbox anyway
biggrin.gif
 
Ok, so just so I understand, do I start by taking the bolt off, than rig the puller to get the wheel off?
 
The bolt has to come out to get the wheel off. Yes. You don't want to mess up the threads on the shaft where the bolts threads in. I generally back the bolt off five or six turns and place the puller center bolt on it. Once the wheel pops loose take the puller off back the bolt all the way out.


-- Edited by Anode on Friday 29th of April 2011 11:59:29 AM
 
Taking the wheel off looks like a good thing. from the pics it could really use a refurbishing.

SD
 
Ah, thanks, now I get it. You're right SD but I'm not sure I'll have time to do the job this spring. This is a job for long winter evenings!
 
skipperdude wrote:
Taking the wheel off looks like a good thing. from the pics it could really use a refurbishing.

SD
*And that's why I'm so reluctant to show pics of my barge!*
biggrin.gif


I had to pull the wheel off to install the wheel pilot drive ring.* It was easy for me.* The wheel was not secured by an interference fit, pressed-on type device.* It was a simple nut.* I didn't need any special tools that I can recall.* Maybe a strap wrench to get the cover plate off was all that I can remember.

*

*
 
On my DeFever* wheel, once the nut is off, the wheel just hand pulls right*off, no puller required.
 
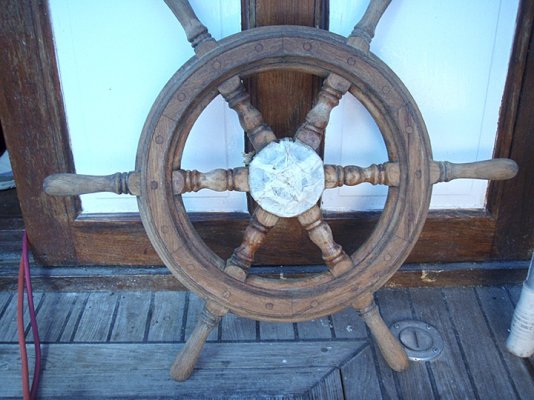
Yes, I think there is some confusion here. You don't remove any bolt, you remove the nut off the shaft, (after carefully removing the cover or cap over the bolt, best down with it wrapped in a cloth and large vice-grips, so as to not damage the varnish over bronze coating which keeps it shiny), then the wheel is a mild taper fit, with a bronze wedge piece that fits in the groove designed for it to relocate the wheel in the same spot so you don't lose top dead centre, so make sure you don't lose that when you remove the wheel. It will best to get it off with a puller as others mentioned, the most elegant way, or, as I found, it is possible by being persistent with the wedged edges of a large screwdriver head tapped down between the back of the wheel and the bulkhead face mount, to ease it off, or, as Sunchaser found, (as I did with the upper helm), it might just come free with a tug, but that's unlikely. Of course, as others mentioned, once off you will be under extreme pressure to smarten it up, but a good sand down and re-varnish is quite easy, just a bit fiddly, but well worth the effort, and of course you can take it home to do this. I found a nice newly re-varnished wheel did wonders for the look of the helm.
 
Fotoman,

Please let us know how it works out for you. I have exactly the same problem, and have not been able to get the wheel off, even with a puller. My puller is a little small for the job, so maybe a bigger puller is what I need. On the ring at the center of the wheel, I have a notch, just like yours, and I was wondering if there was some sort of alignment needed to get the wheel off...

Wannabe
 
Fotoman - this may not apply in any way to your wheel but - a while back I was involved in an Oriental mfg'd trawler and needed to remove the wheel. I cannot remember any manufacturers labels however here's what I found.
The wheel hub had a hexagon recess cast into it that a sort of un-threaded "nut" was recessed into. The wheel was actually held on by a center bolt that ran through a cone washer that bore up against a tapered section of the hub and kept everything together. The large "nut" was actually keyed to the shaft and I presume was meant to take the load of the steering, passing it through the hex recess to the wheel.
Once we figured what in H... was going on it was a snap to get it apart - removed the "bolt" and gave a tug on the wheel and it all slid apart easily, be careful not to loose any of the bits and pieces !!
Like I say, this may not bear any resemblence to what you have but the second picture you posted immediately reminded me of this other vessel.
Hope this may help you and good luck,
John Tones "Penta"
Sidney, BC
 
Superdiver, it mounts back onto a slightly tapered shaft. All you need do, if it is like the standard arrangement, is to line up the squared groove in the shaft with the same on the inner face of the wheel aperture, inserting the bronze wedge in the groove, then push it all straight back till it stops, tap lightly with a mallet, then put the large nut back on and tighten snug, but not over-tight. Then re-apply the cover cap which cosmetically hides the end of the shaft and nut, but does nothing otherwise. I velcro onto this cap one of those cheap weighted top dead centre marker things myself to make use of it, and which is a bit more accurate than taping the wheel or spoke to mark top dead centre/midships. It really is mechanically an extremely simple process, all largely intuitive when you are looking at it.
 
SOME wheels are on a tapered shaft.

Many are not , just pulling the bolt might be all she takes.
 
Photoman - If it's on a Wagner 500 series steering pump and it's like mine. It's a bolt and you'll need a puller. I have mine apart at present. PM me and I'll be glad to call you and walk you through the process.
chip
 
Mission complete. I got a 4 inch puller but it ended up being too small, it would loose it's grip as soon as i started applying pressure. Got a 6 inch with 3 handles instead of 2, worked liked a cham and the wheel litterally poped off after a few turns. Thanks for all your advice. Got all my painting done and the flybridge now looks like a million bucks!
 
Fotoman,

Thanks for the follow-up.* I guess I will have to try a bigger puller too.* I like the suggestion of a three prong puller instead of the two prongs.

Wannabe
 
The bigger gear puller works like a charm!* The wheel popped right off.


-- Edited by Wannabe on Wednesday 4th of May 2011 03:27:17 PM
 
Wow. A lot of discussions for a pretty simple task! fotoman, I would like to add one piece of additional advice. I "refurbished" my wheel a couple of years ago, identical to the pics you posted. To get 30+ years of old varnish, cetol, etc off the spokes and hub I decided to dis-assemble the pieces so they could be sanded/refinished completely and I could get all the gunk off the hub and polish it up a bit. . If you take this approach, figure out a way to number all the pieces for re-assembly. These things did NOT come off an assembly line machined to very close tolerances (!) and a lot of jiggling was necessary to get the individual pieces back in place. Keep the refinishing material off the tenons also.
Mine is on a straight shaft with a tapered key in a slot - if yours is like that, don't lose that key.
 
I'm still debating if I will take the time to refurbish it this spring. With all the other important things to do... I'd much do this over the winter but now that it's off and in my hands... Decisions, decisions...
 
Ok, I gave in and decided to refurbish it... Half way there.
 

Attachments

  • p5083934.jpg
    p5083934.jpg
    119.6 KB · Views: 61
Back
Top Bottom