New Head Base

The friendliest place on the web for anyone who enjoys boating.
If you have answers, please help by responding to the unanswered posts.

DHeckrotte

Guru
Joined
Nov 1, 2015
Messages
1,024
Location
USA
Vessel Name
Revel
Vessel Make
1984 Fu Hwa 39
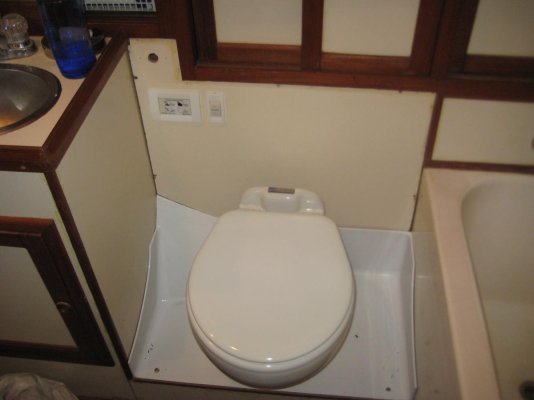
I will be replacing the Raritan PH II head with their Marine Elegance. This will be at least the fourth head on the boat and on that original Formica- or Melamine-covered plywood. There already is one unused, blocked blackwater drain hose (why?). And both hoses run above the base, through the apron of the bathtub. Additionally, there is a 1/2" thick solid Teak angled piece covering the tapering shape of the hull.

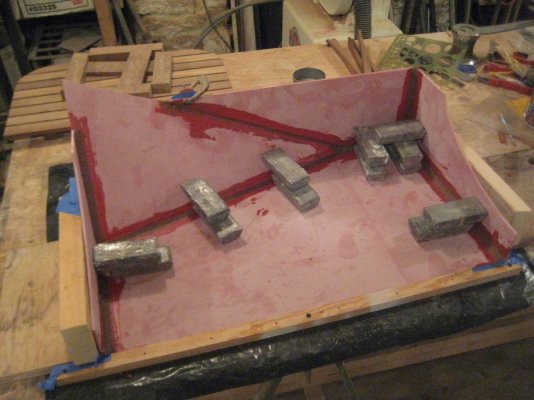
Possible materials to replace the base and angled Teak include: new Formica-covered plywood, painted fiberglass (from McMaster-Carr, which could be epoxied together, coved and painted for cleaning - the 'glass is green and not all that smooth), or Starboard - HDPE (also from McM-C - it's white, shiny and smooth but cannot be glued). I repaired and painted (Brightside Polyurethane) the fiberglass base in the sailboat and it has looked fine for the last eight years (I coated the fiberglass with epoxy to seal my repairs so it's not as smooth under the paint as I would have wished. That's a PH II with the pump installed backwards for comfort - the parts are symmetrical.).

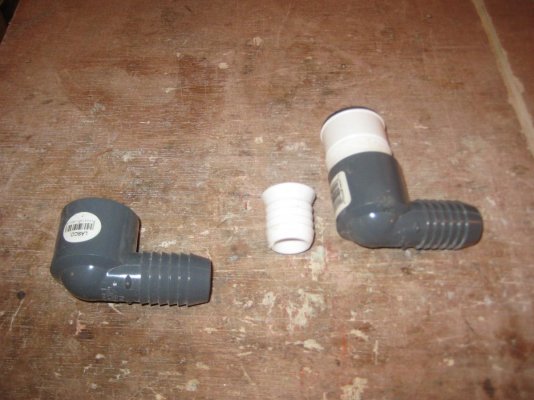
The Marine Elegance is plumbed from underneath with pressure potable water, pressure raw water, and smaller-dia-than-usual black water drain.

Comments?
 

Attachments

  • 2016-03-15 Head 001.jpg
    2016-03-15 Head 001.jpg
    74.4 KB · Views: 115
  • 2016-03-15 Head 002.jpg
    2016-03-15 Head 002.jpg
    68 KB · Views: 117
  • 2016-03-15 Head 003.jpg
    2016-03-15 Head 003.jpg
    78.5 KB · Views: 111
  • IMG_0424.jpg
    IMG_0424.jpg
    62 KB · Views: 114
New base progress.

This new head base replaces a rotted one and covers the several previous toilet's connection/hose holes on the side of the tub. That brown stuff is 'filleting blend' epoxy and the corners will be neat and coved for easier cleaning. The red stuff is electrical grade polyester-fiberglass sheet from McMaster-Carr - why? because McM-C does not sell efficiently-sized sheets in the regular resin.

Previous pics in my first post.
 

Attachments

  • IMG_2587.jpg
    IMG_2587.jpg
    138.2 KB · Views: 87
Nice job. I think you'll like the Marine Elegance. I've sold a bunch of them and no complaints yet. I think your choice of the Sea Fresh option is a good one. Save water with raw water flush and once in a while flush it with fresh to reduce odors.
 
I use salt water to flush and it used to stink badly when flushed, if it sat for a day unused.
I put a small fine strainer screwed onto the through hull. Dramatically-definitively reduced the stink. I had read it is tiny organisms alive in the water will die and stink up the head. The fine mesh filter keeps them out so they do not die and rot inside the head.

What I got on Ebay was a 1/2 pipe thread black plastic bodied filter housing with a fine SS mesh and a clear plastic screen cover. Meant for an electric water pump used as a strainer-filter. It is very convenient to screw onto the bronze elbow on top of a Groco thruhull and then screw on the bronze nipple for the hose to the head.

I have had it for on the boat for more than 5 years and it is still in perfect condition.
 
Just remember some day a heavy person will be sitting on the throne and you will fall off a wave,.,,,,

2G ? 3G? the base mount needs to be robust and secured well.!!!
 
FF, 2'-3" wide, 1'-4" front to back, continuously supported on sides and front, the john will be in the middle and its seat is roughly centered over the front edge of the base. The 'glass is 3/8" thick and will be reinforced at the bolt positions of the john. I will add a little something - 'glass blocks - between the reinforcements and the hull.

McMaster-Carr This table shows the stuff; interesting the wide range given for the properties!

The original base was 1/2" melamine-faced plywood with two screws holding it down.
 
Last edited:
Nice job. I think you'll like the Marine Elegance. I've sold a bunch of them and no complaints yet. I think your choice of the Sea Fresh option is a good one. Save water with raw water flush and once in a while flush it with fresh to reduce odors.
We installed a Marine Elegance this spring with the smart flush control. Quiet powerful vacuum flush with your choice of water usage or empty only. Great made in USA product
 
I finally got the new elegant toilet installed and working. I was able to re-jigger the three hose connections on the Raritan Marine Elegance to feed from the back rather from the bottom. It required re-making the PVC fitting that contains the joker and which had barbs to fit both 1 1/4" and 1" hose. I cut the 1" barb section off, filed the barbs off the 1 1/4" section, drilled the threads out of a 1" x 1" combination FIP x insert PVC fitting and glued the two modified fittings together. I disassembled the fresh water feed and installed a 3/4" PVC street ell between the cut-off valve and the check valve. I ran all new hoses and wiring, and eliminated 32 years of old spliced stuff. Far more flexible than I, my son installed the new strainer and sea water pump in the ER.

Installing this thing was a bear, fraught with unbelievable frustration, water leaks and physical pain. I installed part of the wiring so that I could have the satisfaction of seeing it work; I have yet to finish the sea water pump and relay wiring.

I think the Marine Elegance, as I installed it on its new base, is pretty neat and good looking; wiring and hoses are concealed, surfaces neat and cleanable.

I have not received decent support from Raritan. I need to wire the TankWatch (the old model, which is a simple dumb you're-full switch and indicator light) to the SmartFlush electronic module. I understand that the module accepts ordinary dumb switches and will not accept the new level indicator systems. My SmartFlush is the new version and Raritan gave me the instructions for converting a TankWatch IV to operate an original version. Aaaargh! The two versions have different labels on the connections and neither tell you which to use! And there is no information to be found on the 'net! I am loathe to try and error for fear of frying the fancy control module.

Pic 1: modified joker fitting
Pic 2: Whew! The head door clears the bowl by 1/4"
Pic 3: Pressure water supply
Pic 5: All hoses connected and watertight
Pic 6: In and working

That toilet base is described in earlier posts. I mentioned that there was a mystery blanked-off hose leading behind the sit-tub. Turns out, it was the overboard discharge for an earlier head. There must have been a vented loop in the head; the screw holes remain from its mounting. That old hose leads to a ball valve on a through-hull, and that ball valve is open and won't close. I'll wait 'till the boat's hauled before using adequate force to close it-cap it/remove it-patch the hull.
 

Attachments

  • 2016-08-15 ToiletPlumbing.jpg
    2016-08-15 ToiletPlumbing.jpg
    129.1 KB · Views: 78
  • 2016-08-16 ToiletWork 009.jpg
    2016-08-16 ToiletWork 009.jpg
    69.3 KB · Views: 80
  • 2016-08-20 ToiletWork 002.jpg
    2016-08-20 ToiletWork 002.jpg
    88.5 KB · Views: 81
  • 2016-08-20 ToiletWork 003.jpg
    2016-08-20 ToiletWork 003.jpg
    83.8 KB · Views: 76
  • 2016-08-20 ToiletWork 005.jpg
    2016-08-20 ToiletWork 005.jpg
    62.6 KB · Views: 78
Last edited:
Congrats. For me, pain and frustration are SOP whenever I undertake a project on a boat. Sounds like you have got this one whipped.
 
I need to wire the TankWatch (the old model, which is a simple dumb you're-full switch and indicator light) to the SmartFlush electronic module.

If you replace it with a tank level monitor that lets you know how much is in the tank, you wouldn't need to wire it to the flush panel. The SCAD Scad Tank Monitors (which is a private label version of the Profile Profile Tank Monitors ) system) was top rated by Practical Sailor a couple of years ago. It's easy to install and because the sender is attached to the outside of the tank, it never comes in contact with the contents, so never gets clogged.
 
(the old model, which is a simple dumb you're-full switch and indicator light) to the SmartFlush electronic module.

If you replace it with a tank level monitor that lets you know how much is in the tank, you wouldn't need to wire it to the flush panel. The SCAD Scad Tank Monitors (which is a private label version of the Profile Profile Tank Monitors ) system) was top rated by Practical Sailor a couple of years ago. It's easy to install and because the sender is attached to the outside of the tank, it never comes in contact with the contents, so never gets clogged.

Mistress, the SmartFlush control module is designed to accept a 'tank full' signal and deny you the ability to flush. An arguably not bad idea. I've so far resisted the opportunity to spend the remarkable number of boat dollars that monitors cost.
 
Will you have notification that the tank is at various levels or only full?


Sent from my iPhone using Trawler Forum
 
The SmartFlush control module is designed to accept a 'tank full' signal and deny you the ability to flush.

What you really want to happen to someone who'd just deposited a bowlful of solids...and sooner or later it will.

I've so far resisted the opportunity to spend the remarkable number of boat dollars that monitors cost.

The SCAD solo is only $167 @ Defender and I'll bet HopCar can beat that price.
 
I am going to get a Raritan Marine Elegance for our aft head. I will also need a rear discharge instead of thru the deck. I thought that I saw somewhere that Raritan had an option that would allow the rear discharge thru a bulkhead.
 
Talk to Raritan,but NOT tech support in NJ...Mac McCoy in their Ft Lauderdale plant. He's been with Raritan 25 years and has become my go-to person since Vic Willman retired: 954-525-0378
 
Thanks, Peggy, you do know everything about heads...
 
Hey Peggie, Mac's my go to guy! Ok I'll share him with you.
 
I'll have to say that Mac McCoy was the person with whom I corresponded and he did not come through adequately. I dealt with another fellow about 11 years ago who was quite helpful.

Comodave, I made my own rear discharge fitting because Raritan does not offer one. See my pic above. An ordinary 1" x 1" FIP x insert PVC fitting from Lowes on the left. The cut-off 1" barbed bottom from the Raritan fitting in the middle. The combined Raritan fitting and another 1" x 1" FIP x insert fitting on the right.

HeadMistress, you and my Admirable Admiral may cost us a fancy tank indicator. Since I own a TankWatch 1, presuming it still works, I may opt to wire it to the SmartFlush and buy a a fancy tank indicator rigged to watch the plastic holding tank. Even better would be to add the two stainless steel water tanks, and the steel fuel tanks since their senders seem to have died. Would be nice to have near the helm position and the power panel. These multi-read devices are quite expensive and would require grovelling installation work. The metal tanks apparently require in-tank sensors...ahh, well.
 
Last edited:
I'm pleased to report that Mac McCoy replied today to my question of six days ago about wiring the TankWatch to the STC.

All is forgiven, Mac!
 
I just spoke to Mac at Raritan. He said that they do make an adapter that turns the discharge 90 degrees to go through the bulkhead instead of the deck. The 1" part number is 22148 and the 1 1/2" part number is 22147. You can use either 1" or 1 1/2" hose from the head to the holding tank. He actually knew the part numbers without having to look them up...
 
Comodave,

Actually, and sadly, not quite true. Here is text of my original inquiry from late July, followed by his reply:

[FONT=&quot]Gentlemen,
I have purchased one of your Marine Elegance toilets with the Smart Flush and Sea/Fresh options. I have made a new head base to replace the rotted plywood/melamine panel.
The ME cannot be installed as your instructions show: the hull is tapering inwards there and the head door would interfere with the bowl. In fact, the handle of the PH II has to be lifted to swing the door. My solution is to rout the three hose connections and the wiring towards the back, outboard, athwartships where I will have more room. Obviously, the two water connections are pretty easy; I can even buy hose barbs that are ells rather than straight. However, if memory - and your instructions - serve, the two-stage (1 1/2" and 1") discharge adapter fitting is integral with the enclosure of the joker, part #221145. It would be dandy if that fitting could be swapped out with one that discharges as an ell, horizontally, rather than straight down. That way, the connection would be higher, where the boat is wider. I'll share pics and an AutoCAD drawing when we get off this space-limited form. Thanks!

Here is his reply:

[/FONT]
[FONT=&quot]Hello,[/FONT]
[FONT=&quot]Unfortunately we don’t offer an integral 90 degree fitting. We do offer an add-on 90 degree kit (consisting of a hose to hose 90 and a piece of hose) that would accomplish the turn, but would lower the assembly.[/FONT]
[FONT=&quot]#221147 1.5”@$48.00 or #221148 1” @$34.50 both plus shipping and tax, if applicable.[/FONT]
[FONT=&quot]Thank you[/FONT]
[FONT=&quot] [/FONT]
[FONT=&quot]Mac McCoy

I then asked a follow-up question:

[/FONT]
Thanks, Mac,


What kind of plastic is the fitting? PVC?

Thinking of cutting and gluing my own.


D

And his reply:

[FONT=&quot]Hello,[/FONT]
[FONT=&quot]Yes, these 90 degree fittings are std off the shelf PVC fittings.[/FONT]
[FONT=&quot]thanks[/FONT]
[FONT=&quot] [/FONT]
[FONT=&quot]Mac McCoy[/FONT]
[FONT=&quot]
[/FONT]

[FONT=&quot]Having read this far, you will note that the part numbers he gave you were slightly mis-remembered and the prices he gave me were probably wrong by a decimal point. They are ordinary insert x insert ells, available at Lowes and elsewhere.
[/FONT]
 

Latest posts

Back
Top Bottom