Replacing flybridge deck beam - help

The friendliest place on the web for anyone who enjoys boating.
If you have answers, please help by responding to the unanswered posts.

Brisyboy

Senior Member
Joined
Mar 7, 2015
Messages
423
Location
Australia
Vessel Name
Malagari
Vessel Make
Island Gypsy 36 Europa
Hi,

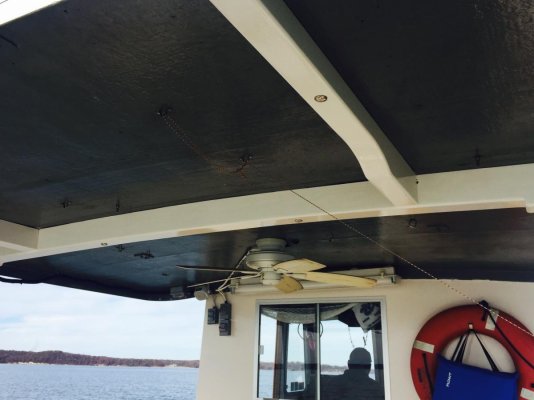
On our IG 36 Europa, there is an exposed beam in the cockpit that runs across the cockpit (ceiling) immediately behind the hatch to the flybridge.

This beam has dry rot in the area immediately near the hatch. It was caused by water leaking between the teak boards and running down between the teak and glass to the hatch area. I have now fixed this leak by re caulking the teak.

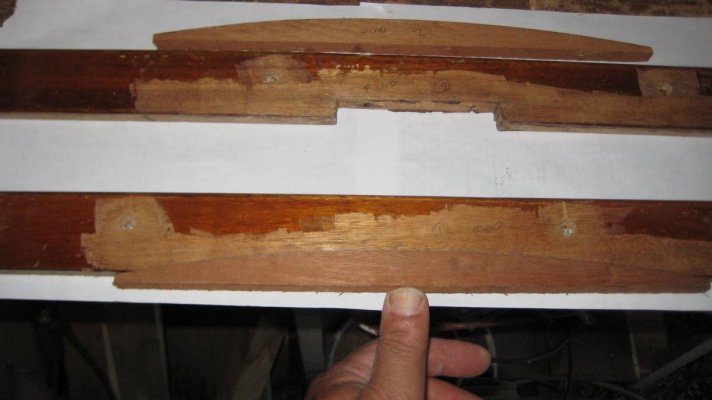
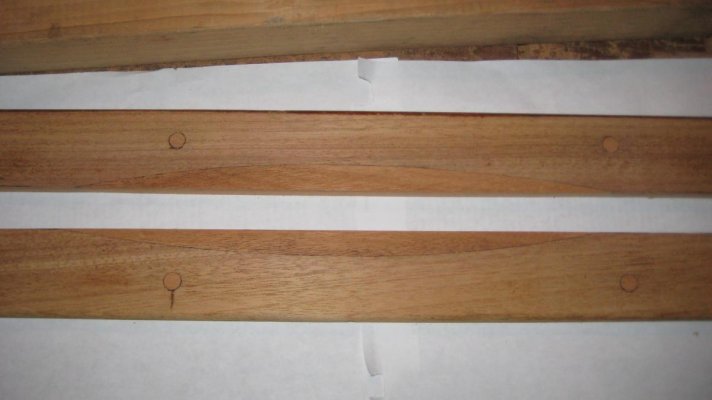
My question is this: can I remove the damaged beam, use it as a template and cut it from a suitably thick board, or do I need to steam it to get the curve.

Thanks in advance for any help.

BTW, for any `82 IG 36 owners, my decks are foam sandwich, not wood..
 
I replaced repaired beams support over the years. I try to remove old beam would to use as templates. I by mahogany or oak that is wide and thick enough and cut to shape, no bending. If it not to bad, might be able to remove rotten wood and fill a wood piece fitted to the hole and epoxy in place with a new bean screw and epoxied to added addition strength.
 
We looked at a fixer upper that had several deck beam ends that were rotted. A boat builder's recommendation was to cut out the bad wood and scarf in new wood or sister in new wood. He said the problem with replacing the entire beam was how the floor or deck was attached to the beam and how the ends were attached. Each boats different though.
 
If you can get the old one out use it as a template and laminate a new beam. A laminated beam will be stronger than a solid wood beam and it is easy to make the curve.
 
I have to go with TDunn on this one. Laminated layers would make a stronger beam and, depending on the cut you need to make on the existing beam, you may be able to stair-step the ends to make stronger joints.
 
We just replaced ours a while back . I laminated up 1/2 thick marine plywood , 8 layers on the big one and 5 layers on the two small ones with epoxy . Then we epoxy coated, primed and painted them . I used the old beam and made templates with 1/4 plywood to get the camber right .We had to shore the ceiling up with other material when we took out the old beam.The long ones were close to 11 ft . I only had 8 ft material so I staggered the laps .
 

Attachments

  • image.jpg
    image.jpg
    86.4 KB · Views: 69
Last edited:
Sounds like a relatively short portion of the beam is rotten. Cut out the rotted portion with tapered ends (presuming you have room) and scarpf in a new piece of similar wood. The scarpf - taper - ought to be at least 6:1. Choose the direction as a matter of convenience while working overhead and preferably across the short dimension to shorten the length of the cut. Glue the new piece in using epoxy thickened with one of the structural fillers: filleting, microfibers. The fit need not be perfect, but only pretty good. I've scarphed lots of different things, from chair parts, to Flying Dutchman sailboat parts (pics), to structural members in major beams (pic), to repair termite damaged floor joists in this old house. Always with the idea that repair is less painful than wholesale replacement and making new parts.

Pictures below: Lazy but pretty scarph on a Mahogany coaming. Cut with an angle grinder, dutchman fitted with a disk sander, epoxy. Important scarph on a Spruce mast. Cut with a spoke shave almost to the hollow inside, dutchman fitted with hand plane, epoxy. Scarph in 2" x 6" top and bottom chords of a plywood web beam spanning 30'. Cut with a carpenter's circular saw, cleaned up with a hand plane, glued with urea resin - so the fit had to be darned good.
 

Attachments

  • IMG_1692.jpg
    IMG_1692.jpg
    71.8 KB · Views: 79
  • IMG_1697.jpg
    IMG_1697.jpg
    63.5 KB · Views: 70
  • 2014-01-24 Surcease Mast Scarph.jpg
    2014-01-24 Surcease Mast Scarph.jpg
    82.8 KB · Views: 81
  • 1978 09 _03 porch beam.jpg
    1978 09 _03 porch beam.jpg
    123.3 KB · Views: 77
Laminated beams are not any stronger than solid wood beams, it's the same wood after all. The advantages conferred are that curved members can be made more easily than by finding appropriately curved lumber or by steaming, and bigger pieces of good-enough wood can be replaced by shorter/smaller pieces of good-enough wood.

The advantage conferred by laminating cheap wood is that the defects in the individual pieces of wood are dispersed throughout the laminated whole. That's what's happening with the improved strength in 'Microlam' or 'Parallam' structural members.

Replacing solid, laminated or steamed structural members with strips of plywood glued up is problematical. The plywood has only about half of its fiber running in the correct direction; the other half is running crosswise to the stress.
 
...Pictures below: Lazy but pretty scarph on a Mahogany coaming. Cut with an angle grinder, dutchman fitted with a disk sander, epoxy. Important scarph on a Spruce mast. Cut with a spoke shave almost to the hollow inside, dutchman fitted with hand plane, epoxy. Scarph in 2" x 6" top and bottom chords of a plywood web beam spanning 30'. Cut with a carpenter's circular saw, cleaned up with a hand plane, glued with urea resin - so the fit had to be darned good.

Perfect examples. :thumb:
 

Latest posts

Back
Top Bottom