DIY Fiberglass on my Swim Platform

The friendliest place on the web for anyone who enjoys boating.
If you have answers, please help by responding to the unanswered posts.

slowandsteady

Senior Member
Joined
Jul 23, 2013
Messages
179
Location
USA
Vessel Make
Mainship 34 III
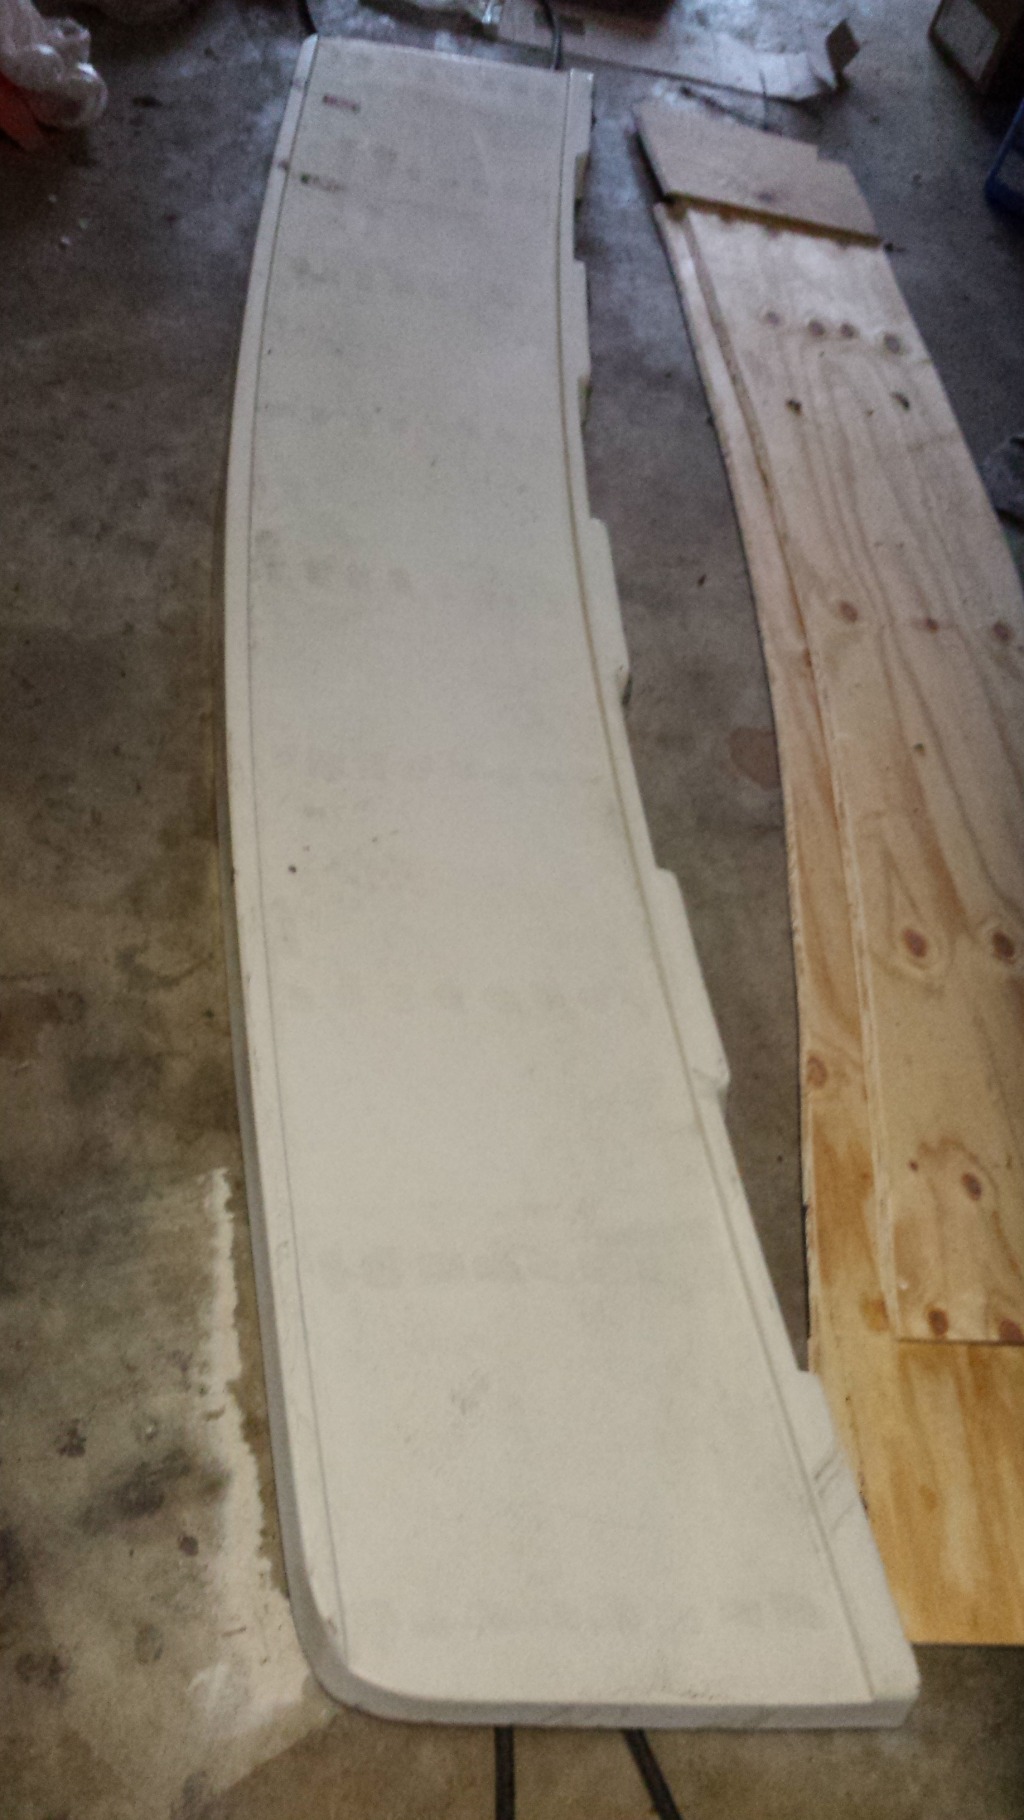
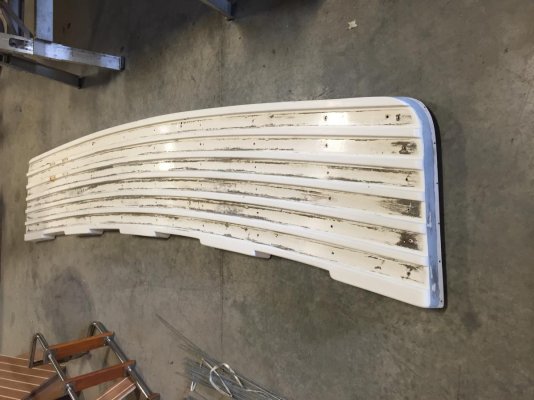
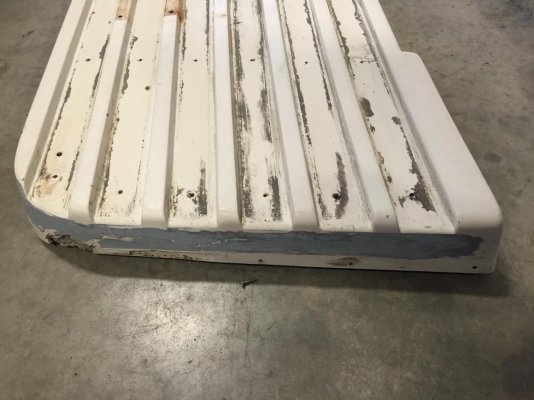
My 1983 Mainship has a factory fiberglass swim platform. In between 1/2" high fiberglass ridges were strips of teak. They were sanded and varnished over the years and were looking kind of ragged so this year when I hauled the boat out I removed the platform. I removed the teak and the factory platform steps and it is in pretty good shape. Ideally, I would like to eliminate the raised areas and make it a smooth, level platform with a non skid surface, maintenance free. While I'm at it, I would also like to laminate a piece of 3/4" marine plywood to the underside to install a 4 step under mount ladder to. Since I have never done fiberglass work, I have been searching around to educate myself on what method to use and what products/systems to use. There's a lot of info out there but I haven't found anything that describes exactly what I should do.
Here is what I want to do and how I think I want to do it:
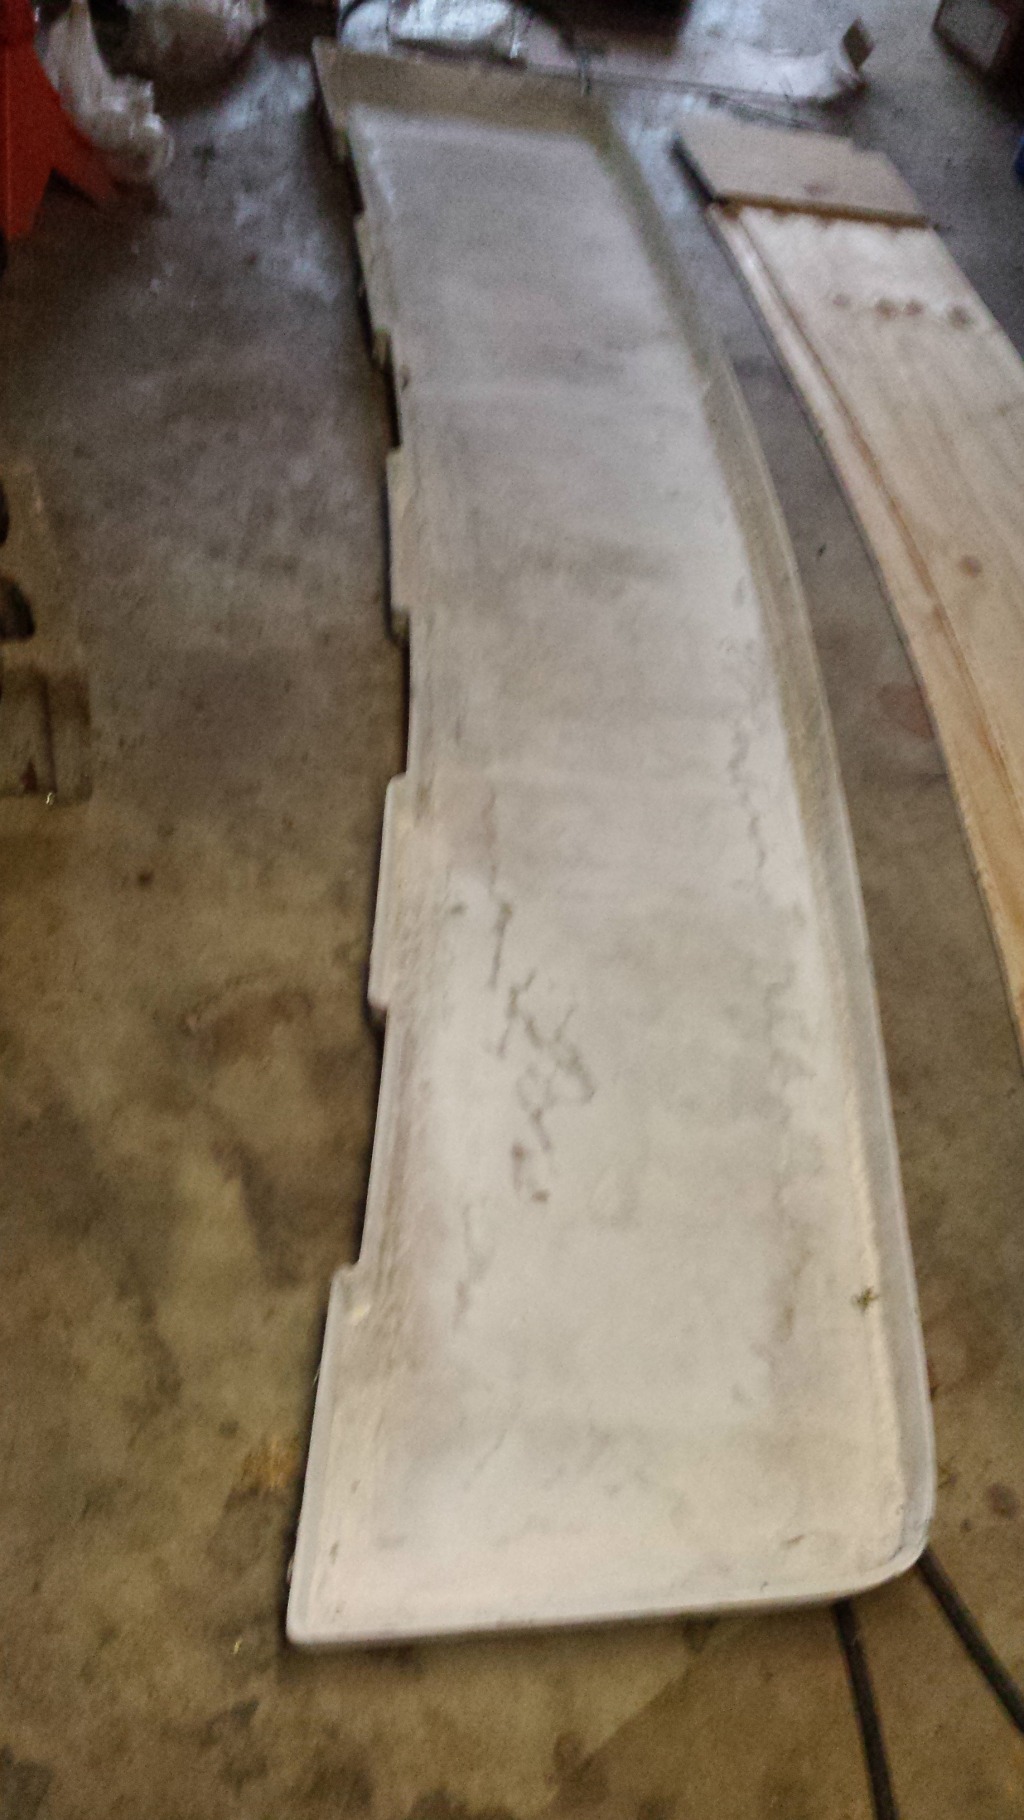
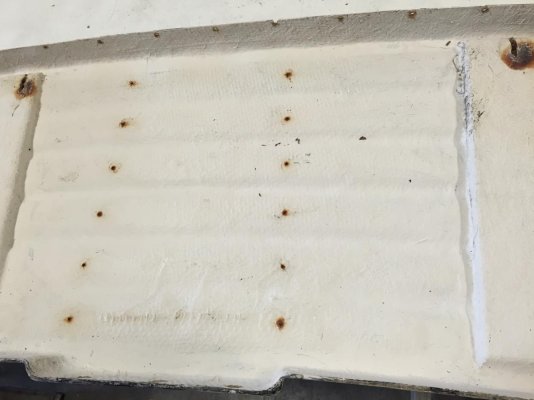
On the underside of the platform I will sand the perimeter of the location of the new plywood that I will mount the ladder. It is wavy because it kind of mirrors the raised ridges. Should I make it smooth and level or will the cloth follow the wavy contours? I will round the edges of the board where I want to wrap the cloth from the plywood to the platform. I will coat all sides and edges of the plywood with resin before I mechanically fasten it to the platform. I will also install blind fasteners so that I don't have fasteners showing on the top of the platform. Which products shall I use? Polyester or epoxy? What kind of cloth should I use and how many layers?
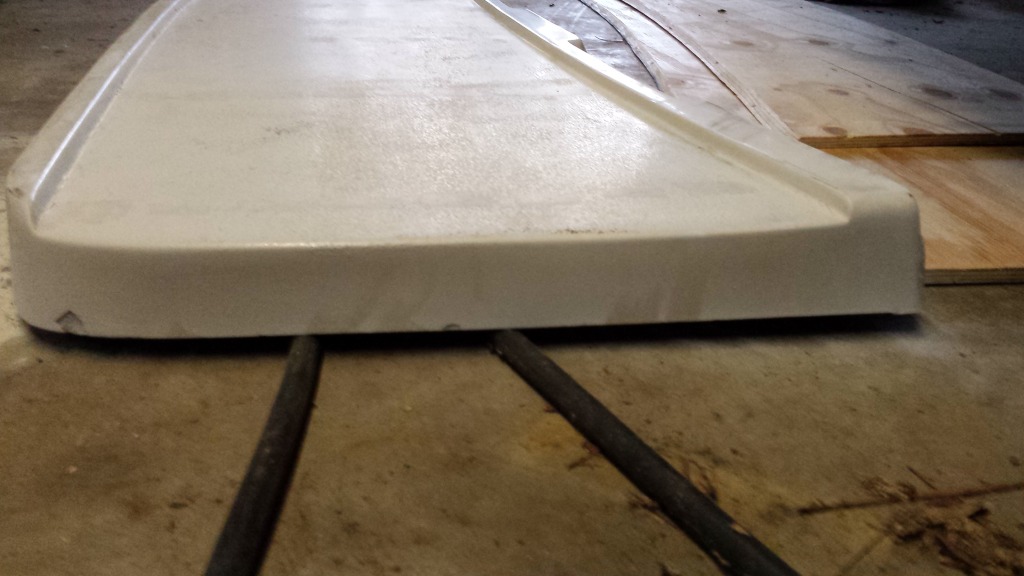
On the top of the platform what I plan on doing is filling the low areas with a material to the top surface of the raised ridges. I was going to use some 1/2" thick marine plywood. Should I screw the filler strips or should I use some type of adhesive? I assume I will have to rough up the lower surface if I chemically bond it. Right now it is gel coat in very good condition because it's been covered by the teak strips. Since the ridges do not have square edges (they are on a slight angle) there will be spaces on each side of the filler strips. Do I have to fill these gaps in with some type of filler or will the cloth bridge them? I would then like to glass over the whole thing from the bottom edge, over the top and down the other edge. Can I glass over the existing gel coat easily? Polyester or epoxy? How many plys of what kind of fabric? If I use epoxy, I can't use gelcoat, right?
As you can see, I have more questions than answers. There are so many products, I don't where to start when I gather my materials.
If there is anyone out there that has done something similar to this, I would appreciate a little advise or maybe you can point me in the right direction.
Thanks!
 

Attachments

  • IMG_2675.jpg
    IMG_2675.jpg
    116.2 KB · Views: 224
  • IMG_2674.jpg
    IMG_2674.jpg
    113.1 KB · Views: 202
First comment would be to forget the plywood. Go with something like Coosa board that won't rot and that fiberglass will readily stick to.

If everything now is fiberglass, I would stick with that and not use epoxy. If you want the best adhesion, grind / sand off the gelcoat. For building up areas, mat cloth works well. For structural strength, bi-axial cloth is the way to go.

Ted
 
Here is a picture of the wavy underside of the platform. The rusty dots are where the screws that held the teak strips to the platform came through. Instead of using the correct length screw, the tips that came through were ground flat. On the left and right side is plywood that the brackets screwed to. They used stainless wood screws, 2 per bracket, but the plywood rotted around the screws and most fell out. Most of the platform is 1/2" thick solid fiberglass with 4 plywood pads for the previously mentioned brackets.
 

Attachments

  • IMG_2672.jpg
    IMG_2672.jpg
    81.2 KB · Views: 234
If you want to fill in the grooves on top, cut strips of 1/2" Coosa to lay in the grooves. Sand the gelcoat off the bottom of the grooves, and bed the Coosa strips with thickened fiberglass. When it's cured sand the tops of the grooves and Coosa board until level. Then cover the surface with 2 layers of bi-axial cloth.

Where the plywood was on the bottom, cut strips of bi-axial cloth the width of the plywood plus maybe a half inch. Sand the area where the plywood was and fiberglass down the strips of bi-axial cloth until you reach the desired thickness. Then sand the sides smooth. When attaching to the platform brackets, you can drill and tap these strips to take machine screws or bolts.

Ted
 
If it were my project, I would grind down all the strips on top except the inner and outer most. Then I would cut a piece of plywood (or core of your choice) and bond and screw it in place (countersunk screws). Then I would use 1 1/2 ounce mat and polyester resin 2 or 3 layers to make it one piece.

On the underside I would grind it all flat before adding anything. Then do the same as the topside.

Gelcoat the entire platform when you are done, and use non skid on the top for the last coat. I like the plastic beads better (Interlux) but I have also used sand.
 
If you want to fill in the grooves on top, cut strips of 1/2" Coosa to lay in the grooves. Sand the gelcoat off the bottom of the grooves, and bed the Coosa strips with thickened fiberglass. When it's cured sand the tops of the grooves and Coosa board until level. Then cover the surface with 2 layers of bi-axial cloth.

Where the plywood was on the bottom, cut strips of bi-axial cloth the width of the plywood plus maybe a half inch. Sand the area where the plywood was and fiberglass down the strips of bi-axial cloth until you reach the desired thickness. Then sand the sides smooth. When attaching to the platform brackets, you can drill and tap these strips to take machine screws or bolts.

Ted

Nice, solid, but heavy!

Rather than filling with bi-axial cloth to build up the former plywood area, use a sheet of coring, then cover it with a couple of layers of bi-axial cloth.
 
Nice, solid, but heavy!

Rather than filling with bi-axial cloth to build up the former plywood area, use a sheet of coring, then cover it with a couple of layers of bi-axial cloth.
The plywood areas are on the bottom and look to be 1.5" x 1" x 24". The 4 of them out of solid glass wouldn't weigh that much. The top grooves would be filled with Coosa which is lighter than plywood and the original teak. Would prefer solid glass over coring on the bottom for strength in holding fasteners. Some weight savings on top if you went with coring over Coosa to fill those grooves.

Ted
 
Screw non skid starboard over it.
 
I am also in the middle of rebuilding a mainship 34 swim platform. I will snap some pictures when I am at home but there are some interesting differences which makes me suspect that mine was modified.

This one looks the same on the bottom including the rows of epoxied holes but on the top side it only has the forward and aft lip, there aren't any ridges in the middle. The platform was flexing excessively in the center and the coring where the support brackets attached was all mush so the fastener attaching the bracket to the platform was sliding fore and aft in an elongated hole in the fiberglass rather than firmly held by the core. This one only had 4 cored sections where the brackets attached, the rest of the platform is solid fiberglass with no coring. I was really surprised by this and how thin it is when I measured it. The thickness varies, it is only 1/4" to 3/8" thick. The spans between supports are about 24"-30" wide. I can see where the platform you have would be much stiffer.

When I saw the rows of epoxied holes I assumed that the PO though it was cored and tried to inject epoxy into damaged coring to stiffen it up, but I didn't realize there were originally teak strips. On this one, the surface is flat and finished with non-skid, there are no signs from the top of previous holes, it looked like it could be stock but now I realize it wasn't. I have removed the 4 damaged cored areas and ground the remaining ridges down and all of the gel coat from the bottom. I am going to level it up with polyester resin and fiberglass mat and then laminate two layers of 1/2 plywood across the bottom. The new core is beveled around the edges and stops at the beginning of the lip along the fore and aft edges. I have notched the plywood out there they supports attach and will lay up glass for the full thickness in those 4 spots. I do realize that coosa would be a better material and have worked with it before, it is really great stuff but the thing lasted 30 years as it was originally constructed and another 30 will be sufficient.
 
img_407166_0_f7f218580da9c240ffcd6cfe6f1c11ac.jpg

Now that I am looking for it I can seewhere the screw holes were but it did not have the ridges.

img_407166_1_8b7ed5de915b8a6ea0c06d69e61d4805.jpg


img_407166_2_f94453ebdd583ef62f7aafabcf28f02a.jpg
 
Gdavid,
That looks to be an original Mainship platform. I know of two Mainships, one a 1984 and the other a 1985 that look exactly like yours

JLeonard,
That was exactly what I wanted to do with it! I wanted to grind the high ridges off and make it look like Gdavid's. But upon further examination I found that if I did that I would, at best, have a very weak platform, or at worst, a 6 piece one. The middle of the ridges are 1/2" thick and where the teak was screwed in the low areas is 1/2" thick also. So I abandoned that plan and I'm going the above route.
 
Another plan was to scrap the whole thing and start from scratch using Starboard AS. I still haven't abandoned that idea but I really don't want to reinvent the wheel. The original is still in very good shape, strong, but in need of some TLC. The holes through the hull will all be the same and the brackets will be reused. The only bad thing is that one of the brackets broke off at the flanged base that screws to the stern, below the water line.
 
Back
Top Bottom