Teak Door is becoming unglued

The friendliest place on the web for anyone who enjoys boating.
If you have answers, please help by responding to the unanswered posts.

rusbet

Veteran Member
Joined
Oct 1, 2010
Messages
63
One of our exterior teak doors has developed separation at the bottom, approx. 1/16". * We are only able to bring the edges together half way and there is still slight gap.* What would be an easy but good solution?*
 

Attachments

  • img_0643.jpg
    img_0643.jpg
    115.5 KB · Views: 107
  • img_0644.jpg
    img_0644.jpg
    168.7 KB · Views: 106
Epoxy thickened with teak sanding dust.* Mix it to slightly less consistency than peanut butter (very, very slightly) and trowel it into a plastic baggie.* Cut the corner off the baggie - no more than enough to create a 1/32 of an inch outlet.* Pull the pieces apart slightly and squirt the epoxy mix into the crack, then shove them together.* Do one side at a time, letting the epoxy harden for 4 hours before doing the other side.* Using a putty knife, remove all the excess you can.* Epoxy doesn't shrink so what you get when wet is what you have when dry.**

You sure you can't jam the pieces together?* If not, why not and will it fit where it has to go with a slight gap?* As long as it fits where it has to go with a small gap, no problem.
 
We can bring it together but leaving a slight gap. The boat is new to us so we are guessing that there was some water damage. We were wondering if we should be clamping it or something similiar after applying the epoxy.
 
Clamping is not required with epoxy, in fact, isn't the best for optimum strength.* Unless the pieces are flopping around, just whack them together with a wood mallet and squirt the epoxy into the gap.* A slight gap is required for epoxy.* If you can force the pieces together so there is not a gap, then I would recommend a different approach.
 
Can you recommend an epoxy? We are overwhelmed with the choices available?
 
I like System Three, but epoxy is pretty much epoxy, so if you can find one that mixes 1:1 or 1:2, its easier than some of the new formulations that are 1:5 when mixing small batches.* You don't need much for this project and you can probably get it at West Marine.* Quite honestly, given the small amount you need and the fact that you aren't doing anything structural, I wouldn't shy away from tubes available at the hardware store.* Just don't get the 5 minute stuff, as you need 20 minutes or so to mix it, apply it, etc.* If you have more projects to do, buy the smallest amount available from West Marine and keep it on hand.*

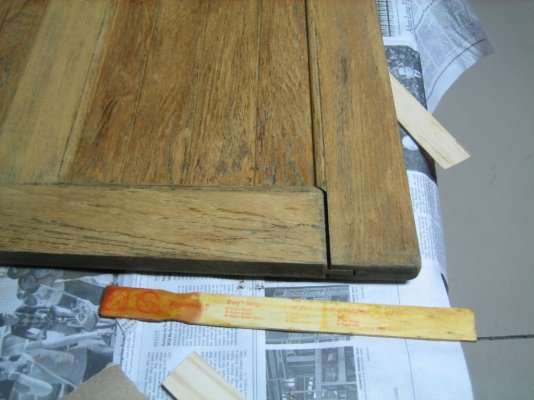
To get the sanding dust, from your photo it looks like the door could be refinished, if you have an orbital sander with a bag, you'll make the dust you need easily enough.* Use 180 grit.* If you don't have an orbital sander, and you have other maintenance projects like this, buy one.* I have a few, and like the deWalt DW421 the best.
 
I use ColdCure epoxy. I don't know if it's a local brand or not but it is 2:1. and less picky about mixing accuracy than some others for small quantities as pointed out. You need to be reasonably accurate though. Get too far off and the stuff will not setup, goes for all epoxies. Watch the setup times and cold temps will stretch out setups so keep that in mind.

I put the hardener into the wax paper mixing cup first because it has a very slight amber colour which can be seen through the cup sides, than add the appropriate amount of resin.
These cups have measurements on the sides.

I like useing hypodermic needles for jobs like this. You can get them from where you buy the epoxy supplies.
File or grind off the very sharp point. The blunt end will feed the epoxy where you want it to go better. It's a bit messy to get the epoxy into the syringe but it works well. A 5cc minimum or larger, 10cc, would be better.

The syringe and needle can be cleaned with acetone afterwards as long as you don't leave clean up to long. A SMEAR of silicone GREASE on the rubber plunger will help prevent it sticking inside as you retract it after the job is done. Automotive distributor cam grease is the same or dielectric silicone grease. Or just sacrifice it after the job is done.

I would suggest trying some pipe clamps to pull the door together before you try glueing. Be carefull but I wonder if what has happened, in addition to wood damage pushing it apart yes, is the old glue has broken up and is interfering with the gap closing. SOme pressure may help to close it.
As suggested you shouldn't need pressure to clamp with epoxy, just to hold things together untill the stuff sets and holds.
 
Teak will sometimes shed whatever is on it, including epoxy, if it isn't properly prepared. Be sure to wash the surfaces you want the epoxy to adhere to with an appropriate thinner before expecting the epoxy to hold it all together.
If you are only using the epoxy as a filler, adhesion doesn't matter as much.
 
I'm coming unhinged. 10 F below zero this morning. What do you recommend that will work at that temp.
 
dwhatty wrote:

I'm coming unhinged. 10 F below zero this morning. What do you recommend that will work at that temp.

Moving south!*
 
dwhatty wrote:

I'm coming unhinged. 10 F below zero this morning. What do you recommend that will work at that temp.
Jack Daniels with a little splash of spring water.
smile.gif


*
 
Moonstruck wrote:

*
dwhatty wrote:

I'm coming unhinged. 10 F below zero this morning. What do you recommend that will work at that temp.
Jack Daniels with a little splash of spring water.
smile.gif

Am already taking that daily, and it definitely works at that, or any, temperature.
 
Hang on Dave!* Only one more month to go!
 

Attachments

  • la jolla.jpg
    la jolla.jpg
    40.9 KB · Views: 98
SeaHorse II wrote:

Hang on Dave!* Only one more month to go!
Yes, but what do I do before and after?

*
 
Being new at this, we are a bit puzzled (actually a lot) with epoxy, resin, putty, adhesive and wanting to figure out what product to use and when. Is there a tutorial somewhere that will make it plain as day?
 
Rusbet, there are some good tutorials at www.westsystem.com that will help explain the uses of epoxies, which in gluing stuff, repairing stuff, and building stuff are pretty varied.*

Epoxy - two part system that can be thickened with different agents to glue, fair or fill.
Resin - one of the two parts of epoxy.
Adhesive - includes epoxy, but anything designed to stick things together
Putty - Elaine's boyfriend in the Seinfeld episodes, as well as any compound that is used to fill small cracks or irregularies. It can be made of different stuff from epoxy to oil based thickened pastes.
 
Delfin beat me to it, so I was going to delete the post but can't. How does one delete a post?


-- Edited by dwhatty on Monday 24th of January 2011 08:07:04 PM
 
I would recommend you borrow, rent , steal or buy a pipe clamp. Put the pipe clamp on the door with a wood shim on both sides under the clamp so you don't compress the wood. Tighten down the clamp until the joint pulls together, then loosen the clamp and pull the joint apart enough to clean it as well as possible. Clean inside the joint with acetone and then brush slow setting epoxy or Tightbond III glue in the joint. Tighten the clamp but just less then really tight (you don't want to force all the adhesive out of the joint. Let dry overnight for the glue or several hours for the epoxy and your done. The reason for the slow set epoxy is you want it to soak into the wood and make a bond that will never come apart, doors take a lot of abuse.
 
When a panel door separates like that, it is usually due to the panel swelling from moisture absorption.* To get it back together, you may have to disassemble the rail from the door and either shave some off the panel or deepen the groove in the rail.* Panels usually float in their grooves so they can expand and contract without splitting.* Be careful tightening the rail in too much as there may be no room.* You could try to see if you can "dry" out the door and get it back together.* Re glue it.* Then be sure do keep the boat humidity level* at an acceptable level.

-- Edited by Moonstruck on Tuesday 25th of January 2011 12:19:53 PM
 
Let me make a suggestion that hasn't already been made:

Clean the joint up as best you can with acetone, etc. and glue it and clamp it as suggested above. Then, drill two holes through both the tongue and the grove. 3/16" diameter or so. Large enough to do some good and small enough to center in the joint.

Now, take two teak plugs the same size as the holes coat the plugs and holes with epoxy and drive them into the holes and through the door. Let everything cure for a day or so, saw the excess off the plugs, sand and finish
 
rusbet wrote:

Being new at this, we are a bit puzzled (actually a lot) with epoxy, resin, putty, adhesive and wanting to figure out what product to use and when. Is there a tutorial somewhere that will make it plain as day?
If this seems difficult, considering hiring a carpenter to do the job.* It will be second nature to him/her.* It doesn't have to be a "marine" carpenter.

*
 
Thanks for the abundance of good advice. We bought a pipe clamp and mixed some epoxy and put it all together. Unfortunately we didn't read the West System tutorials on-line until after we applied the epoxy. We used a 1:1 type epoxy but it was more of a filler than an adhesive epoxy. Anyway, we'll know tomorrow morning. If it doesn't work, at least we'll know the right way to do it next time.

There's nothing like getting to know your boat.
 
Since it was a filler epoxy you might want to go ahead and glue in as suggested two plugs (Tightbond III would be fine for this) or countersink two long stainless screws and glue teak plugs to cover. Chances are however the "filler" epoxy will be fine and this project at least is in the rear mirror.
 
rusbet wrote:There's nothing like getting to know your boat.

In this case, it's not so much a "boat" project, it's a carpentry project.* You could easily have the same problem with a door (or cabinet door) in your home.

*
 
Just an update - the door came out great.* It has been cetoled and you would hardly know there had been a repair.

Thanks to everyone for their comments and advice.
 
congrats! you need to post a pic of the finished product! :)
 
Here's the photo of the door refinished and reinstalled.
 

Attachments

  • monk door.jpg
    monk door.jpg
    5.7 KB · Views: 39
that's a small picture (even if you click on it) but it looks great! Since we have the same boat, what did you have to do to take the door off?
 
The only photo we had on hand was from the iphone and that how it came out. Next time we need to use the camera.
There is a strip of wood screwed into the base that holds the door. Once we took off the strip of wood the door could be pulled towards you and removed. It was easier than we thought it would be. If only the windows had a similar magic button. We can't believe the only way to replace glass is to remove the wooden frame from the side of the boat. What a design faux pas.
 
i have a sliding door like that, its not coming apart but it seems sometime it is difficult to slide open/close.
any suggestions? its just sitting on a fiberglass grove with a wood panel holding it in place. should a grease be used?
 
Back
Top Bottom