You are using an out of date browser. It may not display this or other websites correctly.
You should upgrade or use an alternative browser.
You should upgrade or use an alternative browser.
Hendo's Randall 35 Cray Boat complete rebuild, Perth, Western Australia
- Thread starter Hendo78
- Start date
The friendliest place on the web for anyone who enjoys boating.
If you have answers, please help by responding to the unanswered posts.
If you have answers, please help by responding to the unanswered posts.
Matt,
The sheer is the line that is the gunwale viewed from the side. Some swoop up a lot in the bow and others (like speedboats) hook down so the helmsman can see where he's going. Some are straight. Your sheer line is not continious. There is a break in the sheer line. A stepped or broken sheer accommodates the difference in the higher fwd deck and the frequently much lower after decks. In a way you have two sheer lines ... basically straight. For years Chris Craft had a broken sheer line that hooked down comming from the bow. It was a visual brand name identy feature that was featured more or less throught the line. A broken sheer makes the boat look shorter and a straight sheer makes the boat look longer. The angular lines of your fwd windows sorta match the angular lines formed by the "broken" sheer line. Nice marriage. I like it.
Put the posts (one on each side) considering the following;
Where there's structure to attach to.
Where activities like comming aboard and handling mooring lines aren't encumbered by the posts. Comming aboard may be easier with the post than without it. Putting canvas around the aft cockpit may be easier w the posts.
Having a "rake" or slant that mimics another prominent line like the back of the cabin. Or like vertical lines of many side windows, other stanchions or even the transom.
But it's purpose is structural so primarily it should just support the cabin roof. Then it's more or less what you like. The visual support of the post may make the boat look "correct" and the lack of a post may in a small way may make the roof look like it may break off. If my cabin roof extended all the way aft w no visual support it would look really odd and somewhat "visually upsetting".
Awesome. Thanks for that post mate. It's clearer now. I'm glad the angles married up but to be totally honest, that was a fluke mate lol
I wasn't going to put and post or supports on the roof. I ran a 100x50 RHS Steel beam along the roof sides to support the weight. I'm 120kgs :-/ and it doesn't move when I'm up there. Is this something I should reconsider? I suppose it would make it easier when I go to make the clears for the side and something for the zipper corner panels to fix to
Sent from my iPhone using Trawler Forum
Matt - The more I see AXE the more I like her! She's a beaut! You're a Master!
Thank you mate.
Sent from my iPhone using Trawler Forum
RT Firefly
Enigma
Greetings,
Mr. H. Whilst corner posts/decorator bars may enhance both the look and structural integrity and aid in installation of enclosure fitments, think about your aft cockpit when you're fighting that 50 kilo Barramundi that is flitting all about your boat. You most definitely do NOT want obstructions in the corners. Open and airy IMO mate.
Mr. H. Whilst corner posts/decorator bars may enhance both the look and structural integrity and aid in installation of enclosure fitments, think about your aft cockpit when you're fighting that 50 kilo Barramundi that is flitting all about your boat. You most definitely do NOT want obstructions in the corners. Open and airy IMO mate.
dimer2
Moderator Emeritus
You most definitely do NOT want obstructions in the corners. Open and airy IMO mate.


Right rudder
Veteran Member
G'day Frank.
Where have I lost ya mate..?
Is there something wrong with the shape?
Sent from my iPhone using Trawler Forum
Let me rephrase that, "right rudder can't see straight".
As to the shape of your reborn Cray, well I am rather smitten with it, to say the least.....BUT, what really impresses me, is the blood, sweat and tears backed by marvelous work ethics and knowledge possessed by a lone workaholic in the outskirts of Perth.
I raise my glass to you Mate.
Greetings,
Mr. H. Whilst corner posts/decorator bars may enhance both the look and structural integrity and aid in installation of enclosure fitments, think about your aft cockpit when you're fighting that 50 kilo Barramundi that is flitting all about your boat. You most definitely do NOT want obstructions in the corners. Open and airy IMO mate.
Mmm can't wait to get fishin
Sent from my iPhone using Trawler Forum
Let me rephrase that, "right rudder can't see straight".
As to the shape of your reborn Cray, well I am rather smitten with it, to say the least.....BUT, what really impresses me, is the blood, sweat and tears backed by marvelous work ethics and knowledge possessed by a lone workaholic in the outskirts of Perth.
I raise my glass to you Mate.
Oh thank you; that's very nice of you to say mate..!!
Sent from my iPhone using Trawler Forum
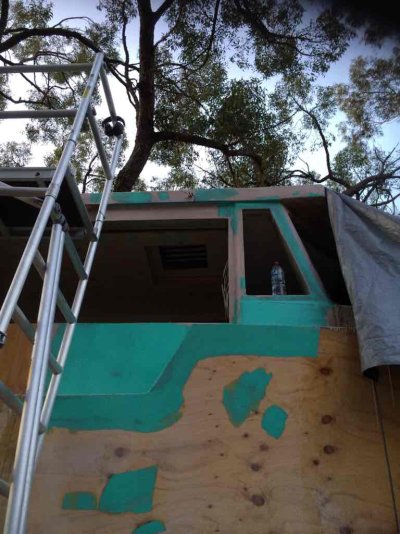
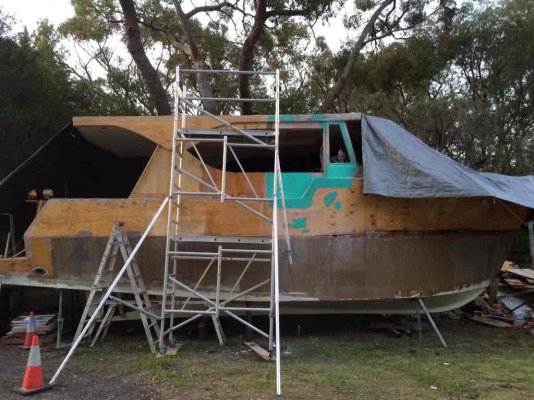
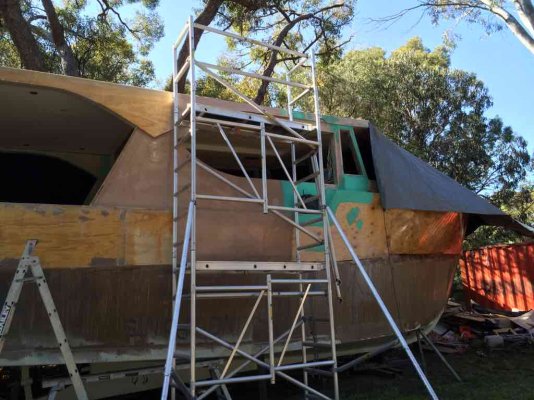
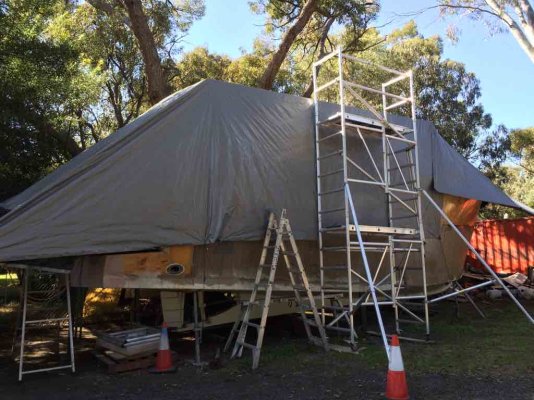
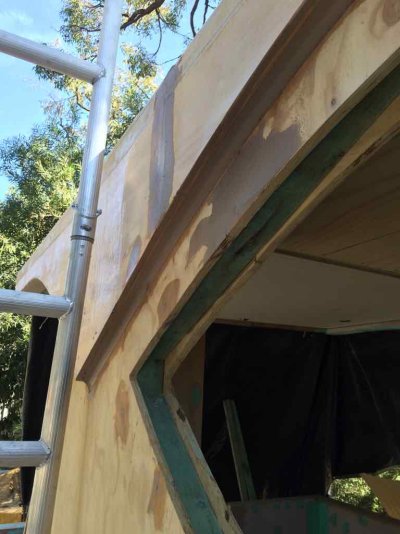
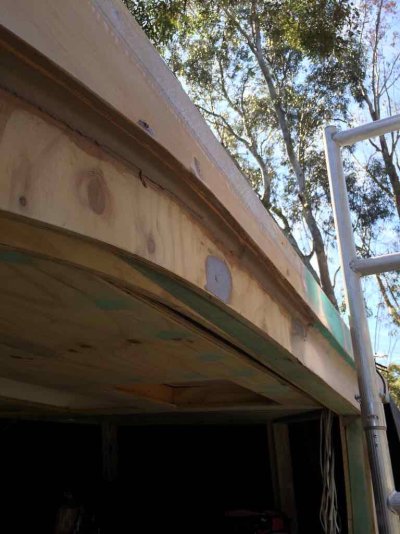
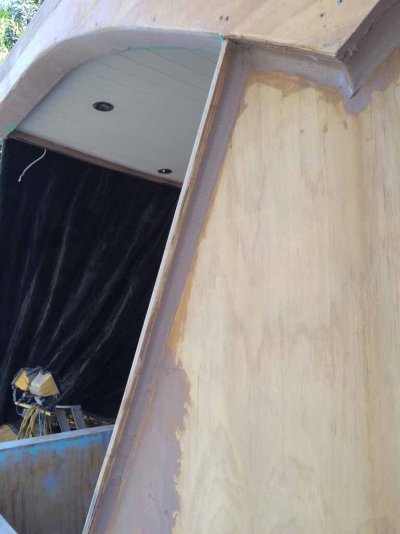
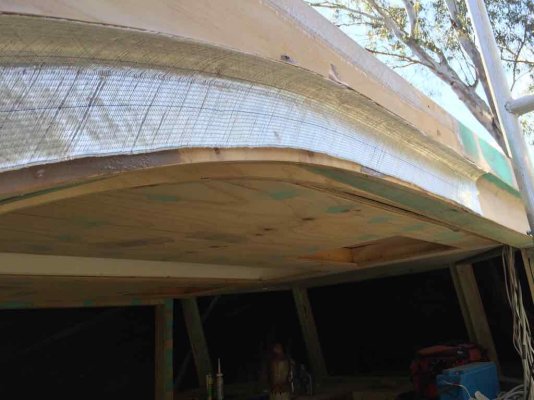
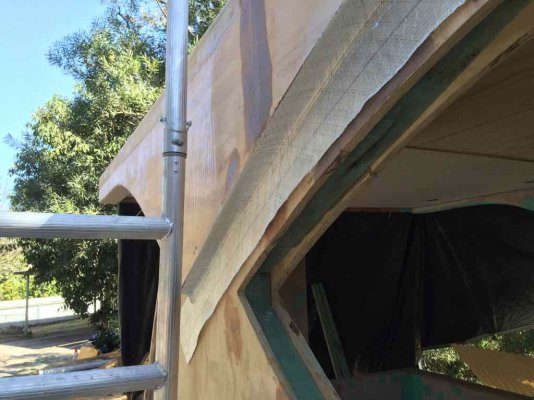
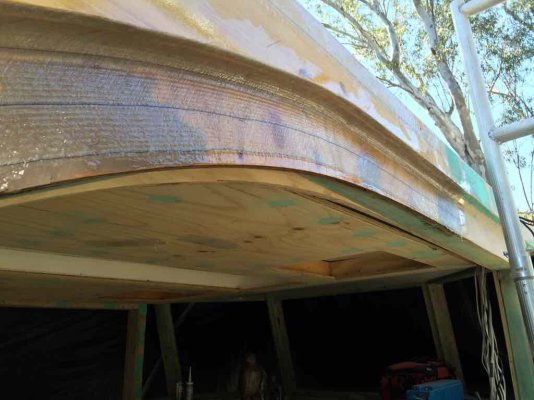
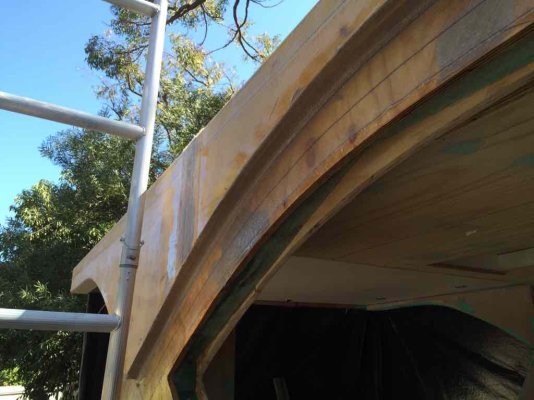
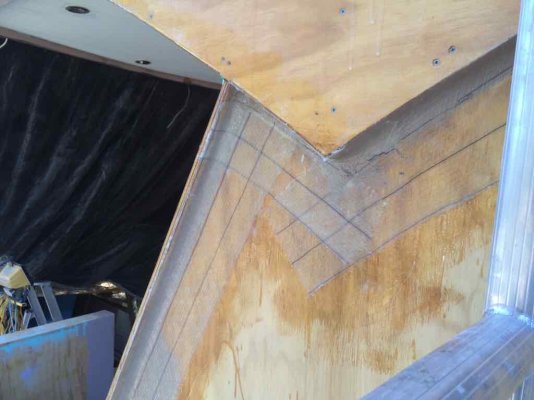
Good effort this arvo. Made some 50mm fillets with glue/fillet mix, waited for it to go off a bit, ran some 450gsm glass tape, wet it out with epoxy, waited for it to go off a little bit then applied sanding/fairing filler. Chemically bonding is the BOMB..!! No hard sanding. I'm loving it now that the days are heating up allowing this to happen. Normally this would have taken me 4 days to do instead i did it in 1. Now she's all wrapped up cause of the poxy storms we have until Sunday.
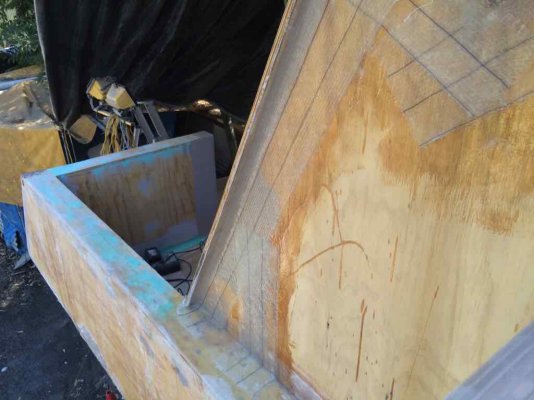
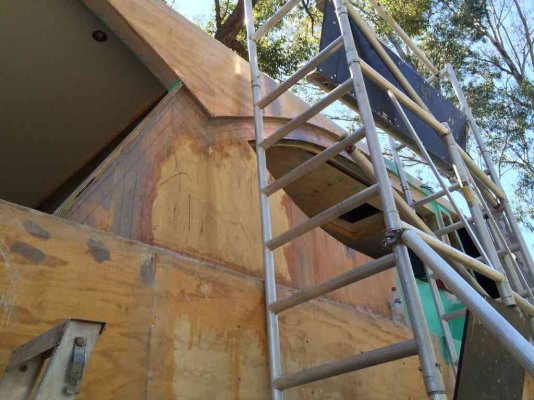
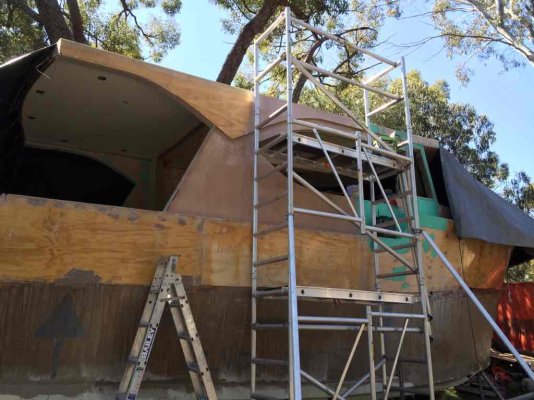
Sent from my iPhone using Trawler Forum


Sent from my iPhone using Trawler Forum
Moonstruck
Guru
- Joined
- Nov 27, 2008
- Messages
- 8,276
- Location
- USA
- Vessel Name
- Moonstruck
- Vessel Make
- Sabre 42 Hardtop Express
Good effort this arvo. Made some 50mm fillets with glue/fillet mix, waited for it to go off a bit, ran some 450gsm glass tape, wet it out with epoxy, waited for it to go off a little bit then applied sanding/fairing filler. Chemically bonding is the BOMB..!! No hard sanding. I'm loving it now that the days are heating up allowing this to happen. Normally this would have taken me 4 days to do instead i did it in 1. Now she's all wrapped up cause of the poxy storms we have until Sunday.
View attachment 44282
View attachment 44283
View attachment 44284
View attachment 44285
View attachment 44286
View attachment 44287
View attachment 44288
View attachment 44289
View attachment 44290
View attachment 44291
View attachment 44292
Sent from my iPhone using Trawler Forum
Matt, the crisp lines of the graceful frieze at the top of the cabin sides and overhang with create a dynamic shadow line. While the fillet strip at the termination of the cabin sides is a nice visual effect, it could create a problem getting kicked or chaffed by lines. A little rounding there might be a good thing. Just a thought. I love what you are doing with Axe.
Good thing you get some storms that slow you down for a day or two... you might explode otherwise! - LOL
As always - She's looken great!!
Thanks mate. Too much time off and I'll loose my mojo and start enjoying the couch lol
Sent from my iPhone using Trawler Forum
Nicely done! Are you going to wrap the Window openings with glass tape also? That seems to be an area where wood rot occurs often.
Ted
G'day Ted
Not sure if I will yet mate tbh. I'll have the cut ply ends covered in epoxy and will be using that caulking tape stuff (can't for the life of me remember what it's called) that doesn't dry out for sealing the windows.
Open to suggestions tho so I'll revisit that suggestion when I finish skim coating the superstructure.
Thanks for bring it up mate..!!
Sent from my iPhone using Trawler Forum
Matt, the crisp lines of the graceful frieze at the top of the cabin sides and overhang with create a dynamic shadow line. While the fillet strip at the termination of the cabin sides is a nice visual effect, it could create a problem getting kicked or chaffed by lines. A little rounding there might be a good thing. Just a thought. I love what you are doing with Axe.
Hello old mate
You are a wordsmith.!!
I might have to lean on you to help me with the wording in the video I will make once AXE is launched.
I designed the logo, have picked song, have picked the drone pilots and just need to have some words.
Anyway plenty of time for that, back to your suggestion.
Yeh I've looked at that strip for a while now and have been trying to make it work. My latest attempt was to put the fillet on it with glass tape.
I originally put that over hang there for sea spray. I thought It might in some way assist in spray deflection. I then thought about flushing it so it wasn't there and then I thought; oh, I can use that return bit to fix the side clears to before wrapping around and going aft.
I'll revisit it when I put the top rail bit on. I ordered it today and should get it delivered on Monday. I ordered
2 @ 300mm x 65mm x 6mtrs LVL's (port and stbd) and 1 @ 200mm x 65mm x 3mtr LVL for the stern.
I'll get more of an idea then I think ;-)
Thanks again for the suggestion. I appreciate it mate.
Sent from my iPhone using Trawler Forum
She-Kon
Senior Member
.....will be using that caulking tape stuff (can't for the life of me remember what it's called) that doesn't dry out for sealing the windows.
Butyl tape
O C Diver
Guru
- Joined
- Dec 16, 2010
- Messages
- 12,867
- Location
- USA
- Vessel Name
- Slow Hand
- Vessel Make
- Cherubini Independence 45
G'day Ted
Not sure if I will yet mate tbh. I'll have the cut ply ends covered in epoxy and will be using that caulking tape stuff (can't for the life of me remember what it's called) that doesn't dry out for sealing the windows.
Open to suggestions tho so I'll revisit that suggestion when I finish skim coating the superstructure.
Thanks for bring it up mate..!!
Sent from my iPhone using Trawler Forum
The cabin on my charter boat was rebuilt 12 years ago out of plywood and covered with epoxy and biaxial cloth. They cut the window openings slightly over size and soaked the edges with epoxy. Then wrapped them with biaxial and epoxy. After fairing and sanding they dry fit the windows and drilled the screw holes. Then they removed the windows and drilled all the screw holes with a 1/2" drill. The holes were filled with epoxy bonding putty so that when the windows were permanently mounted, the wood was all sealed and the screws went into epoxy not wood. The process is time consuming, but the wood will never rot around the windows. Don't know if you going to seal the wood on the inside around the window or not. Wrapping the opening seals the wood better than any tape or caulk can.
Keep up the good work!
Ted
Last edited:
Codger2
Guru
- Joined
- Oct 11, 2007
- Messages
- 6,691
- Location
- US
- Vessel Name
- Circuit Breaker
- Vessel Make
- 2021..22' Duffy Cuddy cabin
Matt,
It's been quite awhile since I last signed in. I can't believe the Progress you've made on "The Boat."
I took the time to look at the latest pics of AXE and am impressed with the design. She's certainly a "looker."
Keep up the intensity (If that's at all possible!)
Codger II
It's been quite awhile since I last signed in. I can't believe the Progress you've made on "The Boat."
I took the time to look at the latest pics of AXE and am impressed with the design. She's certainly a "looker."
Keep up the intensity (If that's at all possible!)
Codger II
bfloyd4445
Guru
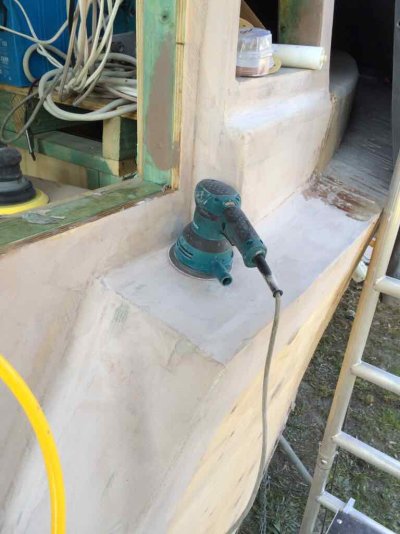
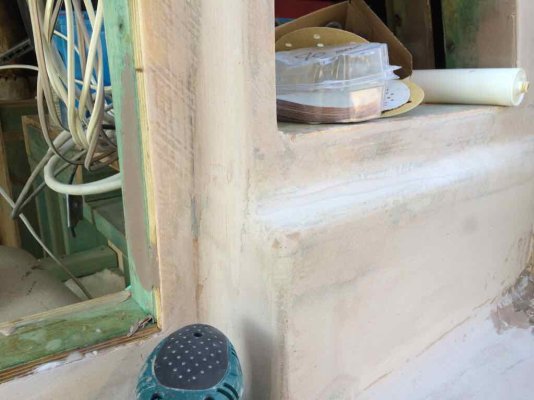
Trying things differently today. Thought I'd try and skip a couple of sanding steps by chemically bonding instead of mechanically bonding. Filleted with glue/fillet powder, then I laid out some 450gsm tape, then I wet it out with epoxy then I skim coated with sanding filler. Bit trickier to do and is a lot wetter/runnier than doing each step individually but I just saved myself 4 hrs of sanding in the one section alone that I did today, not to mention $$$$ from product waste.
View attachment 44180
View attachment 44181
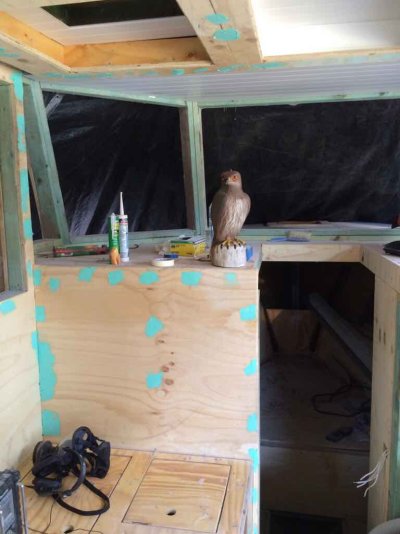
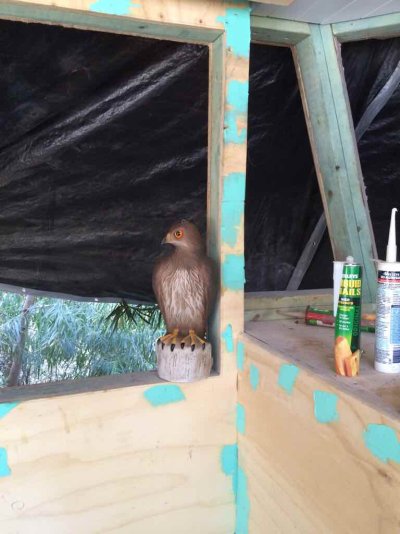
Hey Bruce, was able to take some closer pics of my feathery friend. Do you know what it is mate? I recorded the call it dies of that helps?
View attachment 44182
View attachment 44183
View attachment 44184
View attachment 44185
Sent from my iPhone using Trawler Forum
yikes! That is an endangered species, you cant do anything to disturb them or the authorities will be after you.
RT Firefly
Enigma
Greetings,
I'm sure one could adapt for the species...Hot Fried Birds Recipe - Meat & Wild Game Cooking Recipes, Techniques & Tips
I'm sure one could adapt for the species...Hot Fried Birds Recipe - Meat & Wild Game Cooking Recipes, Techniques & Tips
bfloyd4445
Guru
Greetings,
I'm sure one could adapt for the species...Hot Fried Birds Recipe - Meat & Wild Game Cooking Recipes, Techniques & Tips
Do that and ye may become an extinct species
 ....or incarcerated
Had a friend once that got his pix into the sports page of his giant snow goose limit. He was so proud till the warden knocked on his door and fined him $5,000 x 2 = $10,000 for killing two trumpeter swans of whitch there were only a couple of doxen left in the pacific flyway. Think that was like 1975
We all had a good laugh at his expense
Last edited:
Forkliftt
Guru
- Joined
- Oct 6, 2007
- Messages
- 2,450
- Location
- USA
- Vessel Name
- KnotDoneYet
- Vessel Make
- 1983 42' Present Sundeck
After fairing and sanding they dry fit the windows and drilled the screw holes. Then they removed the windows and drilled all the screw holes with a 1/2" drill. The holes were filled with epoxy bonding putty so that when the windows were permanently mounted, the wood was all sealed and the screws went into epoxy not wood. The process is time consuming, but the wood will never rot around the windows. Don't know if you going to seal the wood on the inside around the window or not. Wrapping the opening seals the wood better than any tape or caulk can.
Keep up the good work!
Ted
Ted that sounds like a great way to seal a window. Love the "screws into epoxy" approach.
Forky
1983 Present 42 Sundeck
Twin Lehman 135's
bfloyd4445
Guru
Ted that sounds like a great way to seal a window. Love the "screws into epoxy" approach.
Forky
1983 Present 42 Sundeck
Twin Lehman 135's

Some of the better built vessels use similar methods like Grady white
The cabin on my charter boat was rebuilt 12 years ago out of plywood and covered with epoxy and biaxial cloth. They cut the window openings slightly over size and soaked the edges with epoxy. Then wrapped them with biaxial and epoxy. After fairing and sanding they dry fit the windows and drilled the screw holes. Then they removed the windows and drilled all the screw holes with a 1/2" drill. The holes were filled with epoxy bonding putty so that when the windows were permanently mounted, the wood was all sealed and the screws went into epoxy not wood. The process is time consuming, but the wood will never rot around the windows. Don't know if you going to seal the wood on the inside around the window or not. Wrapping the opening seals the wood better than any tape or caulk can.
Keep up the good work!
Ted
G'day Ted,
Thanks for your input mate. I've had a bit of rain during the week and the ply started to lift around the window where I didn't get to epoxy yet. It's panicked me so I'll be doing what you recommended.
Thanks again mate..!!
Sent from my iPhone using Trawler Forum
Matt,
It's been quite awhile since I last signed in. I can't believe the Progress you've made on "The Boat."
I took the time to look at the latest pics of AXE and am impressed with the design. She's certainly a "looker."
Keep up the intensity (If that's at all possible!)
Codger II
Hey ya ol Codger..!
Been a while mate. Where ya been hiding?
Thanks for your kind words of support and encouragement.
Sent from my iPhone using Trawler Forum
yikes! That is an endangered species, you cant do anything to disturb them or the authorities will be after you.
Endangered? Crikey. Didn't know that. Well they've gone and found a new home now. Hopefully is less noisy and dusty than being on AXE
Sent from my iPhone using Trawler Forum
Similar threads
- Replies
- 21
- Views
- 4K
- Replies
- 49
- Views
- 11K


