OP
OP
She-Kon
Senior Member
C'mon over Ben. I have an epoxy roller with your name on it!That's a lot of work for a few hours by yourself.

C'mon over Ben. I have an epoxy roller with your name on it!That's a lot of work for a few hours by yourself.

C'mon over Ben. I have an epoxy roller with your name on it!
Hi EricRick,
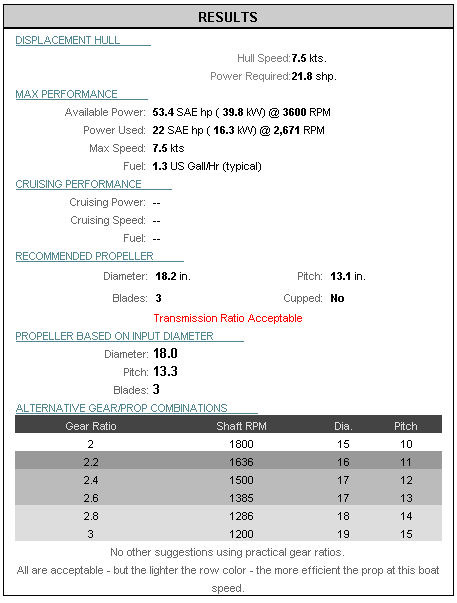
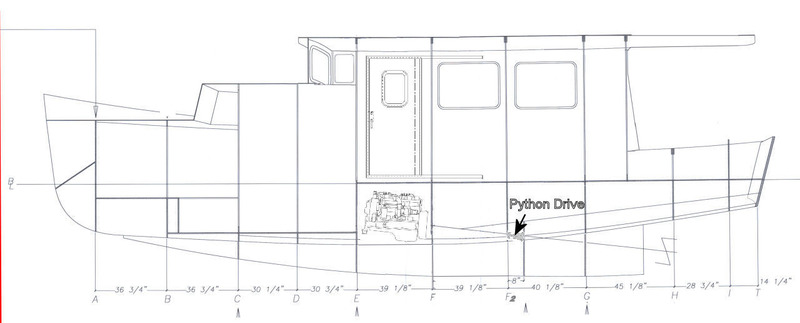
All sounds well to excellent except the 18x 13 prop. I have much less power (37hp is what Mitsubishi says) and a 2.57-1 gear w an 18 x 13 3 blade prop. Quite sure you'll be well underpropped. And you,v'e got a faster boat. But thosen older Yanmars made their power at 3800rpm so it's possible you won't be far off. Probably be running her about 2800 to 3000rpm.


That is rough.
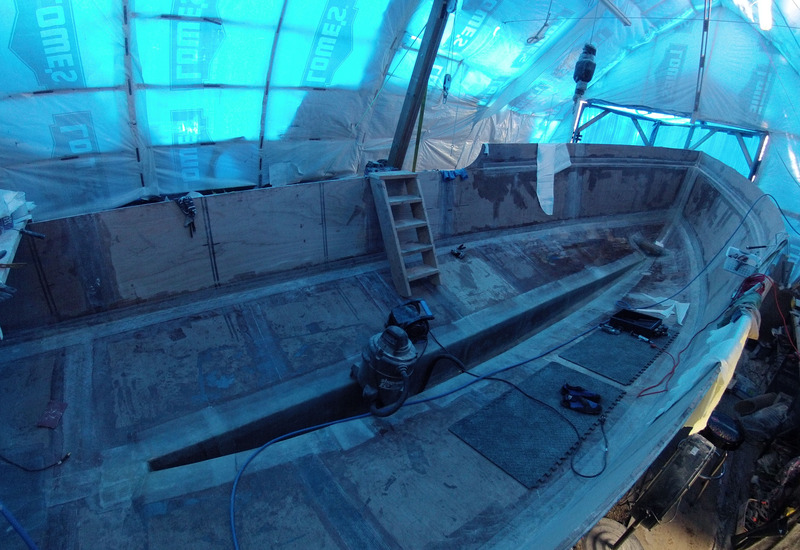
Say Rick.What your thoughts on stitch and goo for big boats?


Oh I dunno. Probably the same primer I used on the bottom then paint over that. Once I get some structure in I'll have a look see what I can get.Have you thought about your choice of bilge coatings?I think now would be a good time to prep for it.What do you think?
Wise guy!
I wanted to build in aluminum but it was well above my pay grade.
I'm sure there are bigger boats built using this or similar methods. Would I do it again? NO! But we live and learn.
You can fix pretty much any screw up with enough epoxy & fiberglass!
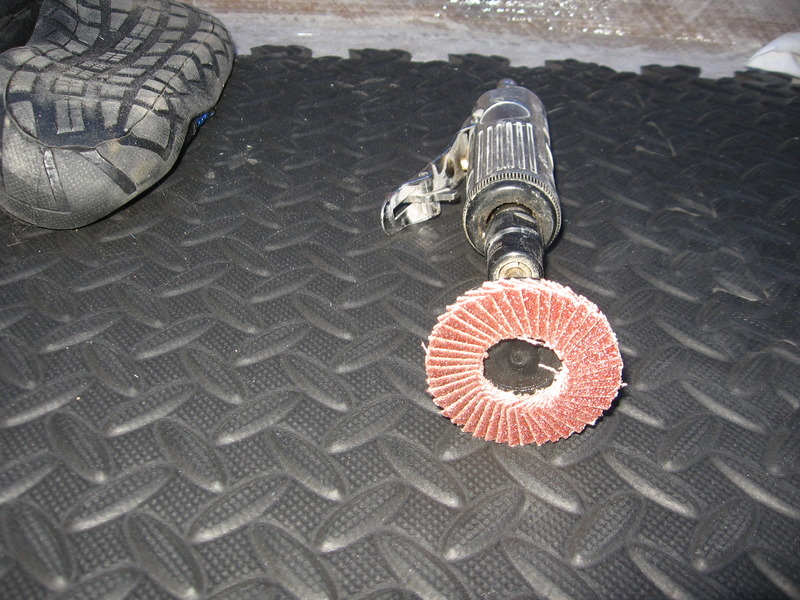
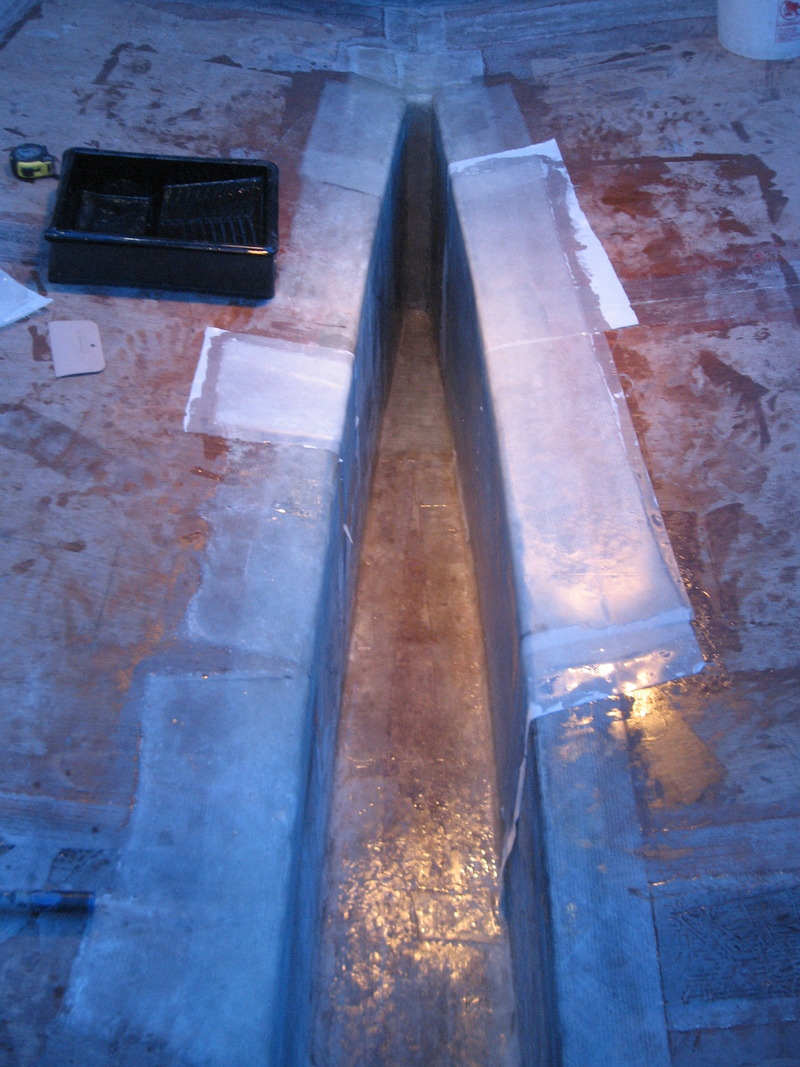
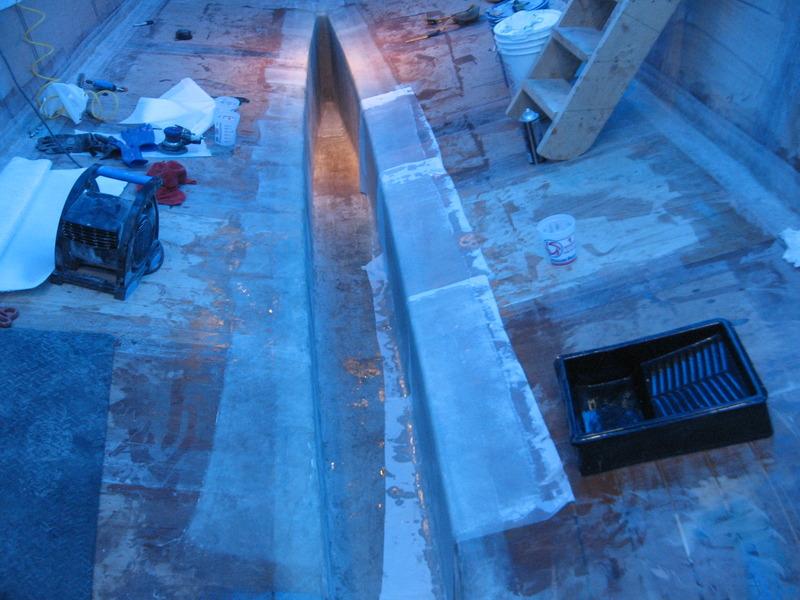
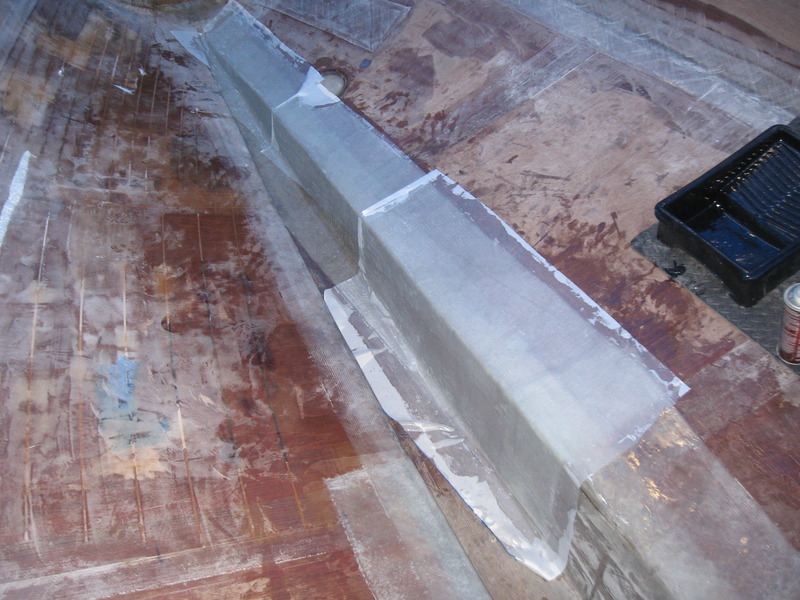
Spent 2-1/2 hrs grinding my sins away with my new 'Mini WMD'! What a great tool for gobbling up bad fiberglassing!

I have one of these flappy style discs on my 4" grinder and it has a ravenous appetite! The little 2" disc on the die grinder was the perfect tool for grinding out the bubbles. Probably saved me a couple of hours with my head stuck in the keel. A right angle die grinder would have been even easier.
All that above and more gibberish on the web log which I just updated: M/V She:Kon: Mini WMD


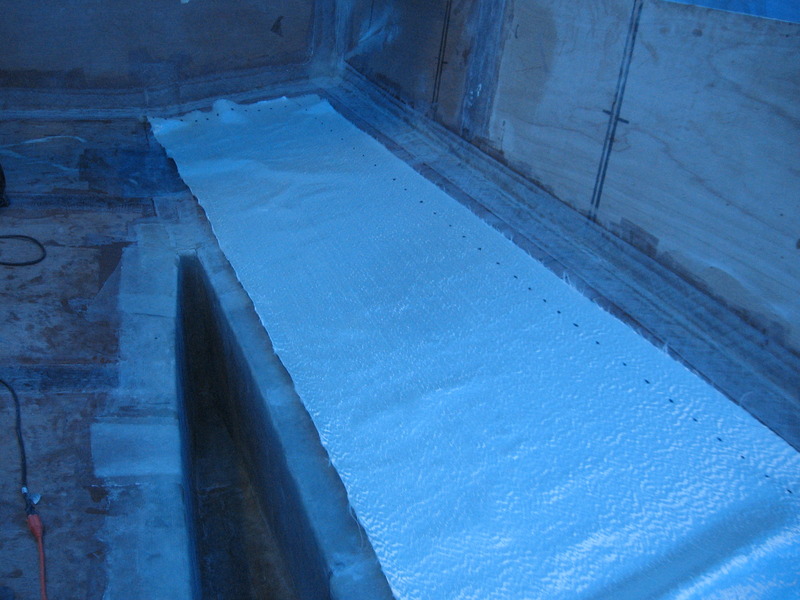
That is a lot of glass going into your boat.Does the plans call for all of this glass reinforcing?
Yup. Three layers inside. 17 oz 45/45, 12 oz 0/90 & finishing cloth 8-10 oz plain weave.
Bottom panels will get 1 x 33 oz triax & 1 x 12 oz 0/90 and that's it.

Ken,
Are there going to be any stiffeners like mini bulkheads in that keel?
Any ballast .. probably not thinking of the speed of this hull.
Perhaps a little bulkhead and an intermediate shaft bearing?

Have you decided on ballast type,lead,sand,concrete,steel,feathers?


 Other side should get done tomorrow morning.
Are you planning to cast that lead into shape?