How to remove and restore port-lights?

The friendliest place on the web for anyone who enjoys boating.
If you have answers, please help by responding to the unanswered posts.
Joined
Feb 24, 2008
Messages
681
Location
St. Lucia, West Indies
Vessel Name
"Dragon Lady"
Vessel Make
DeFever 41
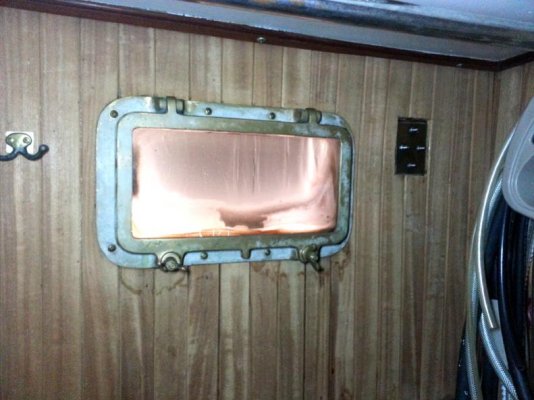
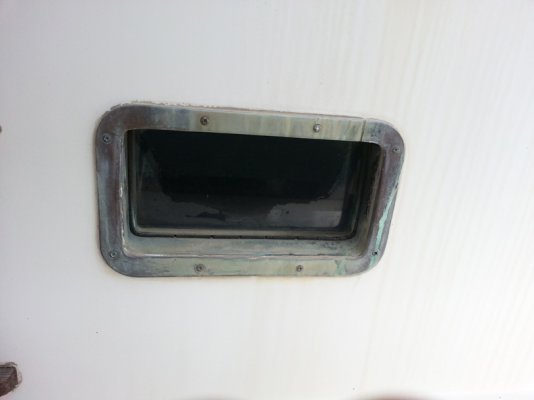
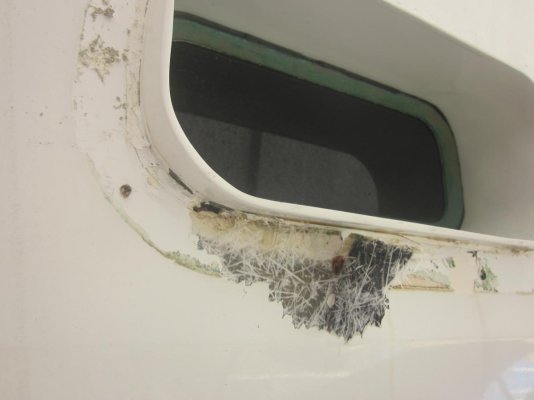
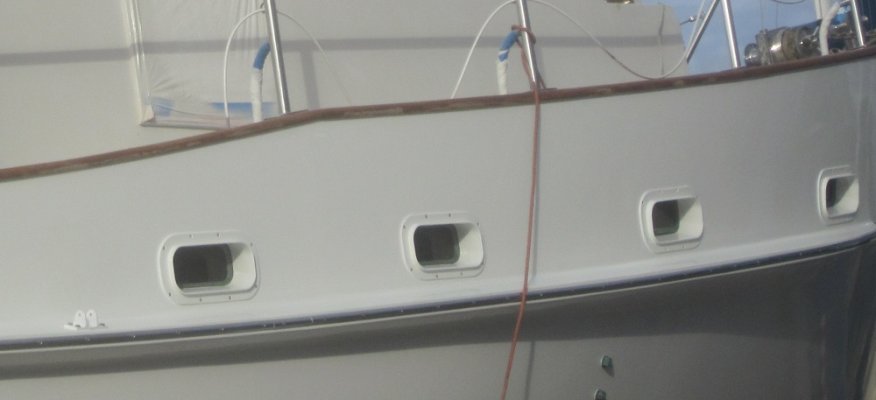
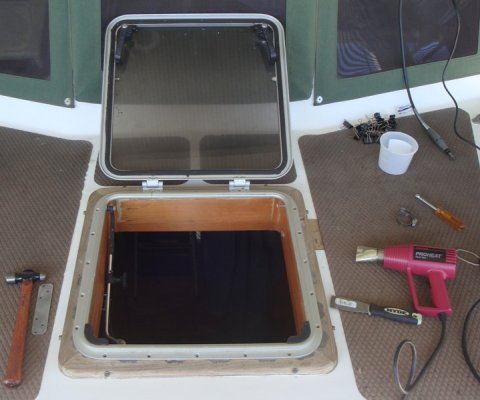
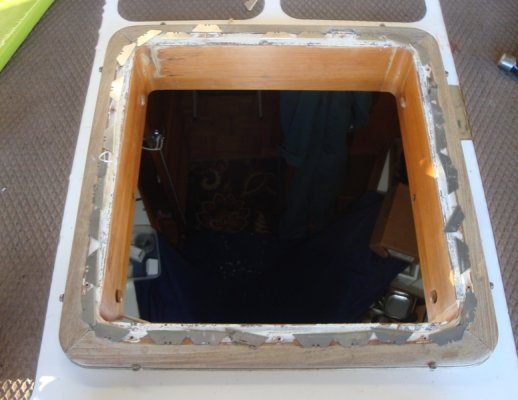
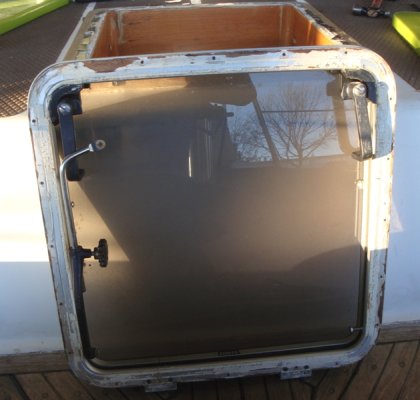
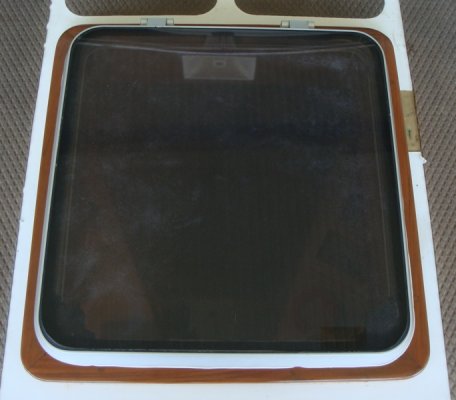
The bronze port-lights on my boat look horrible and this one leaks. I want to remove each in turn, reglaze, polish and refit.

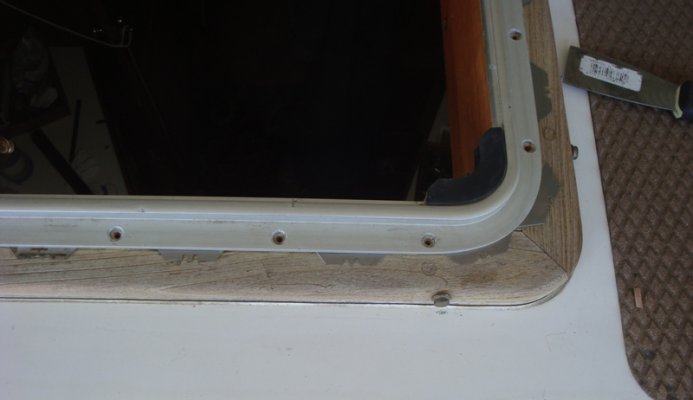
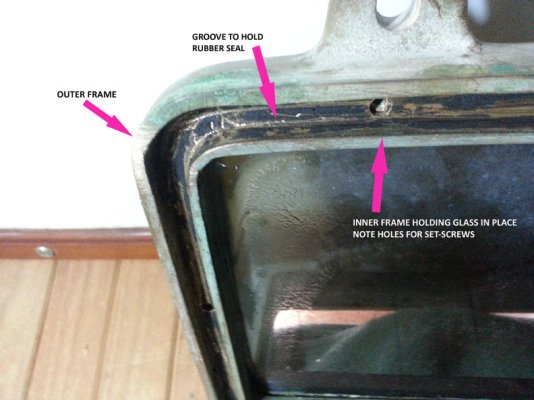
How do I get them off? I see phillips heads inside and out - does one screw into the other?

What should i use to restore the bronze finish?

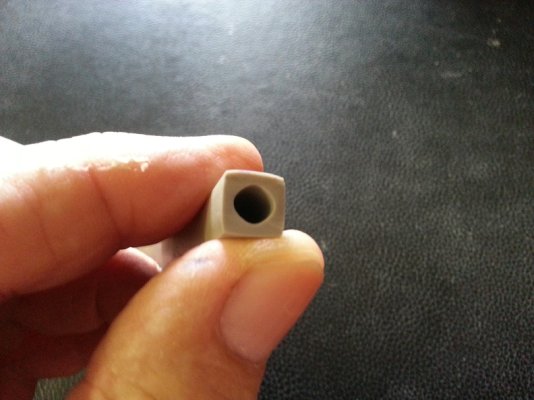
How do I re-glaze them?

What sealant should I use for re-bedding them?
 

Attachments

  • Port-inner.jpg
    Port-inner.jpg
    64.6 KB · Views: 138
  • Port-outer.jpg
    Port-outer.jpg
    79.9 KB · Views: 115
Are you sure they need rebidding and not just a new seal? Those look like they would collect water and it would drain in via the opening seal. Too many makers used ones like that that didn't naturally drain especially if the trunk tapers in a bit.

To remove them usually one side or the other is a trim ring( outside??) the other side has a tube or throat that passes through the hull. It is fastened to the hull from that side.
 
Mike: We removed the outer rings a few years ago when we painted. What a PIA. We removed the screws on the ring. Then with wood wedges and putty knives, we pried the ring off but not with out doing some damage. My fault for being in a rush but also the manufacturer used something to the equivalent of 5200.

The rings were then re-bedded. We left the inner part and just replaced the gaskets. No leaks. The gasket material we bought locally. If you can't get it, FF shared a link from Downwind Marine.

Portlight Gasket Seal - Hollow Black Rubber - Port Hardware & Parts - Ports & Hardware - Ventilation - Downwind Marine
 

Attachments

  • 005 (3).jpg
    005 (3).jpg
    58.3 KB · Views: 116
  • 008 (3)a.jpg
    008 (3)a.jpg
    104.6 KB · Views: 98
For what it is worth, I used a linoleum knife the cut through the bedding on portlights to get them loose. It is the right shape and has enough of a handle you can really put some pressure on to do the job. You basically have to eat away at it - cutting 1/8" inch with each pass, but eventually you get it free, then can razor scrape off the residual caulk.
 
Delfin,

Last Spring I had a similarly frightful time with the forward cabin skylight that had leaked for years; I will try the linoleum knife next time.

I got nowhere with the putty knife, even with the heat gun. Ended up having to drive utility blades under the frame with a hammer and piece of steel, while heating it to soften the 5200 (or whatever has been in there for 30 years)

I agree, Major PIA !!

Well satisfied with the final outcome though.

The portlights don't appear to leak, but look like they might on the outside as they look swollen and the gel-coat is seriously crazed. Will have to do them someday....
 

Attachments

  • DSC06433.JPG
    DSC06433.JPG
    158.1 KB · Views: 122
  • DSC06434.JPG
    DSC06434.JPG
    136.9 KB · Views: 114
  • DSC06439.JPG
    DSC06439.JPG
    184.9 KB · Views: 116
  • DSC06445.JPG
    DSC06445.JPG
    152.8 KB · Views: 123
  • DSC06778.JPG
    DSC06778.JPG
    131.3 KB · Views: 123
Delfin,

Last Spring I had a similarly frightful time with the forward cabin skylight that had leaked for years; I will try the linoleum knife next time.

I got nowhere with the putty knife, even with the heat gun. Ended up having to drive utility blades under the frame with a hammer and piece of steel, while heating it to soften the 5200 (or whatever has been in there for 30 years)

I agree, Major PIA !!

Well satisfied with the final outcome though.

The portlights don't appear to leak, but look like they might on the outside as they look swollen and the gel-coat is seriously crazed. Will have to do them someday....
Nice job Jim. Looks like you got a very professional result. Sounds like they bedded it originally with 5200, so the fact you didn't end up using dynamite is testimony to your perseverance. Course if you had, all you would have ended up with is a bunch of shards of fiberglass the size of tea cups, with one large one being the hatch still attached to the surrounding deck with 5200.

Lino knives come with a rounded edge that is dull, but can be sharpened and you will need to do that. The main thing they do is give you a tool you can grip and bear down on, slicing into the bedding with multiple passes. Still a hideous job, but it eventually works.
 
I just did this job on one port light, one more to go. What a chore! I like the linoleum knife idea, I was using something similar but not as sharp. Luckily these port lights aren't bedded with 5200 like the pulpit I did last year was. Either way, I'm learning that wedges and going slow are key. It's tempting once you get a purchase on some part to just pull with all your might. But if you go a little at a time, cutting or scraping out the old betting when you can, stretching it slowly when necessary, it does less damage to the fiberglass.
 
I agree with Bayview, check first that it is just not the window seal which can be replaced easily. I had to do all 5 last year due to leaks. Not likely that the bedding is leaking at the outside hull joint IMHO. A water hose with two people may tell the story.
 
I replaced all of mine a bunch of years ago, grey industries rectangular ports. Outside ring is just for looks, removed first, then use utility knife to cut adhesive in gap between port and hole. Remove screws from inside and gently pry out port as described above. Clean well and re-bed with Boatlife life seal. I was told to avoid poly sulfide as it can break down the plastics in the port frame. As usual, removal and surface prep is 95% of the job.....
 
I have not done it but has anybody tried to use a fein tool with one of the flex blades meant to do this kind of thing?... if the glass around the port was protected with a heavy vinyl tape ( gas pipe tape) the Fein might quick(er) work of it depending on access
HOLLYWOOD
 
I have not done it but has anybody tried to use a fein tool with one of the flex blades meant to do this kind of thing?... if the glass around the port was protected with a heavy vinyl tape ( gas pipe tape) the Fein might quick(er) work of it depending on access
HOLLYWOOD
Hmmm. I haven't used that tool but you might be onto something. Either that or we have further evidence of the negative impacts of long term pot usage....:whistling:
 
A multi-function tool may not be my first choice....but it might be my last resort on my ports before heat....:thumb:
 
Thanks to all who responded. Bayview: you were spot on: it was the seal that was leaking. I am not going to try removing the frames from the boat.

The seal is/was a square black rubber extrusion. The exposed surface of the old seal was hard and cracked, but the internal 95% was still flexible and well stuck to the frame. I had to gouge it out with a small chisel. Fortunately the PO had left some replacement seal (pic) on board. Shame it's not black, but at least I could weatherproof this one port light.

I still have to replace the window glass. It is held in place by an inner frame secured with tiny set-screws and hardened putty to the outer frame. I have removed the screws but the hardened putty has glued the whole thing together. Breaking the glass goes against my grain - what do I do?

This job is doubly difficult because everything has to be done in-situ and overhead. I can't remove the hinge pins and separate the moving part of the window from the fixed part. The hinge pins look to be plain brass/bronze rods with no retaining screws or scroll pins. I tried hitting them with a flat-nosed punch; good solid knock but no movement. Any ideas?
 

Attachments

  • Frame detail.jpg
    Frame detail.jpg
    181.2 KB · Views: 155
  • Hinge.jpg
    Hinge.jpg
    150.3 KB · Views: 117
  • Seal.jpg
    Seal.jpg
    167.5 KB · Views: 145
I know this thread is older, but am curious how you made out Mike. Were you able to replace the glass in the portholes? If you did what did you replace them with and seal them with? I will be looking at performing the same task on my Defever 41 when I start replacing the see through stuff on the boat this summer. I am thinking smoked acrylic. Were you able to get the bronze cleaned up? Thanks-
 
Meridian: Not much progress to report and not much encouragement to offer. The reason I started work on this port light was that it had been leaking and had damaged a fair amount of the inside woodwork. Having repaired/replaced the damage, I wanted to prevent further leakage and make the window look nice in the process. I have replaced the rubber seal, so the window no longer leaks.

The outside flange is just a trim piece. It is screwed into the fiberglass and does not contact the inner frame at all.

The inner part is fastened with phillips-head screws, which come out easily. The real problem is the 30 year old 5200-type mastic that was used to bed the frame into the apperture. That is going to be a real test of patience and ingenuity.

I have not yet found a magic potion that brings bronze up like new. Everything I try leaves a milky residue that is as ugly as what I am trying to remove.

The frame which secures the glass refuses to move despite removal of the set-screws. I have left the whole thing in place rather than break the glass. Further dismantling, reglazing etc is a major project in itself and I am not ready to tackle it yet.

Good luck and keep us posted on progress.
 
Brillo does fine on bronze as most is no longer high buffed.

If you actually use the ports , when you remove them make up a trim shim .

First tilt the uninstalled window to see if there is enough room to have the soffet flange drain, any water.

Sometimes its only a bit of a angle to be able to open the port after a rain and not take in a cup of water.

At times there is room to tilt 1/2 inch inside the mfg hole , a jig saw and sand paper will make the trim, no need for a major deal.

Not as nifty but a couple of slots hack sawed in the outside flange may be enough to get the water to drain.
 
I restored one port light like the one shown. Removed it, completely disassembled, sandblasted, powder coated, even had a new gasket material custom made (I didn't have square hollow like shown).

Phenomenal amount of work, only so-so results. And the old insect screens were ugly. Oh, and the old spigots were straight in a slightly canted structure so they retained a little water.

So I bought six new stainless opening lights with screens and gas left arms, correct spigot angle and length, with trim rings, and replaced everything including the restored one. Cost about $2400 plus some labor for R&R, but having them out allowed me to rework all openings, make them waterproof, etc.

Huge upgrade for me, well worth the effort and expense.
 

Latest posts

Back
Top Bottom