Door Project

The friendliest place on the web for anyone who enjoys boating.
If you have answers, please help by responding to the unanswered posts.

Aft Deck Capt

Senior Member
Joined
May 18, 2014
Messages
191
Location
US
Vessel Name
Long Shot
Vessel Make
1978 Californian 42' LRC
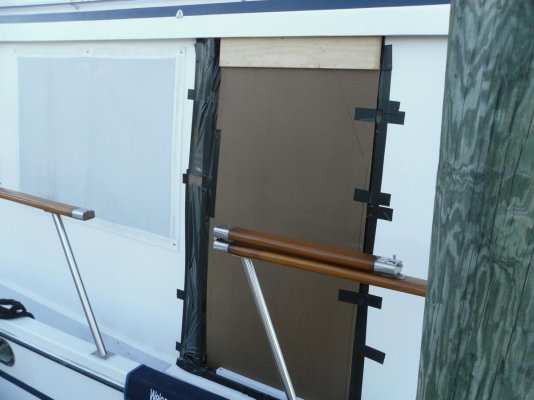
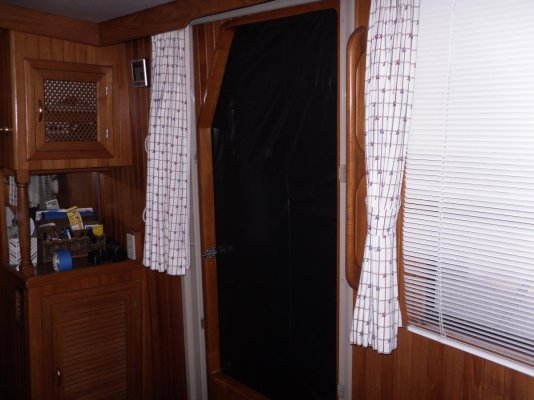
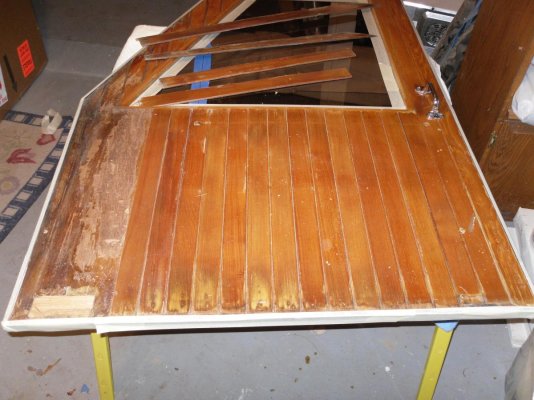
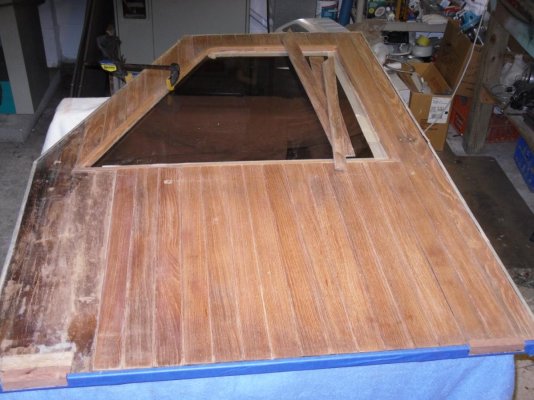
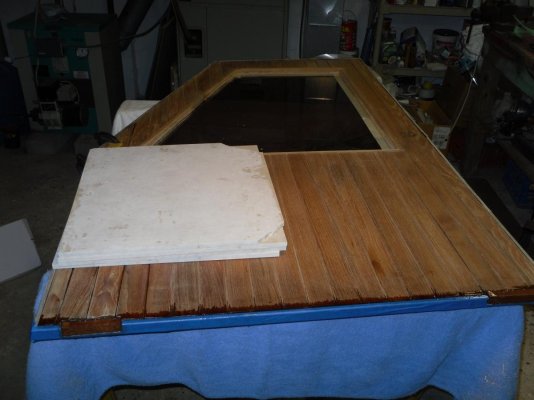
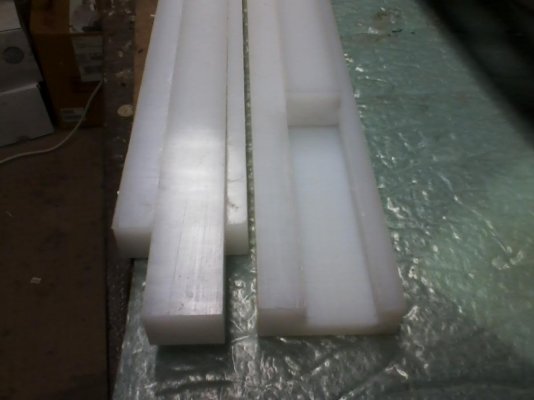
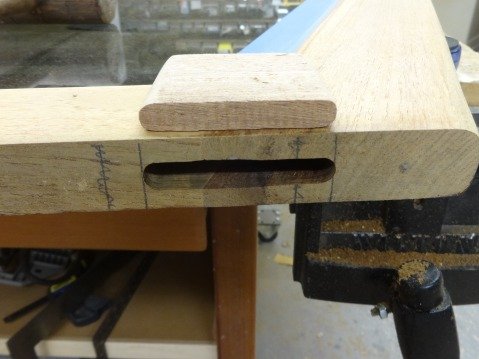
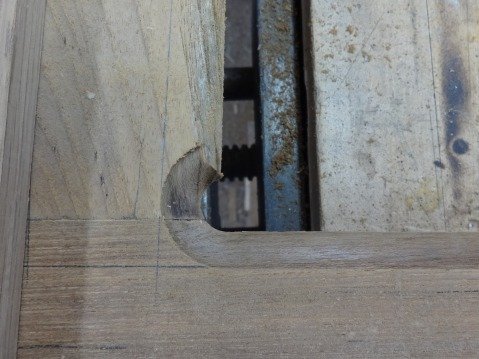
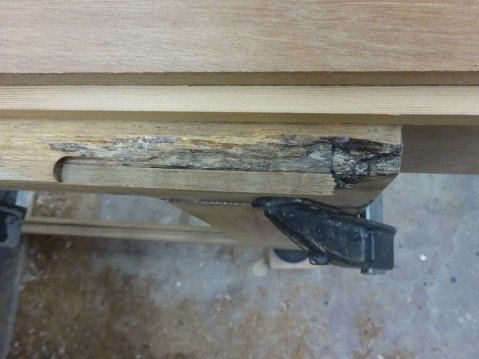
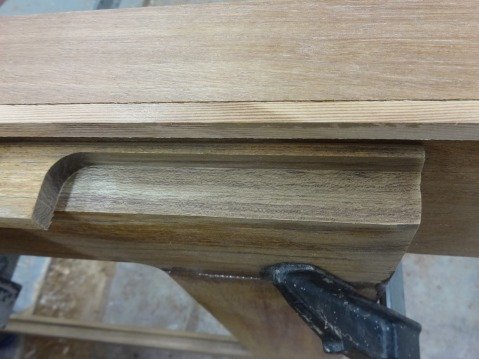
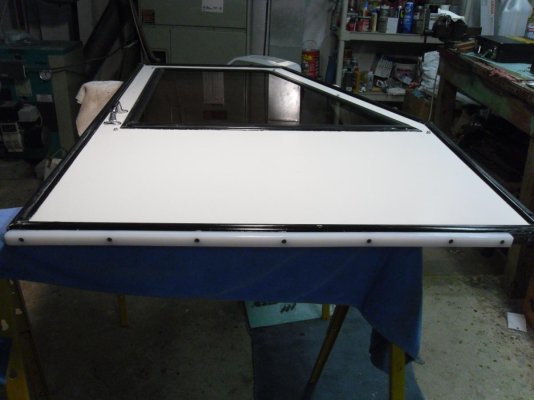
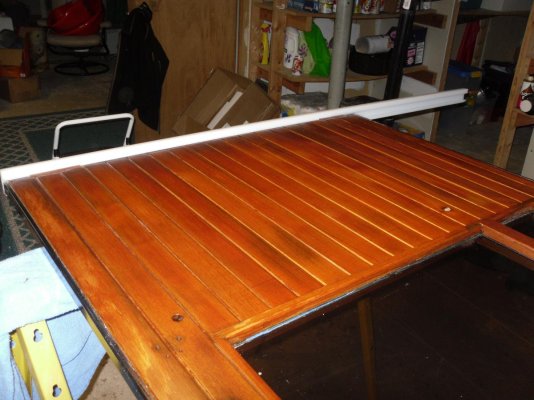
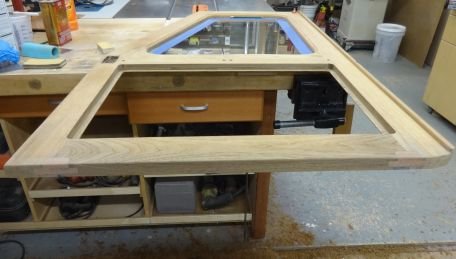
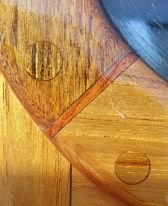
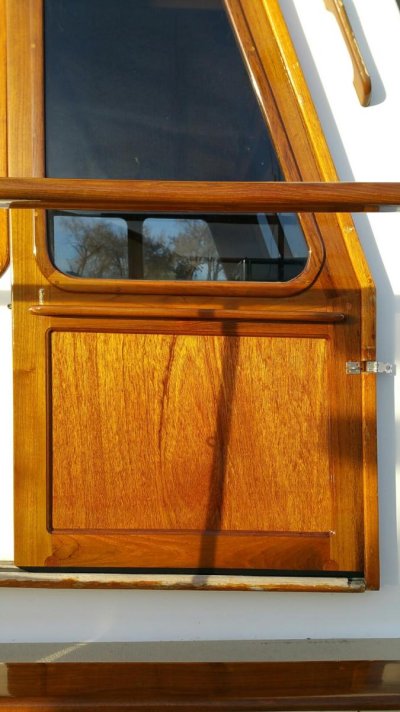
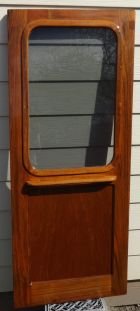
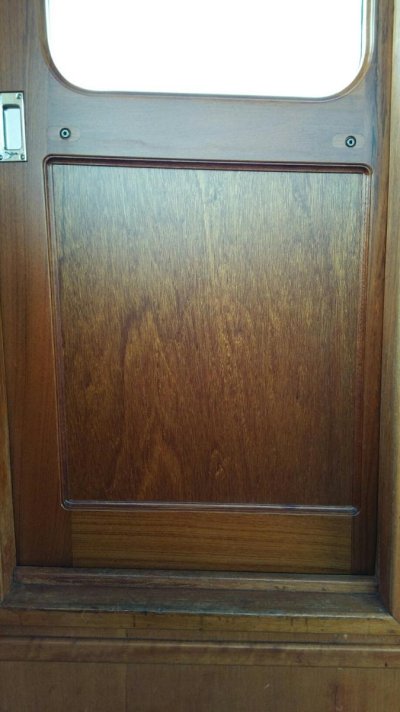
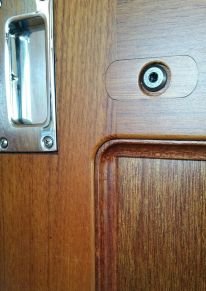
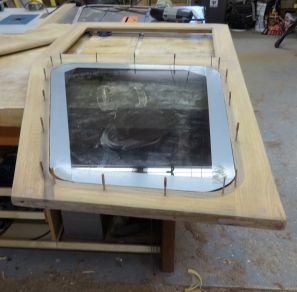
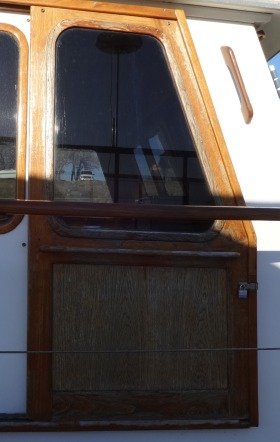
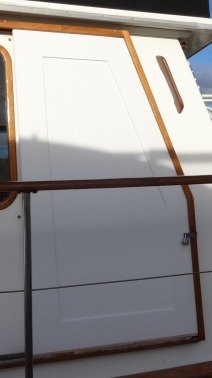
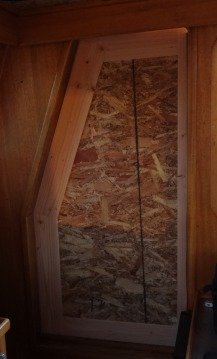
While reasoned thought was away on holiday....I decided to launch on rebuilding the cabin doors and FB steps. Both sliders and the steps were showing their age: joints coming apart, punky plywood panels, badly peeling/absent finish etc. The first step was to template and fab some temp/ghetto doors out of pine and OSB to keep the boat closed up. I'm neck deep in the project now but can see light at the end of the tunnel. I'll post more pics detailing the odyssey soon.
 

Attachments

  • 020.jpg
    020.jpg
    29.2 KB · Views: 111
  • 006.jpg
    006.jpg
    15.7 KB · Views: 707
  • 023.jpg
    023.jpg
    18 KB · Views: 746
I did same thing last winter . New doors and tracks . It's a lot of work but you'll be glad you did it .
 
Me too!

Small world I am in the middle of the same project. Your temp door looks much more profesional than mine. The door is an odd design as the door is about a foot wider than it needs to be. This leaves the inside teak exposed to the weather. The door has wheels on a stainless track that keep the door elevated 1 1/2" and let a lot of air and some water in. I will be following Beach Houses lead and changing to a UHMW poly tracks. Today is finally varnish day.:dance: 
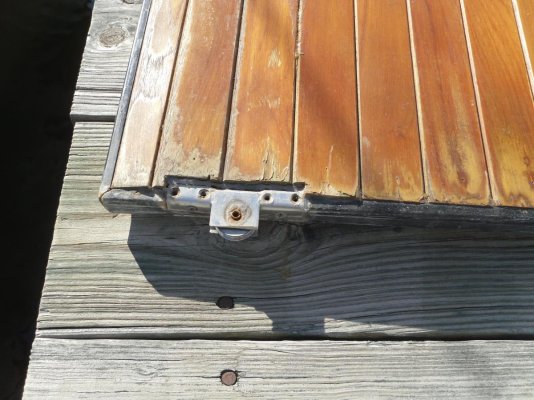
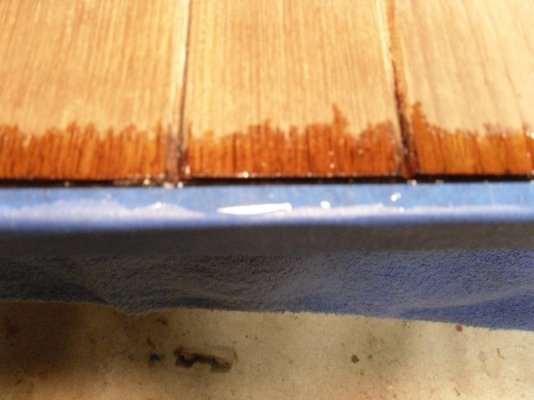
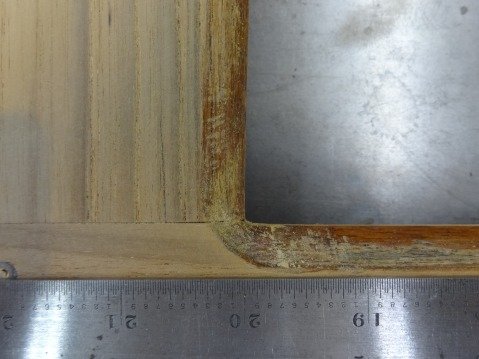
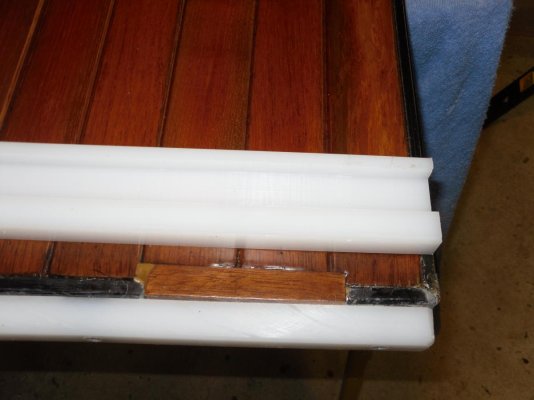
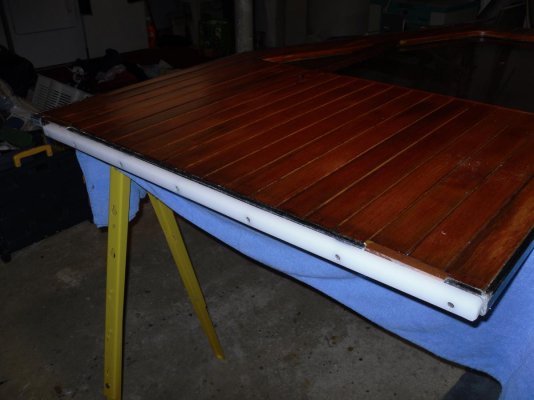
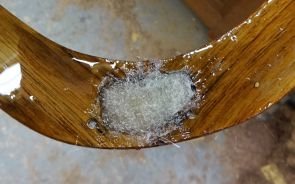
Thanks for the recent TF discussion on penetrating epoxy. You can see in the last picture the thin epoxy I layed into the bottom seam. I thought about doing the entire door with it but the color is way to dark. Cant wait to see your final pictures.
 

Attachments

  • SDC13448.jpg
    SDC13448.jpg
    89.4 KB · Views: 123
  • SDC13443.jpg
    SDC13443.jpg
    121.8 KB · Views: 108
  • 1213141216.jpg
    1213141216.jpg
    68.2 KB · Views: 110
  • SDC13436.jpg
    SDC13436.jpg
    173.8 KB · Views: 108
  • SDC13450.jpg
    SDC13450.jpg
    144.5 KB · Views: 117
  • SDC13454.jpg
    SDC13454.jpg
    140.6 KB · Views: 109
  • SDC13455.jpg
    SDC13455.jpg
    105.1 KB · Views: 102
  • SDC13456.jpg
    SDC13456.jpg
    95.4 KB · Views: 114
  • 1220141032.jpg
    1220141032.jpg
    60.8 KB · Views: 113
More Pics

So far the corner joints have received have loose tennons, all holes or damaged areas filled with mahogany, old plywood panels removed, edge profiles re-cut, 2 coats of epoxy on the exterior face and edges. Color matching the Hydrotech Meranti plywood to the teak has been a challenge but I think I'm in the ballpark.
Dave, your door is coming along nicely! Looks like you've had to patch with mahogany as well. Something tells me that I'll be wishing I had your cap and rub rails about half way through that phase.
 

Attachments

  • 010.001.jpg
    010.001.jpg
    39.7 KB · Views: 99
  • 042.jpg
    042.jpg
    40.9 KB · Views: 93
  • 044.jpg
    044.jpg
    49 KB · Views: 104
  • 021.jpg
    021.jpg
    41 KB · Views: 100
  • 024.jpg
    024.jpg
    43 KB · Views: 102
  • 023.jpg
    023.jpg
    31.9 KB · Views: 116
Can you please say where you purchase your sliding door track and hardware.
 
Something tells me that I'll be wishing I had your cap and rub rails about half way through that phase.
That’s funny. There is a boat like mine with a teak cap rails and it looks great. I wouldn't enjoy maintaining it but it would eliminate the annoying cracks I have at my rail stanchions.
Dave
 
Almost done

Door is refinished and ready to go to the boat. Eight coats Epifane clear and two coats of hand rubbed finish. Waiting on some warmer conditions to install. I have some gelcoat to fix before the door track is installed. Sure hope this works. It has to be better than the wheels.
 

Attachments

  • SDC13501.jpg
    SDC13501.jpg
    90.3 KB · Views: 115
  • SDC13500.jpg
    SDC13500.jpg
    87 KB · Views: 136
  • SDC13496.jpg
    SDC13496.jpg
    127.6 KB · Views: 117
  • SDC13494.jpg
    SDC13494.jpg
    93.2 KB · Views: 131
Awesome job! I love it when a project is undertaken not only to refurbish, but to improve the original design!

Looking forward to seeing how the new sliders work out. I need to do the exact same thing to my door.
 
That door's going to slide like a greased pig in a mud fight. Nice!
 
Looks good Dave .That's what I used on my track also . I only used it on the track . I wish I would have put it on the bottom of the door also like yours . Mine slides good biut yours will slide great and UHMW will last a long time . I also used Epifanes on my doors and caprails .

I know how much work it is for you but you're gonna love the results .
Great job:thumb::thumb::thumb:
 
Is there something to keep the door from sliding from slight movement? Does it have a normal marine positive latch when closed?

If not and it slides too easily...I have had mine wiggle open from wind, vibration and head seas.

I have heard others that also need some kind of tensioner to keep the door in position for those without latches.
 
psneeld, this door doesn't have a latch. It has a dead bolt on the inside that pins the door open or closed. I will have to keep an eye on it. It wouldn't be good if it worked its way open due to wave action when I am away from the boat. I think a good handle and latch will be an improvement for another day. My other door has a latch and key lock.
 
psneeld, this door doesn't have a latch. It has a dead bolt on the inside that pins the door open or closed. I will have to keep an eye on it. It wouldn't be good if it worked its way open due to wave action when I am away from the boat. I think a good handle and latch will be an improvement for another day. My other door has a latch and key lock.
Mine has a really cool deadbolt...but no simple latch so I try and keep the track 1/2 way clean...so the door slides..but not too easily.

Thus my dilemma with improving the slides on my door...:facepalm:
 
Dave, excellent work on the door! I just checked out your site and must say that you are an inspiration.
My project was interupted by a week of the flu followed by a week of catch up. Just installed the meranti plywood panels and milled some small cove molding out of mahogany to trim the cabin side of the panels. I hope to start the finishing stage soon.

Cant wait to see it.
 
Dave, excellent work on the door! I just checked out your site and must say that you are an inspiration.
My project was interupted by a week of the flu followed by a week of catch up. Just installed the meranti plywood panels and milled some small cove molding out of mahogany to trim the cabin side of the panels. I hope to start the finishing stage soon.

My doors are overdue for repair and new varnish. I'm trying to think of some excuse that Pack Mule will fall for allowing me to send him my doors for his care and attention. His doors look perfect!
 
Overdue Progress Pics

I should have uploaded these last summer.

The rails and doors will have been back on the boat since last June. For the foreseeable future our only option for moorage is out in the open, so I'm really hoping that the extra effort will buy extra time between re-coating.
The focus has been to prevent water from entering joints...if possible.

The working pics show the dado that the BS1088 plywood was epoxied into and the old frame screw holes being plugged.
The closeups show a sliver of mahogany epoxied between the butt joints and the back of the joint reinforced with epoxy & FG. (note PO glass scratches)
I used brass inserts in the teak handles to make them easy to remove for re-coating. The screw heads as well as the handle (helm door) were recessed to clear the jam.

This year I plan to add UHMW tracks like Fryedaze and Pack Mule used.

It feels good the have this done....but it only highlights the remaining work! :eek:
 

Attachments

  • 030.000 (1).jpg
    030.000 (1).jpg
    22.5 KB · Views: 64
  • 20160220_163116_resized (3).jpg
    20160220_163116_resized (3).jpg
    9.1 KB · Views: 261
  • 057 (1).jpg
    057 (1).jpg
    12.4 KB · Views: 265
  • 20160220_163036_resized - Copy.jpg
    20160220_163036_resized - Copy.jpg
    111.2 KB · Views: 73
  • 011.000 (1).jpg
    011.000 (1).jpg
    7.7 KB · Views: 222
  • 20160220_163408_resized (1) - Copy.jpg
    20160220_163408_resized (1) - Copy.jpg
    92.8 KB · Views: 76
  • 20160220_163456_resized.3.jpg
    20160220_163456_resized.3.jpg
    12.7 KB · Views: 232
  • 054 (1).jpg
    054 (1).jpg
    15.6 KB · Views: 230
Nice work Eric! They will look great for a long time.
 
Back
Top Bottom