You are using an out of date browser. It may not display this or other websites correctly.
You should upgrade or use an alternative browser.
You should upgrade or use an alternative browser.
Starside's Electric Conversion
- Thread starter Starside
- Start date
The friendliest place on the web for anyone who enjoys boating.
If you have answers, please help by responding to the unanswered posts.
If you have answers, please help by responding to the unanswered posts.
Starside
Senior Member
Starside
Senior Member
Starside
Senior Member
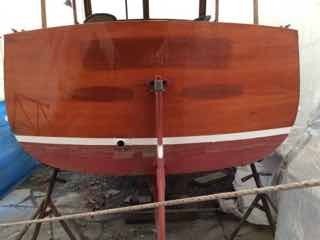
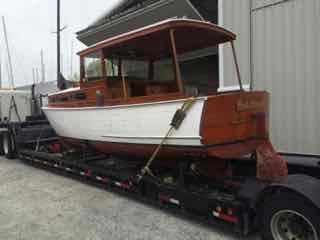
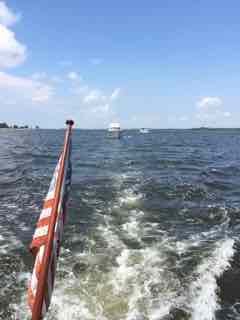
Okay, last one for now...in case you are missing cruising!
Here's a pic from my stern during my maiden voyage from Galesville to St. Michaels for the classic boat show last year.
The boats behind me were kind enough to convoy with me into the harbor, as they knew I was a novice & needed an escort. One is the Jubilee, which I believe is a Matthews. The other is Mary Katherine (sp?) which I believe is a Trumpy.

healhustler
Guru
- Joined
- Oct 2, 2009
- Messages
- 5,198
- Location
- USA
- Vessel Name
- Bucky
- Vessel Make
- Krogen Manatee 36 North Sea
Fantastic thread! Thanks for sharing your process. A vessel worthy of saving!
Ski in NC
Technical Guru
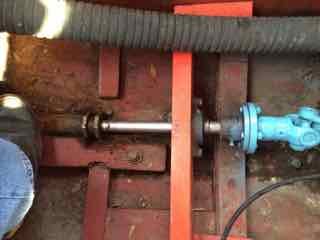
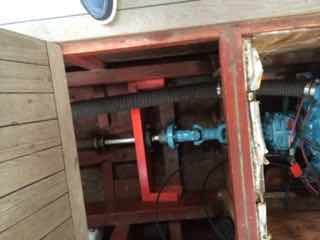
If electric motor can handle thrust load from prop, consider getting rid of the hard mounted thrust bearing and ujoint kit, and putting motor on soft mounts. Vibrations from the prop and motor will get transferred into hull structure through the thrust bearing. Quieter if motor and prop shaft are floating.
Starside
Senior Member
If electric motor can handle thrust load from prop, consider getting rid of the hard mounted thrust bearing and ujoint kit, and putting motor on soft mounts. Vibrations from the prop and motor will get transferred into hull structure through the thrust bearing. Quieter if motor and prop shaft are floating.
Yes, they are already talking about removing the prop, etc., & going with what Elco is recommending. Part of it is trying to save what we can to keep costs down but we also want a smooth transition.
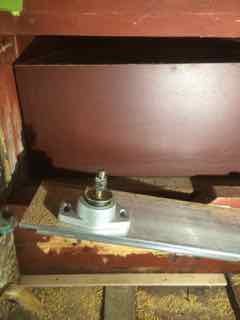
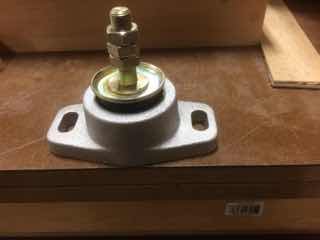
Here's a pic of the mount.
Starside
Senior Member
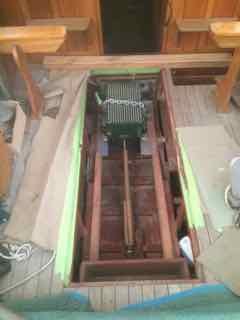
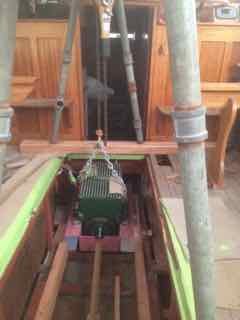
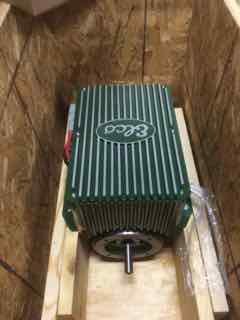
Another close up of the Elco engine as it arrived in the box. It will take a while for them to install it. I think the first process is to hook it up on the work bench first before installing it. If all goes well in the shop & it's running independently, then it gets installed. I'm not sure if they do the electrical panels first before the engine goes in, but once I know, I'll post. This process will take a few months. We are hoping to do the sea trials in April.

Ski in NC
Technical Guru
Those mounts look like the ones usually spec'd for much heavier gasoline and diesel engines, and do not have much "flex". To minimize noise, mounts must be carefully selected using motor weight, thrust and torque to keep it "floating" slightly. There are many much better mounts out there, one brand I have used with success is "Metalastic", their site has the charts needed to properly spec.
Pacemaker
Member
- Joined
- Jan 24, 2015
- Messages
- 6
- Location
- USA
- Vessel Name
- Party Girl
- Vessel Make
- 1967 Pacemaker Sportfish
Thank you for sharing with us this very interesting conversion. Sounds like you have done a lot of research and been asking the right questions. I am looking forward to more pics and reading about Starside's progress. 

Starside
Senior Member
Those mounts look like the ones usually spec'd for much heavier gasoline and diesel engines, and do not have much "flex". To minimize noise, mounts must be carefully selected using motor weight, thrust and torque to keep it "floating" slightly. There are many much better mounts out there, one brand I have used with success is "Metalastic", their site has the charts needed to properly spec.
I think the yard & Elco have both chosen the mounts for the project. One issue was the size of the engine & well to ensure it all fit. I recall a discussion about it being too tall, so it's possible they chose this mount to keep the profile lower. I will ask about this cuz that's a good question...
Starside
Senior Member
thanks for keeping us updated. Does the motor well get its own bilge pump?
Not that I'm aware of. My bilge pump is located under the stairs going into cabin. My water collects midship...that is, it drains to the cabin floor & builds up from the center, so the stairs will flood before the engine compartment. I also have another bilge pump directly in the bilge.
As an old boat, she always has water in her bilge. Drives me crazy!
I'll ask about a separate pump in the well but I do recall a discussion about where the water flows & builds up. It's mostly rain water that collects in the bilge but I also keep her in a covered slip.
I'll inquire -thanks for the tip.
a dry bilge in a wood boat may be impossible. In the old days shipwrights installed salt shelves under the deck near the devil plank so that rainwater would wash salt into the hull sides and bilge. The thinking was that wood rotted less in salt water than fresh. Is it true? I don't know.
Starside
Senior Member
a dry bilge in a wood boat may be impossible. In the old days shipwrights installed salt shelves under the deck near the devil plank so that rainwater would wash salt into the hull sides and bilge. The thinking was that wood rotted less in salt water than fresh. Is it true? I don't know.
I've been told that water in the bilge is not a bad thing, that wood likes to remain in humid conditions & my bilge is covered in this black tar like substance that protects it. Re saltwater vs rain water, I have been told rain water does more damage - I think it rots wood faster if you're not on top of it. On the other hand, I've read that woodies do better in fresh water than cruised in salt water. On the Chesapeake, I'm in briney water on the rivers although some are fresh, like the Potomac near DC.
Anyway, i find the salt wash to be fascinating. I also read in Brightwork that the best way to clean teak is just to wash with salt water! So this may be accurate. I'll know over time...
The idea of salt wash for teak probably comes from the sailing ship days where sailors would scrub the decks with ocean water and bricks. They were on their knees so it was called holy stoning the deck.
Unless you plan that level of work just letting teak bleach in sun will turn it gray/silver. Much easier than a zillion coats of varnish.
Unless you plan that level of work just letting teak bleach in sun will turn it gray/silver. Much easier than a zillion coats of varnish.
Starside
Senior Member
Fascinating, Bayview.
I have a book called Brightwork by Rebecca Wittman. She has a good reputation & since I have so much varnishing to do, I got her book & plan to follow her advice. Re teak, she says never varnish & just a light wash of salt water with a soft rag. I think I'll try that & go thru the book to do my own varnish work. It's a bit daunting but I think I'm up for it!
I have a book called Brightwork by Rebecca Wittman. She has a good reputation & since I have so much varnishing to do, I got her book & plan to follow her advice. Re teak, she says never varnish & just a light wash of salt water with a soft rag. I think I'll try that & go thru the book to do my own varnish work. It's a bit daunting but I think I'm up for it!

