Evans Head NSW to Port Albert Vic in a 49ft McLaren Timber trawler

The friendliest place on the web for anyone who enjoys boating.
If you have answers, please help by responding to the unanswered posts.
PopArcher,
I would think that as the water swelled the planks the whole bottom would just bust apart .. each plank pushing against the next.

Troy it's good to see the basement of a good wood boat again.
 
Thanks for stopping by manyboats and popacher
In question to the wedging of the seam with timber to my knowledge its called splining. And is one way of sealing
up your boat l will be going with the traditional method of using
cotton caulking. Manyboat thank for your comments it's a big
job but we are getting closer every week
Troy
 
Troy,
I don't know about down south but up here we use tared okum for caulking hard wood planking and cotton for softwoods such as pine , oregon etc.
All my seams are caulked with okum and sealed with putty. The 2 water line seams are now sikaflexed and I have started using Norflex , flexible epoxy filler. This is the modern ducks guts filler.
Cheers
Benn
 
Big job

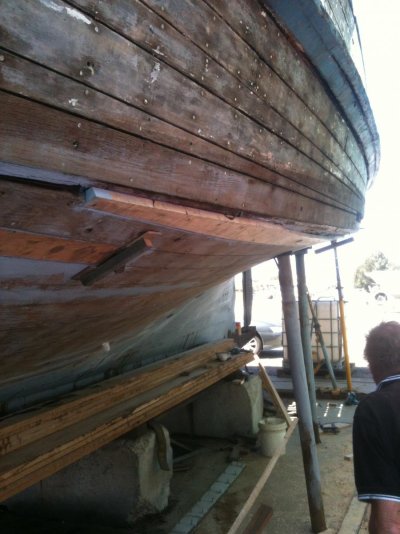
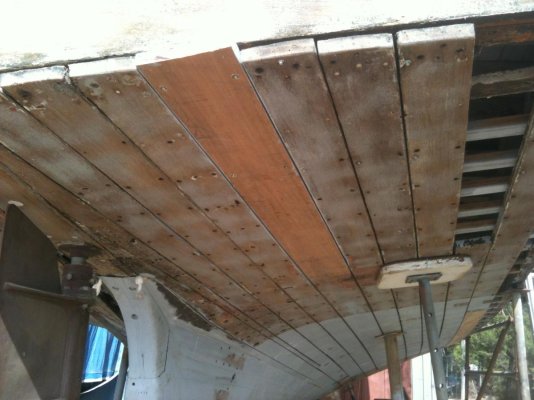
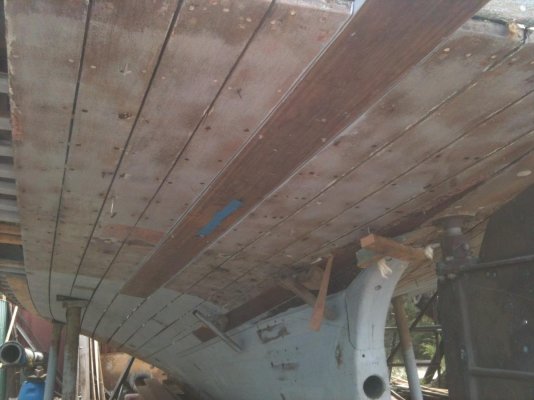
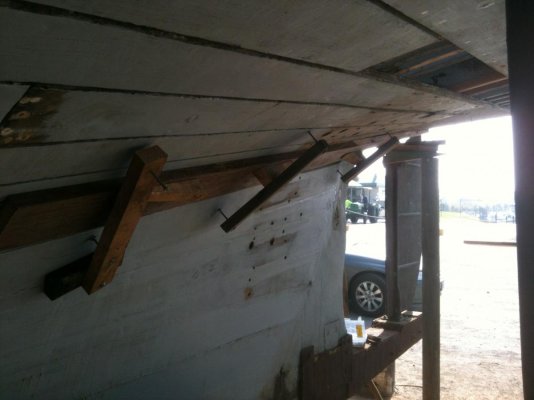
Wow what a big job. Having been down this road myself, I can remember only too well wondering if I was ever going to turn the corner from removing timber. On the subject of caulking, as you probably are well aware those planks are pretty dried out at this point. The problem for most of us is not having enough manpower to get a wood boat back in the water soon enough to keep them from drying out. If you caulk these seams tight in this condition you will probably end up with buckled planks once you splash, at the minimum you will have caulking squeeze out of the seams. In a perfect world it would be nice to splash the boat in slings for before caulking for several days if not a couple of weeks. Unfortunately it would be hard to find a yard that would do that for you. What I have done is wrap the hull with canvas painters tarps and used soaker hoses along the gunnel to wet the hull and keep it wet for several weeks before caulking. It's not perfect but it's better than not doing anything. If you don't have the manpower to move fast on the caulking you might consider focusing on the bottom below the waterline and splashing and finishing the hull sides in the water. Unfortunately one of the challenges of working on wood boats is time, they just seem to fall apart before your eyes as they dry out. A word of caution as you replace planks keep an eye on the fairness of your hull, wood boat are easy to distort with hull supports, you can't have enough supports in my mind. It looks like your doing a nice job, working part time makes a tough job even more difficult, I hope you enjoy the challenge, there are unfortunately many false summits on these projects, hang in there when your done you will have a truly unique vessel.
 
Thanks Scary,
Thanks for that mate, we are trying to close the planks up as we progress outwards have carpet underlay down closing up the seams with the weather of late hasn't been to hot and getting rain as well so she has closed a lot since the warmer weather last year. After summer hit I was thinking how are these seams ever going to touch fit again some I could put my thumb through but have close up nicely with the colder weather were having so would like to have her in the water before it heats up again with the underlay in to should speed up the process. keep in touch, just on the caulking scary we are laying in cotton caulking quite loosely paint seam first lay cotton in paint again if another layer required more cotton them paint and putty is the process, most just going in by hand not to much hammering with the paint and putty holding it in as she starts to swell.
Regards
Troy
 
Hello,
Bit of and update on the progress on the Tracey Lea, We have machined up the planks and took them down a week or two ago.
We spent last week down the boat and started to put in new planks they are looking spot on and starting to fill in a few holes that i have created, we managed to
in 6 planks amongst roving off nails in lazerett while we lost power on the site for a few hours. lippy refasten planks along the chine stringer along the planks with
steps in them also looks great will post some pictures to help so you all what we have been up to more planking next week so more pictures to follow.
TroyIMG_1700.jpg.IMG_1742.jpgIMG_1746.jpgIMG_1750.jpgIMG_1754.jpgIMG_1770.jpg
IMG_1781.jpgIMG_1774.jpg
 

Attachments

  • IMG_1700.jpg
    IMG_1700.jpg
    186 KB · Views: 102
  • IMG_1742.jpg
    IMG_1742.jpg
    121.7 KB · Views: 104
  • IMG_1746.jpg
    IMG_1746.jpg
    123.9 KB · Views: 100
  • IMG_1750.jpg
    IMG_1750.jpg
    120 KB · Views: 106
  • IMG_1754.jpg
    IMG_1754.jpg
    122.4 KB · Views: 119
  • IMG_1770.jpg
    IMG_1770.jpg
    116.4 KB · Views: 112
  • IMG_1781.jpg
    IMG_1781.jpg
    100.9 KB · Views: 110
  • IMG_1774.jpg
    IMG_1774.jpg
    83.2 KB · Views: 102
Thanks for the photos looking good
 
Hello all, hope everyone has recovered from Christmas. plenty has been done since I last posted. and heaps of photos to boot so stay tuned to see some more pulling apart and new construction work...
Troy
 
Troy,
Good to see you are back on the job.
Cheers
Benn
 
How are you Benn,
Hope Santa was kind to you a gave you a life time of fuel for the boat.
but anyway wouldn't need that much for Mr G. yes have been back down and wrecked more and replaced more one day it will splash I guess.
Troy
 
Onwards and Upwards Troy,

It's always better to do it the right way and the satisfaction will be totally worth it in the end!
 
eagle419,
That's what I try and keep telling myself mate hope you have been enjoying the journey with more to follow cheers and thanks for your support need all I can get for inspiration for completion of stage one.
Troy
 
You'll get it Troy. Just keep on getting after it, bang away long enough and it'll keep the water out.
 
Back on deck,
Been missing for a while, had a bit of progress on the hull but have been busy freshening up the engine and a few bits and pieces. Gave the Gardner a good hot water clean and degreaser and decided to take it back to bear metal so l hit it with the old wire wheel on the grinder and drill to get into all the nooks and crannies, after a good few days of that we primed the aluminium with a killrust etch primer and three coats of top cot aluminium paint. Cylinder head was also taken back to bear metal and was give a coat of rust eater (rust neutralizer) and a coat of heavy duty primer and three coats of top coat in a grey l mixed up out of some killrust paint me and a mate had in the shed. Had the turbo recondition while it was off waiting for some more money to get the exhaust manifold sand blasted and either get it ceramic coated or just use a heat proof paint feed back on this would be great. but anyway enough rambling on now for the pictures which everyone loves hope you enjoy them.
Troy
 

Attachments

  • IMG_1790.jpg
    IMG_1790.jpg
    174 KB · Views: 84
  • IMG_1797.jpg
    IMG_1797.jpg
    152.8 KB · Views: 84
  • IMG_1867.jpg
    IMG_1867.jpg
    105.2 KB · Views: 92
  • IMG_1887.jpg
    IMG_1887.jpg
    118.4 KB · Views: 77
  • IMG_1892.jpg
    IMG_1892.jpg
    108.5 KB · Views: 86
  • IMG_1897.jpg
    IMG_1897.jpg
    81.5 KB · Views: 85
  • IMG_1903.jpg
    IMG_1903.jpg
    87.5 KB · Views: 80
  • IMG_1914.jpg
    IMG_1914.jpg
    111.7 KB · Views: 86
  • IMG_1926.jpg
    IMG_1926.jpg
    88.3 KB · Views: 90
  • IMG_1964.jpg
    IMG_1964.jpg
    113 KB · Views: 86
Wow. That Gardner is a work of art IMO. Nice job.
 
And more pictures for you viewing
 

Attachments

  • IMG_1966.jpg
    IMG_1966.jpg
    106.5 KB · Views: 85
  • IMG_1931.jpg
    IMG_1931.jpg
    118.7 KB · Views: 87
  • IMG_1934.jpg
    IMG_1934.jpg
    107.6 KB · Views: 82
  • IMG_1972.jpg
    IMG_1972.jpg
    123.1 KB · Views: 94
  • IMG_1969.jpg
    IMG_1969.jpg
    120.7 KB · Views: 84
  • IMG_1975.jpg
    IMG_1975.jpg
    161.6 KB · Views: 74
  • IMG_1936.jpg
    IMG_1936.jpg
    114 KB · Views: 85
  • IMG_1943.jpg
    IMG_1943.jpg
    120.7 KB · Views: 82
  • IMG_1946.jpg
    IMG_1946.jpg
    109.9 KB · Views: 96
Dang Troy! First class work there mate....absolutely stunning!
 
and still more l know you all love pictures
 

Attachments

  • IMG_1983.jpg
    IMG_1983.jpg
    103.6 KB · Views: 95
  • IMG_1985.jpg
    IMG_1985.jpg
    86 KB · Views: 90
  • IMG_1984.jpg
    IMG_1984.jpg
    103.2 KB · Views: 81
  • IMG_1986.jpg
    IMG_1986.jpg
    128.8 KB · Views: 91
  • IMG_1993.jpg
    IMG_1993.jpg
    150.2 KB · Views: 89
  • IMG_1992.jpg
    IMG_1992.jpg
    144.6 KB · Views: 89
  • IMG_1979.jpg
    IMG_1979.jpg
    141.7 KB · Views: 91
  • IMG_1994.jpg
    IMG_1994.jpg
    135.8 KB · Views: 95
  • IMG_1991.jpg
    IMG_1991.jpg
    155.1 KB · Views: 96
Impressive! Does it have two injector pumps ?
 
Dimer2
thanks for your kind words mate I am very happy with the way it has come up lots and lots of hours cleaning but the result has been worth it, look at the pictures the followed your reply...
Troy
 
cardude01
It only has one injector pump as such but has two injector units that are located at the top of the main pump body, each one run off the same cam shaft in the main housing. Hope this makes cense.
 
It just gets better! Very impressive, you just gotta love that old iron.
 
That you do mate, made a big difference with a good clean up.
Troy
 
Troy,
Good to see the G is getting a nice clean up.
On my 6LXB I don't have a water cooled exhaust manifold but it is ceramic coated.
No problems with heat transfer in the Eng Rm, just have to be careful not to touch it as it does not appear hot or exude much heat. I think it is a great way to go.
Cheers
Benn
 
Hey Benn,
Good to hear from you again mate,followed you on your trip to tassie this
year sounds like you had a ball. 2017 was hoping to be down there with Tracey
Lea if she is ready might have to meet in the paddock somewhere looks
like I missed out in entering the boat as seams be booked out rang the
up last year and was told April was when they where taking bookings
but missed out. Hope there will be room to tie up somewhere down there.
Engine has come up ok and was looking at getting the ceramic coating but
haven't looked into pricing as yet sounds like the go from your comments.
Troy
 
Aquabelle,
Thanks mate lot better to look at now then it was hope it won't be long before in goes back in.
 
I hope the Gardner is accessible for viewing, and can repel the drooling of those taking a look. A work of art. Congratulations.
 

Latest posts

Back
Top Bottom