New construction: She:Kon

The friendliest place on the web for anyone who enjoys boating.
If you have answers, please help by responding to the unanswered posts.
Sorta hit a milestone today. Keel & bottom panels sanded. The RO sander came off the top of the boat never ever to go back up again! :thumb:

I've got maybe another day sanding on the sides & bulwarks & corners and then she'll get cleaned up for primer. I do have a couple of low spots on the sides that might need 'nuther coat of epoxy. I think they're too deep for primer to hide. We'll see tomorrow when the sanding is done.

Are you going to paint the bottom to the boot stripe, and then roll,or paint all the way to the gunnels?
 
Are you going to paint the bottom to the boot stripe, and then roll,or paint all the way to the gunnels?
No. Just to the chine. No need to do it now. It'll be just as easy to do it when it's upright. I won't be finish fairing the sides & painting until the boat is nearly finished.
 
No. Just to the chine. No need to do it now. It'll be just as easy to do it when it's upright. I won't be finish fairing the sides & painting until the boat is nearly finished.

:thumb:
 
That's It! I'm done sanding! 5+ hrs today sanding the chines & stem by hand plus I went over the sides & transom with the Flexicats one more time for good measure. Tomorrow I'll clean it all off and wipe it down. Depending on the weather I hope to start spraying primer on it on Wednesday! :thumb:

Beer Time! :dance:
 
Is that chine sharp enough to cut hot butter? :hide:
 
Rain Delay :banghead:

Looks like we have 5 or 6 days of rain in the forecast. Temps in the low 60's & humidity through the roof. I can't spray the primer in these conditions. The shed roof leaks! *sigh* That will definitely have to get fixed when the boat has been flipped.

Until the weather clears I'll start work on the Gin Pole & rigging. I picked up all the hardware I'll need yesterday. The lumber for the rolling frames was delivered the day before.

Standby.
 
I can't wait to see your flipping rig. :hide:
 
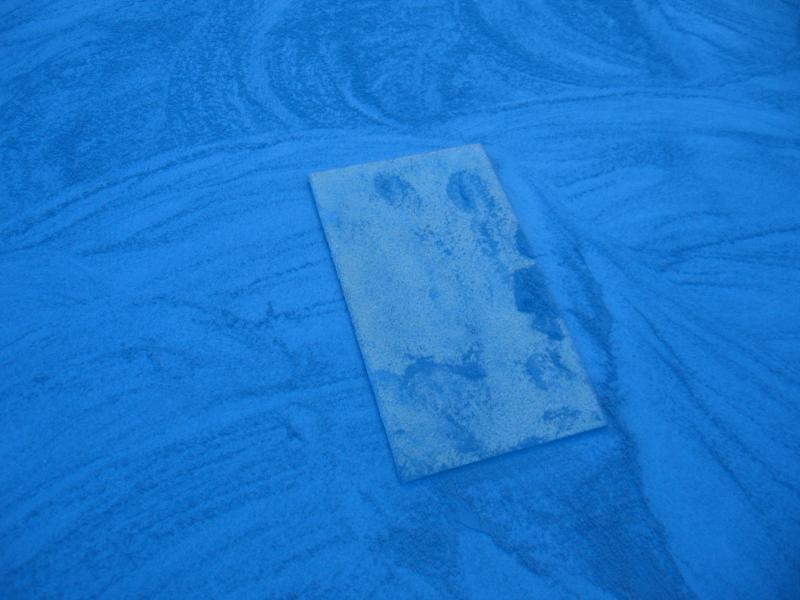
Well we did manage to get a lil' break in the weather so I decided to give this spray painting primer thing a go. I made a mess. I don't think HVLP & high build barrier coat primer work too well together. The spray pattern was tiny, about 2-1/2" wide. Took forever to get about a quarter of the way around the boat so after lunch I switched to the roller and it went much faster.

I know it looks blue in the picture but it's not, Thank Gawd!!! :thumb:

spacer.gif
img_254305_1_95772ccf4c0383d8b93eb15862282e02.jpg


Web log updated: http://she-kon.blogspot.ca/2014/08/let- ... paint.html
 
Well we did manage to get a lil' break in the weather so I decided to give this spray painting primer thing a go. I made a mess. I don't think HVLP & high build barrier coat primer work too well together. The spray pattern was tiny, about 2-1/2" wide. Took forever to get about a quarter of the way around the boat so after lunch I switched to the roller and it went much faster.

I know it looks blue in the picture but it's not, Thank Gawd!!! :thumb:


Web log updated: http://she-kon.blogspot.ca/2014/08/let- ... paint.html

Did you try adjusting the gun to widen the spray pattern?There should be a knob on the back of it to adjust the spray pattern.It should move the center pin closer or further away from the spray nozzle.I also run an inline dessicant filter, and a regulator with a small gauge, at the gun.I spray between 30 and 45 psi at the gun,usually.I leave the compressor at 175psi or whatever it normally gives the best cfm rating.My compressor was HUGE,200 gallon tank and 3 phase 240v motor.


Coming soon! Standby.....

:dance:
 
Did you try adjusting the gun to widen the spray pattern?There should be a knob on the back of it to adjust the spray pattern.It should move the center pin closer or further away from the spray nozzle.
Yup. Tried that.

I also run an inline dessicant filter,
Yup, got one.

and a regulator with a small gauge, at the gun.
Yup, got one of them too.

I spray between 30 and 45 psi at the gun,usually.
50 psi and I tried more and less. No change.

I leave the compressor at 175psi or whatever it normally gives the best cfm rating.My compressor was HUGE,200 gallon tank and 3 phase 240v motor.
I have compressor envy! :eek:
 
I'm all out of idears.That compressor I had to leave behind, when I quit being an auto mechanic.I had no where to move it to.Made a few dollars off of it when we closed the shop.The owner of the shop we were leasing took it off my hands.It was a good deal for both of us.
 
Pretty in Primer! :eek:

spacer.gif
img_254530_1_a75a05918317003940f979c59417d681.jpg


Still have one more gallon to put on tomorrow. That'll give me two full coats on the hull. I'll be out of primer so that's gonna have to do for now. Took me about 3-1/2 hours and I don't know how many climbs up the step ladder! Oh I need a hot shower & a siesta! :ermm:

More pics & details on the blog site: http://she-kon.blogspot.ca/2014/08/pret ... rimer.html
 
I'm all out of idears.That compressor I had to leave behind, when I quit being an auto mechanic.I had no where to move it to.Made a few dollars off of it when we closed the shop.The owner of the shop we were leasing took it off my hands.It was a good deal for both of us.
I would recommend when it's time to start your boat get the biggest compressor you can afford. Minimum 60 gallon two stage or even better an 80. I wish I had the money to buy a bigger one but had to settle for a 30 gallon. :banghead:
 
She looks pretty smooth and properly faired. :thumb:


I would recommend when it's time to start your boat get the biggest compressor you can afford. Minimum 60 gallon two stage or even better an 80. I wish I had the money to buy a bigger one but had to settle for a 30 gallon. :banghead:

The one I am looking at is 80 gallon,240v single phase,175psi two stage,and 23cfm.It has a cast iron compressor head and cool coil with fan between the compressor head and tank.Oh,it's an upright unit so I can tuck it in the corner or build a little lockable addition to house the compressor.
 
You can't win 'em all as they say. I lost today's round. It started out warm in the shed and got hotter, quickly. I was hoping to get the keel & bottom covered then let it tack so I could hot roll on the anti-foul as per mfgr's recommendation. Couldn't do it. The heat and the amount of real estate I had to cover beat me. I was pushing too hard to try to get it done and ended up making a mess while the primer kicked off in the paint tray. So now I've consigned my self to having to sand the keel & bottom one more time. Small price to pay I think to be able to work at a more comfortable pace. The sides have two coats of primer and the transom has three. That's all they'll get unless they need more at final fairing before shiny paint goes on.

spacer.gif
img_254765_1_80926741fd13d17aafe9db59cc99aa80.jpg


spacer.gif
img_254765_3_027e9b001d3c646030c810194a211766.jpg


I know it's hard to tell from the pics but it turned out pretty good. I'm happy with it.

So tomorrow's task is to get the second coat of primer on the bottom panels. That'll sit for a day or two then I'll sand them to key the surface for the anti-foul. I have to mark the water line and mask off the sides before that stuff goes on.

There's a few more details & pics on the web log if you're interested. http://she-kon.blogspot.ca/2014/08/i-lo ... round.html

Standby...
 
My understanding is that anti-foul shouldn't be dry for very long. You might want to check whether it's a good idea to put it on so early before launch?
Great work, inspiring. I'm girding my loins for a winter Reno project but it will be all interior work. I don't intend to post the work as you, Hendo and Connall are setting the bar too high!
 
My understanding is that anti-foul shouldn't be dry for very long. You might want to check whether it's a good idea to put it on so early before launch?
I checked with the mfgr. It's ok to put it on. It's a semi-hard ablative that'll be fine out of the water for awhile. I'll recoat just before it goes in the water.

Great work, inspiring. I'm girding my loins for a winter Reno project but it will be all interior work. I don't intend to post the work as you, Hendo and Connall are setting the bar too high!
I've reset the bar so low a snail couldn't crawl under it! ;) Go ahead and post away. It's nice to know I'm not alone on this gong show! :lol:
 
Just a lil' bit more


That's it. Hull is primed. Two coats on absolutely everything plus an extra coat on the transom and bow. I'm done with primer. Terribly messy stuff to work with. I was sort of hoping the paint sprayer would eliminate a lot of the work but that didn't work out as planned. :-( Oh well, it is what it is. I figure it took me 20 hrs to get both coats on over 4 days. This morning's session was only a couple of hours. I used up all the paint. Four gallons in total.

Rest of today I'm going to organize my hardware etc. for the Gin Pole. Have to move some stuff around and start digging the hole for the pole. Might even start rigging the pole. Dunno yet. My hands are killing me. Maybe it is time to get sanding again! ;-)

Taking tomorrow off to let the primer firm up then I'll lightly sand the keel & bottom panels for anti-fouling. Hopefully that'll go a lot quicker.

Standby.
 
Last edited:
Hey Rick.What additive did Peter use in his bottom paint,ceramic powder or graphite powder?Will you be keeping her in fresh water?
 
Hey Rick.What additive did Peter use in his bottom paint,ceramic powder or graphite powder?Will you be keeping her in fresh water?
I don't know. He might have put some cayenne pepper in it! :D

Fresh water for the first few years then who knows! :rofl:
 
I don't know. He might have put some cayenne pepper in it! :D

Fresh water for the first few years then who knows! :rofl:

:lol:

Retired and to much time on your hands.Just let me know when you come through SC. :lol:
 
Took the day off from boat building. Went and saw some old friends. Just like in the song it's good for the soul. :D

Anyhow, having a day off leaves lotsa time to think. I was reflecting on all the work that went into prepping the outside of the hull, most of which was due to my own inexperience and I've reconsidered doing a vacuum resin infusion of the inside of the hull. I put together a rough estimate of the costs of materials to do that and the rationale behind the decision in my latest blog update:

M/V She:Kon: See some old friends

I'm 99.9% sure I'm going to do it this way. I just have to gather all the ingredients to make it happen. The downside is it won't happen till next spring but that's ok.
 
Rick my friend,I have done this several times,probably more,and it does make a significant difference in small parts like moto fairings and hood scoops.I did a comparison with fiberglass as the only material in the mould.The infused,vacuum bagged part was much lighter and stronger compared to a general wet lay up and allowed to cure at an ambient temp of 75*F.It was a fairly significant process and is pain the @$$ to say the least,but we had many tight and compound curves to deal with.I can't imagine doing ant entire 31.5' x 10' hull inside.We used Tuck tape to seal all of our seams to the mold and it worked better than the sealing tape we got from the supplier,who's name has escaped my fragile mind.Good luck with the sealing.I hope it goes smoothly.
 
Last edited:
My understanding is that anti-foul shouldn't be dry for very long. You might want to check whether it's a good idea to put it on so early before launch?
Great work, inspiring. I'm girding my loins for a winter Reno project but it will be all interior work. I don't intend to post the work as you, Hendo and Connall are setting the bar too high!


You're right Xsbank. Antifoul should not be applied and let dry out for more than a week or two. AXE's bum won't be painted in Antifoul till two days before her second launch for that exact reason.


Sent from my iPad using Trawler Forum
 
You're right Xsbank. Antifoul should not be applied and let dry out for more than a week or two. AXE's bum won't be painted in Antifoul till two days before her second launch for that exact reason.
Just doing the very bottom of the keel. I likely won't be able to reach it once I flip it over.
 
Just doing the very bottom of the keel. I likely won't be able to reach it once I flip it over.


Seems a better alternative than no antifouling at all.
 
I should have had some anti-fouling on the bottom of the keel by now but things sorta went off the tracks yesterday. I started to lightly sand the keel & bottom to prep it for anti-foul and immediately burned right through the primer. Doh! Anyhow, what to do, say 'screw it' or roll on more primer? I don't have any primer left so off to the store in Ottawa I go! *sigh*

I do apologize for the delay in flipping this tub. All the good intentions in the world don't add up to a hill of beans in my world! :ermm:

spacer.gif
img_255840_1_3e7da75817f3c3c60122ac7a47fc63d2.jpg


Web log updated: M/V She:Kon: Best laid plans of mice and men often go astray.

More sandinsanity to come. Standby....
 
Last edited:
One last coat of primer going on the keel & bottom panels.
spacer.gif
img_256072_1_4e0c3ff5f15c31cf1cf99a8fc40e6409.jpg

This one is an industrial grade underwater epoxy primer. It came highly recommended by a fellow boat builder so I thought I'd give it a try. Once this is on I'll put some antifouling on the bottom of the keel then flip this pig over.
spacer.gif
img_256072_3_f259b5ab129368543110cbe01d2356d5.jpg
 
I'm done with primer & bottom coat. There's nothing left I have to do to the boat before I flip it. Probably a couple of weeks till that happens. Can you contain your excitement? :rofl:
 
Back
Top Bottom