Portuguese
Guru
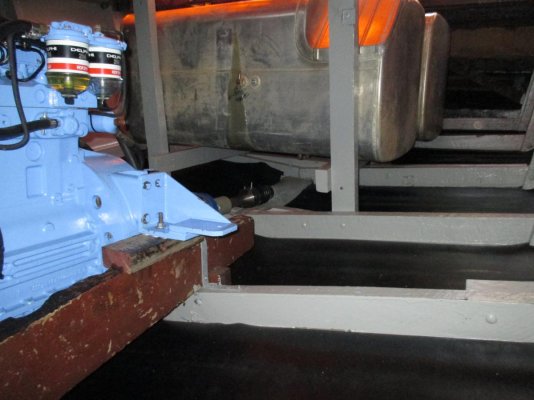
Isn't that a beautifull view? Your prop turning as it should
Congratulations.
Congratulations.
Os sonhos so sao bons quando se tornam relaidade. E obvio que os teus estao tornando-se uma realidade muito bonita e eficiente.
Abraco
Fernando


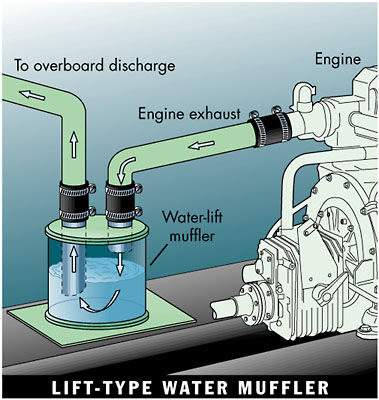
I've often wondered about that myself. I think it's something we learned in Grade 11 Physics class that has long been forgotten as 'I'll never need that in real life'.Picked up my 4" exhaust muffler today. Anyone use one of these before? Are they Any good? Bit confused as to how the water is forced up the riser and out the side of the boat. I got the instruction paperwork but still not sure how the water doesn't just flow back to the Perkins.

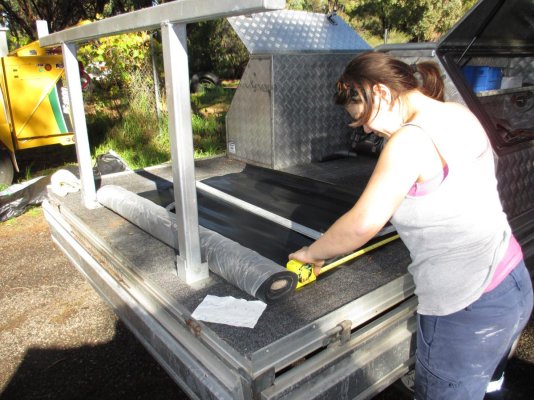
I think your rubber matting looks good, but I have a concern that if it gets wet in the bilge for whatever reason, the mats will prevent it from drying out properly, leading to smells and mold? Plus, if you spill any oil or antifreeze it will be harder to clean up.
I also can't see any limber holes?
Just to make your life easier, once you get floating, have you looked at a sump pan like they put under the engines in Grand Banks boats? Just a suggestion.


")
Nice work Mate.
An ole' boat builder once told me 'you know you're making real progress when you start drilling holes in the hull you've works so hard on to keep water tight!'
Did you at least coat the hole with epoxy before you put the through-hull in? Ya probably should consider that to keep water from seeping into the ply. Just a thought.
Build on, we're watchin!
Hi mate.
Thanks for the words of support. Yep kinda but I'm hoping about it a different way. I've not finished playing with this through hull just yet mate. The hole saw I chose to use is 5mm bigger than the through hull. I used sikaflex today on the join between the fitting and the hull surface and assembled it all so When I go back I won't need to move the fitting to make sure the alignment is set.
When I go back, I will remove the ball valve and backing block and pour epoxy in the gap between ply surrounding the through hull. The sika will stop epoxy draining out. I will then epoxy the back block down and fillet the edges and reassemble it all.
I was considering lining the through-hull openings with a layer of glass & epoxy and use a balloon to hold it in place while it cures. I did that with my bow thruster tube, worked great. Just trim after and you're good to go!Greetings,
Mr. H. Is there any reason you can't or shouldn't "T" the return into the vent line right at the tank? Alternately, I see no reason why you can't run the return line to the tank at the top of one of the sides.