New construction: She:Kon

The friendliest place on the web for anyone who enjoys boating.
If you have answers, please help by responding to the unanswered posts.
Part 7 Prep on the hull before glassing

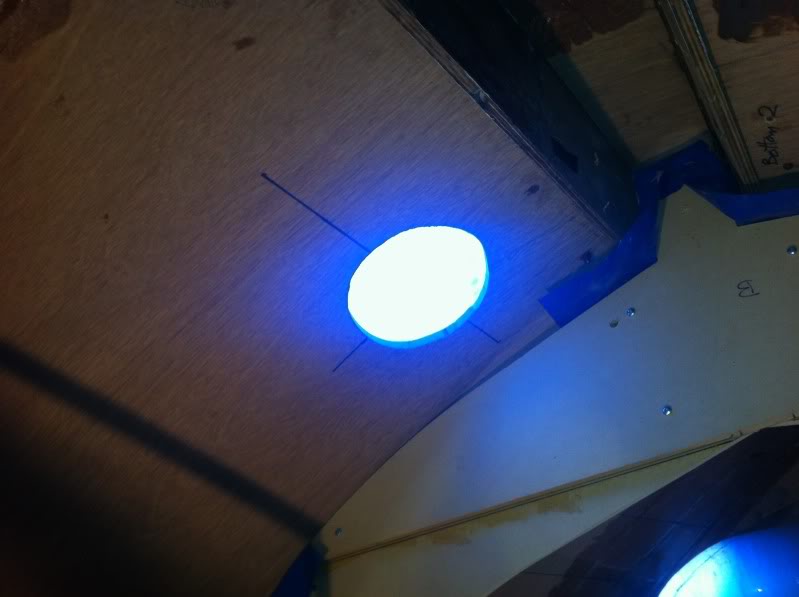
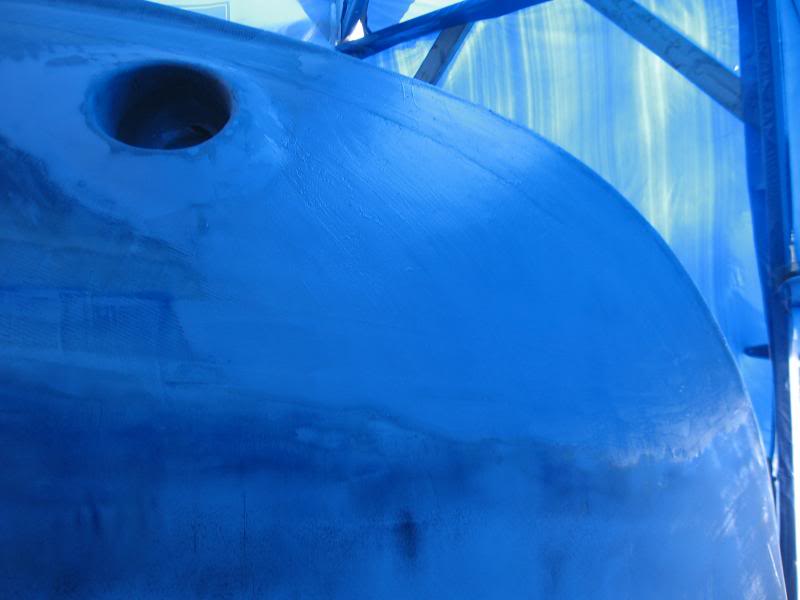
Had to chop just one more tiny eensy weensy little hole in the boat before I got to some serious fiberglass work. Having had a couple of situations on our old boat with the depth sounder transducer on the transom I decided to have a forward through hull transducer this time. Airmar P76 I believe it is. This requires no core between it and the bottom of the boat so a hole had to be cut to remove the core.

img_244764_0_cbb21dd7154e1e772642e09b288a7f35.jpg


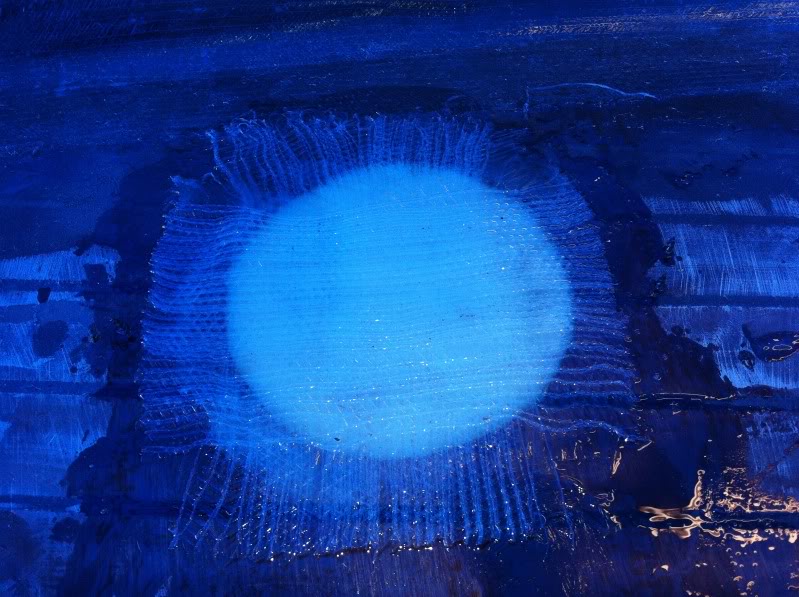
Yup, that's progress, more holes in the hull! I used the cutout covered in some plastic & peel ply to fill the hole and glassed over top with a couple of pieces of tape.

img_244764_1_edf10a530b785b448b0aa00d49841946.jpg


img_244764_2_325e969e1c77798ca703ec6a6c5d85c8.jpg


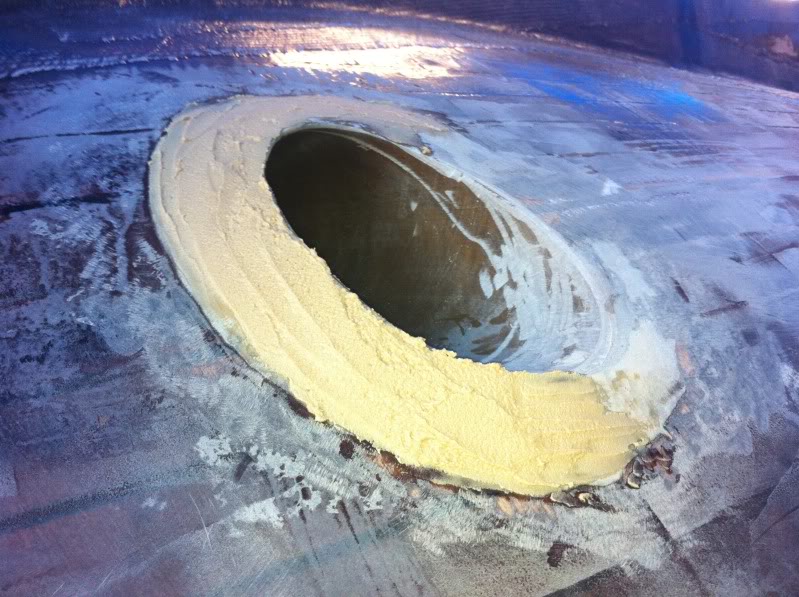
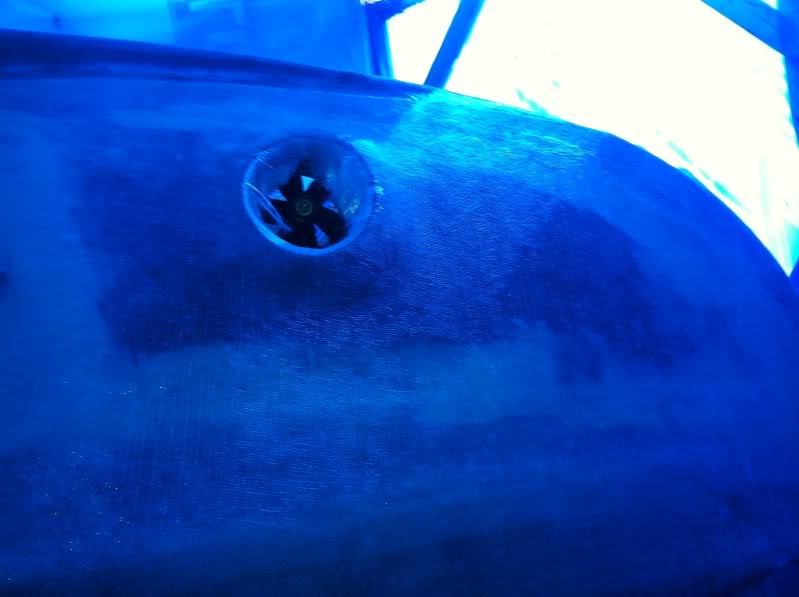
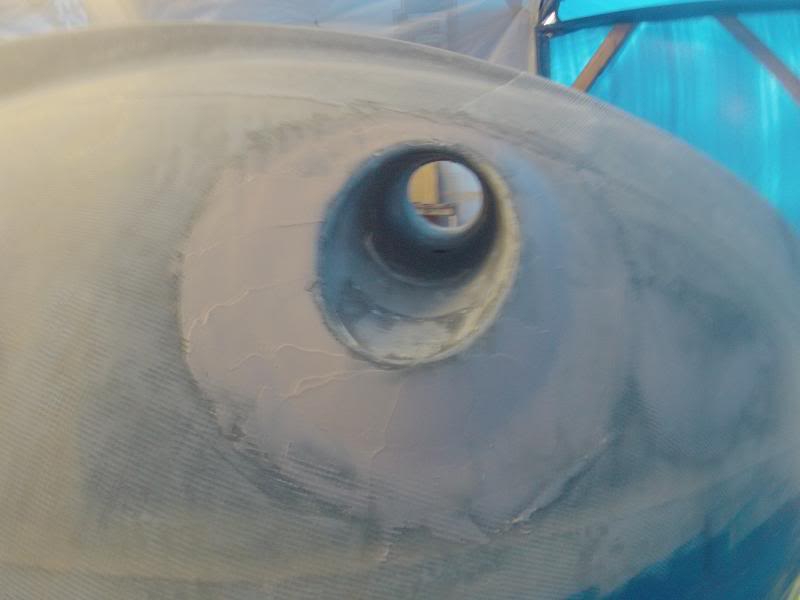
Started to build up the area around the bow thruster holes to give them some shape that hopefully will direct water flowing over and not into the tubes. That's the theory anyways.

img_244764_3_932c2eec5150026ba155b89f6fd1e345.jpg


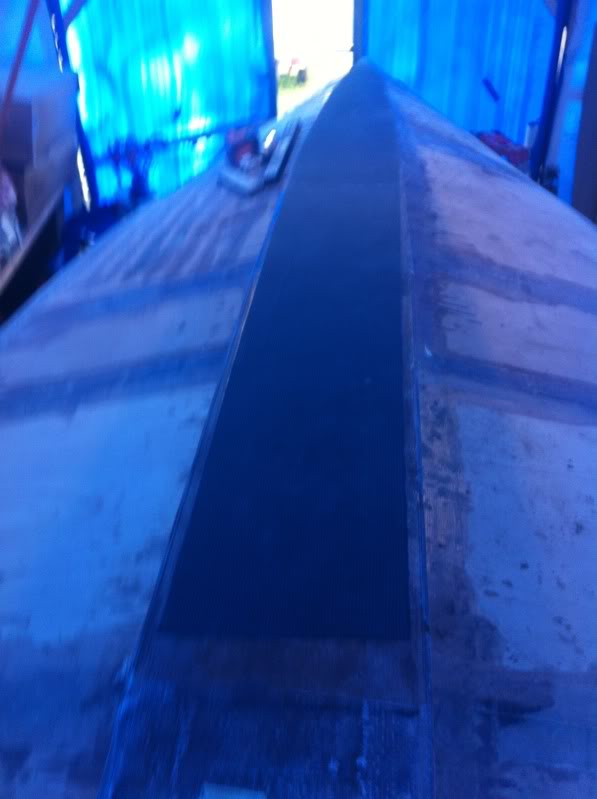
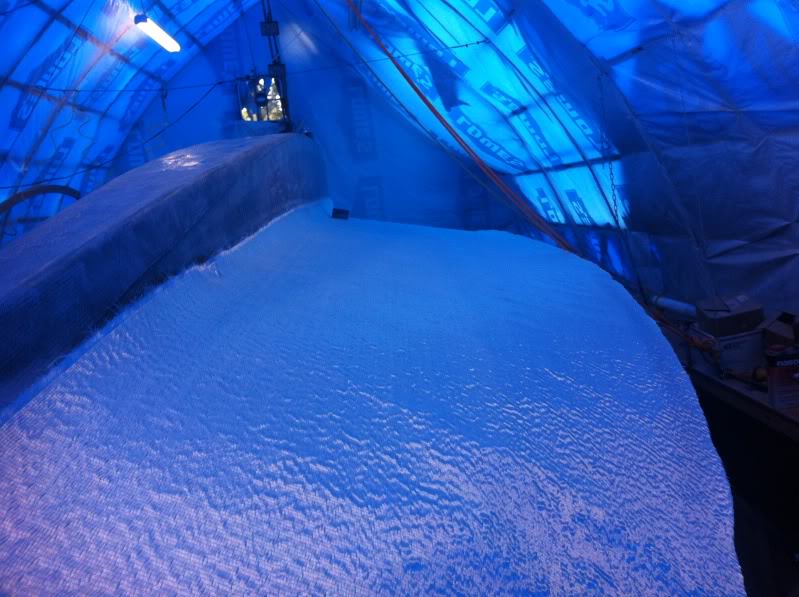
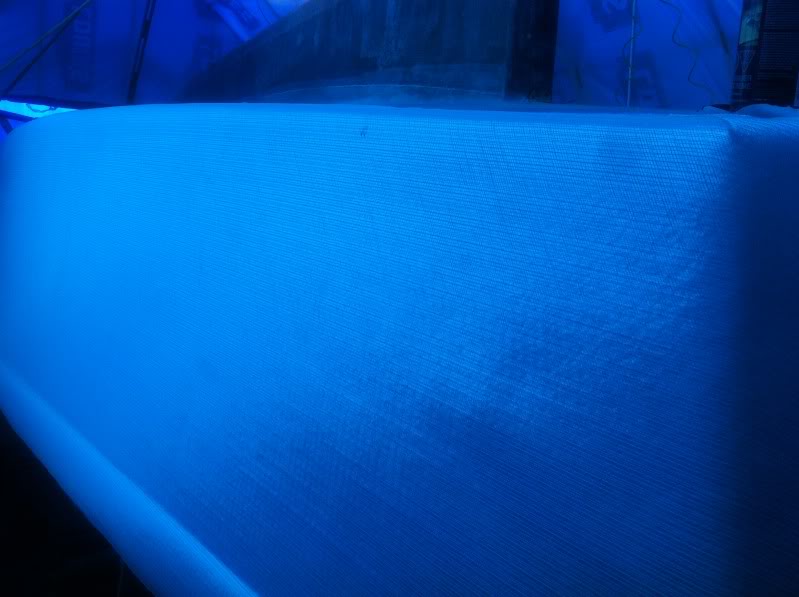
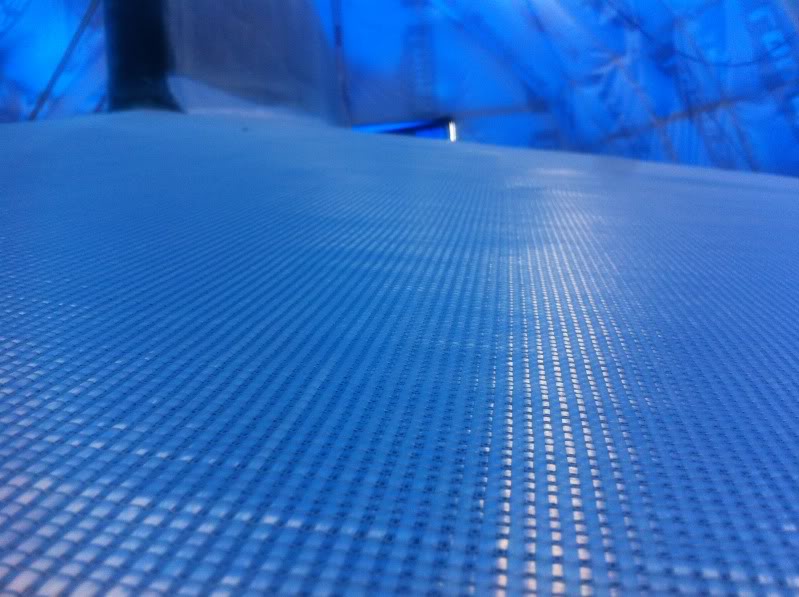
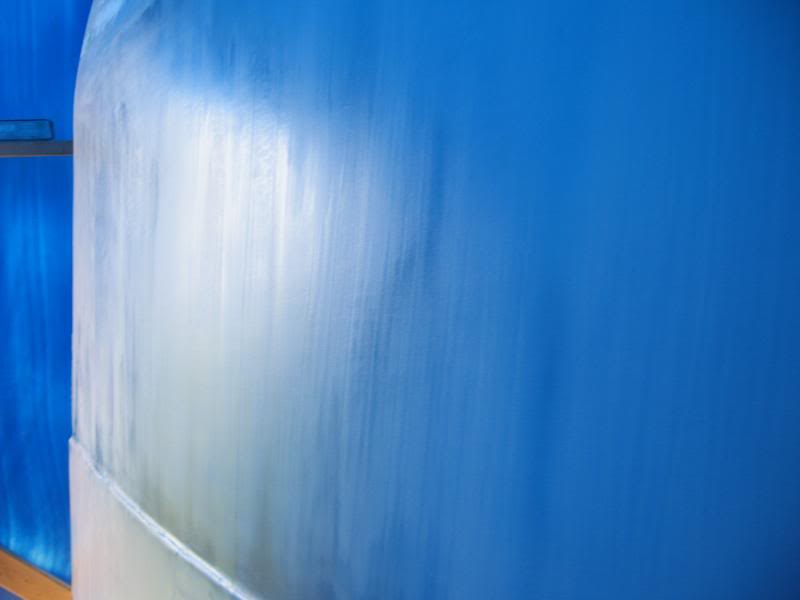
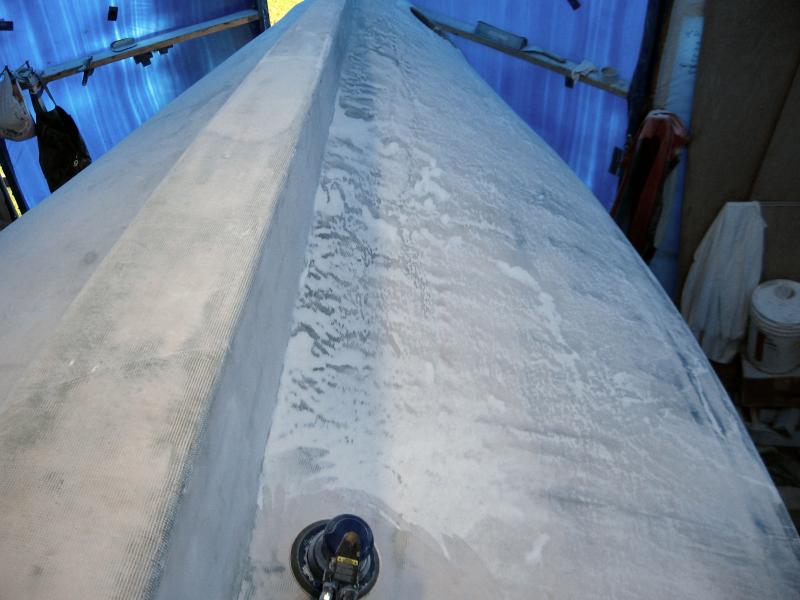
First up for glass was the keel. Don't worry, that's not bubbles in the glass, that's peel ply overtop of the glass. It won't conform to curves as nicely as fiberglass does.

img_244764_4_2c89e25ac6fd2d276e07ef8c5bf0f003.jpg


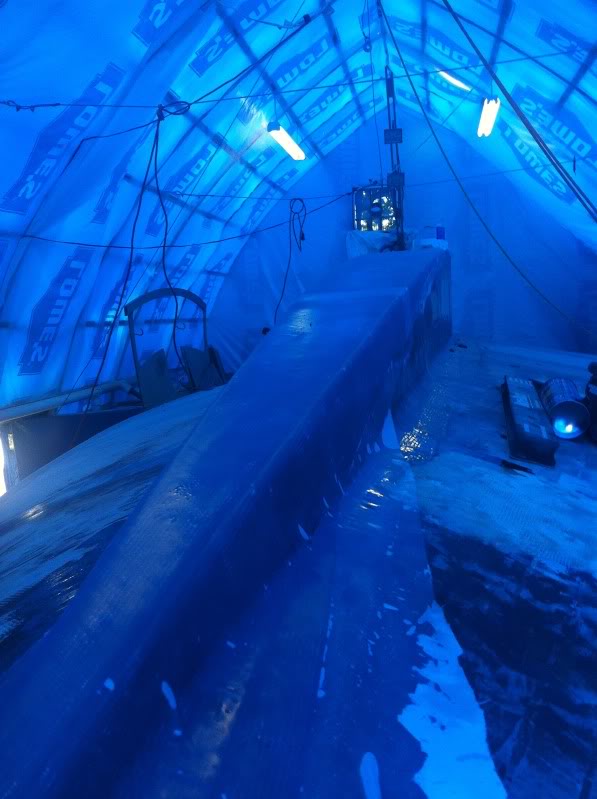
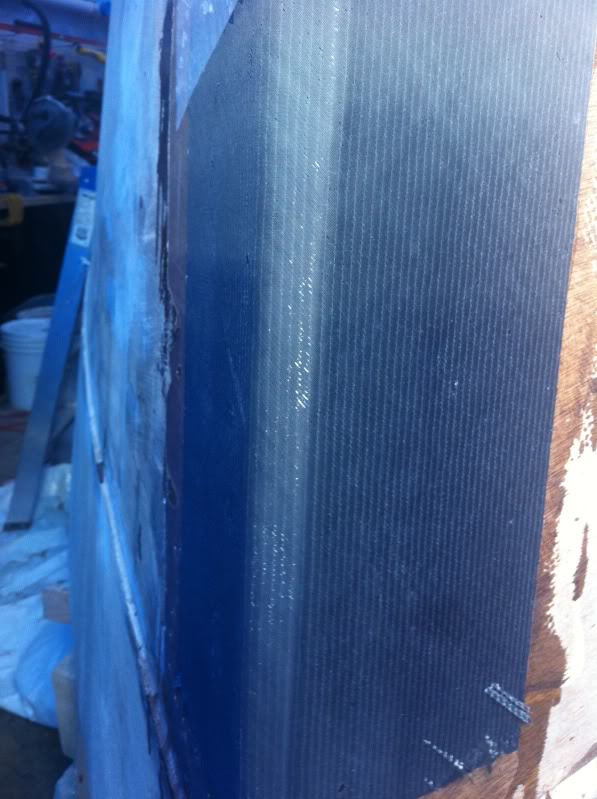
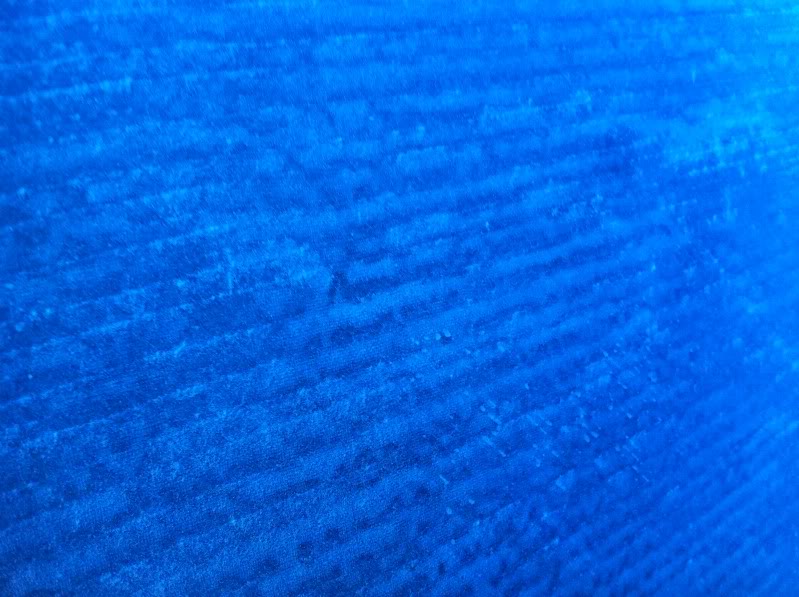
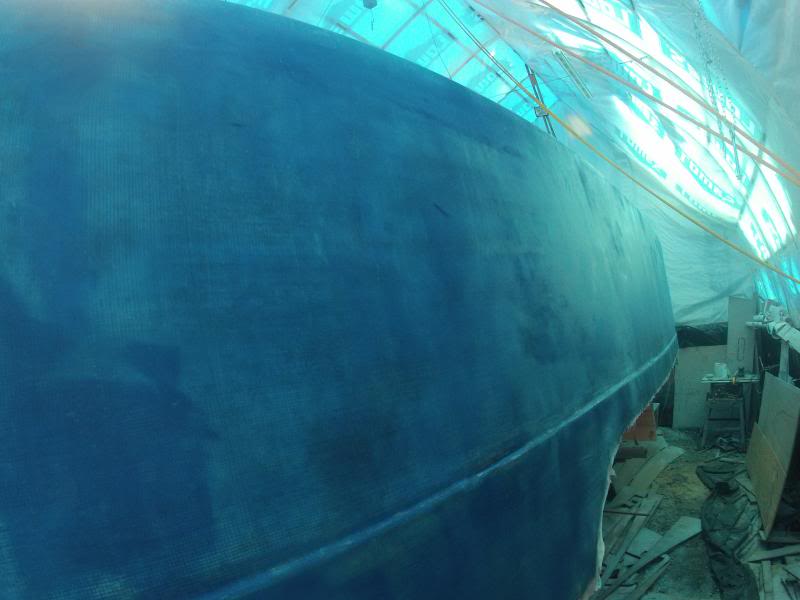
As well as the carbon fiber you saw earlier covering the bow there's an extra layer of Saertex on the stem and bottom of the keel. Why? well I have it and it's not a whole lot of extra work to put it in now. One extra layer of insurance maybe in case we hit a submerged D8 dozer or something! :)

img_244764_5_474867c755f9f75946bdef29fe954a0c.jpg


img_244764_6_0f39e6f6f7589e18ade8909b9ede2937.jpg


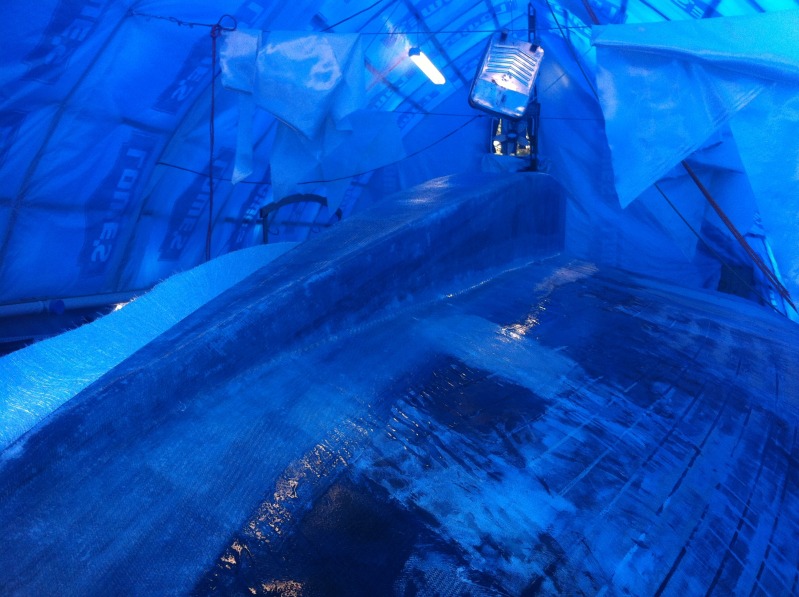
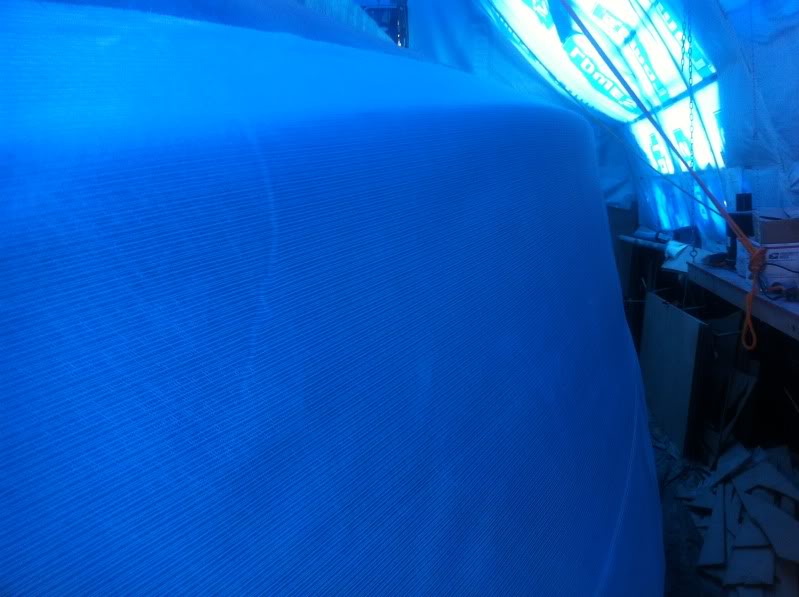
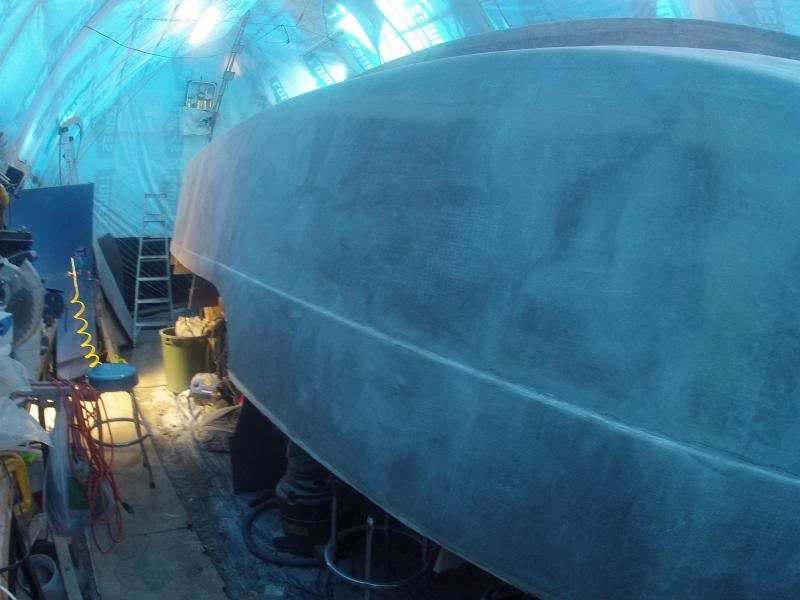
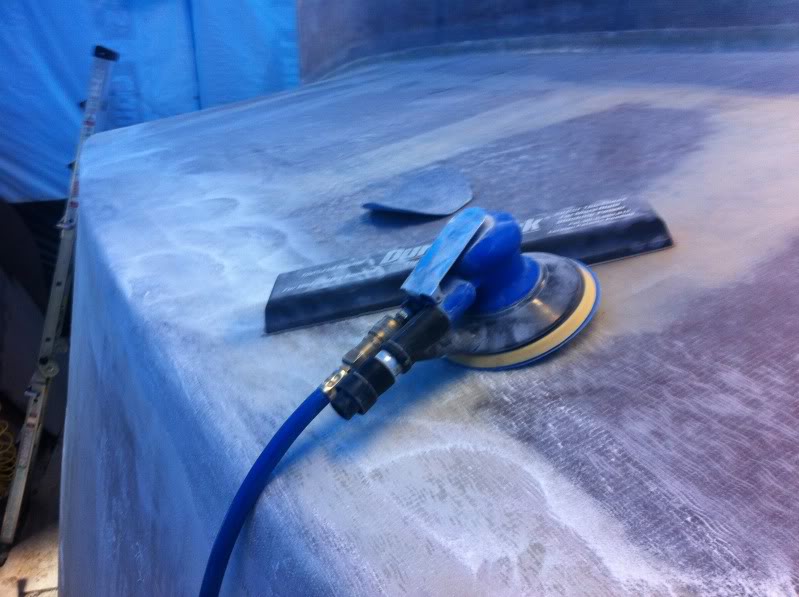
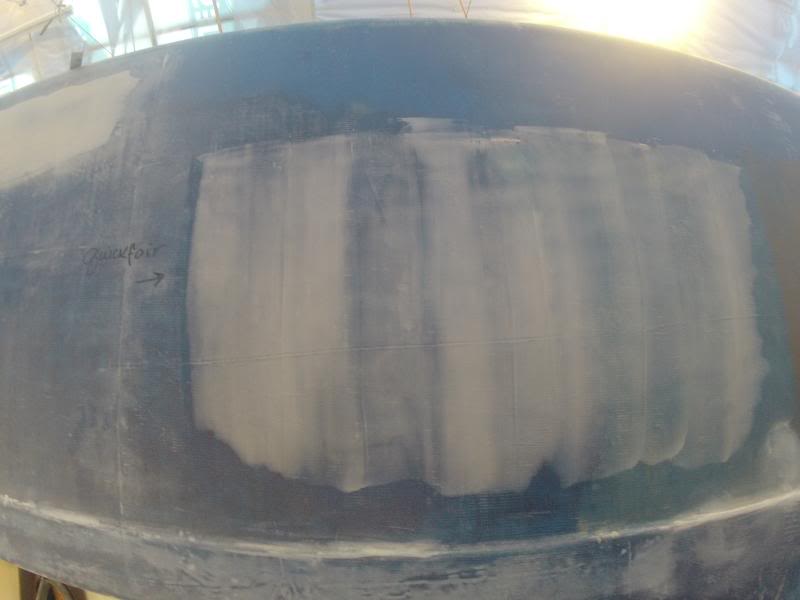
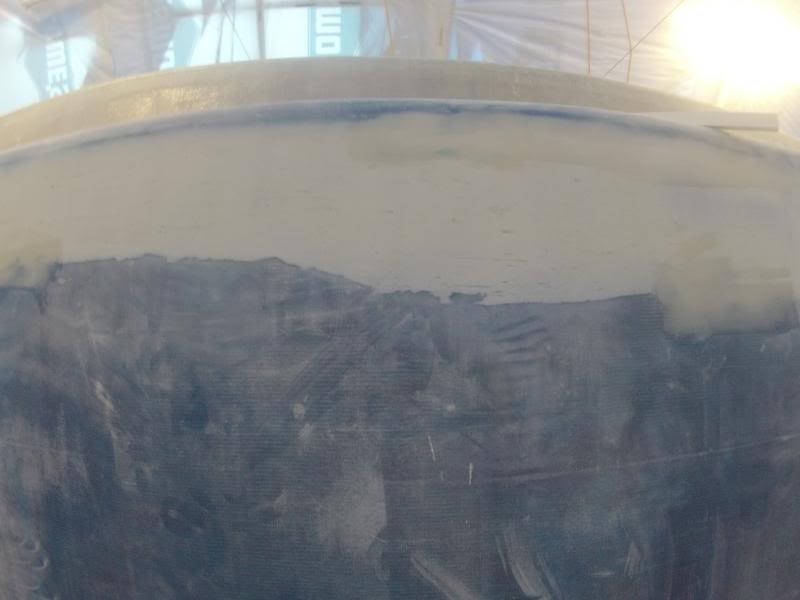
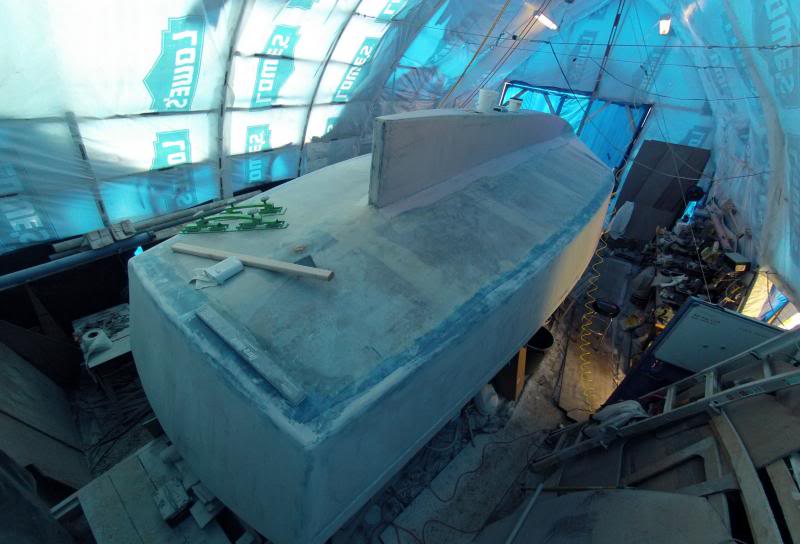
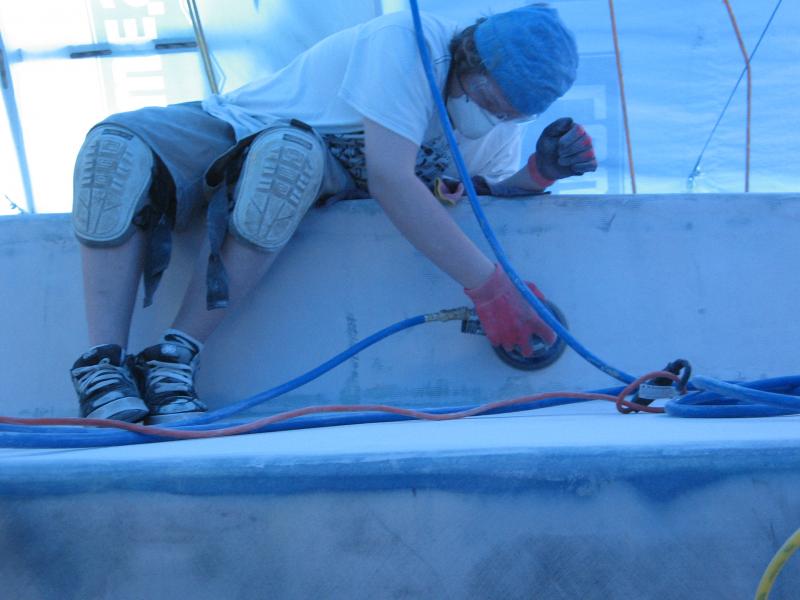
All the seams were double taped and faired a bit before any glass was laid on the hull. I know it's kind of ugly at this point but all the prep work is done except for some sanding then the glass gets rolled out.
img_244764_7_300b4dd0bbb20d3baf1cdffa4ca840d0.jpg


Standby for part 7b, glassing the hull.
 
Part 7b Glassing the hull

If I remember correctly the roll of 33 oz Triax I used on the bottom panels weighed just a bit over 150 lbs. No way I could hump it up to the top of the boat and handle it myself so I used the electric winch I rigged to the top of the shed. I'm a firm believer in letting the machines to the bulk of the work and save my poor aching back.

img_244770_0_94a3080e70763ebf0d71f60751a0c8b7.jpg


The fabric was all laid out and trimmed to fit. You can see the pieces hanging from the stays that span the shed roof. I put the stays there to prevent the shed from bowing out when I lifted loads with the winch. I couldn't leave the glass in place and walk on it so I had to fold it up and hang it out of the way. Not really an ideal situation but it was the best I could do at the time.

img_244770_1_24643fe7c225d56fdb4567f835bfc97f.jpg


If I remember correctly the bottom panels are just a hair over 25' long and 5' at the widest point. They overlap the chine about 4" and at the keel another 4" tapering to no overlap at the bow and back of the keel. I used extra tape on these sections to make up for the lack of overlap.

img_244770_2_bc1b3bbb877e22419cff3cf5ed26da64.jpg


The heavy triax leaves a pretty pronounced texture once wetted out. This caused me some concern because I knew I would have to sand before next layer went on. No chance of working wet on wet with this project, too big. It took me most of the day working alone to do one side. Luckily I could work from the step ladder with an extension handle to spread the epoxy. The triax sucked it up like a sponge and I think I used 6 gallons per side! *Yikes* But when you think about it that's not too bad, one layer of triax replaced two layers of biax.

img_244770_3_b8d0327b7df253601bef286f1cf5833e.jpg


The 'Landing Strip' glassed! I was a bit luckier on the port side as I had help mixing epoxy! Job still took 4 hours to complete.

img_244770_4_caabbeb4c7d214d584b7a52d2eb1e1d0.jpg


The extra heavy bottom glass left a pretty big edge to be faired. I ground them down a bit then faired them out as best I could. I knew this would help down the line so I did what I could.

img_244770_5_8e7d9aa1dc5b51f7ccbfa28ae7da04ca.jpg


I think it was about this time I took my little tumble down the stairs and tore up my right knee and pulled something in my back. I don't remember exactly how much time passed before I got back to the boat but it was mostly over one winter. The next step coming up is the basalt fabric on the transom and the glass on the sides. Standby....
 
I often get asked 'how much is this boat going to cost?', well I've tried to track what we've spent over the years and capture that in a spreadsheet. I've always had a spreadsheet online to share with other builders/dreamers and have now included a couple of spreadsheets on our web log to illustrate what it costs: M/V She:Kon: Added a few features
 
What's inside the box keel Rick?
Nothing right now Eric. Eventually there'll be a shower sump & bilge pump in the fwd section and ballast. In the engine room just a drip pan under the engine and two bilge pumps.

I had considered putting batteries in there. They'll fit but I don't think it's the best place for them.

img_244996_0_abcfb055a360f1694b2dbc7130fbc905.jpg


I want to keep it as clear as possible. Makes fishing tools out of it a lot easier! :rofl:
 
Part 8 Glassing the sides & Transom.

Once the 'Landing Strip' and the 'Bowling Alley' were glassed & sanded it was onto the sides & transom. I did the transom first with the help of a buddy from Montreal, accomplished boat builder, Peter Lenihan. Peter's built himself a beauty of a Bolger.

img_245513_0_208c5818a627d81b0d9605e9d7d9f59a.jpg


I decided to use the remaining two yards of basalt fabric I had left for the transom. It really is very nice stuff to work with. If I remember correctly it was 22 oz biaxial. It wets out extremely well and conforms to complex corners easily. I used peel ply on this section hoping to get a really nice fair transom.

img_245513_1_071901e43f216e0ae316e8a212f23664.jpg


All I had at the time was my cell phone and it wouldn't take a good picture of the finished product. The basalt is near jet black when laminated, almost as black as carbon fiber.

Anyhow, next came the sides. These get three layers total. One 1708 0/90 and one 1208 45/45 and a final layer of 10 oz satin weave. Working along this time I knew there was no way I could get all three layers done on both sides in one shot so I had to do them one at a time.

img_245513_2_a1ad5932875e949a1ad81d36ca4c5615.jpg


img_245513_3_8a5553494dd804eb81bea3a7d4b5859b.jpg


I used peel ply again on this layer and I think this side turned out Ok.

img_245513_4_25dfe81a9563bd32c803d7d5ca74ebaf.jpg


No dry spots but a couple of bubbles at the chine. These were ground out and patched.

img_245513_5_578e37077ce6e7688a570e22ec98a608.jpg


Moving onto the other side I ran into an issue that I think was related to the cold temps I was working in. Ripples! The cool temps (low 60's) combined with the slow hardener allowed the epoxy to slump inbetween the fabric weave making these ripples. I panicked!

img_245513_6_4d12f2274aa8edcde2f30bd1584f84e4.jpg


All I could do was put the sander to them and hope for the best. What I found was the fabric was well set to the plywood underneath and I was only sanding off the tops of the epoxy ripples not touching the glass (hardly).

Both sides were lightly sanded and the process repeated with the 1208. I didn't use peel ply this time as I figured I'd likely have to sand it anyways before the final layer of satin weave.

img_245513_7_f0fa02938df88568cc4fbb6489f54d10.jpg


The 1208 later also got put on the bottom & keel at this time. It went a lot quicker so I could get more done in one session without burning myself out. This is play 1208 with no mat on the back and it wets out very well.

img_245513_8_797f86c6b6ebd8e27b3e772c6564907f.jpg


I tinted the last layer, satin weave blue so I'd know later on if I was sanding too far into the reinforcements.

img_245513_9_93c8c9138972346d3739642ca7541d13.jpg


I think this took me up to the end of the building season pretty much. I did a few test patches of home brew fairing compounds and tried some Quikfair I had. Thought and read a lot about fairing over the winter 'cause I knew that was coming next.

Standby for the following spring (2014).....
 
Part 9 Fairing and Sandinsanity

A lot of time was spent feathering out the fabric edges where they overlap especially at the chine. If I remember correctly there are 4 layers of 6 oz tape, one layer of 33 oz triax, 1 layer of 1708, 2 layers of 1208 and 1 layer of 10 oz satin weave all overlapping at this point. I feathered them out as I went because I knew the buildup of tape edges would be a hassle to fair.

img_245520_0_7f9ec8643f18738e146fa0dbf5d49a5d.jpg


As I mentioned before I tried out some home brew fairing compounds with stuff I had. Wood flower, fumed silica and microspheres. I never did settle on a recipe that I liked. I did have some Quikfair and tried that. Pretty simple stuff to use. Ease of mixing and consistancy were important so I decided to use the Quikfair.

img_245520_1_abc12c42ec08c05fd56b6302c1fb6a6f.jpg


This shows the fairing required to try to get the chine fair. I had to do this a couple of times, fill, fair, fill, fair and still had issues.

img_245520_2_33abef6eb6029d7caf2b241d61273b1f.jpg


Luckily most of the chine will be below the water line so it's not really a big issue it's just I know it's not fair. I don't mind spending the time to try to get it as decent as possible.

Also did some more shaping around the bow thruster exit. This took some time, all done freehand and shaped with the RO.

img_245520_3_9a096abd83b5f3ca8ff91791b1528085.jpg


I ordered myself 3 gallons of Quikfair and while waiting for that to arrive I used what I had left from the year before to get a start on the bow. This is one section I want to try to get perfect, if I can, because a lot of it will be above the waterline.

img_245520_4_a4358b7b903320da60e48304d7f6228f.jpg


As of this time I've got two layers of Quikfair on the bow and will likely need another before it's ready for primer. When supplies arrived I moved onto the sides and transom.

img_245520_5_6ad44024283e43dc5b992f410746dce6.jpg


In October of last year I ordered two Flexicat tools. A 22" fairing spreader and a 33" sander. At the time I fully expected to get the tools quickly so I'd have them for the start of the season.

Well long story short that didn't happen. The US supplier couldn't get any inventory from the mfgr in EU. Apparently the company wanted to move to a new facility. The contractor who was supposed to mfgr the tools went bankrupt and left them hanging in the breeze with no way to fill their orders. The US supplier graciously loaned me two Flexicat sanders they had as demo's so I could at least get started. This left me with no choice but to use Bondo and drywall spreaders to apply the goo.

img_245520_6_9327660d4c86b5c3128e668790809ce4.jpg


I started on the sides but in hindsight I should have done the bottom first. Learned how to work with this stuff where cosmetics weren't an issue then moved onto the sides where it is. I ended up chasing my tail a lot. Fill, fair. Fill the lows and fair. When I did that I ended up with lows on either side of a high spot which I'd have to go back and fill/fair again! Round and round it went till I gave up and just sanded the crap out of it all to get back to fair. Live and learn.

img_245520_7_76b74d5db4176d9d3de52a0053b3a180.jpg


I tried a couple different guide coats, regular cheap flat black sandable primer and 3M Dry Guide Coat. The 3M stuff is for later use and the flat black primer really sucks if you get it on too thick. It's weird stuff. 10" from the hull, too much goes on, 10-1/2" from the hull and it just falls to the ground Oh well, sand it all off and try again.

img_245520_8_f91dd5d11d419985402ca9740876be77.jpg


Eventually, with a lot of elbow grease I got the sides and transom worked fair to the point where I think I'm ready for high build primer.

img_245520_9_0ab76e9e60ff44035f17afb29dd244d3.jpg


So, we're almost caught up. Here's a shot of the bottoms getting faired. As of right now both bottom sides have been faired and almost finished sanded. The keel has yet to have some Quikfair applied and sanded. There'll be a couple rounds of fill/fair on the tape edges and fillets but I suspect that'll happen pretty quickly.

img_245520_10_17ae9f65c6537da4042aaf6512da587c.jpg


Once the fairing is done I'll roll on a couple coats of neat epoxy and sand. When that's done I'll shoot a couple of coats of high build epoxy primer (actually a barrier coat like Interprotect 2000e) and the bottom up to the drawn waterline will get an ablative antifouling.

Whew!!! That was a mouthfull! AND then, we flip this whale over!

Just a cool pic!

img_245520_11_a35af5c11b6328e320ed47c16d56ffa1.jpg


There. We're caught up. From now on it'll be nearly live updates!
 
Great stuff and a beautiful job. Thanks for posting.
Question. Are you keeping track of your hours? Working not thinking. lol
 
Great stuff and a beautiful job. Thanks for posting.
Question. Are you keeping track of your hours? Working not thinking. lol
Thanks for the kind words Larry. They help.

No, not keeping track of hours at all. It's too depressing a statistic in a home built project! :blush:

I've seen the 28' version built in 8 months by two guys. One was a pro. I've also seen the 28' version built in 3 years by one guy. A lot depends on the quality of the finish you're trying to achieve. I know mine won't look like it came out of a mold but it'll be as close as I can get it.

Thanks again for looking in.
 
Hey Eric.

Here's an interesting vid on Youtube of a guy who stretched his sailing cat.

Boatbuilding - How To Add 5 Feet To Your Cruising Catamaran - YouTube

Now I know why I didn't do that to my Albin or Willard. Looks like he stretched his wife to about the limit. Probably WAY beyond the limit for most women... or men. I think stretching a wood boat would be more enjoyable. All that goo and dust and fumes and FG itch and suites and gloves. How are you w all dat? Looks tike your'e fine actually.

About the box keel I figured you'd be putting some heavy things down there and you are. Hate to bring this up but are you water proofing your battery attach cables so the box keel can get flooded w/o trouble? Perhaps your start batt will be higher up. Our keel is filled w concrete and steel punchings. No caged up electrons to get away. I've never flooded a batt. What happens? Probably not much but I would thing a lot of electrons would be going places in a hurry. Warm up your bilge water?
However I suspect that if one dosn't put a lot of weight in a box keel it could have a negative impact on the stability and righting moment of a boat. After you've heeled a few degrees w an empty box keel it would seem to me that the box keel would lifting on the high side of the boat aiding forces that tend to capsize the boat. Does that make sense .. to anybody?

What ever happened to TAD? Haven't seen him for awhile. Probably too busy on his work or/and BoatDesign.net
 
Last edited:
Hey Eric

I don't think I'll put the batts down in the keel. If it needs ballast I'll use something inert instead. Not having any idea as to the conditions the batts will have to live in down there I think it's best to keep them higher up and dry.

Some builders have indicated that their 28' versions are a we bit tender in a following sea. Most add weight, 400 or 500 kg of ballast strategically placed usually addresses the worst of it. As well as for hoisting the dink we'll add a conventional mast that'll be able to carry a steadying sail.

Back to the sanding. Standby....
 
Rather than the lack of weight low in the boat stability problems on a following sea can come from side forces on the keel. You've heard of a boat tripping on it's chine to more readily capsize? Well when a boat moves violently sideways any resistance laterally will promote serious rolling movement. Even to the point of capsizing.

Once our boats are boats we have little chance of changing their shape so a low CG may be needed to save the day .. So to speak.

This is one of the wonderful advantages of Sampan cross sections or multi-chine or extremely soft rounded Chines. Keels are probably less likely to cause a capsize than a deep and sharp chine but still may cause some tripping force that may roll the boat in an uncomfortable or scary way or even knock her down.

It would be rather ideal to have the batts down in the keel on your boat Rick. AGM batts as I recall don't need to breath or need fluid added so could be down in the keel (assuming they'd fit). One could make the cable attachment permanent and seal the exposed metal w 5200, truck bed liner goo (or?) and make normal connection to the batt via "pigtails" about 2or 3' long.

This is probably a "before coffee" idea but may just may have merit. Having the batts up higher would seem an opportunity lost. And adding considerably more weight to the boat in the form of ballast would seem a negative too.
 
Thanks for the kind words Larry. They help.

Not keeping track of hours at all. It's too depressing a statistic in a home built project! :blush:

QUOTE]

:rofl: ... here I was thinking I was the only one that thought like that during the building process :rofl: ... Good to know im not alone :dance:

Great work mate! ... keep it up :thumb:
 
:rofl: ... here I was thinking I was the only one that thought like that during the building process :rofl: ... Good to know im not alone :dance:

Great work mate! ... keep it up :thumb:

An ole' wise man once told me: "It's a very fine line between genius and insanity." You sir have one foot firmly planted on each side of that line! :thumb: I'm watching your thread with great interest.

Thanks for looking in.
 
Two of us managed to get 5 hrs of sanding in on the keel. A few more hours dealing with little details on the fairing then it's almost ready for epoxy coat then primer. If I were hazard a guess we'll flip this whale over somewhere around the 30th. of this month! :whistling:
 
Got dust? :thumb:

img_247218_0_9c22b96fe6ff276aea48039b1f2e2485.jpg


One more go-round on the sides of the keel then some minor detailing and we roll on some epoxy. :cool:
 
Happy Independence Day to our friends south of the border but work goes on in the Big Blue Boat Building Shed. I hope you and your loved ones are all safe from the hurricane.

I put my lil' shop helper to work with yet more sanding on the keel. We're almost there. A few minor spots to fill & fair but that's 'bout it. I'll start sealing it up with a few coats of neat epoxy.

spacer.gif
img_247432_1_f982e7890970bf559d003e4fbe5fc6df.jpg


Sunday I'll be shopping for hardware I'll need to get to rig the Gin Pole. 16' long 6"x6" is on order and is what I'll use for the gin pole. Compressive breaking strength is 26,137 lbs. X and Y axis buckling is approx. 1386 psi. My best guess his this hull weights about 1100 lbs tops so I think I've got enough capacity to lift it. I'll use a 2500lb electric winch for lift and a come-along to pull the bottom sideways in the shed. That's the plan anyways.

Web log updated: M/V She:Kon: It may have been
 
Crude animation of how I think I'll flip the hull using a Gin Pole. A lot of details were left out. I've never made an animation before. It was really clunky doing it in Sketchup. So there's no tag lines or come-a-longs showing etc.

Animation Flipping the Hull - YouTube

Carpal tunnel has been kicking up bad these past two days so I've laid off sanding for a bit. Back at it tomorrow.
 
Once she's done, it will feel your heart of proud and joy only looking at her. Imagine cruisng in.

See when I turn mine right side up!
 
Last edited:
Once she's done, it will feel your heart of proud and joy only looking at her. Imagine cruisng in.

See when I turn mine right side up!
Oh man, that's just way too easy! :D That guy in the yellow shirt sure earned his lunch that day! ;) I saw that video awhile back when I was reading through your thread. I had thought about doing it that way but I can't afford to invest that much in hardware just to turn one boat over.

Thanks for sharing Portuguese. I enjoyed that! Looking forward to seeing yours in the water soon!

Cheers
 
Grab a couple of frannas mate. Cost me $350 for them to flip it. took 10 mins. easy as
I had to google frannas. ;) I thought you were talking about those undocumented democrats they have in the states! :lol: I considered a crane but I don't want to have to demolish the shed to flip the hull then have to rebuild it. :banghead:

I found this blog entry awhile back that got me on the Gin Pole idea.

Boat Yard 26


Yeah cool. Ya Can't put wheels on the frames and wheel her out, flip her then roll her back in?


Sent from my iPad using Trawler Forum
 
Last edited:
Yeah cool. Ya Can't put wheels on the frames and wheel her out, flip her then roll her back in?
I would still have to demolish the front of the shed to do that. I'm all for the path of least resistance and cost! ;) The wife tells me I can squeeze a nickle and make the beaver sh*t! :eek:

2Q==
img_248030_1_f0b07ddd04818dc04593673e2f519148.png

2Q==
 
Ok, you should know by now I'm tight with the sheckles. I'm building this boat totally out of pocket, no money borrowed to do it so I'm being frugal where I can. I have a budget of about $750/month for boat stuff.

So get this. I wanted to order a longer (1 meter) intermediate shaft for my Python drive. Contacted the mfgr in Holland. Cost was very reasonable. €55 and then it ballooned from there! They only accept Electronic Money Transfer bank to bank.

Shaft: €55 - $80.00
Shipping: €80 - $116.25
Bank surcharge: $30.00
EMT: $100.00
Total: €224.51 - $326.25 Cdn

That's almost exactly 4 times the cost of the part! :ermm: I think I'll have a local machine shop reverse engineer a longer shaft for the Python Drive. Still gonna be spendy but whoever said building a boat was cheap eh?
 
You'd think in this day and age Banks, who are so very very good and stripping the lint from our pockets would at least be competitive with online services. I sat down at the computer this afternoon and tried 7 different online payment services, Western Union, HyperWallet, Xoom etc. before I landed on Xendpay a UK company that will process the online payment and direct bank account deposit into a company held account. :thumb:

The others would only let you send money to an individual. :banghead:

Web Log Updated: M/V She:Kon: Just a weeeeeeee bit of frustration
 

Latest posts

Back
Top Bottom