My Teak Table Project

The friendliest place on the web for anyone who enjoys boating.
If you have answers, please help by responding to the unanswered posts.

ksanders

Moderator Emeritus
Joined
Feb 24, 2011
Messages
6,284
Location
USA
Vessel Name
DOS PECES
Vessel Make
BAYLINER 4788
I've never liked the table in my pilothouse.

Its teak, and its not too bad, but its a fold out unit, with no edges, and we almost never fold it out, so well, I dont like it.

I had this really nice piece of Burmese Teak left over from another project so I decided I'd try to make a table today.

The board I started with was a little over 13" wide and 7/8" thick, and just over 5' long.

The table I wanted should have a surface area of about 12"X20" not counting the lip.

So, off to work I went. I used the surface planer to get the wood to 3/4" thick, The jointer to true things up, and the router table to cut the edge pieces.

The edge pieces required a little imagination, since I cant cut a groove in a curved piece. I had to notch the table top to fit the lip properly so the edge pieces don't stick out the sides and end.

The table is glued up and ready for tomorrows work, which will be to add corner pieces so the table top looks to be the same thickness in the corners.

Also I'll be adding a hidden slide out cup holder to the bottom of the ends.

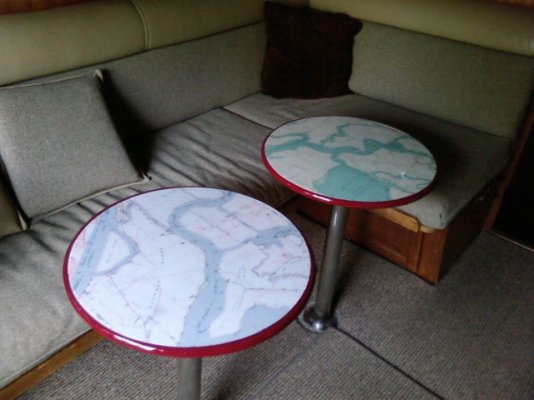
Here's photos of it so far...

teaktableclamp1.JPG


teaktableclamp2.JPG


teaktableclamp3.JPG
 
Nice work, Kev. Will there be a before and after photo? I'm interested in how the new table size changes the space. I've got a nice Stidd helm chair to add to my pilothouse, but the table should be modified a bit for space to walk around.
 
Nice work, Kev. Will there be a before and after photo? I'm interested in how the new table size changes the space. I've got a nice Stidd helm chair to add to my pilothouse, but the table should be modified a bit for space to walk around.

Thanks,
Yes, I'll post photos as the project progresses. This is my first teak table and it's of course a work in progress.

I would love to find a Stidd helm seat!
 
Last edited:
OK Guys heres a a couple of photos of how it looks at this point.

I still have some issues with the corners to work out.


teaktablenoclamp1.jpg


teaktablerawcorner1.jpg


In order to fill in the corners required more steps than one might think

First I took a piece of teak and cut to match the radius of the table top corners.. Not just the radius but the grain direction as well.

Then I rounded off the edge of the radius to match the bottom of the table

After that I had to surface plane the teak to match the thickness of the lip on the bottom of the table which is 1/2"

Last was final fitting by hand and glup up.

Here's a photo of how the corner looks prior to glup up. The gap of course goes away once the wood is clamped together.

teaktablerawcorner2.jpg


Tools used today:
Radial arm saw
Band saw
Surface planer
Router table
Bench mounted disk and belt sander
 
Last edited:
Nice job matching the grain pattern. Looks good, what are you using to glue the teak? Before glueing wipe with acetone to get rid of get a better bond.

Sent from my iPad using Trawler
 
So that's what you do in the winter

Looks good, fiddles what a novel idea. I can't tell you how many times a drink fell on the floor from mine. Looks like a nice improvement. Funny how these simple ideas turn into bigger projects than planned. What are you going to finish it with.
 
Great work - I am looking forward to my next wood project myself. Practical and good looking what a great combo!
 
Nice job matching the grain pattern. Looks good, what are you using to glue the teak? Before glueing wipe with acetone to get rid of get a better bond.

Sent from my iPad using Trawler

I'm using Titebond 3 after an acetone wipe.

Looks good, fiddles what a novel idea. I can't tell you how many times a drink fell on the floor from mine. Looks like a nice improvement. Funny how these simple ideas turn into bigger projects than planned. What are you going to finish it with.

I really like oil. The challenge is that oil has a tendancy to let things like water rings absorb into the wood.

I'm not as big of a fan of polyurethane. It works, and its tough, and its shiny but its difficult to fix.

Here's a photo of two scrap pieces, both cut from the same board. The top one has three coats of spray on high gloss polyurethane. the bottom one has three coats of Watkins oil, Natural or no color.

teaktablefinishsamples.jpg

I like the oiled look best, but I'll probably go with the polyurethane.

In order to help solidify the decision I'm doing an experiment. Right now I have a glass of ice water sitting on the oiled sample.

In a couple of hours I'll remove the ice water glass, and wipe off the sample.

Then I'll see if the watermark goes away, and how long it takes to do so. That will help allot with the decision.
 
...I'm not as big of a fan of polyurethane. It works, and its tough, and its shiny but its difficult to fix...

Looking good! I agree with gloss polyurethane is to shiny but have you considered satin? We refinished 2 tables with it and like the hard durable finish plus the satin fits in with our other wood finishes.
 
I just had an idea guys, please tell me what you think...

When I was a kid in the 60's I remember my dad gluing up table tops then pouring boat resin on them. He learned this from a buddy of his that lived down the street and built surfboards named Ernie Tanaka. I remember Ernie built me a water ski as a kid as well, same kind of finish I supose.

He taped up the edges and poured probably 1/8 to 1/4" of resin. On the edges he painted resin on.

Then he sanded the drips off of the lower edges and buffed out the table top.

I'm and old man and dads been gone for a very long time, but I sure wish I could run this by him.

What do you guys think about that idea??
 
I used resin to cover the tops of these tables. I used the West System 2-part epoxy resin which I purchased from Tap Plastics. They also provided the instructions and decoupage protection for the paper maps I used.

They look nice, but after a few years, I am beginning to notice minor scratches in the surface. I suppose a fine grit buffing might help remove the scratches, but it hasn't become noticeable enough for me to want to move that to the top of my to-do list yet. Besides, I'd have to research it first to see if it's even possible or practical.
 

Attachments

  • tables.jpg
    tables.jpg
    57.1 KB · Views: 115
There's a local guy over in Stuart that also uses the resin to seal his custom sketched tables. They sure look good, but I can't say anything about the life....no tables over a year old yet, and most of them are going on luxury yachts and probably get constantly polished with stray bikini tops.
 
Epoxi or resin don't provide UV protection.

So if fade is an issue these aren't good choices. Resin needs thin deck cloth (Tap Products 1522) is one brand , to not crack over time. You are using solid teak which expands and contracts with humidity changes so this can cause problems as well.
If you want a long lasting finish, try using penetrating epoxy followed by 4 coats of a good gloss varnish, scuff with green scotch bright pad between coats of gloss. After 4 coats flatten the finish with 220 followed by 600 grit to eliminate any imperfections and coat with either 2 to 4 coats gloss or satin varnish, sand lightly with 220 or 600 using a tack cloth between coats. This will give you a piano like finish that holds up well. Put the same number of coats of finish on all sides of your table, top and bottom.
Epiphane varnish holds up the best of the varnishes I've used. West Marines best varnish is made by Epiphane. It's about a buck cheaper. Two part polyurethane, like Interlux Perfection Plus may hold up better but require careful degreaseing and should not be applied over oil based stains, so I tend to stay away from them.
Good luck, the finish always takes longer than the construction. Don't get in a hurry and ruin all that good work.
 
Kevin:

Re teh resin idea: In 1973 I built a kitchen table of pine boards. I covered the top with a 1/4" thick layer of polyester casting resin, the kind they used for arty things like bugs in a ball. It looked really good, and since my kitchen didn't get direct sun on it, the shine and clarity lasted well too. One trouble I had was that the resin was only poured on the top, so when it shrank, the underside didn't shrink, so the table bowed. If you do something similar, you should do the underside too to avoid that problem.
In 1979 or so, I tried the same stuff on the teak hatches on my sailboat. Looked good for the first summer, then the UV made it cloudy, so it had to come off.
 
Well guys I decided to go with polyurethane.

I also decided to go with plain old spray on gloss minwax polyurethane. There might be a better "marine" product and I'm sure there is, but I've used this stuff before and it works really well.

All of the maple trim in my house, and all of the maple faced doors are finished with it, and, well they've held up pretty darn well.

That and it was something I could go to Home Depot and actually buy, vs taking a day to drive to Anchorage.

So, I sprayed four light coats so far, leaving about an hour in between coats. I'll spray a couple more tonight and let it set for a few days and see what I want to do next.

I'm thinking after that it'll be a light sanding with say 600 grit, or with a scotch bright pad then I'll put another one or two finish coats on.

Here's what it looks like thus far. Rememvber this was one solid board on Saturday morning

teaktablefourcoats.jpg
 
Nice work .Finish looks good .
 
The finished product

Well, my teak table project is complete. Now i just need to wait until March when I go dewinterize the boat for summer to install it.

I started with a board, and an idea. I am no professional woodworker, but I am really happy with the results.

The table ended up with 6 coats of minwax polyurethane spray on varnish. The finish is very smooth, but I'll probably use some 0000 steel whool on it when the varnish has cured some more, to make it perfectly smooth.

teaktablefinishedtop.jpg


teaktablefinishedcorner.jpg
 
Greetings,
Mr. k. Sweeettt! I wasn't sure how the corners would turn out but they appear to be A-1. Just had a thought....How about cup holders with cups UNDER each corner and very small cues? Could be a nautical version of Beer Pong, Rum Pong, Grog Pong........ Beer pong - Wikipedia, the free encyclopedia
I anticipate a VERY interesting outcome if you're waked.
 
Great Job

Nice work Kev.
I think poly was the best choice - very repairable, just sand and recoat.
 
Greetings,
Mr. k. Sweeettt! I wasn't sure how the corners would turn out but they appear to be A-1. Just had a thought....How about cup holders with cups UNDER each corner and very small cues? Could be a nautical version of Beer Pong, Rum Pong, Grog Pong........ Beer pong - Wikipedia, the free encyclopedia
I anticipate a VERY interesting outcome if you're waked.

Thanks!

I actually thought allot about cup holders. The thought would be to add a slide out, thin piece of teak to the sides that has a hole drilled in it for a tapered cup. I saw a photo of a setup like that and thought it looked great!

Then reality set in...
90% of the time we drink out of water bottles. In the evening we have a glass of wine or a beer. The wine might fit in a tapered cup, but not a beer bottle. Then I thought of a actual cup holder, either a insert of something a few inches thick made from teak. The problem with that idea is you'll hit your knees on it when its not in use.

I have a great idea for teak water bottle holders. Think of a teak box, made of say 1/2" thick stock probably 4" high to put a water bottle in. Possibly with some weright added to the bottom. You could for example use some lead encased in resin in the bottom to make it more bottom heavy.

Glue some felt to the bottom, or little rubber "feet" available at lowes and you'd have a pretty nifty and effective cup/water bottle holder.
 
Nice work Kev.
I think poly was the best choice - very repairable, just sand and recoat.

Thanks Tony!

I actually did a teat on a oiled piece of teak yeaterday. I set a icewater filled glass on a piece of oiled teak and let a water ring form.

The water ring is now permenant. I thought it might dissappear as the wood dried out but thats not the case.
 
You gotta lot of nerve having a project come out like that and then sayin you're not a carpenter. How will the table be fastened underneath....double pedestal?
 
You gotta lot of nerve having a project come out like that and then sayin you're not a carpenter. How will the table be fastened underneath....double pedestal?


Thanks! I'm an electrical and electronics person by trade :blush:

The existing table has a alumanium pedestal style mount. I'll just ubscrew the old one and screw this one on.

As long as I dont use too long of screws :rolleyes: I'll be good to go
 
Well, here's an update and a lesson learned on my table.

The next day after my 6th thin coat of spray on minwax polyurethane I was suprised to find the finish, while looking nice was gummy.

I was to say the least unimpressed with this. It felt dry to the touch but when I tried to lightly sand it to put on a final coat it gummed up.

So, I took a handy scotchbrite pad soaked in laquer thinner and removed that stuff. It took all of less than an hour and I had my nice table back down to wood.

Well, after some very light sanding I headed to the local store for something better than minwax polyurethane.

Remember my options in Wasilla, Alaska are fairly limited, but I was able to find some old fashioned real varnish, made by a company called Cabot.

Guys, that varnish made the world of difference. I put one good coat on the table a day for three days, sanding with 220 grit in between. With three coats i now have the table I always wanted. The Varnish is 100% stunning.

Steve and others, you taught me a valuable lesson, and I'm glad for your advice, and glad my table didn't have to pay the price for my learning.

Thanks very much
 
Wow, Kev. In the end, a "conventional" product came through. I'm listening.
 
Kevin,

In my flooring business life I have never liked Minwax urethane. I have had good luck with everything else Zip Guard, Lasts and Lasts, Hard as Nails, Fabulon and what my supplier carries, Lenmar. There are others but I can't remember them all. On the other hand, I swear by Minwax stains.

A lot of the newer waterborn finishes are very good also. They will not give the golden hue of urethane but you can apply several coats per day.

Can't wait to see the finished product.

Rob
 
I have had some bad experience with polyurethane myself. I think that poly has changed some lately . I built a walnut bookcase this summer and tried poly myself and had the same results . I think that it has a tendency to dry on top to soon and not get dry underneath .I had to take it all off and start over and thin the poly for every coat. Also the natural oil that is in teak doesn't help either. I thinking on raw teak it might be best to put a couple thinned coats of epoxy before starting the varnish. I have had better results with the wipe on poly ,but for teak I think varnish gives the best results.
 

Latest posts

Back
Top Bottom