You are using an out of date browser. It may not display this or other websites correctly.
You should upgrade or use an alternative browser.
You should upgrade or use an alternative browser.
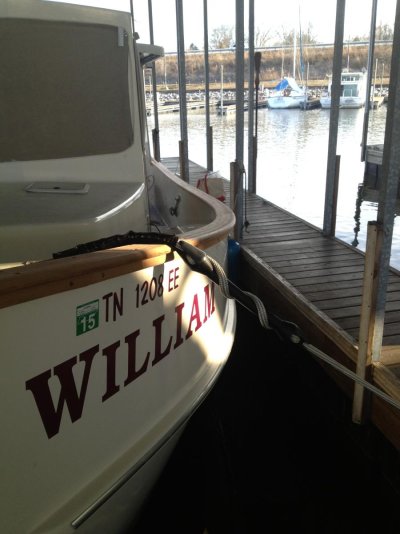
Winter Project Replace entire caprail
- Thread starter Pack Mule
- Start date
The friendliest place on the web for anyone who enjoys boating.
If you have answers, please help by responding to the unanswered posts.
If you have answers, please help by responding to the unanswered posts.
OP
OP
Pack Mule
TF Site Team
- Joined
- Jan 24, 2013
- Messages
- 3,749
- Location
- USA
- Vessel Name
- Slo-Poke
- Vessel Make
- Jorgensen custom 44
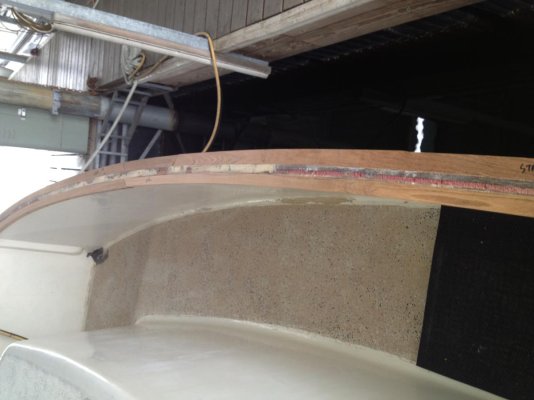
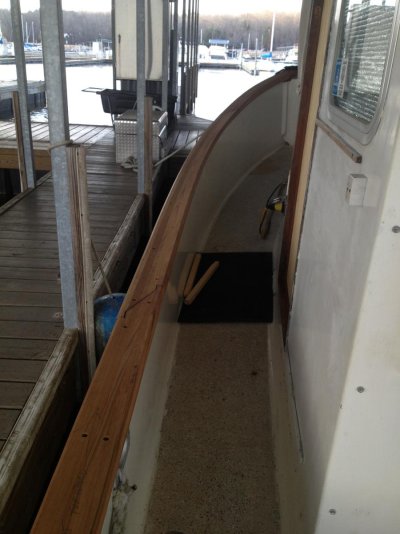
About 80% of cap rail stringers are dry fitted in place. Doors are taken off and boarded up . Going to make new doors and new tracks. also have the visor cowling off getting ready for paint. Looks like I might have to laminate the curved sections of the cap rail to help on yield. Anybody got any pics they want to share of their cap rail scarf joints?
Attachments


Here's a picture of one of Hobo's. We have 2 on each side. I opened them up with a Dremel tool and used TDS caulk. There were originally epoxied but there was to much movement at the joint and a finish wouldn't last. The cap rail is 4" wide.
I looked at others on the dock and all were similar to the Grand Banks in the second picture but the cap rail's were only a few inches wide.
I looked at others on the dock and all were similar to the Grand Banks in the second picture but the cap rail's were only a few inches wide.
Attachments


OP
OP
Pack Mule
TF Site Team
- Joined
- Jan 24, 2013
- Messages
- 3,749
- Location
- USA
- Vessel Name
- Slo-Poke
- Vessel Make
- Jorgensen custom 44
Thanks Larry ,Here's a picture of one of Hobo's. We have 2 on each side. I opened them up with a Dremel tool and used TDS caulk. There were originally epoxied but there was to much movement at the joint and a finish wouldn't last. The cap rail is 4" wide.
I looked at others on the dock and all were similar to the Grand Banks in the second picture but the cap rail's were only a few inches wide.
I like that stile joint. I plan on leaving a little bit of a space on mine to allow for caulk . I put a new cap rail on my old sailboat and did not allow space for caulk and had to go back and open up the joint . Not an easy thing to do.
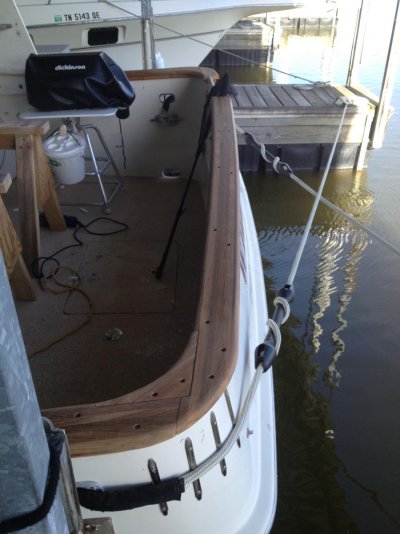
About how wide is your anchor platform ? I' m rebuilding mine and my old one was to narrow only about 8" or so .
...About how wide is your anchor platform ? I' m rebuilding mine and my old one was to narrow only about 8" or so .
Marty: Here are some pictures. It's 3" thick and is horizontally thru bolted and plugged in 4 places not including the anchor rollers. Hope these help. If you need more dimensions we're on the boat and it's a nice day here.
")
Attachments


OP
OP
Pack Mule
TF Site Team
- Joined
- Jan 24, 2013
- Messages
- 3,749
- Location
- USA
- Vessel Name
- Slo-Poke
- Vessel Make
- Jorgensen custom 44
Dang another reason I've got get one of these KK 42's . That's a heck of a platform.Marty: Here are some pictures. It's 3" thick and is horizontally thru bolted and plugged in 4 places not including the anchor rollers. Hope these help. If you need more dimensions we're on the boat and it's a nice day here.


Northern Spy
Guru
- Joined
- Feb 5, 2012
- Messages
- 4,075
- Location
- Canada
- Vessel Name
- Northern Spy
- Vessel Make
- Nordic Tug 26
That looks great!
RT Firefly
Enigma
Greetings,
Dayum' that's NICE!!!!!!
Dayum' that's NICE!!!!!!
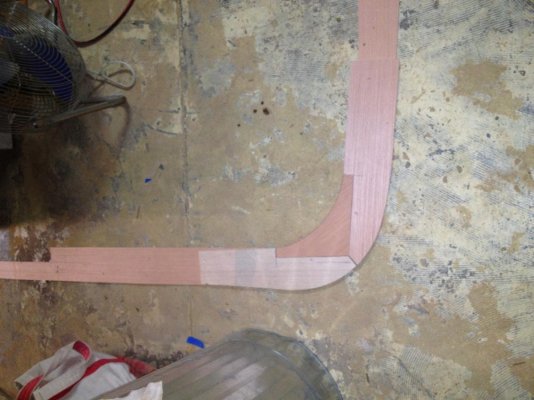
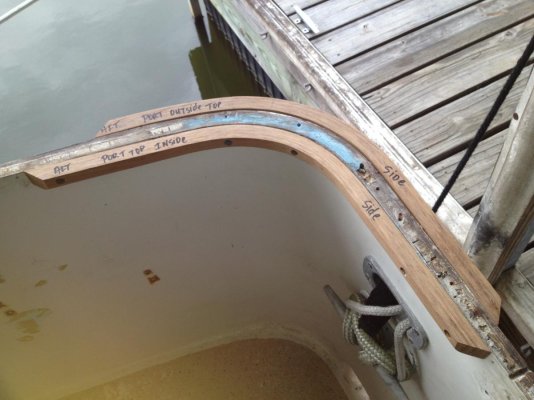
Trying to figure out these aft corners . Kinda going with this but not sure .Any suggestions? This one is messing with my head .
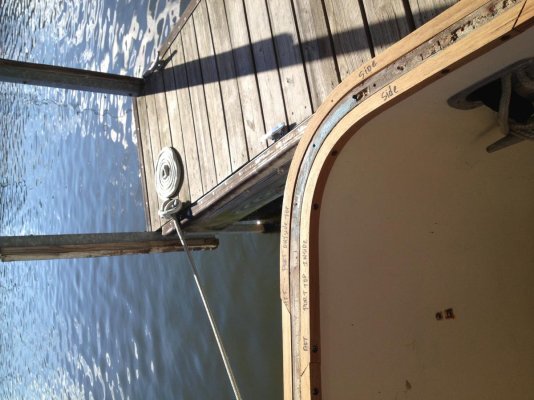
I'd go with it. It looks good and only a few joints. Here's what Krogen did on ours. The right side is 4" wide and the left is 5" wide. It's the stern port quarter.
Attachments

Nomad Willy
Guru
Yea it would even look better if you put a rather small inbd knee at the bend. Perhaps the same width as the two existing pcs or a bit smaller.
After looking at it a little closer the knee should be thinner .. Even half the thickness as the existing pice. By existing pice I mean not the whole thing just one of the two pices bending around the top of the hull.
After looking at it a little closer the knee should be thinner .. Even half the thickness as the existing pice. By existing pice I mean not the whole thing just one of the two pices bending around the top of the hull.
Last edited:
OP
OP
Pack Mule
TF Site Team
- Joined
- Jan 24, 2013
- Messages
- 3,749
- Location
- USA
- Vessel Name
- Slo-Poke
- Vessel Make
- Jorgensen custom 44
Smaller than the one in the template I made ?Yea it would even look better if you put a rather small inbd knee at the bend. Perhaps the same width as the two existing pcs or a bit smaller.
Nomad Willy
Guru
I just went back in the thread and see each pice is a laminated pice of 8 or 9 strips about 3/16" thick. Perhaps you could get up a bunch of clamps and lam strips and lam in a series of strips descending in length. The most inboard one being the shortest and as long as the bend. The rest being about 1 3/8" to 1 1/2" longer .. All of them curved a bit on the end.
Wish I could draw on this pad. This stuff is hard to describe in text. I know a way to do it but is considerable trouble. Take pics of drawings and post the drawings as pictures. Anybody know a better way?
Is my text at all clear?
Wish I could draw on this pad. This stuff is hard to describe in text. I know a way to do it but is considerable trouble. Take pics of drawings and post the drawings as pictures. Anybody know a better way?
Is my text at all clear?
OP
OP
Pack Mule
TF Site Team
- Joined
- Jan 24, 2013
- Messages
- 3,749
- Location
- USA
- Vessel Name
- Slo-Poke
- Vessel Make
- Jorgensen custom 44
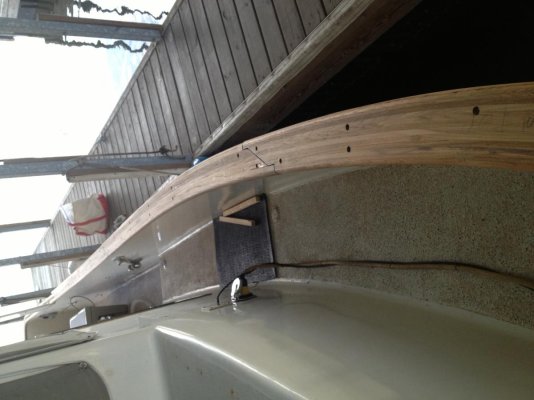
I could laminate the whole curve but that would take about 45 laminates 1/8" thk. Anything any thicker won't take the bend .the rail is is 4-1/2" wide .As the curve got straighter down the length I increased the width of laminates. The last sections that were the straightest my laminations were 3/4" thick .
I could laminate the whole curve but that would take about 45 laminates 1/8" thk. Anything any thicker won't take the bend .the rail is is 4-1/2" wide .As the curve got straighter down the length I increased the width of laminates. The last sections that were the straightest my laminations were 3/4" thick .
The corners of the eye brow on Hobo are laminated using the same method you are thinking about, though the are much smaller dimension wise. So far we have replaced 2 out of the 4 corners. The reason they failed was the finish was compromised and moisture got in and slowly started to delaminate the 1/8" to 3/16" laminated strips. The eye brow is now painted for a more easy monitored and maybe durable finish, I hope. IMHO the fewer pieces you need to fabricate the corners, the better off you are .
- Joined
- Apr 15, 2008
- Messages
- 13,731
- Location
- California Delta
- Vessel Name
- FlyWright
- Vessel Make
- 1977 Marshall Californian 34 LRC
Great joinery, Packmule. Very nice work!! It'll look tremendous when varnished.
OP
OP
Pack Mule
TF Site Team
- Joined
- Jan 24, 2013
- Messages
- 3,749
- Location
- USA
- Vessel Name
- Slo-Poke
- Vessel Make
- Jorgensen custom 44
Thanks FlyWright ,It's just dry fitted right now .Everything has to come off and put back down with caulk . I'm also building some new teak doors . I try to keep two or three different projects going at once.At times on a project like this things just aren't working or going the way you planned and you need to back away and work on something else .
I'm thinking on a couple coats of thinned epoxy first then varnish. Your finish looks great ,what is your secret?
I'm thinking on a couple coats of thinned epoxy first then varnish. Your finish looks great ,what is your secret?
- Joined
- Apr 15, 2008
- Messages
- 13,731
- Location
- California Delta
- Vessel Name
- FlyWright
- Vessel Make
- 1977 Marshall Californian 34 LRC
When I get around to stripping and rebuilding my doors, that's exactly what I plan...a couple coats of CPES, then lots of varnish. My favorite varnish is gloss Epifanes. It's what the PO used and I have continued.
Thanks for the compliment. I tried the Epifanes Wood Finish Gloss last summer with good results. It allows repeated coats without sanding between coats, allowing a faster buildup of many coats. It looks just like the Epifanes varnish.
Thanks for the compliment. I tried the Epifanes Wood Finish Gloss last summer with good results. It allows repeated coats without sanding between coats, allowing a faster buildup of many coats. It looks just like the Epifanes varnish.
Moonstruck
Guru
- Joined
- Nov 27, 2008
- Messages
- 8,276
- Location
- USA
- Vessel Name
- Moonstruck
- Vessel Make
- Sabre 42 Hardtop Express
Pack Mule, what a project! I am absolutely intimidated by it. I can't wait to see the new doors. Great job.
Nomad Willy
Guru
Pack Mule consider bedding the CR down w something that comes apart w ease like Dolphinite. But that particular product may dry out in your hot weather but if not it should be perfect. You don't need to seal out water on the CR do you? Does anyone know of a product similar to Dolphinite? It's sort of a putty like stuff that seals very well and stays soft and pliable for extremely long periods of time where there isn't extremely low humidity for long periods. I think I took some Dolphinite apart on my Willard that I'm quite sure was original. Still soft and the bedded part came off easily.
I use a lot of Sika Flex 291 and after 6 to 10 years it seems to always fail.
Tempted to use Life Caulk but I think I recall several here were not happy w it. Wasn't it designed to adhere especially well on teak? Teak is such a problem.
I use a lot of Sika Flex 291 and after 6 to 10 years it seems to always fail.
Tempted to use Life Caulk but I think I recall several here were not happy w it. Wasn't it designed to adhere especially well on teak? Teak is such a problem.
OP
OP
Pack Mule
TF Site Team
- Joined
- Jan 24, 2013
- Messages
- 3,749
- Location
- USA
- Vessel Name
- Slo-Poke
- Vessel Make
- Jorgensen custom 44
Thanks Moonstruck, I'm only 20 minutes from the marina . It takes a lot of trips back and forth for measuring and ideas . Luckily each side of the hull was "close enough" to each other to use the same templates. We still have a lot to do before attaching everything to the hull with caulk .
OP
OP
Pack Mule
TF Site Team
- Joined
- Jan 24, 2013
- Messages
- 3,749
- Location
- USA
- Vessel Name
- Slo-Poke
- Vessel Make
- Jorgensen custom 44
I was unsure of what to use ,so I asked the TF . Several said TDS SIS 440 would be the best. I have never used this but I'm leaning that way. I used LIfe Caulk before with the primer but wasn't happy . It also could have been that I starved the joint or made to tight of a joint and pushed all the caulk out. A starved glue joint is always a concern.When I went back and reworked the the end joints I wound up with a caulk gasket about 1/16 " thick that wasn't stuck to either side of the teak joint.Pack Mule consider bedding the CR down w something that comes apart w ease like Dolphinite. But that particular product may dry out in your hot weather but if not it should be perfect. You don't need to seal out water on the CR do you? Does anyone know of a product similar to Dolphinite? It's sort of a putty like stuff that seals very well and stays soft and pliable for extremely long periods of time where there isn't extremely low humidity for long periods. I think I took some Dolphinite apart on my Willard that I'm quite sure was original. Still soft and the bedded part came off easily.
I use a lot of Sika Flex 291 and after 6 to 10 years it seems to always fail.
Tempted to use Life Caulk but I think I recall several here were not happy w it. Wasn't it designed to adhere especially well on teak? Teak is such a problem.

RT Firefly
Enigma
Greetings,
Nice corner treatment.
Nice corner treatment.
CPseudonym
Moderator Emeritus
Great job Pack Mule!
Similar threads
- Replies
- 14
- Views
- 1K
- Replies
- 25
- Views
- 5K