replacing fuel tanks

The friendliest place on the web for anyone who enjoys boating.
If you have answers, please help by responding to the unanswered posts.

albin43

Senior Member
Joined
Dec 22, 2009
Messages
233
Location
US
Vessel Make
Albin 43 Trawler
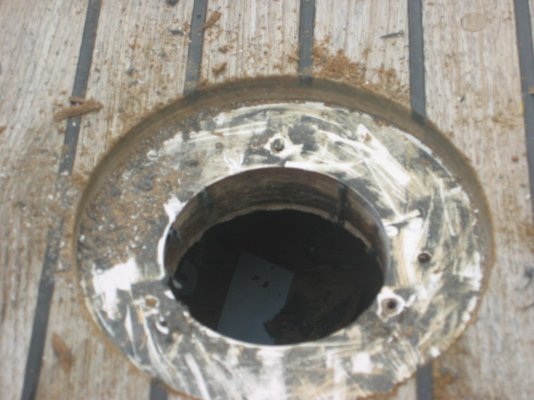
I was screwing around in the engine room of BYE ALL and took out the false walls between the lehmans and the fuel oil tanks on both sides so I could better inspect the fuel tanks. Taiwan trawlers as many of you know cheeped out on the fuel tanks BIG TIME. No inspection ports, one light coat of exterior paint, no inner tank coatings and less than .125 CRS.

What I found wasnt good; I knew when I bought the boat that I would be replacing tanks sooner than later. They arent leaking fast, or even dripping but the exterior bottom (lowest corner) is wet like the fuel is seeping through.

So now im looking at replacing the tanks and this is my plan that I thought I would share.

There are three different approaches ive seen with removing fuel oil tanks from this style vessel. 1)* Cut out the bottom and let the whole tank drop, bolt new tank to hull that was removed and reglass it in place. Personally I would never even consider that.

2) Remove engine one at a time and pull tank whole that way. Requires building a crane system inside the salon to lift the heavy Lehman. Not doing that either.

3) From what I see this is the most popular and deff makes the most since to me. Drain the tanks and cut with a sawsall into smaller removable pieces. Then fab 3 tanks per side to fit in with no mods and plumb them together in the machinery space. Ive debated which material to use, steel, aluminum, stainless... they all have there own problems. I have settled on just .125 CRS. I have designed the tanks using ESPRIT CAD CAM software that I use for work. Very simple tanks 2ft square with 10 degree taper on bottom side to fit the hull.

I have the machinery to shear the plate to size and weld it in our shop so thats the easiest way. I dont have much experience welding aluminum, my brother does but the original steel tanks have lasted 29 years and are .090 thick.

Better built tanks with proper inspection ports and drains should last more then that.

im am going to reduce the capacity from 500 US GAL to 375 US GAL

I will keep you all updated with the process and hopefully it goes as planned.


-- Edited by albin43 on Tuesday 30th of March 2010 06:14:35 AM

-- Edited by albin43 on Tuesday 30th of March 2010 06:17:46 AM
 
*

*
When I replace our three 400 gallon tanks, I will use the old tanks as the frame work for the new smaller multi tanks, but they will be either plastic or steel.* SS, I believe is not allowed by regulations as it needs to breath, with aluminum you have to be careful and know how to install and connect them because of the low galvanic rating of 7.* So steel seems to be the best metal and the most forgiving, but plastic seem to be the best of all.
*
I keep the tanks less than ½ full so if one does start to leak can transfer the fuel to the other to tanks.* Also the new low and ultralow diesel does not have a long storage live.*I did open and weld/repair one of the tanks by cutting a hole big enough to climb into the tank to clean and weld.*Might want*to inspect it first to see if its repairable?* *Anyway, keep us informed as to your progress. *****
*

*


-- Edited by Phil Fill on Tuesday 30th of March 2010 08:12:07 AM
 
I use fuel oil. I try not to put any of the new ultralow sulfer diesel in there if I can avoid it.
 
Phil Fill wrote:

SS, I believe is not allowed by regulations as it needs to breath
Actually, stainless is a currently approved fuel tank material by the ABYC.* At the time we bought our boat (1998) it was not, or so the surveyor said.* The reason, he said, is twofold.* First, the quality of stainless can vary all over the map--- even if a batch of stainless is sold as 316 or whatever, it might not meet that alloy specification depending on where it's made.* Taiwanese stainless in particular (at that time) was famous for having "anybody's guess" quality.

The other issue is the quality of the welding.* As I understand it, heating stainless changes the properties of the alloy, so if the welding is not done correctly the seams can become subject to crevice corrosion and other problems.

The boat we bought had been fitted with an entire new fuel system the year before we bought it, with five stainless tanks replacing the boat three original iron tanks.* While the surveyor made note of this and the fact that stainless was not an ABYC-approved fuel tank material, he told us that he had surveyed many boats in the San Francisco Bay area that had stainless tanks and most of them were holding up just fine.

Because we have several relatively small fuel tanks (four 85 gallon "cubes" and a 60-gallon day tank) fuel tends not to sit in a tank for long periods of time.* And we run each saddle tank--- they gravity feed from their lowest points into the day tank--- completely dry before refilling them.* So they do get "aired" out on a regular basis if that is even important to their integrity.

When I commented on stainless not being an ABYC-approved material in a discussion the other year, someone--- I believe it was RickB--- said that stainless is, in fact, an ABYC-approved material and quoted the relevant passage that said so.* So either their position has changed or our surveyor was incorrect to begin with.* The bottom line is that stainless--- assuming it's the right kind of stainless, really is what its specs say it is, and the tank manufacture is done correctly--- is a perfectly acceptable material for fuel tanks.* I'm not sure it would be my first choice for a fuel tank material, but it is approved.

FWIW the original tanks in our boat were cut up in place and removed and the new tanks were sized to go into the boat without having to remove the engines or generator although I suspect the transmissions might have had to have been removed.


-- Edited by Marin on Tuesday 30th of March 2010 10:58:08 AM
 
Albin 43
Not all TT's went cheap on their tanks. We have a factory access port in all 4 tanks. The exterior was also sprayed with resin and material. I read an article that said this can lead to external rusting- but that hasn't been the case with our tanks. We have factory FG decks so never had water on top of the tanks.
 
lucky you! i know grand banks has similar issues as albins
 
albin43 wrote:

lucky you! i know grand banks has similar issues as albins
The primary problem that can occur on GBs with regards to tank deterioration is that the bedding/sealant material under the deck fills can harden, crack, or fail over time which allows rain and salt water that gets on the decks to migrate down along the fill tubes and collect on top of the tanks.* This is not a problem unique to GB, but can occur on any boat with deck-mounted fuel filler hardware over the tanks that depends on a bedding compound/sealant to keep moisture from getting under the rim of the filler.*

From what I read on the GB owners forum, the problem on the fiberglass-decked boats is not one of water getting down through the deck itself via the screws that hold down the teak planking as these do not penetrate the underside of the deck.* The culprit is water migrating down the outside of the filler tubes.* In addition to starting to rust the tops of the tanks, this moisture can also run down the outside of the tanks and, depending on how the tanks are mounted, can collect between the bottoms of the tanks and the platforms or supports* they sit on and start to work on the metal.


-- Edited by Marin on Tuesday 30th of March 2010 02:10:48 PM
 
Speaking of,
My fuel fills look like they need to be rebedded. I finally scored some Dolfinite. Is this the right product?
 
Forkliftt wrote:

Speaking of,
My fuel fills look like they need to be rebedded. I finally scored some Dolfinite. Is this the right product?
Based on my limited experience I would think Dolfinite might not be the best material for this.* The lip is usually not very wide, and Dolfinite tends to dry out over time if it's exposed to air.* Plus it never "cures."* I would think something like Lifecaulk or Sikaflex would be a better choice.* But I would pose this question to an experienced shipwright.* There are a couple of on the Grand Banks owners site and I'll pose the question there and let you know what kind of answer I get.
 
Another choice that could work is to simply remove enough tank to install a custim fuel bladder , or two .

These can be made in any tank configuration and might solve some hassles.

You could remove the bladder after a decade to rinse it if needed.

The other question is what is directly above the lowest point of the new tank?

A proper servicing tank could be installed if there isnt something in the way.

AS a very least have a sump built on to the lowest point and a 1/2 inch suction tube fitted .

Every time you get an urge you could pump a quart and see what has collected.
 
I'd use lifecaulk on the fuel fills. I'm using that today to re-bed a windlass switch.
 
Forklift---


Here are two replies to your question as posed to the GB owners list. The first one is from a member I don't know, the second one is from Bob Lowe, the resident GB expert who used to own Oak Harbor Boatworks, a yard that specializes in maintaining, repairing, restoring, and customizing Grand Banks boats (as well as other makes.)

"Our GB36 had leaking deck fills when we purchased it. Bedding in black Lifecaulk, and subsequent top of fuel tank refinishing seems to have fixed the problem. After 4 years, tops of tanks still dry."

And from Bob---

"One of the problems with sealing deck fills for fuel, water or waste, is that they get pretty hot in the sun. This will tend to melt the oil based bedding compounds like Dolphinite.

"When bedding the deck fill to the deck surface, most of the bedding is squeezed out so the benefit of cold flow of the urethane caulks is pretty much all lost since there is little left to cold flow.

"The best method I have found and used successfully is to use a hole saw the size of the deck fill flange plus 1/4" all around (if the deck fill is 4" then use a 4 1/2" hole saw) and cut to a depth of the flange thickness plus 1/4" or so.

"Use deck seam compound to bed the deck fill fitting. Make sure the deck fill is installed flush or a bit proud with the deck. The goal is to fill the voids under the deck fill fitting and all around it so that when cured, any excess can be trimmed and the deck fill will be sitting in and on a nice thick gasket that seals it all around and under."

I will add that if you go the deck seam compound for this, the best stuff on the market by far is TDS (Teak Deck Systems).
 
Marin,
It looks like my deck fills might be set up this way already. The sealant extends out 1/8 to 1/4" in a "groove" around the fill. I will check this weekend to see how deep it is.
 
Our method is to remove the deck fill .

We install a 6 or 8 inch bronze deck plate where the fill was.

The hose is shortened a couple of inches and a pipe nipple is fitted in the fill hose.

A simple pipe cap closes the setup .

With a small hole in the pipe cap , no overboard deck vent is needed, so the shene police will never visit with their big $$$$$ Fines book..
 
Here is another technique for bedding fuel fills that was posted in response to my question on the GB forum. This only applies to boats with teak decks, of course, but it might be of interest to someone----


"I took it one step further on the theory that the problem is that the fuel fill flange is sitting on the teak strips with seams as well as the fact that water could get under the deck at another location and migrate to the fuel fill hole.

I had the teak routed out around the fill fill down to the fiberglass and then had a teak "doughnut" sealed to the fiberglass. The teak doughnut sits about 1/4 inch higher than the deck.

It is no longer noticeable and I don't trip on it."
 

Attachments

  • fill fitting 2.jpg
    fill fitting 2.jpg
    139 KB · Views: 175
  • fill fitting 1.jpg
    fill fitting 1.jpg
    211.8 KB · Views: 230

Latest posts

Back
Top Bottom