Replacing My Teak Deck After 47 Years

The friendliest place on the web for anyone who enjoys boating.
If you have answers, please help by responding to the unanswered posts.
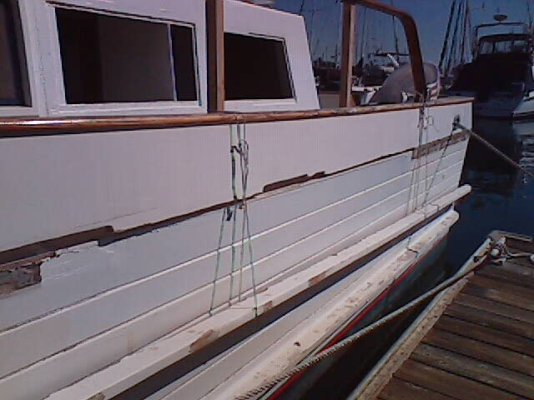
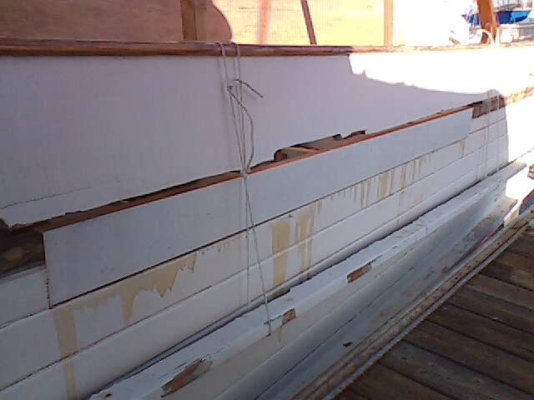
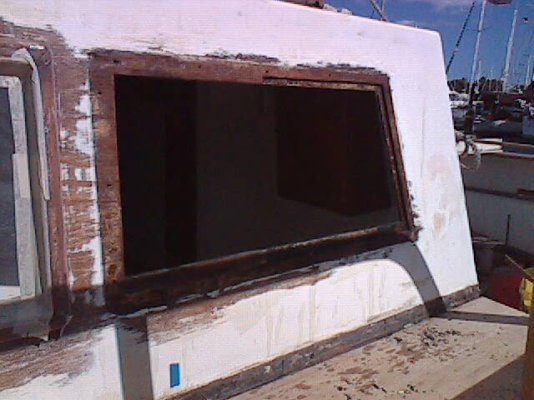
I haven't reported in a while and wanted to update. Progress is going well and I have sealed the inside of the hull around the engine room vents, sistered all the stringers from the boarding gate towards the cockpit and made new ones at the door. It will be strong.

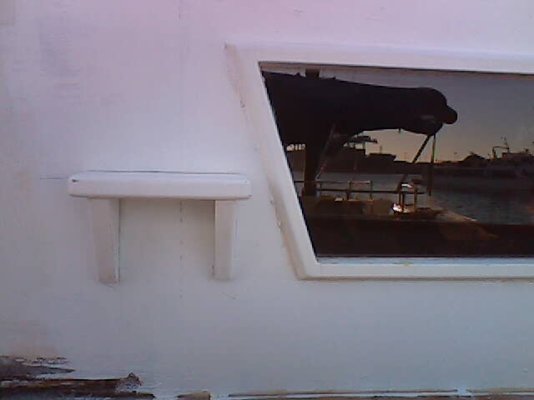
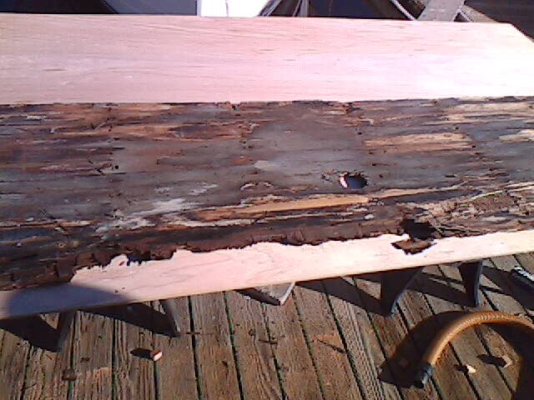
I found a slight dry rot area in my sheer plank and I intend on replacing a portion of that. This has definitely changed from just a deck replacement to a restoration project on the port side. I'm hoping to finish the port by next week and move over to the starboard side.

I did take a day off and help a fellow boater take his boat to a haulout facility in the Newport Harbor.
 

Attachments

  • 09-23-13-092938.jpg
    09-23-13-092938.jpg
    32.7 KB · Views: 142
  • 09-23-13-112116.jpg
    09-23-13-112116.jpg
    22.3 KB · Views: 557
  • 09-23-13-114631.jpg
    09-23-13-114631.jpg
    48.6 KB · Views: 151
Lots of work since my last post. I replaced a section of my sheer plank, the top plank, that was 1/2 behind the rub rail. The part behind the rub rail was pretty much rotted but the part showing below the rub rail was not showing any signs. This was a measure three times cut once and it came out perfect.

I finally found oakum and cotton and packed the seam correctly. I just need some boat life caulking to complete the seam.

After cutting out the glass area from the new wall piece and making a new frame, I installed the glass and bedded it with a product I bought years ago and cannot find it online or anybody who knows about it.

Dolfinite Butyl White Compound and there isn't any cleaning instructions on the label. It's a rubber and it looks like it will last indefinitely and not dry out like the other dolfinite.

Does anyone know how to clean this up? I tried acetone, lacquer thinner, paint thinner, denatured alcohol and isopropyl. Nothing really works. When you pull this apart it leaves a string. It's rubber and I like it, just need to clean my mess up.
 

Attachments

  • 10-07-13-163812.jpg
    10-07-13-163812.jpg
    62.4 KB · Views: 133
  • 10-18-13-125311.jpg
    10-18-13-125311.jpg
    34.8 KB · Views: 143
  • 10-15-13-164535.jpg
    10-15-13-164535.jpg
    41.1 KB · Views: 129
Try toluene. It works on a lot of stuff nothing else will touch.
 
Agree with toluene. If that fails, and you can get some, try 1-1-1 trichloroethane. Stuff is definitely not for kids.
 
We used to thin it with Linseed oil and clean up with just paint thinner before it set. Once set it is a b*tch to get off. An old can says use 1481 Compound thinner but I have no idea what that is.
 
I took a picture of this stuff. It's not the peanut butter kind it's like thick liquid rubber. I've never seen this before and bought a can from a store that bought an old warehouse of stuff.

When I got to the boat today the stuff had dried and it was easy to scrape it off the glass with a razor blade. Then it rolls up like that rubber stuff behind the credit cards that come in the mail.

I hope it hardens enough to sand off the frame. I really screwed up not taping off first, but I thought a quick wipe would clean it up.
 

Attachments

  • 10-23-13-085349.jpg
    10-23-13-085349.jpg
    58.2 KB · Views: 133
  • 10-23-13-085434.jpg
    10-23-13-085434.jpg
    38.7 KB · Views: 138
I see its main ingredient is NAPHTHA (PETROLEUM SPIRITS OR BENZIN) so assume this would clean it up also??
 
Thank you, I'll buy some on the way to the boat this morning.
 
I see its main ingredient is NAPHTHA (PETROLEUM SPIRITS OR BENZIN) so assume this would clean it up also??

I bought some and it works great. Thank you very much!! :thumb::dance::socool:
 
Whew! That's great. Glad I could help. You doing an awesome job!
 
I haven't reported lately and wanted to update. I now have the entire port side sub deck installed, screwed and glued with epoxy. All the stringers aft were replaced with new mahogany and epoxied in place. I replaced all dry rot spots in the cabin wall so there is all good wood port side now.

I decided to replace all the glass with bronze tint lami and I had the sliding window done in 1/4 tempered with polished edges for a smooth glide in the new track. Finding the stainless window track and edge channel wasn't easy and then getting a good price was even more difficult but I managed to buy both at a great price.

Making the window frame out of mahogany with the sliding track is the hardest job I've done so far. I have a router table with a 40 yr old Sears router and it started tearing up wood. The bearing is worn out causing wobble and then the wobble makes the bit move up. I'll have to buy a new router.

I'll be placing the top deck 17m on this week and hopefully next week I can start laying fiberglass mat and cloth down.

I also made a new step for the side of the house to the aft cabin top. It's 1" instead of the 3/4 GB had and will be painted not varnished teak.
 

Attachments

  • 10-21-13-120948.jpg
    10-21-13-120948.jpg
    36.9 KB · Views: 108
  • 10-29-13-134621.jpg
    10-29-13-134621.jpg
    54.1 KB · Views: 126
  • 11-05-13-110243.jpg
    11-05-13-110243.jpg
    56.5 KB · Views: 126
Nice going Capthead....the end is in sight!
 
Capt:

My wife believes the only reason I get into projects at all is to get more/better tools. I can't say she is far off the mark..

You need a better router. I recommend a plunge router, 1/2" sharft, by a good manufacturer. My newest (which I love) is by Freud, and welll worth the premium. I have 3 small (1/4") routers, none of which I have ever enjoyed using. I also have a 1/2" cheapo, that likewise I have never enjoyed, so the jump to the good quality Freud 1/2" was dramatic. You will then find that there are other things you can tackle that would have been beyond your capabilities before.
 
Love watching the progress! Inspiring:)
 
Today went pretty well. Still waiting for the glass and searching a router which I greatly appreciate koliver's recommendation.

I am amazed that wood boat builders never sealed any wood that isnt seen. Like behind the window frames. I soaked in as much CPES as it would hold, then faired the needed areas with epoxy and fillers then I applied a 2 part epoxy barrier coat primer. I'm hoping that will do the trick.

The plank I patched in the hull is totally unnoticeable. I'm happy with that. :dance:
 

Attachments

  • 11-06-13-112031.jpg
    11-06-13-112031.jpg
    52 KB · Views: 122
  • 11-06-13-111825.jpg
    11-06-13-111825.jpg
    45.5 KB · Views: 124
By the way, that is 13 years on my 10 year varnish. I have a lot of bare spots but most of it is okay still. That's my next project, or second to next. :facepalm:
 
Capt:

Glad you appreciate my comments. Your courage to attack a project of that magnitude is way beyond that of most of us. Also your courage posting your progress is commendable. Keep up the great work and please continue allowing us to be voyeurs.
 
Thank all of you very much. I really appreciate the kudo's. I'm no shipwright but I can say I really enjoy working and learning as I go. I get a lot of knowledge by posting and asking questions and I greatly appreciate the answers and feedback.

I just hope I can inspire someone else to save a great woodie. I love wood boats but this will be my last one. :thumb:
 
Very inspiring, Stretch! I'd probably never tackle a project of this magnitude alone, but your success makes me wonder if maybe...just maybe...hmmm...

:thumb::thumb::thumb:
 
I did a search for a Freud plunge router and found this.

Everyone who is interested ina Freud router should be aware that they are no longer in the power tool business. All of their remaining inventory, including replacement parts are being sold by Bosch. I spoke with a Freud representative today and he told me that they would no longer sell OR SERVICE their routers. Beware.

I use their bits. They sell bits and blades under the Diablo name. I'll have to find a used one.
 
Greetings,
Mr. Ch. WOW!!!! I've just reviewed the whole thread and I'm ready for a nap. Just reading is a daunting task in itself and I can't imagine taking on a rebuild/renew of such magnitude. GREAT job!
I have to laugh every time someone refers to their wooden vessel as a "woodie". No problem with the southern latitude crew and their timber vessels but woodie breaks me up every time.
-To our southern contingent who may not be familiar with North American use of the term and the "Woodie"....(ah...upright)
thats-a-penis.gif

My woodie has a name, Heads UP!!
 
Very inspiring, Stretch! I'd probably never tackle a project of this magnitude alone, but your success makes me wonder if maybe...just maybe...hmmm...
(Thinking about that Admiral's barge in Oceanside, aren't you.) :whistling:
 
Walt, that's funny. I saw that posting too and thought..........:eek: Can't do another one.

Bought a new router and the difference is like going from a 1962 VW to a 2013 Caddy. Big difference!!

Sized the new glass to the opening and made sure the fit was good.

Put the new frame I cut out together and placed the stainless track in it with the glass and saw I need to cut a small amount to either the top or bottom so the glass will slide easier.

Taped it in place for a check. Much more work to do. Seal it, prime and paint it then install it. I really like the bronze tint.

This glass is tempered, not laminated. The edges of the sliding glass is polished so smooth it's like a baby's butt. :)
 

Attachments

  • 11-07-13-113145.jpg
    11-07-13-113145.jpg
    31.4 KB · Views: 120
  • 11-07-13-113639.jpg
    11-07-13-113639.jpg
    43.8 KB · Views: 123
  • 11-07-13-154440.jpg
    11-07-13-154440.jpg
    37.9 KB · Views: 124
I am having a small problem with the alignment of the window frames so I only drilled two screw holes and did a test mounting. The window frame is not finished yet and when it's done I'll have two large drain holes that are sealed with epoxy and painted.

I have the end cap strip but I haven't cut a piece and installed it on the fixed glass yet. I think I like the look without it, but I will install it.

The step to the aft cabin top is just placed on for me to test fit. It will be finished with paint before I install it. I'll have nonskid on it too.
 

Attachments

  • 11-08-13-153816.jpg
    11-08-13-153816.jpg
    43.7 KB · Views: 113
  • 11-08-13-154008.jpg
    11-08-13-154008.jpg
    28.6 KB · Views: 135
Hey R T FIREFLY,

Thinking about you. :eek:

Well actually, this was in my yard this morning. :hide:

:whistling::whistling::whistling:
 

Attachments

  • 11-09-13-085408.jpg
    11-09-13-085408.jpg
    73.4 KB · Views: 135
Greetings,
Mr. Ch. Thanks for the thought but surely you were thinking of my comment (post #112) rather than me.
dawgs.gif


OK. Back to our regularly scheduled programming...
 
Back
Top Bottom