Hendo's Randall 35 Cray Boat complete rebuild, Perth, Western Australia

The friendliest place on the web for anyone who enjoys boating.
If you have answers, please help by responding to the unanswered posts.
Hi Gang,
Thanks for the replies and Tech info to my issue. good thing I don't have talk to text on my computer cause there be a lot of Mother F*$%& Bloody piece of sh#t F^%$ing stupid bastard F#&K me .... going on lol :banghead: :whistling:

I did measure it and she dropped 50mm. She always had a slope on it cause the dip is around 200mm ... but yeah ... too much it would seem:nonono:

I did find this on the net this morning

http://mysite.verizon.net/resqp86c/performancepropellers/id29.html

http://www.eagle.org/eagleExternalP...Papers/2005/InfluencePropellerHullInteraction


Seems like I need to pull it apart and fix it ... F@RKKKKK!!! :banghead:

another issue is now ive already cut the drive shaft ... Grrrr lol Oh well :facepalm:

 
Last edited:
Matt - This made my day! Bet it made your year!! Congrats!!! :thumb: :dance:

that's great Hendo. Nice to have her history. In that prop chart you sent there was this.
If the prop is in open water, Performance Propellers has available special extended hub propellers that mount on the existing shaft but position the propeller 6 inches aft. This change in position of the propeller, due to the angle of the propeller shaft to the hull, can permit a 2 to 3 inch larger propeller

maybe six inches would get you the clearance you need. Still might handle a bit weird with that hook

Hey Britt,
Yeah saw that too bit the prop is positioned in the high/low spot so moving it will make it closer to the hull, That and its already close to the rudder. :banghead:
 
Ok well today after getting the heads up from my Trawler Forum possé
and then jumping on google, I confirmed that I was wallaby Ted (Brother of Roo Ted) get it?? :rofl: ... :whistling:


Anyway so we went down with the plan of unscrewing the sheets ...
  • FAIL :banghead: ...
  • The bote-coat sticks like sh!t to a blanket so ended up cutting the sheets off and cutting out some of the jarrah framework as well.
At this stage I was still in denial and thought, Ahhh ... I'll just chuck in some threaded rod and crank the section down until the rudder base lines up and itll all be sweet....
  • FAIL :banghead: ...
  • I may have buggered the height of this section but i sure didn't bugger up the construction and strength side of it. I did the rod up as tight as i could but nothing. Not even a creak or crack! :facepalm: ...
So by this stage reality had set in and it has dawned on me that i need to remove the sheets and framework from the transom upto where the driveshaft comes out of the keel and start again starting with the framework :censored::censored::censored::cry::cry::cry::angry::angry::angry:

As crap as this is, I am and will be forever greatfull for everyone coming forward and telling me to STOP and THINK! ... Especially thankful to Britt for sharing his personal experiences to ensure the same doesn't happen to me.

Thanks heaps mate and thanks again for everyone one that came forward :smitten:

As guttered, angry and disappointed as i am at myself for this happening, Id be devastated to find out about this once im in the water. I reckon that'd break me ... :blush:

Thanks again folks :thumb:


Last edited:
Hendo

Good job mate! Been there, Done that and know how much it takes and the hapinness when it's done

About the spacing for the wheel. According to the books you’d need 15% of the wheel diameter on top and 5% on bottom; otherwise you will have vibration and noises. These are obviously flexible numbers. They depend on the wheel design and number of blades. I heard that 5 blade only need 2.5% either way.
 

Attachments

  • HeliceColocada2.jpg
    HeliceColocada2.jpg
    86.8 KB · Views: 115
  • P1150207.JPG
    P1150207.JPG
    61.4 KB · Views: 109
  • F48_prop_Space.jpg
    F48_prop_Space.jpg
    33.6 KB · Views: 123
Hendo that sag/hook is a far bigger problem than the prop clearance. The red line in post # 601 says it all. Like the red line the bottom should be straight or ever so slightly convex from close to the end of the keel to the transom.

But on the plus side you've otherwise got an excellent semi-displacement hull form even if a bit lacking in deadrise. At 10 to 12 knots it looks to me like you'll have a very efficient boat if you don't get too much weight aft. But the prop clearance and hooked bottom needs to be fixed. At 10 to 15 knots the hook may actually be a plus but it would probably be dangerous going faster. Worst case scenario would be entering a small inlet w outgoing current and seas and wind coming ashore. That hook will drive your bow right down into the next wave and a broach or worse would be almost certain.

But I'm no NA and would like TAD to weigh in here.


Hendo I'm glad my "edit" window hasn't closed.
There's something else I've thought I should have mentioned for a long time but I didn't wish to play w water cannon on your parade so I've not mentioned it.
I've seen lots of old wood boats reworked but this is the first one I've seem where only the frame on the old hull has been retained. Just from your pics your frame always looks it should be part of an archeological dig. It's probably just in the pics though but in view of the prop and hook issue I've decided it would be better mentioned now than never said. Are the frame members solid enough and strong enough to hold the fasteners under basically extreme conditions? Those fasteners will be holding the whole boat together to a great extent. You've run a lot of screws into the old frame members so you should have a good idea of how strong they are. I know oak is often used for framing as it's dense and holds fasteners well. If there is some doubt extra overlay adjacent to frame members may be a good thing.

Here's a very similar boat; http://www.glen-l.com/designs/workboat/potluck.html

My girl likes to work on the boat too.
 

Attachments

  • STH71765 copy.jpg
    STH71765 copy.jpg
    174.1 KB · Views: 131
  • STH71257 copy.jpg
    STH71257 copy.jpg
    164.6 KB · Views: 127
Last edited:
G'day Eric.
Thanks for your reply mate. In response to your post, I appreciate all feedback, suggestions and help beit good, bad or indifferent so please don't think you need to walk on eggshells around me or feel that I only want to hear positive things or only want to have sunshine shot up my a**e.

I post on hear to show everyone what im doing and to open up my project to get ideas and help and to receive feedback. Knowledge sharing is a wonderful thing and without advice from people like you and everyone else on here that has helped me along the way then i'd be up sh!t creek so don't ever think that you're raining on my parade. I might tell you to piss off or ignore your suggestion but that doesn't mean I don't value it

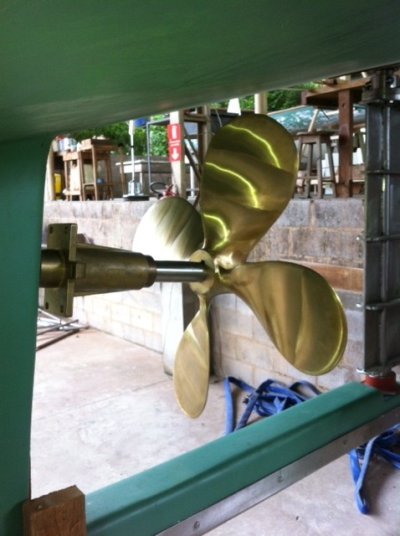
In relation to the hook, its now gone. I gave AXE a nice straight bum with plenty of prop clearance. I thought about leaving the hook as it would be like a giant trim tab but it was easier to make it straight than hook it and still give it the prop clearance I needed.

Now in relation to the last section of your post pertaining to the timber. Im not sure I understand properly so if my answer makes no sense then ive not understood what you meant and will need clarification.


The only original part of the boat that was kept was the keel. The rib timbers are second-hand "Seasoned" Western Australian Hardwood called Jarrah. They measure 100mm x 50mm. Two reasons why I went with second-hand "Seasoned" jarrah.
  1. Cost - Definitely played a big factor. It was less than half of what new timber cost
  2. Seasoned - The jarrah came out of a house that was built in the 60's and was pulled down. The timber actually came out of the roof and was essentially in an oven for over 50 years.
Not only is this timber dry, but it is rock solid and is like iron. Ask any Australian and they will tell you the same thing about Seasoned WA Jarrah.

In relation to the fixings. Because the timber is so hard, I have had to bolt the ribs together thus moving away from the traditional layup and joining of the members and thus making it look like the ARK. Any screws I used either snapped the head off the screw, stripped the thread of the screw or I snapped the driver bit in the drill.


The bolts I am using range in sizes and are dependant on where I am using them but the sizes are
  • M12 cup head bolts (12mm thick Bolts)
  • M10 cup head bolts (10mm thick Bolts)
  • 100mm Bugle head batten Screw (5mm thick)
  • 70mm Bugle head batten screw (5mm thick)
To give you an idea of just how strong these bugle head screws are in the jarrah, I had to cut them off with the grinder and smash the sheets off with a sledge hammer because I snapped all but three of my bugle head drivers and they are strengthened tooling steel

Also not forgetting that I am using epoxy as the main fixing here. The screws are just used to take the tension of the glue line and move it to the sheet face on tight bends. The glue I am using is a high strength epoxy filler powder glue. The glue is actually designed to glue sail masts to ships so the strength properties are unbelievable. Then there's the epoxy filleting and glass matting. It may not look like much now but she'll turn out ok and will out last me with the right maintenance and care.

also adding to the strength is the 450GSM double biaxle cloth that I will be putting on her, plus the 5 mm of epoxy to cover the weave then another 5-8mm of fairing filler powder/epoxy resin mix.

There is nothing conventional or typical in the way I am building this boat. There must be boat builder that read this and think OMFG what is he doing but im not building this to the standards of peoples boats like Portuguese etc. They are in a totally different league. Actually I'm not in any league, im not really in the same game lol

As I have always said. I am not a boat builder. I am just a bloke doing his best to build one.

Whilst this is my first ever attempt at building a boat, I have spent 19 years as a Carpenter. Well 15 years as a Carpenter and 4 years as an Apprentice Carpenter. I know my timbers and am more than confident that the timber and fixings will be more than capable for the job at hand :thumb:

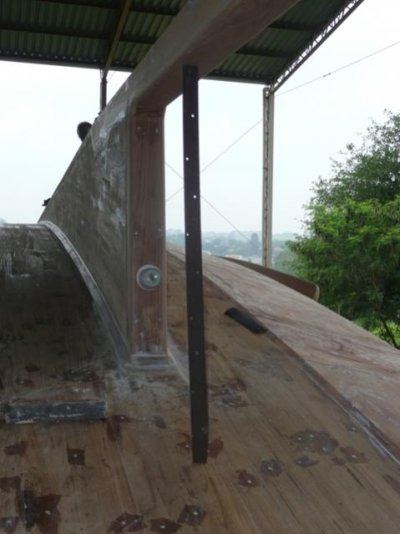
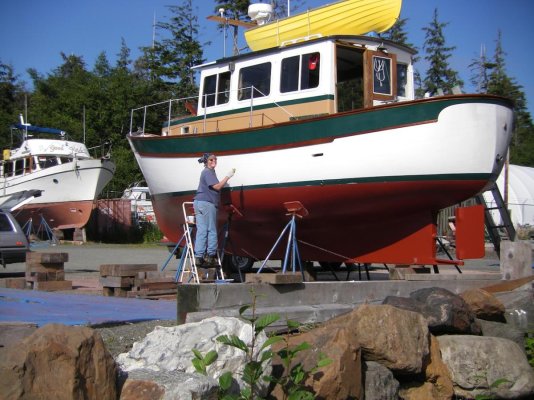
Below are pics from this mornings effort :dance:


Last edited:
Nice one Hendo. Must have been hard to hack into it, but better to do it now than find out she did not go well once in the water, and final paint coats on, etc. At least it gave you a chance to find out just how strong your construction method is.
One thing that puzzles me re this prop clearance issue however, is how about those planing boats where the props are in a recessed tunnel arrangement? They certainly would not have those clearances recommended..? I think you were right to do what you did, because it might have acted like a permanent trim tab, but it is interesting...
 
Thanks Pete. Yeah am very grateful that the members on here worded me up before it was too late. Would hate to have found out the hard way.:ermm:

Also very happy with how well the epoxy worked out. Pic #7 shows a great cross-sectional view and just how great it is by getting into even the smallest cracks and a 1-2 mm layer on the surface of the ply. Its a great piece of mind to see it. Its one thing to read it but truly a different story to see it first hand and seeing that it was done right is a massive relief and confidence booster for the rest of the work that was done on the hull. :dance:

Add the 450GSM F/glass double biaxle cloth, 3 mm thick layer of epoxy to cover the weave than another 5-8 mm of thickened epoxy fairing filler and Its not hard to see how different that would look and how water resistant (dare I say waterproof) the hull will be. :thumb:

Cheers
 
Last edited:
Whilst this is my first ever attempt at building a boat, I have spent 19 years as a Carpenter. Well 15 years as a Carpenter and 4 years as an Apprentice Carpenter. I know my timbers and am more than confident that the timber and fixings will be more than capable for the job at hand :thumb:
This post sure answers a lot of questions I've had but didn't want to ask. Thanks for the photo essay!
 
What do you want to know Walt ??? :popcorn:
I've been following your project since day one and many of the questions I've had were answered in your photo essay. Questions like: What kind of wood are you using for the frames? Are you really going to remedy the hook? What experience do you have as a shipwright? How long have you been a carpenter? Etc. Like I said....they were answered in your photo post. :thumb:=======>:popcorn: (Please continue.)
 
G-Damn Matt - You got a film crew there! Great picts of your "kink" removal/replacement. Get it on man!! :thumb:
 
One thing that puzzles me re this prop clearance issue however, is how about those planing boats where the props are in a recessed tunnel arrangement? They certainly would not have those clearances recommended..? /QUOTE]

Peter, the clearance is still an issue with tunnels. I have seen tunnels where prop diameters had been increased. On the fiberglass there were signs of erosion through the bottom paint and into the first layers of glass. My boat has shallow tunnels and has the clearance.

This picture is not the best angle, but there is clearance all around.
 

Attachments

  • Moonstruck Bottom Palmetto Bay 6.jpg
    Moonstruck Bottom Palmetto Bay 6.jpg
    100.8 KB · Views: 121
I've been following your project since day one and many of the questions I've had were answered in your photo essay. Questions like: What kind of wood are you using for the frames? Are you really going to remedy the hook? What experience do you have as a shipwright? How long have you been a carpenter? Etc. Like I said....they were answered in your photo post. :thumb:=======>:popcorn: (Please continue.)
Don't be backwards in coming forwards mate. 12 months is a long time to be wondering :lol::rofl:

Seriously tho, thanks for following and contributing to my thread mate :thumb:
 
My boat isn't Kinky any more Art :cry:... look like Flic and I will have to make up for that :eek::rofl:

OMG Matt - Don't publish them type picts :rolleyes:

Lest of course ya both really wanna! :D

Even then - Not On TF!! :facepalm: - LOL

:speed boat::speed boat::speed boat::speed boat:
 
Made a start on the Marlin Board today. Probably should have allowed to do this when I was originally doing the framework but alas, that would make sense and that is not allowed when Im building things lol ... I Made it nice and big ... :thumb:. Its gonna get plenty of action with fishing and SCUBA diving and me not being the smallest bloke around, didn't want a pissy little step on the back. I opted to make it a built in one and extend the hull. Its going to have built in angled sides etc but obviously cant do that atm.

Not totally sure but I think it might affect the steering a little but I don't think it going to be a major issue. If its does then on her first pull out I'll chuck on a stern thruster :whistling:

Anyhoo that's all. Got the BBQ warming up so I gotta go!

:thumb:


Last edited:
Hendo I'm kinda surprised at your "Marlin Board". I'd call it more of a hull extension myself but hey you're in OZ.

You're doing something similar to what Gulfstar did. Extend the stern and leave the prop and rudder where they were. A stern extension is almost always better than a big swim step. In you're case it wouldn't take much effort to extend the prop shaft and install an appropriate "V" strut. For that matter moving the rudder aft is something you could do after dinner and only miss your favorite news program. You would have even more prop clearance and possibly open the door for a larger prop but I like the one you have. But moving the prop and rudder aft I'm quite sure will be a good thing. Need to get it all lined up well though.
 
Hendo I'm kinda surprised at your "Marlin Board". I'd call it more of a hull extension myself but hey you're in OZ. You're doing something similar to what Gulfstar did. Extend the stern and leave the prop and rudder where they were. A stern extension is almost always better than a big swim step. In you're case it wouldn't take much effort to extend the prop shaft and install an appropriate "V" strut. For that matter moving the rudder aft is something you could do after dinner and only miss your favorite news program. You would have even more prop clearance and possibly open the door for a larger prop but I like the one you have. But moving the prop and rudder aft I'm quite sure will be a good thing. Need to get it all lined up well though.


Thanks for your reply Eric. Yeah look I just called it a Marlin Board mate, with no real basis of reason other than that's what I was reading about at the time and was looking at building before I got carried away and built what I built but I agree with your naming Being more like a hull extension.

The topic of prop shaft extension has popped up a few times in my time here. Can you help me understand how that would work please mate cause I'm struggling work out how I could do that without changing a whole heap of things. I've been looking at her and if i move the prop to far aft then she'll swing below the keel. I've also noticed that the rudder can only be adjusted so far without interfering with the seals. Not saying I couldn't cut and weld a shaft extension on the rudder stock to overcome that but that's something I was about.


If I move the whole unit aft to keep the clearance between the screw an rudder then the keel tunnel will be on the piss and need to be changed to ensure the shaft is straight.

Thanks to AXE's supporters and followers on here, I found out about the min clearance relationship between screw and hull thus ultimately saving my arse. Is there a similar relationship between the rudder and screw? Could the rudder move aft counteracting any drag the hull extension would make but leave the screw where she currently is? I then would be looking at having to enlarge the rudder because the water force passing over it from the screw would be less do to the increased spacing wouldn't i?

Not sure if the time and cost would be worth any change? What's your thoughts?

Appreciate your advice and help mate. Cheers
 
Last edited:
A lot to swallow mate.

Rudder aft of normal will decrease the propwash over it but increase the leverage it has on the hull. May not need a bidder rudder. Depends on several things. Was it big enough in the first place ect ect. In the other direction if the rudder istoo close to the prop I'm sure you will feel more vibration and yes I do think there is a rule of thumb for this.

A prop further fwd would/may have an advantage of not coming out of the water in heavy going. Also prop walk would be slightly reduced.

I'll get back later about the shaft extension.
 
It's not even noon yet and the edit feature is off. Used to stay on for days and on BD.net I think it never goes off.

You can extend a shaft w couplings. I prefer the long couplings that don't have a flange. One must be ready to install intermediate bearings if needed. There are standards set forth that dictate how much unsupported shaft is OK w a given dia. shaft. If you're at the limit you'll need to install an additional shaft bearing. When it's all done and the boat has been in the water a few days all bearings need to be in alignment and the engine aligned to the shaft. This means room for radial adjustment on intermediate bearings should be provided.

If your propeller swing needs more room re the keel shoe from moving the shaft aft just install a new shoe attached to the bottom of the keel. This should give you the added clearance of the thickness of the old shoe. Rudder shaft may need to be extended also.

Remembering the pics of the past you probably should consider a V strut just ahead of the propeller ... 4" approx.

I think making your boat longer is a very good idea.
 
Last edited:
Thanks mate :thumb:
years ago I delivered new Vikings and they made a 44 ft motor yacht, then they took the same mold and made it into a 50 ft motor yacht, they added 6 ft to the hull,the 50 ran faster with they same engines as the 44 and they left the shafts and rudder in the same place that they were on the 44, the 50 ran nice and flat,may be the 6 ft gave it more lift,but the boat ran 4knts faster
 
years ago I delivered new Vikings and they made a 44 ft motor yacht, then they took the same mold and made it into a 50 ft motor yacht, they added 6 ft to the hull,the 50 ran faster with they same engines as the 44 and they left the shafts and rudder in the same place that they were on the 44, the 50 ran nice and flat,may be the 6 ft gave it more lift,but the boat ran 4knts faster

WOW! That's interesting...

6' longer boat than the 44'er (with well over 10% length increase, did beam remain same?) - therefore carrying considerably more weight - using same engines and leaving shafts/rudders in same location as the 6' shorter 44’ version... but the 6' longer 50'er attained 4 knots added speed... I'd love to read sea test spec sheets on both... you have access to any?

Was the 6' length addition to stern only - or disbursed in areas?? If 6’ addition was gained only by lengthened stern... it would be a long swim to props if buoy line became tangled! And, lift operators of sling hoists would be pretty surprised unless there were sling-placement instructions/arrows clearly posted on hull/gunnels.
 
Last edited:
Lift operators of sling hoists would be pretty surprised unless there were sling-placement instructions/arrows clearly posted on hull/gunnels.

Good point od mate :thumb: i'll have to remember that when the time comes ... Cheers :)
 
years ago I delivered new Vikings and they made a 44 ft motor yacht, then they took the same mold and made it into a 50 ft motor yacht, they added 6 ft to the hull,the 50 ran faster with they same engines as the 44 and they left the shafts and rudder in the same place that they were on the 44, the 50 ran nice and flat,may be the 6 ft gave it more lift,but the boat ran 4knts faster

I think I'm right in saying the extra speed would have come almost exclusively from the added waterline length alone. Remember the old formula, speed in kn = 1.34 X sq root of waterline length in feet..?
 
I think I'm right in saying the extra speed would have come almost exclusively from the added waterline length alone. Remember the old formula, speed in kn = 1.34 X sq root of waterline length in feet..?

My head hurts just thinking about working that out.
 

Latest posts

Back
Top Bottom