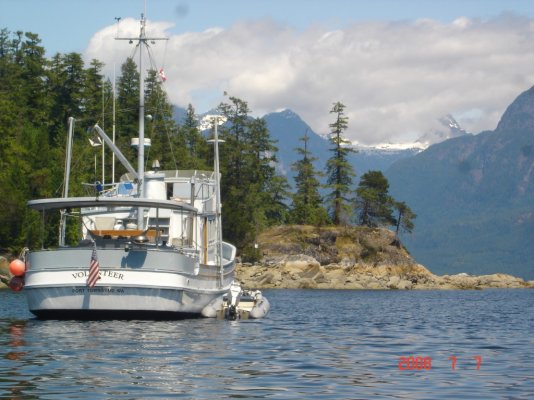
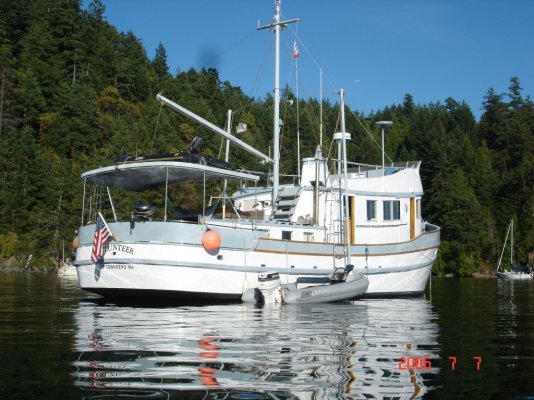
Painting Yout Trawler the Inexpensive Way

The friendliest place on the web for anyone who enjoys boating.
If you have answers, please help by responding to the unanswered posts.

marinetrader

Senior Member
Joined
Oct 6, 2007
Messages
301
When buying a used trawler, its easy to be turned off by the exterior looks of the boat. Of course, I'm not proposing that it be dismissed. I tell buyers to judge how good the used trawler's been kept up by how she looks. If the exterior finish is all scratched up and the brightwork is in bad shape, I usually find the rest of the boat the same way. It's merely an indicator.

All things considered, a dull exterior isn't a terrible matter either. The gel coat on a used trawler is there for a single reason, to make her look good. It has no other purpose. The gel coats biggest foe is the UV rays of the sun. After 5-10 years exposed to in the Florida sun, almost all gel coats begin to show their age. Not even intense polishing will take the gel coat back to the luster when it was brand new. So when you find a used trawler that has a lack luster outside but everything else is up to par, there is a way to bring her back to her factory-fresh appearance with a little work. How can we do that, by painting her?

There are just a few yachts that are factory painted, Hatteras comes to mind.* When we bought our trawler the Patricia Ann, she was in excellent shape, but her gel coat was dulled and there were a few cosmetic fiberglass nicks here and there. Professional painting of a used trawler or motor yacht is no inexpensive task. You can count on about $1000 a foot to have it professionally done so that was unthinkable.

I started to explore the procedure of doing the painting myself and read as much as I could about what paint to choose and how to do it. At the Ft. Lauderdale Boat Show, I talked with spokespeople from Interlux.* The rep explained to me that both the Interlux make of boat paints and the Awlgrip trademark are very synonymous in formulation and practical application. Interlux, even so, is formulated for the do-it-yourselfer. So my choice was made, Interlux Perfection, two part paint was the way I was going to go.

I'm not going to discuss what the directions read, let me just say that even though operating with two-part paints looks frustrating, its really very easy to do. Just stick to the instructions supplied with each container and you'll get the technique immediately.

I selected the roll and tip method of practical application as spraying in a crowded marina was impossible. Its easy to do once you practice. I practiced on a scrap piece of glass until I had it perfect.* Instructions are provided by Interlux.

Here are a few tips.

<ul>[*]Start your project by dividing the trawler into manageable segments; that way the job will not consume you. I chose the starboard bow pulpit on the Patricia Ann to start my project.[/list]
<ul>[*]Preparing the surface to be painted consumes about 3/4 of the time you will expend on your plan. A bad surface will create a terrible paint job. Start by wiping the gel coat with thinner. This will rid the surface of any silicon or wax that may have been used that will cause your paint to lift after application. [/list]
<ul>[*]The next step, take a small hammer and check the entire surface to be painted, taping lightly to find any voids below the gel coat. When you find them and you will, dig them out with a Dremel tool. You do not want to spend the money and time to do a nice paint job and have voids open up later on.[/list]
<ul>[*]I utilized the West System epoxy with the fairing filler to repair the voids I found.* Follow the directions supplied to make the resin simple to use.* Sand them flat after the restored places have cured. Wash the dust off with water.[/list]
Is this too big of a project?*

<ul>[*]Now we must tape the region that's going to be painted and take off any hardware to cause it go easier.* I applied the 14 day painter's tape available at Lowe's or Home Depot for masking.[/list]
<ul>[*]OK, its time to paint. I used a 4 inch foam roller and the best 2-1/2 inch natural paint brush I could find, also available at Lowe's. Mix only enough paint that you can apply in 2 hours, for me its 1/2 quart. The paint is pricey, about $85.00 a quart and you don't want to be throwing any out.[/list]
<ul>[*]Only use paint when the outside humidity is 75% or less. Be certain there is no risk of rainfall.[/list]
<ul>[*]The paint needs about 5 hrs. to fully harden. Be careful to complete your paint application no later than noon to allow complete drying. If dew settles on your paint, the moisture will turn the high gloss to a dull finish.* I use a window between 10 AM and noon to paint.[/list]
When it was over, it took at least 600 hours to prepare and paint the Patricia Ann. We utilized about 1 gallon of West System resin and 12 quarts of Interlux Perfection to paint two coats on her.

Was it worth it?

Absolutely! She looks great!

If you have been contemplating the painting of your trawler would like to ask me some specific questions, feel free to ask.
 
Good info , our choice is Toplac .Excellent results with roll & tip or a just a good brush,

It can be touched up without a total repaint , unlike the 2 part .

Cruisers may need to touch up far more than cottagers.
 
Eight years ago I would have labeled this suggestion (Painting your own boat) as lunacy. Since gaining more experience in Trawlering and spending much more time on the docks and in the yard, I have seen boats that have been "rolled and tipped" by their owner. (Most were done in their slips.) I had to be told that the job was done by the owner. The quality was excellent and at a fraction of the cost normally incurred by the yard.
 
I have rolled and tip our 58 ft several times in the 15+ years we have owned her, but have done it in manageable segments.* Like this summer will roll and tip the Starboard side of the salon and the Portuguese bridge, and maybe freshen up a few other smaller areas.* The real protect is the primer coat, which is 90% of the work, not the thin glossy pretty coat.* *Most people look at how pretty the gel/pain is and not its primary purpose of protecting.*
 
When you thin the paint. (If needed.) If you use a piece of glass as a tester. Apply the paint when it doesn't show brush marks, and doesn't run off. The thinning is just right. Glass because you can wipe it off as you test for the perfect ammount of thinner
 
Any suggestions on the type of roller to use?
Also, can you explain the "tip" part of your process?* I assume the brush is to get to the hard areas and/or tip any runs?

Thanks for the information!
Steve
 
Steve,I have been looking into this with interest for a while now and there seems to be several variations of "favorite" rollers and brush types. What I do know is that the idea is to have one person rolling the paint on while a second person works behind him/ her using the tip of a brush to smooth the texture of the rolled paint. The goal would be to have it level out as much as possible. I am in serious need of exterior paint and am hoping to use this method on the hard within a year.
My wife and I recently painted an office with 2 doors and tried this "roll and tip" to paint the doors. She ran the roller and I followed behind with a bristol brush in long strokes going with the grain and it looked great. Like SD said, part of the challenge is keeping the paint thinned correctly from what I have read.
 
The key here is the roller lays on the film , which must be a "wet edge" .

The brush person needs to find an even smooth film which is wet enough to smooth evenly.

Too small an advance is much better than to large , as the paint may start to dry .

We try to put a fairly generous film on (just short of dripping or running ) as it seems to smooth to a finer gloss.

FF
 
And always tip back into the paint and not towards the person with the roller. We used foam 3" brushes for tipping.

We painted the topsides of our 38' woodie with two coats of paint each and every year for 22 years.

Now all we have to do is wax and buff.
 
Now all we have to do is wax and buff.


The Polyestermites are underwater how do you buff them?
 
FF wrote:

Now all we have to do is wax and buff.


The Polyestermites are underwater how do you buff them?
We feed them, not buff them.

*
 
If you really want to go the inexpensive way, try Rustoleum Marine paint. Here's a thread from That Other Forum --


http://www.passagemaker.com/Magazin...mid/1/threadid/72616/scope/posts/Default.aspx

Note I commented that my paint job looked good then, and as recently as last week I got another compliment on how good my old trawler looks. This stuff can still be bought at Lowe's etc for about over $12 a quart.

I slapped a couple of coats of the same stuff (in black) on a 20 yr. old pickup truck, and the results were pretty good too.
 
I have been using the " roll and tip" method for years, the paint of choice for me has been brightside 1 part LP.
My best results are achieved by getting the paint as thin as possible, rolling the paint on with a 6" white round end weenie roller... then tipping just as the paint sets with a 4" foam brush. The "tipping" must be done vertically, and the brush should not be allowed to accumulate any residual paint as you are just " flattening " out any roller lines and the bubbles that appear. Paint the area that your working on in a vertical motion, down the length of the hull. Conventional wisdom tells us that tipping vertical will leave brush marks... but it doesn't happen!. I have painted the hull of my 50' trawler and my GB36 this way by my self... but it is a tough thing to do... roller in one hand .. brush in the other... walking down scaffolding. If the damn bullworks to waterline was not 9' tall at the bow on my current boat it wouldn't* be too hard. Dont even think about doing it by yourself if it's over 80 deg.....your old and slow.... you tend to think too much... etc.
I cannot emphasize enough that the tipping MUST BE DONE VERTICALLY!

Years ago at a Grand Banks gathering everybody thought my 1969 woody was a newer fiberglass boat that had just been professionally sprayed..... it was the ultimate complement.... I have done it that way ever since!
LD

-- Edited by hollywood8118 on Wednesday 10th of March 2010 09:28:47 AM
 
Hollywood,
Could you tell me more about the boat in your avatar? Can you post some pics here? Wish I could do the vertical but I've got the molded in faux planking. What happens if you tip horizontal?


-- Edited by Daddyo on Wednesday 10th of March 2010 10:47:25 AM
 
I was going to ask the same thing Hollywood, could you tell us more about your boat?
 
hollywood8118 wrote:
I cannot emphasize enough that the tipping MUST BE DONE VERTICALLY!

Well, for 22 years we tipped our wooden boat horizontally with excellent results. (always with West System yellow, low nap epoxy rollers and 3" foam brushes). I have had passers by in the harbor ask me if the boat were fiberglass the topsides were so smooth (oh, bite your tongue!) And all the local boatyards do the same. Learned from them. If vertically works for you, fine. Why do you say vertically is so important?


-- Edited by dwhatty on Wednesday 10th of March 2010 04:09:30 PM
 
Well.....

My hobby for years was restoring classic wood runabouts..... learned to do " proper" varnishing.
When I got into big boats about 20 years age a old timer was watching me roll and tip brightside. He "suggested" that I try to roll a section and tip vertically. He said that the tipping horz. leaves very small lines at the edges of the brush that are prone to sag before the paint actually sets, and that vertically pretty much eliminated this.... I was very skeptical also... i considered my self pretty damn good rolling and tipping. So I humored the old fart and sure enough it really did make a difference. One of the things to remember is that brightside needs to go on a little thin to get really flat results so it is prone to sag on vertical surfaces. The brilliant white that I use is pretty transparent so you want to roll plenty on to cover... then the sag occurs.
Just remember its like making love to your wife... there are lots of ways to do it and everybody will try to give you advise on what it the best " technique".... but what ever works for you is best!!!!
ok .. so bad analogy..... I am a pig... what can I say!

-- Edited by hollywood8118 on Thursday 11th of March 2010 09:07:03 PM
 
I have been her caretaker for the past 7 years, She was launched in 1970 in California and has made the trip up and down the coast a couple of times. I owned a gb36 across the dock from her and the owner, who was the builder and I became friends. one day he made the comment that " one day you will own my boat". I took this with a grain of salt. 8 years later as he made me a offer I couldn't refuse.

On to the boat, He modified a Monk seiner design for the hull, and designed a great cabin to follow the sheer line. Power is a 130hp John Deere installed in the early 90's.
Tankage of 1000 gallons with a 100 gal. day tank, both a 4kw gen set and a 4kw cruise generator off the main engine with a adjustable clutch that can produce full power at 1k rpm. The cruise generator is a bit of a rube goldberg setup but after 7 years the thing still works very well and has not taken any maintainance.* My annual summer cruise fuel burn works out to 2.3 gal. per engine hour including the diesel genset at a avg. cruise of 7.9 kts.* I only have 2000 hours on the J.Deere so it should be a lifetime motor. The boat has everything.... and the weight shows, right at at 60,000 lbs. The builder was a aerospace engineer and quite the " inventor.... but some of his follow through was not of the highest standards and his wiring was horrible!. The entire boat was wired in surplus NASA wire... the best you and I could buy...literally!. the real issue is ALL of it is white!... 12v, 24v... 120v..... It has been a nightmare to sort the wiring... and I slowly am working my way through it all.
Underway the boat is great... paravanes to stop the roll, commercial hydraulic autopilot to steer, very quiet, great visability.** My plans are to take the boat around the corner and down to the Columbia and Snake rivers for this summer and use it as a houseboat to base off of while water skiing.
Everybody always loves the look of the boat and thinks she is a converted fish boat... I love nothing more than parking her in between a bunch of gin palace yachts when we cruise north in the summer, and to watch all the people that walk the dock smile at her... while the gin captains grimace!... especially if we are covered in salt and just came in from really stinky weather that they would dare go out in for fear of breaking something! If you ever see me at anchor or on the dock dont hesitate to stop by!
I love my boat!
 

Attachments

  • 039.jpg
    039.jpg
    204.9 KB · Views: 85
  • 6-1-06 015.jpg
    6-1-06 015.jpg
    244.7 KB · Views: 94
Hollywood, great looking and capable boat.**Not many*boater*will take the time and spendthe money to maintain/restore an old boat.* It's the older boats that catch my eye.****

I also been using Brightside 1part for 15+ years and would not change as its easy to apply with good results but the best is it blends very well.* So dinks and scrapes can be repaired where many of the others do not blend well.* As mentioned above, I will roll and tip this summer the Starboard side house, and Portuguese bridge.* The prep work will take 4 to 8 hours using 2+quartes of primer, but the actual rolling and tipping will take a couple of hours using less a quart.* That last final gloss coat is just enough to made shiny/pretty.* The dull primer is what actually protect and makes it easier to see how the gloss is covering as you look down the hull.* If there is a dull spot or not covered enough you can just brush over.* Very important not to over load the roller and brush and use a lot of brush thinner as you do not want the paint to get to thick and sticky. I am not sure it has to be vertical as long as its the same direction.* If its not to your satifaction just lightly sand and do it over again.

Women/females seem to be better at tipping than men as they have some experience doing their nails and toes.* Same principle just bigger application.* I roll and *my wife tips, so we move at a good pace.*With a friend*helping we*rolled and tip the entire hull below the rub rail in*4 hours swrich back and forth.* So once you get going and gett he hang of it, it goes pretty fast.*
 
Just remember its like making love to your wife... there is lots of ways to do it and everybody will try to give you advise on what it the best " technique".... but what ever works for you is best!!!!hollywood8118 wrote:Yes, indeed. Different strokes for different folks.

Actually, if I still had a woodie, my wife and I might be inclined to experiment doing her in vertical strokes rather that the horizontal ones we've been doing for years.

Variety is the spice of vice..... er, life....er, boat painting.

Yes, boat painting, wooden or otherwise, that's the subject under discussion.

Darn second cocktail!

-- Edited by dwhatty on Thursday 11th of March 2010 04:28:04 PM

-- Edited by dwhatty on Thursday 11th of March 2010 04:31:02 PM
 
Guys,

You guys just don't realize what a wealth of information y'all are feeding us newbies. I was just looking at an old 1971 Defever that looks awful on the outside and not to great on the inside. But, the boat is just twenty minutes from my house on the river. I was thinking of making an offer, but was thinking I would need to put the boat on the hard to paint it and not sure if I could do it myselft.*The only problem is there is no lift within 200 miles of here. Now I see that I could*paint it and hold out*for a while before taking the boat south to get it pulled to do the hull, bearings, ect.


-- Edited by ce_smith on Thursday 11th of March 2010 08:43:04 PM
 
. Now I see that I could paint it and hold out for a while before taking the boat south to get it pulled to do the hull, bearings, ect.

If you are planning on cruising the boat , plan on a paint job before you dump it.

"Paint Sells Da Boat" is 2000 years old bit of reality.

Why have a fancy paint job as you learn to handle her and explore what boating lifestyle suits you best?

You may just enjoy the hook or a mooring instead of lashed to the power pole!

Even the best protected condom dink will attack the paint , as will visitors less protected dinks.

FF
 
If you use a paint that is cheap, easy to apply and blends you can touch up repair those dinks quickly and easily.* We have a few dings/scrapes that happen.* If we had an expensive hard to match paint, I might get upset.* If I can not reach it from the dock many times I have used the dink.* The two areas I tend to bang is the front bow against the dock as our bow is so high I can not see the dock and the starboard stern where we tie and pull the dink from.* I got it down that it takes about ½ hour to tough up both.* To me making sure the paint blend and flattens well is the most important.


*
 
I'm getting ready to paint from my decks up.* I'm thinking about Pettit Easy Poxy, one part polyurathane.* Has anyone used this, pros/cons.* I've heard and read here that the two part paints makes it hard to repair dings and scratches.* A friend of mine used a foam roller and a dry foam roller behind it instead of tipping.* He said that it levels better.* Has anybody heard of this?* Any info, suggestions would be greatly appreciated.

Tom
 
I've used easypoxy with excellent results via the roll and tip method.
My usual method is to use the aftermarket gloss reducer to bring the gloss down to an acceptable level. My last paint job was on my previous Albin 25 (circa 1975). The boatyard I painted it in were somewhat impressed.
Rememember " Varnished boats look good at the dock... Painted boats look good at sea!
 
I used easypoxy to paint the hull on my 30 ft sailboat, in 1984 or so, by 88 it had to be redone, as the gloss all went away and it looked bad. I then used a two part polyurethane, Interlux, and when I saw the boat in 2007 it still loked presentable. So my vote would not be for easypoxy. The amount of work was comparable for both kinds. the durability of the two part was 20 yrs to 4 yrs, so 5 times better.
 
Today I finished laying the first coat of Interlux 2 Part primer on my boat.

To the horror of some folks, I used a brush and a paint roller from... the dollar store.* It was 85 degrees (but not in direct sun).

It looks great.

I tipped horizontally, and vertically.*

I'm not a professional but I've had quite a few boats and painted them.* Here's the advice that I've read here that is really good and two important tips that are missing from this thread.

As others have said, it's ALL about the ratio of paint to thinner, and this ratio changes constantly as you work, especially if it is hot.* For any given moment, it's too thin 1/3 of the time and too thick the other 1/3 --
biggrin.gif


If it's too thin, stir it and wait.
It it's too thick, use the brush and get the harder to reach sections/tight areas.

Second, do a small area at a time.* I can't roll and tip with anything bigger than a four inch roller.* The size of the area to roll... depends on the consistency of the paint at that moment.


The one piece of advice that is missing... is always, always, always use the thinner called for by the manufacturer or you will be very, very sorry.*

Sometimes the manufacturer's thinner is really, really expensive.* Buy it anyway.

Second do not under any circumstances apply marine finishes without the best* respirator you can get, and please replace the cartridges frequently.** I prefer the 3m with the charcoal cartridges that you can get at Jamestown Distributors, West Marine, or other sources.* They come in different sizes, buy one that fits and doesn't give you "racoon face".* Acetone, Xylol, etc. are very, very bad for you.*

Practice makes perfect, you can always sand it off and start over.* I'm a huge fan of wet sanding between coats and laying the final coat on extremely thin with a brush...


-- Edited by SeaMoose on Saturday 17th of July 2010 06:12:46 PM
 
I've never heard the term "roll and tip" can someone explain this to me?
 
Basically the paint is applied to the prepared surface with a roller, but a roller can leave "bumps" and bubbles in the paint. So as soon as the paint is put on with the roller you (or an assistant) goes over the just-rolled paint very lightly with a brush to flatten the texture left by the roller. If done correctly while the paint is still in its maximum flow stage, the result can be a very smooth surface. Smoother than rolling alone, and smoother than painting with a brush. It can come very close to achieving the same surface one can get by spraying but without the special equipment, the masking of large areas, and the need to avoid or control overspray, etc. that come with spraying.

You do the tipping as you go, not after you've finished all the rolling unless you're doing a very small area.* The reason is that the longer the paint sits the less it wants to flow. So even a few minutes space between the rolling and tipping can result in brush marks or streaks in the paint because the paint has cured enough to inhibit the flow needed to "fill in" the brush marks.* So there are a number of variables that have to be dealt with--- the characteristics of the roller and the brush, the consistency of the paint, the timing between rolling and tipping, the pressure you use when tipping,*and so on.

We've used the roll and tip technique on some of the interior surfaces of our boat and it works very well. It does not eliminate or reduce the need to prepare the surface correctly, however.

Spraying still provides the best, most perfect finish coat, but roll-and-tip can be a pretty close second.

-- Edited by Marin on Tuesday 20th of July 2010 07:38:45 PM
 
"Spraying still provides the best, most perfect finish coat, but roll-and-tip can be a pretty close second."


The tiny surface left bu a good roller can simply be ignored on many surfaces.

Do you really care if the top of the pilot house shines like a new car , or simply looks uniform?
 

Latest posts

Back
Top Bottom