You are using an out of date browser. It may not display this or other websites correctly.
You should upgrade or use an alternative browser.
You should upgrade or use an alternative browser.
Replacing My Teak Deck After 47 Years
- Thread starter Capthead
- Start date
The friendliest place on the web for anyone who enjoys boating.
If you have answers, please help by responding to the unanswered posts.
If you have answers, please help by responding to the unanswered posts.
psneeld
Guru
I didn't have a ply underlayment so to speak unless you considered it the core under a thin glass skin...but I crow barred away until about 10 sq ft of screw heads were naked...then I used a 1/2 inch drill (screws were stainless/Phillips head), then used vice grips on the ones that broke/heads stripped.
Can't say the same would work in this case...but getting a flow of tools and motion is 1/2 the battle.
Can't say the same would work in this case...but getting a flow of tools and motion is 1/2 the battle.
Portuguese
Guru
CapHead said: "...In fact, the sub deck was never sealed except for the black glue they used between the teak and it. It's all going away this month and I am replacing the deck with European 12mm marine multi ply as the sub deck and their 19mm on top of that. All will be sealed first with penetrating epoxy and the underneath of the deck will be primered and painted before instillation.
I will use epoxy with fillers added for strength between the sub and top deck. On top of the top deck I will lay cloth and epoxy it in place with a radius to the cabin sides and bulwarks. There won't be any sharp corners...."
The above states the proper and most efficient way to renew such floor and deck. Epoxy impregnated wood is the only way and it will last another 47 years or more, having in mind that the original was not impregnated with such material.
Cheers
CPseudonym
Moderator Emeritus
I wish I had one, Craig.
If I could not source an appropriate brace and bit my second choice would be one of the new generation 'Impact Drivers' sold at home centers in the cordless tool section. Impact drivers install and remove fasteners with a surprisingly gentle impact hammering. We have been using them for over a decade to install/remove many varieties of fasteners including screws.
The do no damage to screw heads if appropriately sized. You can get a set of slotted screw tips and modify to fit your screw. It really helps if you have a friend who is a machinist or retired one that can restore the temper through a simple heat treatment process called oil quenching after you modify to fit.
Good luck
If I may make a suggestion. I've removed a lot of screws and rusted or stuck bolts etc over the years. I've found the following to works well.
1.) Heat the screw - For small screws use a soldering iron or a small gas torch.
2.) Stick the screw driver on the screw, hit it with a hammer then wind it out. The screw is either brass or copper so it won't take much to make the driver fit the head
3.) a drop of oil on the heads and left overnight always works well.
If all else fails, grab the power saw")
Sent from my iPhone using Trawler
1.) Heat the screw - For small screws use a soldering iron or a small gas torch.
2.) Stick the screw driver on the screw, hit it with a hammer then wind it out. The screw is either brass or copper so it won't take much to make the driver fit the head
3.) a drop of oil on the heads and left overnight always works well.
If all else fails, grab the power saw
Sent from my iPhone using Trawler
OP
OP
Capthead
Guru
- Joined
- Mar 17, 2013
- Messages
- 956
- Location
- USA
- Vessel Name
- Heads Up
- Vessel Make
- Grand Banks 42 Classic
If I could not source an appropriate brace and bit my second choice would be one of the new generation 'Impact Drivers' sold at home centers in the cordless tool section. Impact drivers install and remove fasteners with a surprisingly gentle impact hammering. We have been using them for over a decade to install/remove many varieties of fasteners including screws.
The do no damage to screw heads if appropriately sized. You can get a set of slotted screw tips and modify to fit your screw. It really helps if you have a friend who is a machinist or retired one that can restore the temper through a simple heat treatment process called oil quenching after you modify to fit.
Good luck
It just so happens the marina has one of those Dewalt fine tools and an assortment of bits. They were very gracious and lent me the tool with the biggest bit they had. It was too narrow and thin for the screw but I thought maybe I could gently budge a few turns with it and then use my screwdriver.
That is what stripped the screw head. I gave the light quick touch and BAM the head went south.
I bought a new screwdriver and brought it home with the best screw I had removed and filed it to match. BTW, they are 4" long screws.
OP
OP
Capthead
Guru
- Joined
- Mar 17, 2013
- Messages
- 956
- Location
- USA
- Vessel Name
- Heads Up
- Vessel Make
- Grand Banks 42 Classic
Hendo78, I am buying a soldering iron from a leaded glass supply house today. I tried my soldering gun but it doesn't have the horsepower for 4" screws. I tried that Thursday and even though I couldn't get them real hot, it seemed to work.
Hendo78, I am buying a soldering iron from a leaded glass supply house today. I tried my soldering gun but it doesn't have the horsepower for 4" screws. I tried that Thursday and even though I couldn't get them real hot, it seemed to work.

OP
OP
Capthead
Guru
- Joined
- Mar 17, 2013
- Messages
- 956
- Location
- USA
- Vessel Name
- Heads Up
- Vessel Make
- Grand Banks 42 Classic
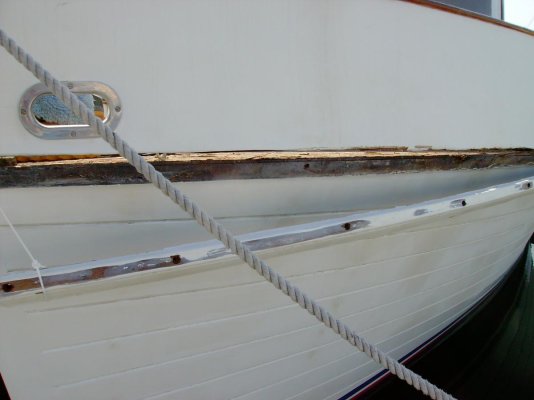
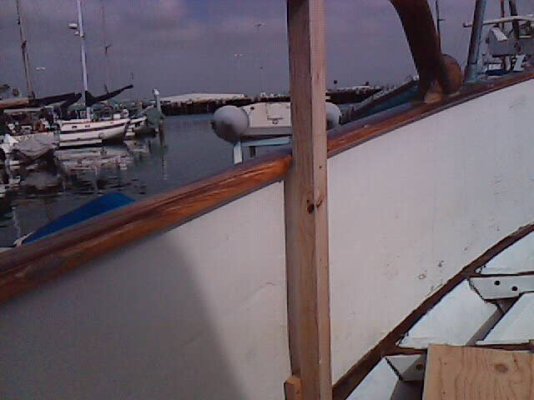
Good News! The screws came out on the port side and I chiseled out the teak from under the bulwarks. That was after using a sawzall to cut the screws between them. I now have the whole port side bow area removed under the bulwarks.
I started removing the rub rail on the starboard side and it's not coming off like the port side. I am going to have to pull it apart as it is actually two layers of wood and glued together. The screws from that thin layer are holding real well and won't pull out like the port side did.
I'll have pictures tonight. I forgot my camera yesterday.
OP
OP
Capthead
Guru
- Joined
- Mar 17, 2013
- Messages
- 956
- Location
- USA
- Vessel Name
- Heads Up
- Vessel Make
- Grand Banks 42 Classic
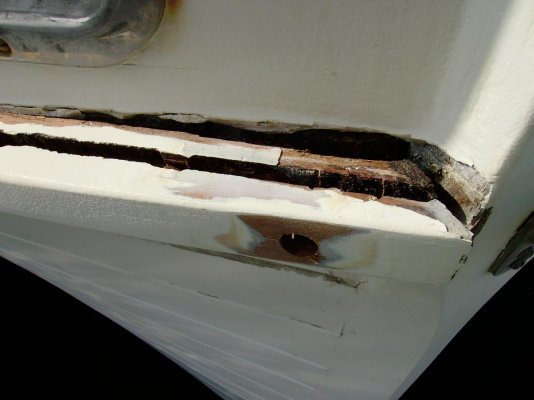
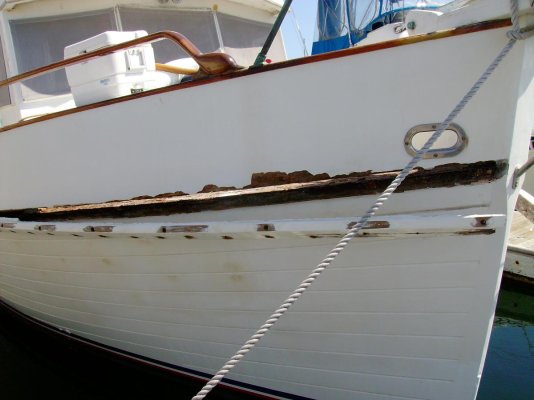
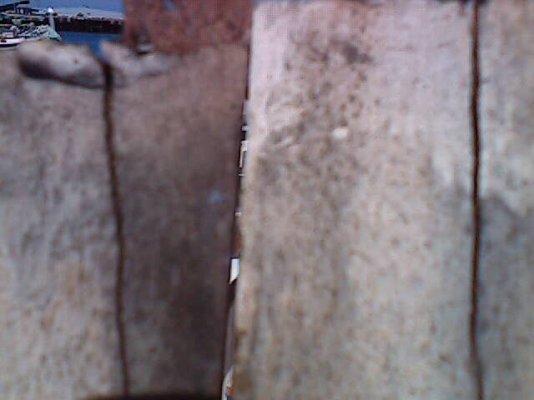
I got the rub rail removed far enough to allow the bow area to be cleaned out of the teak and I am now in the process of removing the sub deck. I took one piece off to check the health of the beams below it and I was very happy to see the ones I exposed were in great shape.
I only split the starboard rub rail far enough to get the first three screws out. Then I found the remaining screws were exposed below the top layer and I didn't need to split it. The problem I had with them was someone had screwed them with epoxy and covered the heads with it too. They didn't want to move. They were stuck and nothing would move them. My friend came with an impact tool and it ended up twisting the blade on the tool.
I ended up placing a 1/2" hole saw over them and sawing a hole deep enough to chisel out enough wood to get vice grips on the screw heads. This removed enough wood and epoxy for them to be twisted out.
Attachments
OP
OP
Capthead
Guru
- Joined
- Mar 17, 2013
- Messages
- 956
- Location
- USA
- Vessel Name
- Heads Up
- Vessel Make
- Grand Banks 42 Classic
I'm also going to move the hawse pipe more aft and build a box between the cap rail on top of the bulwarks and the deck. I'll use this space for my anchor locker and the locker below in the V berth I'll convert to storage. I can put the bedding in there and keep the V berth with a cleaner look.
OP
OP
Capthead
Guru
- Joined
- Mar 17, 2013
- Messages
- 956
- Location
- USA
- Vessel Name
- Heads Up
- Vessel Make
- Grand Banks 42 Classic
Another day and more progress. I only worked a half day after a trip to the lumberyard and spending almost 300 on two sheets of Okoume and a 9' mahogany board. I should have measured better but the bow pieces will take 2 sheets each of 9mm and 18mm. I chose to buy Okoume for this project but there are other less expensive marine grade plys available. The thing to consider is the less you pay, the fewer the number of plys and the strength lessens. Okume is lighter weight also which is a plus.
I got the sub deck removed and cleaned the many nails off the frame members (I don't know what they are called). They are in excellent shape and show no signs of any dry rot so a soaking of CPES and a quick painting should clean them up nicely. No, I won;t paint the top edge where the deck connects to.
I got the sub deck removed and cleaned the many nails off the frame members (I don't know what they are called). They are in excellent shape and show no signs of any dry rot so a soaking of CPES and a quick painting should clean them up nicely. No, I won;t paint the top edge where the deck connects to.
Attachments
Last edited:
- Joined
- Apr 15, 2008
- Messages
- 13,731
- Location
- California Delta
- Vessel Name
- FlyWright
- Vessel Make
- 1977 Marshall Californian 34 LRC
You must he let go with a sigh of relief when you confirmed that she has healthy bones.
Loving this thread...thanks for the updates.
Loving this thread...thanks for the updates.
OP
OP
Capthead
Guru
- Joined
- Mar 17, 2013
- Messages
- 956
- Location
- USA
- Vessel Name
- Heads Up
- Vessel Make
- Grand Banks 42 Classic
You must he let go with a sigh of relief when you confirmed that she has healthy bones.
Loving this thread...thanks for the updates.
Al, you just don't know the sigh of relief I didn't have to go deeper into her bones. I had wooded her complete hull and cleaned out every seam, them repacked them after soaking the wood and inside the seams with epoxy.
I am now in the construction and replacing phase. I thoroughly cleaned the inside hull and then soaked all the wood with Smiths CPES. I might do a second soaking tomorrow.
Attachments
- Joined
- Apr 15, 2008
- Messages
- 13,731
- Location
- California Delta
- Vessel Name
- FlyWright
- Vessel Make
- 1977 Marshall Californian 34 LRC
Nice idea. Will you add an overboard drain to the new locker to allow mud and water to drain overboard? When I had a power winch, my decks would get covered with the mud, weeds and water from the anchor and chain. Adding a RW anchor washdown also helped.
CPseudonym
Moderator Emeritus
I had wooded her complete hull and cleaned out every seam
Loving this thread and you're making great progress
I've heard the term wooded before and never understood its meaning in regards to working on wood boats. Can you explain it to me please? Is this a reference to sanding to bare wood perhaps?
FlyWright and TomB, I'm not interested in you guys explanation!!!
BruceK
Moderator Emeritus
- Joined
- Oct 31, 2011
- Messages
- 13,347
- Vessel Name
- Sojourn
- Vessel Make
- Integrity 386
I`ve heard "wooded" used as 'high wooded", or "low wooded", indicating hull height above waterline, ie freeboard. I also think Capthead means taking the hull back to bare wood, it fits with the work.
Last edited:
OP
OP
Capthead
Guru
- Joined
- Mar 17, 2013
- Messages
- 956
- Location
- USA
- Vessel Name
- Heads Up
- Vessel Make
- Grand Banks 42 Classic
Wooded does mean taking the hull back to bare wood. Most haulout facilities would sand blast the hulls. Then the EPA got hold of silica and now they use other materials. Mine was blasted with a black grainy particle. I don't know what it was.
CPseudonym
Moderator Emeritus
Wooded does mean taking the hull back to bare wood.
Thank you. Quite frankly I was afraid to try a Google search on that one.

IslandEagle
Senior Member
Al, yes to the overboard drain.
A suggestion; lead the drain hose down and have the outlet below the boot stripe. Otherwise you'll have rust stains down your top sides.
Scott Welch
Island Eagle
OP
OP
Capthead
Guru
- Joined
- Mar 17, 2013
- Messages
- 956
- Location
- USA
- Vessel Name
- Heads Up
- Vessel Make
- Grand Banks 42 Classic
This morning early around 2:00 AM we were awoke to the sounds of rolling thunder, sharp cracking booming thunder and very bright lightening. Here I am in So Cal where it never thunders and the driest months are July-Sept. It rained a slight amount too. Just enough to get the street wet and dirty up my car.
I'm so glad I soaked the bare wood with penetrating epoxy yesterday and filled the nail holes with it to soak in.
I'm so glad I soaked the bare wood with penetrating epoxy yesterday and filled the nail holes with it to soak in.
Last edited:
OP
OP
Capthead
Guru
- Joined
- Mar 17, 2013
- Messages
- 956
- Location
- USA
- Vessel Name
- Heads Up
- Vessel Make
- Grand Banks 42 Classic
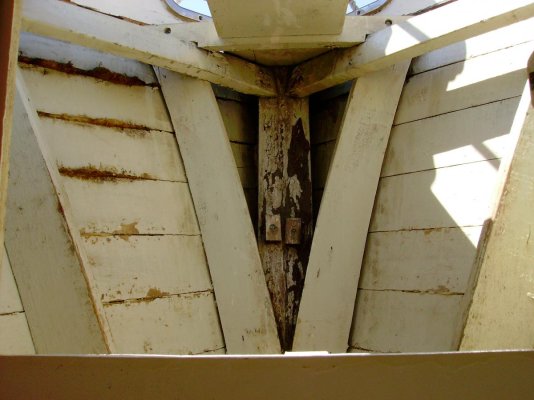
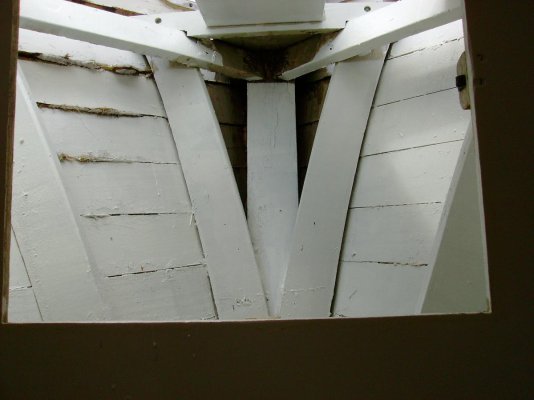
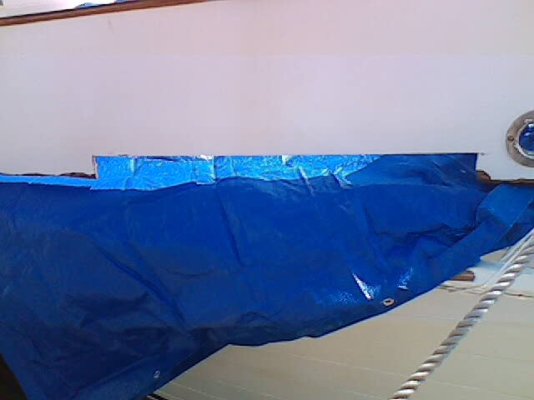
Today I prepped and painted the locker area and cut out the dry rot area in my bulwarks. I wish I could have done more but today wasn't that kind of day.
The good thing about the bulwarks is that dry rot area was less than half of what I cut out.
The blue plastic is incase we get more rain.
The good thing about the bulwarks is that dry rot area was less than half of what I cut out.
The blue plastic is incase we get more rain.
Attachments
OP
OP
Capthead
Guru
- Joined
- Mar 17, 2013
- Messages
- 956
- Location
- USA
- Vessel Name
- Heads Up
- Vessel Make
- Grand Banks 42 Classic
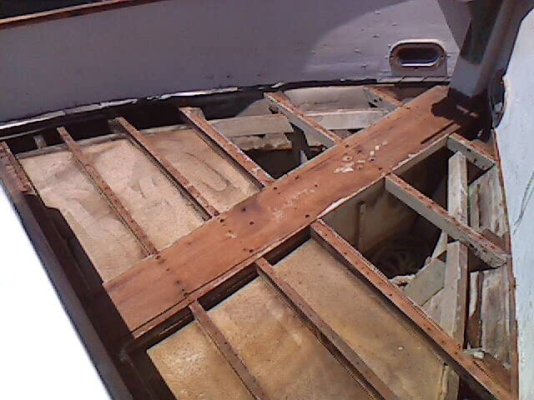
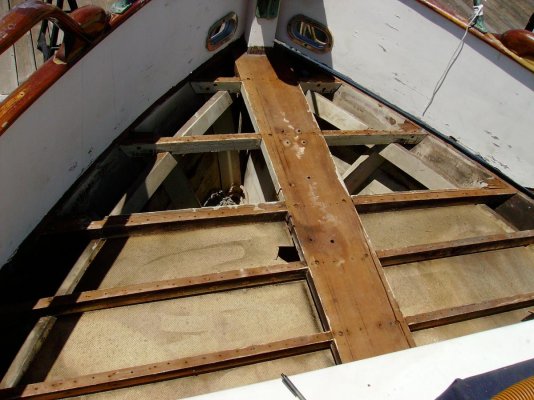
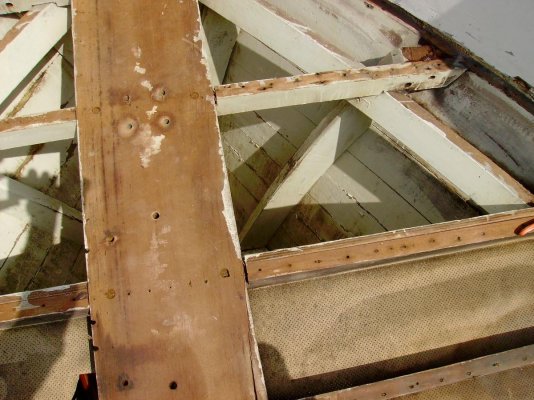
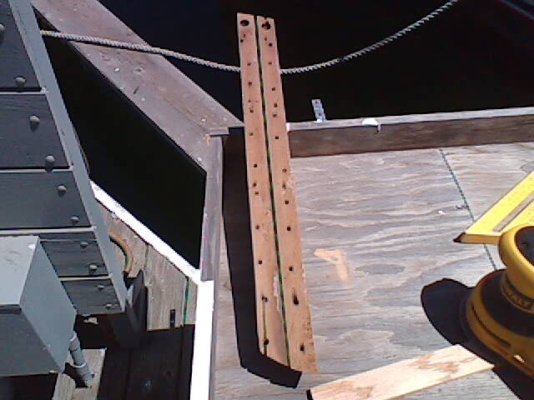
The last two days have been busy for me. I have removed the deck past the bow area and going aft both sides. When I got the subdeck removed port side near the bow I found three support members had cracked. They were originally glued into place and that glue had come lose over the years. I removed them and cleaned them up. I'll fill the crack with epoxy and clamp it together. When they are in place, with more epoxy and thickener, I'll sister them.
This is why I removed the sub deck. I had so many people say just epoxy it and cover with new plywood. I would have never killed the black mold and found the cracked floor supports.
I removed the stanchions and made temporary ones from cheap 2x2 stock and smaller boards.
Looking at the top of the deck support boards, you can see the many many holes they put in them and the crooked lines they followed.
Attachments
- Joined
- Apr 15, 2008
- Messages
- 13,731
- Location
- California Delta
- Vessel Name
- FlyWright
- Vessel Make
- 1977 Marshall Californian 34 LRC
OP
OP
Capthead
Guru
- Joined
- Mar 17, 2013
- Messages
- 956
- Location
- USA
- Vessel Name
- Heads Up
- Vessel Make
- Grand Banks 42 Classic
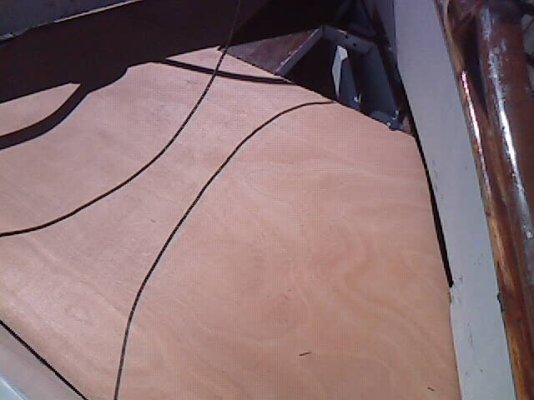
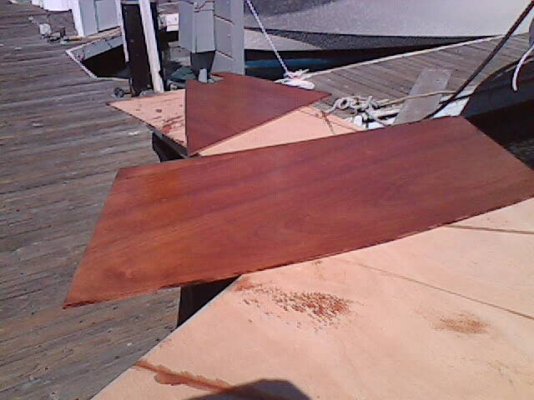
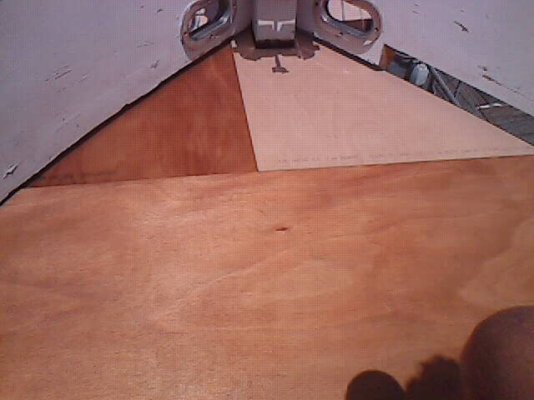
All pieces of the deck area sub deck are now cut out and put in place to check the fit. I removed both side decks going aft for about 4 feet each side because when I fully install the sub deck in the bow area I can't have the old deck next to it.
The picture shows them in place and the next picture shows the newly cut pieces soaked in CPES. They are in reverse to the comment.
The picture shows them in place and the next picture shows the newly cut pieces soaked in CPES. They are in reverse to the comment.
Attachments
Similar threads
- Replies
- 10
- Views
- 1K