Replacing My Teak Deck After 47 Years

The friendliest place on the web for anyone who enjoys boating.
If you have answers, please help by responding to the unanswered posts.

Capthead

Guru
Joined
Mar 17, 2013
Messages
956
Location
USA
Vessel Name
Heads Up
Vessel Make
Grand Banks 42 Classic
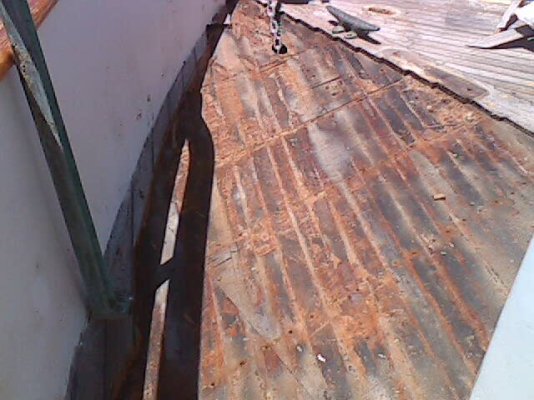
My 1966 Grand Banks is 47 this year and the teak deck has lived a good life. She is old, grey, cracking, has dry skin and her joints leak. Her fasteners are coming through the top and the sub deck suffers the same lot.

In fact, the sub deck was never sealed except for the black glue they used between the teak and it. It's all going away this month and I am replacing the deck with European 12mm marine multi ply as the sub deck and their 19mm on top of that. All will be sealed first with penetrating epoxy and the underneath of the deck will be primered and painted before instillation.

I will use epoxy with fillers added for strength between the sub and top deck. On top of the top deck I will lay cloth and epoxy it in place with a radius to the cabin sides and bulwarks. There won't be any sharp corners.

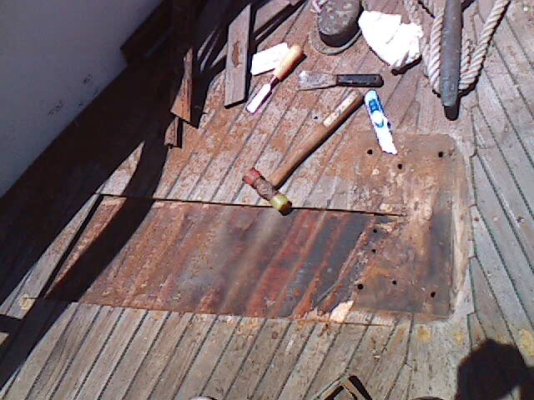
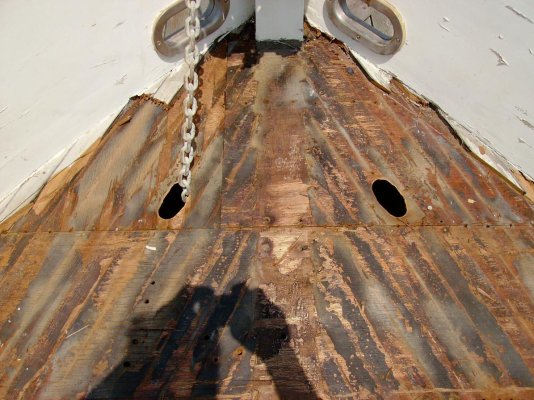
This is a cell phone picture of the first teak removal on the bow. I had removed the windless and supporting block.
 

Attachments

  • deck1.jpg
    deck1.jpg
    65.4 KB · Views: 499
Epic job, Capt! Are you working solo?

Keep us posted on the project as it 'unfolds'.
 
Good Luck To You. I know too well how a two week project can turn into a two year project. Keep in mind how good it will feel when it is done, and approach each work day as progress. This is the stuff of boat ownership. If I had more money than God it wouldn't be as satisfying.
 
Here's hoping the subdeck has maintained its integrity.
 
Thanks everybody. I am solo and there are a few friends who have volunteered to help. One came yesterday and helped me remove the windless and teak block it was sitting on.

This GB's deck was nailed on with boat nails and that's my hardest part to remove so far. I think I have to remove the sub deck. It is mahogany plywood and dry and brittle.
 
did mine last year including the flybridge.....got everything done but the final touch up and topcoat before last winter trip south...will finish up this summer.

learning to get the deck up faster and quick removal of screws was an
on the job learning experience...at first I thought I could save some teak.

the other issue was plugging covering holes before it rained.
 
I've wanted to do this job for a decade but we were living aboard then and that was just not compatible. Now that we bought a house, furnished it and paid that off including home improvements, I can finally start this. I think the planning and research I have done will pan out.

I saw another GB have this done plus talked to a third GB owner who had a boat yard do his. Those were done by cutting the deck next to the bulwarks and butting up to that cut. The one owner took his boat to Cabo San Lucas from here, Los Angeles, and the trip back, which is up hill pounding seas, broke the bulwarks free from the deck. He said the hand rails were not safe and he was scared to walk the deck in the seas.

GB said I need to go under the bulwarks. I have to take my rubstrake off and with a sawzall ct it from the deck.

I love boat projects.
 
I've been living aboard (with partner and 60 pound golden ret) through about every major project a boat owner can do...decks, window replacement (all 16), bottom removal and reglassing, fuel tank replacement, still this summer/ fall...interior wall replacement, general refinishing, bathtub removal and replace with shower...and some more...

While doable...it can be a struggle some days....:eek:

I wooded the hull and soaked up 6 coats of epoxy on the bottom, cleaned out the above the waterline hull seams, soaked that also, re cottoned the hull, caulked and painted that, replaced the cockpit decking, water tanks and refinished the main saloon walls while living aboard. I had a Maine Coon cat also and he contracted renal cancer and you know the ending there. My first mate said no more chemicals while living aboard and we bought a house. We had adopted 2 kittens a year after the Maine Coon's death and a year before moving off.

It's a juggle and for my part, the wife's acceptance of work in progress was a hard one for me. She expected the boat to be pristine every evening she came home and no tools out. I failed that task many times.
 
No I have not, Hendo, but I'd sure like to learn about it. My gray non-skid is looking a bit forelorn and is hotter than Hades in the sun. My hot-foot two-step would make an entertaining YouTube video.
 
Capthead,
I did this on our last boat three years ago. I used the biggest pry bar I could fit into the space allowed. Getting the Taiwanese 5200 (black stuff) off was harder then getting the decks off. I finally settled on an oscillating tool with the scrapper blade. Biggest challenge was keeping things dry enough to dry out the core and then slowly filling with denatured alcohol thinned epoxy.

This is my major project for this winter on this boat as I hope to move her to Deltaville and shrink wrap her to do this and some other things.
 
No I have not, Hendo, but I'd sure like to learn about it. My gray non-skid is looking a bit forelorn and is hotter than Hades in the sun. My hot-foot two-step would make an entertaining YouTube video.

I've not used it either but I've seen the finished product as well as seeing some YouTube instructional vids on it and it looks great. Ability to go on any subsurface is a bonus. I really like how it has a raised profile so you can make a feature out of it yet still have a functional non slip surface. From experience, one gives way to the other in most cases.

When the 2 pak has fully cured on the ski boat I report my findings and lessons learnt to you on how it goes. Fingers crossed it goes well as I have high hopes for its use on the big boat once I finish building it.

Sent from my iPhone using Trawler
 
I had a 5 hour day yesterday and managed to get 1/2 of the bow down to the sub deck. That deck is dry and I don't want to save it. I'll remove it after I get under the bulwarks.

I saw a boat in my marina with KiwiGrip and I wanted to use it on another place, just not this deck. Today I hope to get the rest of the bows teak removed.
 

Attachments

  • deck2.jpg
    deck2.jpg
    57.3 KB · Views: 260
Daddyo, I only have the caulking between the deck boards to contend with. My sharp knife cutting between the boards is doing the trick so far.

My biggest problem is the boat nails. Some come right up, the others are stuck very hard. I guess in a way it's easier than pulling each bung, digging the remains out, then trying to remove fasteners that have the slots filled with glue and the heads strip before they come out, or they twist off.

I was thinking I would save some of this deck and make a coffee table for my patio. This wood is so dry and brittle I don't think It's savable.
 
Not as hard as your project but I replaced the aft deck on my lobsterboat about 12 years ago (10' X 12') Replaced with 2 layers of 1/2" fir ply,
prerolled with 2 coats epoxy then washed & scuff sanded b/4 cutting to size. The lower layer was fastened to the framing the the upper layer, joints staggered, set in thinkened epoxy applied with notched trowel and held down with several hundred drywall screws.When cured, drywall screwa removed, hatches were cutout with Skilsaw and they retained their crown nicely, ledges for the hatches were applied w/ epoxy & clamps. Finally teak strips were laid down as outlined in the West System book. $600 of teak covered the whole thing. Still looking good 12 yrs later.
 
CaptHead, I had my (Europa design) boat done last year. The unprotected bow in non slip 2 pack over 2 layers of glass over the foam substrate; the protected sections aft in new glued teak, over one layer of f/g. As FlyWright says,the bow section gets seriously hot, too hot in summer without footwear.
 
I made good progress today and got the teak of the bow and down both side deck a little. Then I started to remove the rub rail. This is when I ran into problems with removing the screws. There isn't a screwdriver that fits that slot. I tried mine and a friends then went to Home Depot and bought one anyway that is better than mine but still doesn't fit the slot.

I stripped the threads on one screw but did get six removed and one is still stuck.

The first pic is before.
Second pic is all teak removed with the sub deck still in place.
Third pic is the screw and screwdriver in the slot with a gap where it won't fit to the bottom. I think a file can fix that.
 

Attachments

  • deckbefore.jpg
    deckbefore.jpg
    157.4 KB · Views: 261
  • deck14.jpg
    deck14.jpg
    194.9 KB · Views: 249
  • screw2.jpg
    screw2.jpg
    45.4 KB · Views: 258
Last edited:
One of these may come in handy removing those slotted screws...
 

Attachments

  • 21-sno945bitbrace.jpg
    21-sno945bitbrace.jpg
    47.5 KB · Views: 241
I wish I had one, Craig.
 
One of these may come in handy removing those slotted screws...

Old school! I love it. I wish I still had my Grandfather's.

Great job keeping us updated on your big job, CaptHead. Great stuff!
 
can you grind the tip of a cheap screwdriver to fit?
 

Latest posts

Back
Top Bottom